Graduation

When I started this blog I was just beginning graduate school at Texas A&M.  I was having so much fun, and learning so much, that I wanted to share all of the amazing horticultural things I was learning with my fellow gardeners.  For the past four years, Grad school and the blog have been a huge part of my life.  This past Saturday night, the grad school part finally came to an end.   At 7:30 PM I walked across the stage at Reed Arena (and away from graduate school) and into the waiting arms of the Association of FORMER Students.  Whoop!

Aggie-Ring

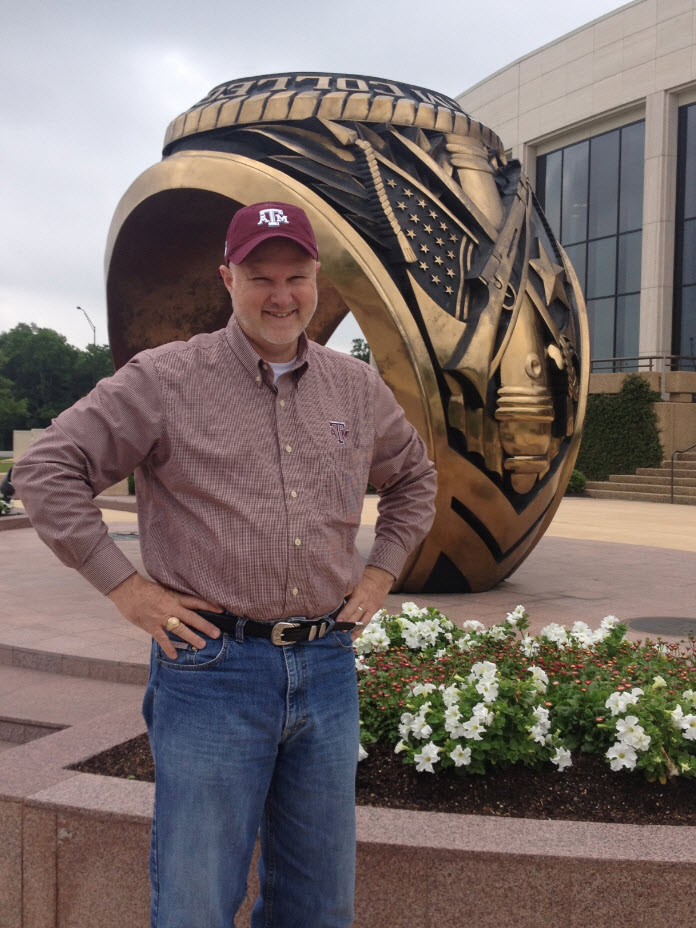
I am a little embarassed to admit how excited I was to finally get that aggie ring!

Now that it is over I can honestly say that graduate school has been the best gift I ever gave myself.  Over the past four years I have learned so much and made so many wonderful friends.  The instructors, staff and Horticultural Extension agents that I have worked with are truly some of the most gifted, knowledgeable and caring people I have ever had the pleasure knowing.  “Thanks” is just not enough to express all they have meant to me.  All of these people welcomed me into their family and I will be forever grateful for that.

Aggie-Ring-History While many, many people have worked to help me achieve this milestone, there are two that deserve a very special “Thank You”.   The first is my wife.    The afternoon that she looked at me and said “You love horticulture.  Since we are moving 40 miles away from A&M you should go talk to them and see if you can get a master’s in it” changed us both forever.  Her idea has now turned into a life changer for both us.  Before her suggestion I thought I would work at MD Anderson until I was 65.  Now, because of her support and encouragement I have the degree and the skills that will allow me to retire at 57 and be “The Master of Horticulture” full time.  Thanks honey!
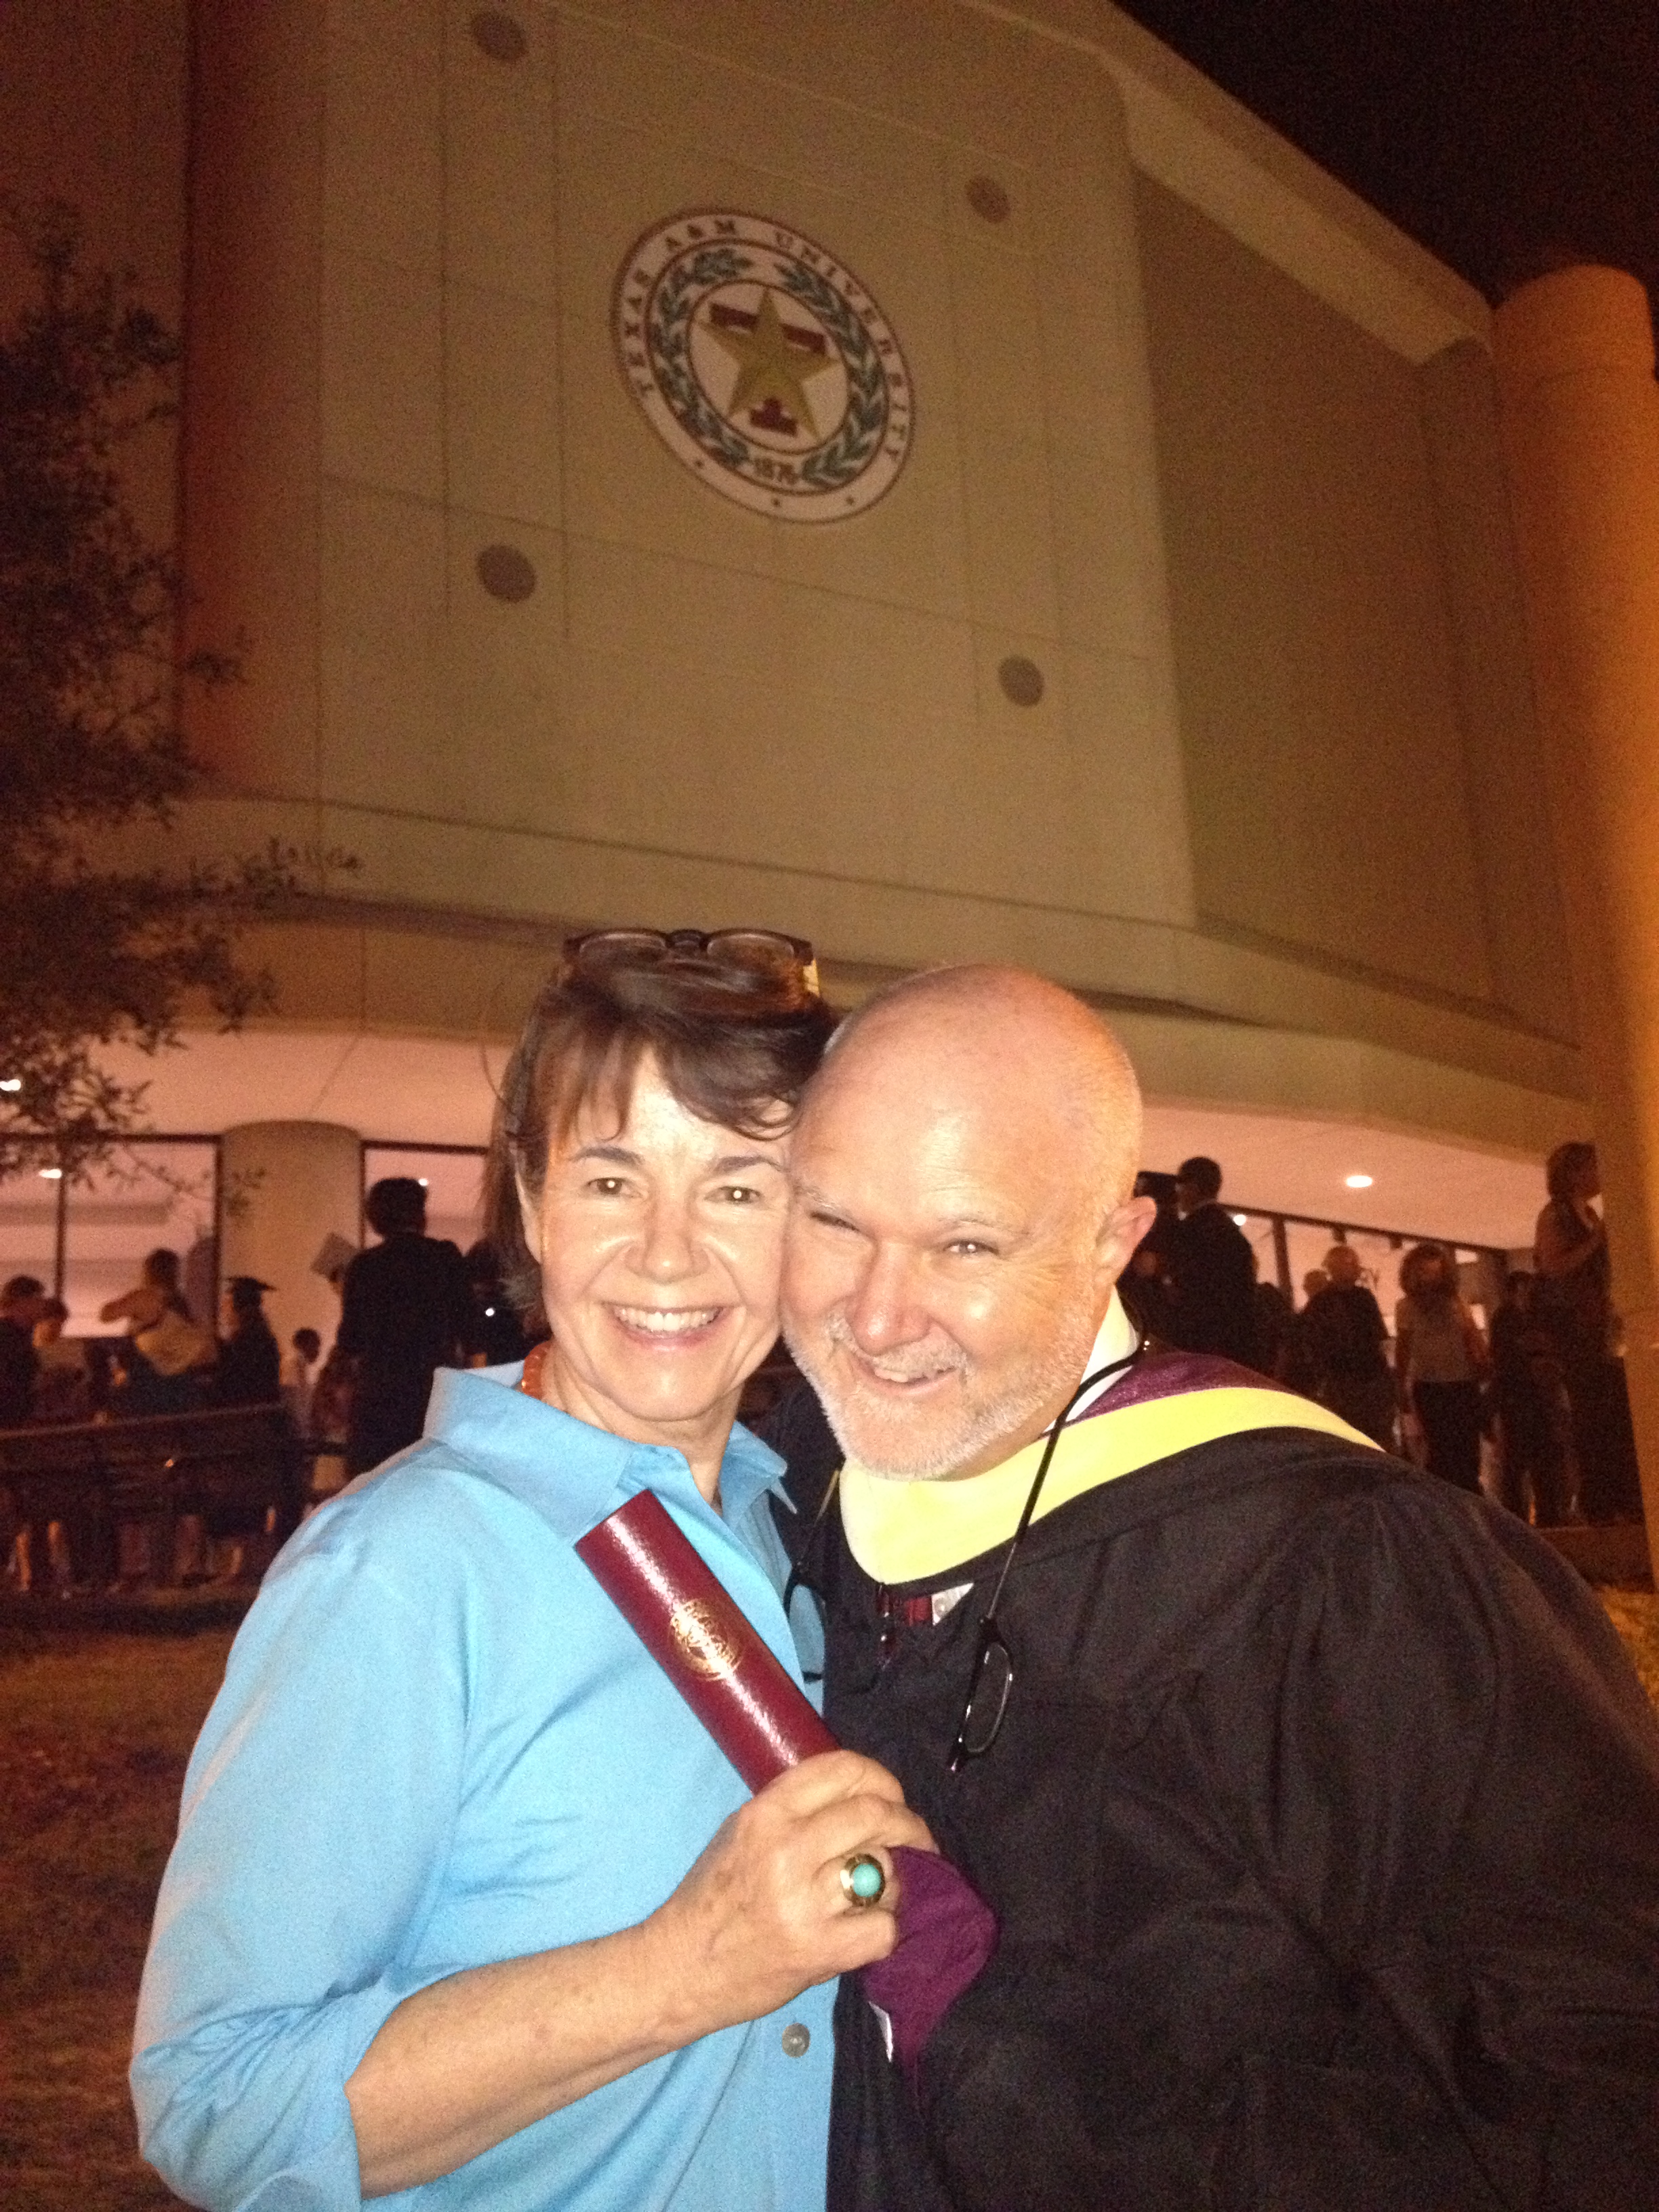
Aggie-Graduation

Thanks honey!

Before coming to A&M the thing I was most proud of was the time I spent serving my country in the U.S. Air Force.  The unofficial motto of the Air Force is “Flexibility is the key to air power”.  My graduate advisor, Dr. Charlie Hall, is a perfect example of that motto in practice.  My full time work schedule often made it difficult for me to fulfill the requirements of this degree.  Whenever things looked bleak, he would smile at me say “Don’t worry about it good buddy, we’ll figure something out”.  And we always did.  Thank you Charlie!  I am so glad that you took a chance on me.  You are a true man of character and you have been a great role model, mentor, instructor and friend.  As Elphaba said to Glinda in “Wicked”, “Because I knew you … I have been changed for good”.

Charlie-Hall

Dr. Hall, I couldn’t have done this without you! Thanks so much good buddy!

Now it is going to be just me, you and the blog.  Thanks to all who continue to read.  In the future, look for new features.  I will begin interviewing home gardeners across the state and high lighting what they are doing well in their vegetable gardens, yards and flower beds.  I will also begin to feature articles about water capture, reuse and living a more water wise life.  Thanks again for your continued support and never hesitate to send me your questions and suggestions.  Whoop!!!

Aggie-ring-family

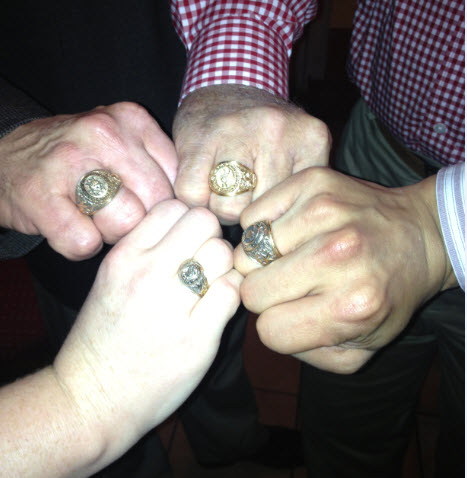
It’s a family affair. Comparing rings with my Brother-in-law Buddy Hemann and my niece and nephew Julie and Daniel Liu.

Myth # 50 Use Epsom Salt on… By C.L. Fornari

Today’s post marks a huge milestone for the Masters of Horticulture—200 posts!  To celebrate this accomplishment I am sharing a guest post from noted horticulturist and radio personality C. L. Fornari. (http://www.gardenlady.com).  C. L.  has a new book coming out on May 16 called “Coffee for Roses” (http://amzn.to/1mhXAGq).  In it, she uses her witty writing style and in depth horticultural knowledge to dispel many common horticultural myths that often show up as “fact” in conversation and on Pinterest and FaceBook.  In her excerpt below, she explains when and why you should use epsom salts in your garden (if at all).

Myth # 50 Use Epsom Salt on…

coffee4roses2 When researching the use of Epsom salt in the garden I was reminded of an old Saturday Night Live sketch about “New Shimmer.” “It’s a floor wax!” the wife, played by Gilda Radner, insists. The husband, Dan Aykroyd, claims, “It’s a dessert topping!” Naturally, the product was both.

Although I haven’t seen Epsom salt recommended as either a floor wax or a dessert topping, it’s been suggested for just about everything else. Through the years, advice columns, books, and now Internet sites have advocated using Epsom salt for tile cleaning, splinter removal, bath soaks, foot treatments, as a hair curling agent, laxative, facial hair remover, curtain stiffening, insecticide, fertilizer, headache cure, sunburn relief, treatment for insect bites, and for creating fake frost on windows.

More about that frost recipe later, but if the same product is recommended for curling hair and removing it, shouldn’t that give a thinking person pause?

coffee4roses3 Epsom salt was named for a town in Surrey, England, where it was once produced by boiling down mineral-rich spring water. Although the crystalline structure looks rather like table salt, Epsom salt is actually magnesium sulfate and contains 10% magnesium and 6% sulfur.

When I’m asked if Epsom salt should be applied on lawns, around roses, in the vegetable garden, or on houseplants, my reply is always the same. “Is your soil deficient in magnesium?” Most people don’t know; they’ve heard that they can put Epsom salt on plants but they don’t understand what it is or why they might use it.

Let’s get down and dirty about this. Connecting back to the fictional New Shimmer dessert topping for a moment, we might think of soil as we would a recipe for sweets. The ingredients for a tasty dessert need to be in the right proportions to make something delicious. Add too much cinnamon, baking soda or salt and the results would be inedible.

Soil also needs to be kept in balance. It’s a complex community made of minerals, organic matter, fungi, bacteria, other microorganisms, air and water. Too much of any one of those elements can throw everything off so that plants don’t grow as well. Most plants need the magnesium and sulfur that’s in Epsom salt, but unless you’ve tested the dirt you don’t know if your soil already has these elements or not.

So why not just give a plant Epsom salts and see what happens? In response, I think of two popular sayings. The first is Barry Commoner’s second law of ecology: “Everything must go somewhere.” It’s important to remember that products we put in our yards and gardens don’t just vanish. When we put anything into our environment it ultimately ends up somewhere, and that’s often downstream. So, better not to use something in the garden unless we know it’s really needed.

The second phrase that comes to mind is, “If it ain’t broke don’t fix it.” If the plants are growing well, chances are they are happy with the current conditions. Should you see that your plants aren’t doing well, identify the problem first, and then consider all possible solutions. If you suspect the difficulty starts at ground level, have a compete soil test done before taking action.

When you’re unsure if your soils are lacking in any one element, use a complete, organic fertilizer. A balanced fertilizer with all the essentials that plants require is less likely to throw Mother Nature’s recipe off kilter.

coffee4roses4

Click here to get your copy of “Coffee for Roses”

Epsom Salts Window Frost

Because of Epsom salt’s crystalline nature, it will form frost-like patterns on windows or mirrors when dissolved in liquid and painted on glass. This can be fun for holiday decorating or creating winter scenes.

You’ll see many recipes for Epsom salt frost calling for beer as the liquid, but there seems to be no reason for this; perhaps someone was looking for a way to use up flat beer. The recipe works well with water so your house doesn’t have to smell like a brewery.

½  cup water

½ cup Epsom salt

3 or 4 drops dishwashing detergent (this helps the “frost” stick on the glass)

Bring the water to a boil in a saucepan. Remove from the heat and add the Epsom salt, stirring until it is completely dissolved. Add the drops of detergent and stir again. Let this mixture cool down before using or it will drip excessively, but apply before it starts to crystalize in the pan. Paint or daub it on your glass surface using a paintbrush, cotton ball, micro-fiber cloth, or even your finger.

coffee4roses1

English Cottage Garden Deep in the Heart of Texas

Did you see Downton Abbey this past Sunday?  OMG!!!!  I did not see that coming!!!!  I am not going to spoil anything for any of you that missed it but OMG!  Killing Matthew – yep saw that one coming, but this past episode truly blew my mind!

Downton Since Downton Abbey is such a hit, our friends at KLRU’s Central Texas Gardener decided to do a tie in on their program for the season opener.  I must say, they did “a jolly good job!”  The clip below feature’s a Texas interpretation of an English Cottage garden in Austin.  Click below to see how David and Jennifer Stocker utilized their English heritage to build their beautiful and water wise “English Garden” deep in the heart of Texas.

If you garden in the US, there is a very good chance that a lot of the design principles you use and the plants you choose came to you from the English.   The English are great gardeners and have been for centuries.  Dr. William C. (Bill) Welch from Texas A&M talks with Tom about the many ways that the English horticultural traditions have shaped our views about landscaping, especially in the south.  If you have not heard Dr. Welch speak before, or read one of his many books, you are in for a treat.  Dr. Welch is one of the most knowledgeable horticultural historians in the entire United States.  Enjoy!

Trimming Trees Correctly – Don’t Overdo It! by Janet Laminack

Some of you out there make yard work way too hard. For example, leaves don’t have to be raked and bagged. You can mow them into tiny bits and let them break down in the lawn. Or you can rake them into your flowerbeds as a mulch. But they can be messy and ill-behaved and blow around places, so I know that some people really need to rake and bag leaves and that is ok.

Downed leaves make great mulch

Downed leaves make great mulch

Did you know that trees don’t have to be trimmed? That’s a real shocker, isn’t it? The three primary reasons a tree should be pruned or trimmed is if they have branches that are dead, diseased or damaged. There are many other reasons that people trim and prune their shade trees but not all of them are very effective or recommended, such as pruning to control size. Find a tree or shrub with a mature size within your desired limits. Removing more than a third of a plant at a time is not recommended ever, so bear that in mind when charging about with your loppers and chainsaws.

Trees will need to be trimmed if branches are crossing and rubbing. Or if a tree is touching your house or other structures, pruning is appropriate. 

Trees don't "have" to be trimmed.  These lovely cottonwoods and sycamores have never seen a a pruner or saw and they look pretty spectacular

Trees don’t “have” to be trimmed. These lovely cottonwoods and sycamores have never seen a a pruner or saw and they look pretty spectacular

Sometimes trees are thinned out in the canopy. This is primarily done to allow more sunlight in for growing grass under the tree. Trees and turfgrass don’t actually mix too well. But, a tree adds so much more value to your home that I tend to always side with the tree over lawn health.  Planting a groundcover or other shade loving plants under a tree is an option if it’s too shady for grass but you want something green. Trees don’t need to be thinned out because they are too heavy or thick.

Trees are also trimmed up to open up a view or sight line. This is sometimes necessary and advisable. Removal of a few of the lower branches so that you don’t clothesline yourself while mowing is reasonable. However, be mindful not to overdo it creating a lion’s tail. This can leave a tree less structurally sound.

Crape myrtles are commonly trimmed back severely or topped in the winter to encourage blooming. They do flower on new growth, but pruning is not necessary in order for them to put on a spectacular show the next summer. Topping can cause the tree to lose its wonderful branching structure.

You don't have to commit crepe murder to get your crepe myrtles to produce beautiful blooms each year.  Photo from Greg Grant on Aggie-Horticulture.  http://aggie-horticulture.tamu.edu/archives/parsons/publications/stopthecrape.html

You don’t have to commit crepe murder to get your crepe myrtles to produce beautiful blooms each year. Photo from Greg Grant on Aggie-Horticulture. http://aggie-horticulture.tamu.edu/archives/parsons/publications/stopthecrape.html

Yard work can be tough, but maybe not as hard as you have been making it all these years. If you have questions about how to care for your trees or landscape, give us a call at 940.349.2892, email master.gardener@dentoncounty.com or visit www.dcmga.com.

It’s Tater-Plantin’ Time! by Patty Leander

Valentine’s Day is just around the corner – a time for love, roses, wine, romance…and taters!

Plant potatoes now for potato harvest in May or June.  Photo by Bruce Leander

Plant potatoes now for harvest in May or June. Photo by Bruce Leander

The traditional time for planting potatoes in Central Texas is right around Valentine’s Day or President’s Day. Gardeners in North and West Texas should wait and plant in early March and gardeners in South Texas should plant right away. Potatoes are like people – they are most comfortable and perform their best at room temperature, so in order to keep potatoes happy, we need to plant them so they can grow in our mild spring temperatures (a pretty narrow window, I know) and mature before those hot summer days arrive.

Russian Banana fingerling potatoes.  Photo by Bruce Leander

Russian Banana fingerling potatoes. Photo by Bruce Leander

Seed potatoes can be purchased at many local nurseries and feed stores, or they can be ordered through the mail (but you’d have to hurry at this point as planting time is near). My favorite mail order source for certified seed potatoes is Potato Garden (www.potatogarden.com). Avoid the temptation to use potatoes from the grocery store – they have often been treated with a sprout inhibitor and you don’t always know what variety they are. They could also carry disease organisms that could be transferred to the soil. Seed potatoes purchased from a reputable source are certified to be disease free.

Potatoes cut and ready for planting; small potatoes, like these fingerlings, can be planted whole.  Photo by Bruce Leander

Potatoes cut and ready for planting; small potatoes, like these fingerlings, can be planted whole. Photo by Bruce Leander

A few tried and true varieties for Central Texas gardeners are Red Pontiac, Red La Soda, Kennebec and Yukon Gold. But don’t be afraid to try some new varieties, just try to avoid the late-season types that take too long to mature. I have had good success with Mountain Rose and Purple Viking as well as some of the fingerlings including Austrian Crescent, Russian Banana and Red Thumb.


A row of potatoes growing in bushel baskets.  Photo by Bruce Leander

A row of potatoes growing in bushel baskets. Photo by Bruce Leander

Cut potatoes into pieces about the size of an egg, making sure each piece has one or two “eyes”.  Allow the cut pieces to cure in a warm location for 2-4 days before planting. Some gardeners dust their seed potatoes with sulfur to help prevent soil borne disease.  Remember that potatoes belong to the nightshade family, so try not to plant them where you have grown tomatoes, eggplant or peppers in the past.

Potato foliage grows very quickly.  The potatoes are ready for harvest after 3 1/2 months.  Photo by Bruce Leander

Potato foliage grows very quickly. The potatoes are ready for harvest after 3 1/2 months. Photo by Bruce Leander

Prepare your soil a week or two before planting by mixing in a layer of well-rotted compost and 1 pound of organic fertilizer per 20 feet of row. When you are ready to plant dig a trench about 4-6” deep and plant the potato pieces in moist (not wet) soil 8-12” apart. Cover them with 2-4” of soil, pressing down firmly to ensure good soil contact over and around the potato piece. You will be amazed at how fast they grow. Before you know it, they will have grown 5-6” and it will be time to “hill” the potatoes.  Do this by piling soil or mulch around the potato stems until only the top two inches of the leaves are showing.  You’ll do this again in 3-4 weeks. The ultimate goal is to have several inches of soil above the seed piece so that the tubers will develop below the soil and will not be exposed to sunlight (which causes them to turn green).

Potatoes are usually ready to harvest in June when the tops begin to turn yellow, but I start feeling around for tender new potatoes in mid-May. When the time does come for harvesting, dig the potatoes gently to prevent damage and let them air dry 1-2 hours in a warm, shady spot. Wipe the dirt off carefully and store potatoes in a cool, dark location.

Seed potatoes planted in a bushel basket.  Photo by Bruce Leander

Seed potatoes planted in a bushel basket. Photo by Bruce Leander

Growing potatoes above ground is fun to do, especially for kids. My young niece and nephew were visiting from out of state last Thanksgiving and they were delighted to harvest potatoes growing in a bushel basket in my garden. Bushel baskets are cheap and easy to work with and they last two or three seasons, but a wire cage or any open-ended container will work. Start by cutting the bottom off each basket. Plant potato pieces 2-3 inches deep in soil that has been loosened and amended with garden fertilizer (use 2-3 tablespoons for each basket). Don’t overcrowd the basket – two or three potato pieces per basket is good. As the plants grow, gradually fill the baskets with compost, mulch or straw, leaving a little bit of the leafy tops showing. When harvest time rolls around just pull the basket up and harvest the spuds from the base of the basket. This is for you, Jack and Ava – let me know how many you harvest!

The prize – several Kennebec potatoes in the base of the basket.  Photo by Bruce Leander

The prize – several Kennebec potatoes in the base of the basket. Photo by Bruce Leander

Soak, Rinse, Drain, Eat, Repeat – Growing Sprouts by Patty G Leander


These alfalfa sprouts are ready to enjoy.  Photo by Bruce Leander

These alfalfa sprouts are ready to enjoy. Photo by Bruce Leander

How are you doing with those New Year’s Resolutions? Did you resolve to eat and/or grow more vegetables? If so, here’s a simple way to do both: grow your own sprouts! Sprouts can be grown any time of year and are always in season, but are especially rewarding when winter days are cold and dreary. They are easy to grow, nutritious, and are ready to eat in only 4-6 days.

Except the seeds, you probably already have all you need to grow sprouts.  Photo by Bruce Leander

Except the seeds, you probably already have all you need to grow sprouts. Photo by Bruce Leander

With the exception of the seeds themselves, you probably already have the supplies you need right there in your kitchen. Seeds can be purchased online and you can often find sprouting seeds in the bulk section of natural food stores or at your local nursery. Popular seeds for sprouting include alfalfa, daikon radish, kale, mustard, broccoli, lentils and mung beans For the purpose of growing sprouts it’s important to use organic or untreated seeds that are sold specifically for sprouting. A few of my favorite online sources for sprouting seeds and supplies include Sprout People (www.sproutpeople.com), Johnny’s Seeds (www.johnnyseeds.com) and Pinetree Seeds (www.superseeds.com).

The lid of this jar is specifically designed for sprouting.  however, you can build your own with a mayonaise jar and cheese cloth.  Photo by Bruce Leander

The lid of this jar is specifically designed for sprouting. however, you can build your own with a mayonaise jar and cheese cloth. Photo by Bruce Leander

There are 3 simple steps for growing edible sprouts: 1) Soak 2) Rinse 3) Drain

First soak seed for 12-24 hours in a clean, wide-mouth quart canning or mayonnaise jar. Use 2 tablespoons for small seed like alfalfa or broccoli and ¼ cup for large seeds like mung beans or lentils. Two tablespoons may not seem like much but once all those little seeds start sprouting they will take up plenty of room in the jar. Cover the opening with cheesecloth, a piece of nylon pantyhose, or a special sprouting lid with holes for drainage. The next morning drain off the water (I drain the water into my compost bucket) and cover the jar so the seeds are not exposed to light by either placing the jar in a paper bag, wrapping the jar in foil or rolling it up in a towel. Lay the jar sideways on the counter so the seeds are distributed evenly. Gently rinse and drain the seeds with tepid water 2-3 times a day. After 3 or 4 days (some seeds take longer, check packet for specific sprouting information), expose your sprouts to bright light for a several hours so they can green up. Give them one final rinse, pat or spin dry and they are ready to eat.

Fresh sprouts ready to eat!  Here is what two tablespoons of alfalfa sprouts produce five days after the process starts.  Photo by Bruce Leander

Fresh sprouts ready to eat! Here is what two tablespoons of alfalfa sprouts produce five days after the process starts. Photo by Bruce Leander

If not consumed that day they can also be stored in the refrigerator for 5-7 days. Pile sprouts on sandwiches, wraps, omelets, salads or slaw. They can also be added to soups or stir-fry, cooking briefly for a pleasant crunch. Start a new jar of seeds every week for a continuous supply of seeds.

Sprouts can be added to soups, salads, stir fry and even sandwiches.  Photo by Bruce Leander

Sprouts can be added to soups, salads, stir fry and even sandwiches. Photo by Bruce Leander

© 2012 Tomato Season Wrap Up by Bill Adams

There weren’t many new tomato discoveries to brag about this year.  What started out as a pretty good season with low insect/mite numbers due to last year’s extreme drought combined with the blessing of occasional rains, wound down with persistent heat and a buildup of stinkbugs—both the Leaf-footed variety and the shield-shaped ones.  It does seem curious that the only tomato varieties that are coming back from the spring planting are the hybrids that have nematode resistance and heirlooms that were grafted on nematode resistant rootstock (Emperador from Johnny’s Seeds).  Emperador is not in the 2012 catalog but Colosus F1 is listed as a more productive replacement.

2012 was a bad year for stink bugs

The most outstanding new heirloom for us in 2012 was Marianna’s Peace.  This large, somewhat oblong and cherry-red tomato had some slight folding but not a drastic amount of core typical of these large heirlooms.  It had good acidity and the complex, sweet tomato flavors that we lust for in a tomato.  In short it was “lap over a burger wonderful” and “lick the juice off the plate tasty”.  These large fruits are produced on a potato-leaved plant and production continued into early August.  This variety will definitely be tried on hybrid rootstock this year.

The most outstanding new heirloom for 2012 was Marianna’s Peace. This photo is the copyrighted property of William D Adams and cannot be published without written permission from William D Adams.

I had almost forgotten how good Juliet is.  This small saladette type tomato has excellent flavor and it is extremely productive, often surviving into the fall.  The skin might be a bit tough but it’s really not objectionable.  Restaurants even mention it on the menu—“Bibb lettuce with Juliet tomatoes”.

Viva Italia is almost like a big sister to Juliet, great flavor, bigger and productive long into the season.  Gets some Early Blight in a wet spring but usually recovers for production in late summer and fall.  Fungicides can keep it productive throughout the season.

Jaune Flamme has good nematode resistance. This photo is the copyrighted property of William D Adams and cannot be published without written permission from William D Adams.

Speaking of fall—this year we planted Fourth of July a Campari style tomato (golf ball size/large clusters) with great flavor.  This is one of Burpee’s best and here it produces long before Fourth of July when planted in early spring and it often lasts into late summer and fall.  Planted in June/July it looks like a good fall targeted tomato.

Purple Calabash is a great black heirloom with good nematode resistance. This photo is the copyrighted property of William D Adams and cannot be published without written permission from William D Adams.

Rowdy Red is supposedly a favorite of Clint Eastwood and though not much larger than a baseball with a nipple end it has great flavor and production.  Our plant is still alive in October and trying to produce more fruit.  We would plant it again—maybe I’ll set an empty chair next to it for support.

Kosovo was a great tasting oxheart but the plants faded in the heat. This photo is the copyrighted property of William D Adams and cannot be published without written permission from William D Adams.

Kosovo, a big Oxheart type was a surprise.  It not only grew well and was fairly productive, it tasted great too.  Might have to try this one on nematode-resistant rootstock since it did fade out in the heat.  Thinking about using Celebrity or Better Boy since the seed is cheaper compared to the specialty rootstock varieties from Johnny’s.

Tycoon looks like it could be our new mainstay tomato variety.  Grown commercially and harvested green, is not much to brag about.  But vine ripe out of the garden, it is delicious.  My Champion tomatoes got ringspot virus rather quickly this year so they may not be a good main crop choice anymore where you’ve grown tomatoes for a long time.  Celebrity is still a good main variety too.

Cherokee Purple is a great tasting heirloom with good nematode resistance. This photo is the copyrighted property of William D Adams and cannot be published without written permission from William D Adams.

Some other good candidates for hybrid/nematode resistant roots include Persimmon, Cherokee Purple, German Johnson, Flamme, any of the black tomatoes like Black from Tula, Purple Calabash, etc.  Brandywine has been a disappointment in this area—on its own roots or when grafted.  Even some standard and hybrid varieties don’t claim nematode resistance anymore—perhaps too much emphasis on breeding for virus resistance—so don’t rule them out for nematode-resistant roots either.  Check out Johnny’s website for tomato grafting info, pick up some single edge razor blades and order some clips from Johnny’s.

German Johnson was another great tasing tomato with good nematode resistance. This photo is the copyrighted property of William D Adams and cannot be published without written permission from William D Adams.

The 2013 catalogs will start arriving soon.  Don’t wait until after December 21 to order (word is the Mayan’s ran out of rock and scientists have found an addendum calendar rock) or you may not get the varieties you want.  If you plant early (Mid-February in south-central Texas) you need to start seed in January.

Black From Tula is a great tasting slicer. Plus, it is very resistant to nematodes. This photo is the copyrighted property of William D Adams and cannot be published without written permission from William D Adams.

Turk’s Cap (Malvaviscus drummondii)

This past weekend, the weather was so nice that my wife and I decided to take a ride in the country.  We went down a long gravel road that had a “No Exit” sign posted just to see where it would go.  The road was lovely.  It slowly snaked uphill through pastures divided by creeks that were crossed on old-fashioned wooden bridges.  As the road worked its way through this rough country, we were taken by two things; the views of Washington County from the top of the hill and the ditches full of Turk’s Cap.

With it’s whorled petals and long stamens, the flowers of the Turk’s Cap are are irristible to hummingbirds

In my opinion, Turk’s cap (Malvaviscus drummondii) is the most attractive and useful ornamental of all of the Texas natives.  This plant produces a large, woody bush that is literally covered in its characteristic red “whorled” blooms from late spring through first frost.  It is a joy to look at and a magnet for wildlife

My first Turk’s Cap plants came from the mark down rack at a local big box. When I bought them (in late July), they looked so bad that my wife thought that the $1 I paid for them was way too much.  I took those sad looking plants home and planted them along the outside fence of my potager.  Since it was July, and they were in such poor shape, I made sure that they got ample water through August.  While I lost one, the other four are still doing well three years later.

This year, my wife pointed out that fewer and fewer hummingbirds were coming to our feeders.  Our neighbors had them, but we were just not seeing them.  The missing hummingbirds bothered us both since we enjoy watching them.  One morning while weeding in the potager, I was startled by the unmistakable sound of hummingbird wings all around me.  I stopped what I was doing and was amazed to see a dozen or more hummingbirds feeding on the bright red flowers of my Turk’s Cap.  In that moment I knew why we had no hummers at our feeders; they prefer the taste of Turk’s Cap nectar to the taste of watered down sugar.  

Hummers aren’t the only thing that feed on Turk’s Cap.  My plants always have a wide variety of moths, butterflies and bumblebees flitting around them.  Plus, all of those lovely little flowers make a lot of “pulpy” seed pods that birds (especially mockingbirds) love.

The fruits and the seeds of Turk’s Cap are irresitable to a variety of wildlife

Two legged creatures can also enjoy Turk’s Cap fruits and flowers.  The raw fruit tastes a little like an apple or watermelon. You can also cook down the fruit to create a very tasty syrup that can be used to make a nice jelly.   Both the fruits and flowers can be boiled to make a good herbal tea.

If you want to try Turk’s Cap in your garden, you are no longer limited to plants with red flowers.  There is a native white variety that is available at several retailers in out area.  While pretty, the white one has not proven to be as durable or prolific for me as the red varieties.  If you like pink, then you have two great choices that have both been developed by my buddy Greg Grant. 


A tangle of Turk’s Cap (on the left), Cassia and Salvia coccinea in and around my potager

Greg was encouraged to create an improved variety of Turk’s Cap by one of the first female graduates of A&M (and fellow Rose Rustler), Pam Puryear.  He crossed one of our native reds with a tropical pink.  His first try yielded a large shrub with flowers that were twice as big as those of our native varieties.  Greg called this cross “Big Momma”.  “Big Momma” is a stunning plant but for me it has been hard to find.  If you find it, take cuttings (and call me) since Turk’s Cap is fairly easy to propagate. 

Greg’s second attempt produced a lovely pink flowered plant that was very similar in size and structure to our Texas native.  He named this plant in honor of the woman that encouraged him to develop it.  Pam Puryear’s Turk’s Cap has been very popular in the nursery trade.  It was also honored in 2011 with its inclusion on the list of Texas Superstars. 

If you can beat the mockingbirds to the seeds you can easily use them to grow more plants. Turk’s Cap is also easy to propagate through cuttings.

In my mind, Turk’s Cap is the ultimate bedding plant.  It is perennial south of the Red River and can be grown as annual further north.  I know of no other plant that is as adaptable or durable as this plant.  It is tolerant of a wide variety of growing conditions and even has a natural resistance to Roundup.  Turk’s Cap is that rare plant that does almost as well in the shade as it does in full sun.   It grows as well in the dense clay of the Central Texas river bottoms as it does in the thin, rocky, limestone rich soils of the Texas Hill Country or the acidic sandy soils of East Texas.  It thrives in average rainfall and it easily survives the worst droughts Texas has to offer.  Basically, all you have to do is get Turk’s Cap in the ground and it will grow for you.

Edible Landscape Tour

Currently, one of the hottest trends in landscape design is called “Edible Landscapes”.  Edible landscapes seek to incorporate vegetable, herbs, berries and fruit trees into urban and suburban landscapes. 

The backyard of one of the homes on the tour. Photo by Bruce Leander

I can attest that it is pretty easy to create an attractive outdoor space using a mix of fruiting plants and ornamentals.  Each season my little potager contains lots of vegetables mixed in with daylilies, salvias, justicias and dianthus.  The structure and color that these ornamentals add make the less showy vegetables much more attractive to look at.

I strive to make my spring and fall potager as attractive as possible.  While the aesthetics are important, there are a couple of side benefits to this combination of plants that make the garden much more efficient and productive.

Pansy, viola, carrots and shallots in my 2011 fall garden

First, since this is a vegetable garden, I mulch everything fairly well.  This mulch moderates soil temperatures and reduces water lost to evaporation.  Because of this, I am able to keep a fairly large amount of plants alive on MUCH less water than would be required to keep up a lush lawn of the same size.

Increased pollination is another side benefit of mixing vegetables and ornamentals.  Since I have a wide range of flowers that bloom throughout the year, my potager is always full of bees and other pollinators.  In addition to giving me something else to watch while I am in the garden, these pollinators make sure that I get lots tomatoes, squash and cucumbers every season.

Another yard on the edible landscape tour. Photo by Bruce Leander

If you would like to learn more about edible landscapes, you can join my wife and I at the Travis County “Edible Gardens Tour” In Austin.  My friend (and fellow MOH blogger and Texas Gardener writer) Patty Leander will be giving a presentation on the healthy aspects of vegetable gardening at the Agrilife Extension Center.  If you don’t want to start your tour at the Extension office, feel free to start at any of seven houses that are on the tour.  You can get your tickets, schedule and map to the houses online.  The tour kicks off at 9:00 and there will be short presentations at each one.  This is a great opportunity to see and learn from some very good gardeners that are doing great things by combining edibles and ornamentals in their yards and gardens.  As an added bonus, some of houses on the tour also use water wise gardening practices.  With the constant threat of water restricitions, this will be a great opportunity to pick up some of the tips and tricks you need to continue growing food when the rains don’t come.

The tour costs $15 per person in advance and you can reserve your tickets on the event website (Click Here).  The tour will start at the Travis County Agrilife Extension Center located at 1600-B Smith Road in Austin.  Hope to see you there!

P.S.  If you can’t make the tour in person be sure to watch KLRU’s “Central Texas Gardener”.   Their October 13 show will feature many of the gardens and the gardeners that are featured on the tour.  Their schedule is below.

Channel Day Date Time
KLRU    SaturdaySunday

Monday

Oct. 13Oct. 14

Oct. 15

Noon & 49 a.m.

5:30 a.m.

KLRU Q (18/3) TuesdayWednesday

Friday

Oct. 16Oct. 17

Oct. 19

6:30 p.m.7:00 a.m.

9:30 a.m.

KLRN (San Antonio) Saturday Oct. 13 11 a.m.
KNCT (Killeen & Waco) Saturday  Oct. 13  1:30 p.m.
KBDI (Denver, CO) SundayTuesday Oct. 14Oct. 16 2 p.m.2:30 p.m.
KPBT Midland (Permian Basin) Monday Oct. 15  12:30 p.m.
KAMU (College Station) Saturday Oct. 13 5:00 p.m.
KRSC (Claremore, OK) SaturdayTuesday Oct. 13Oct. 16


10:30 a.m.1:30 p.m.
KTWU (Topeka, KS) multiple days & times    

also on UNCMX Raleigh-Durham and K32EO Colorado Springs


Celebrate the Bulbs of Fall!

All across Central Texas, Oxblood lilies (Rhodophialia bifida) are at the peak of their season.  For those of us that live in areas that were once part of Mr. Austin’s original colony, these red trumpet shaped flowers have announced the arrival of fall for generations.

Oxbloods in my front bed

Here in Central Texas, no other bulb is as loved or celebrated in the fall as these Argentinian imports.  Sometime in the 1870’s the German immigrant/botanist/horticulturist Peter Oberwetter introduced these bulbs to the German speaking areas of the Texas Hill Country.  These bulbs were so pretty and so reliable that they quickly spread throughout Texas.  Now, thanks to the work of people like Chris Wiesinger and Dr. Bill Welch, oxbloods (and other heirloom bulbs) are becoming hugely popular throughout the entire Southern part of the U.S.

A mass of oxbloods on an abandoned homesite. Photo from The Southern Bulb Company

Even though oxbloods are the most common fall blooming bulb in Central Texas, they are not the only ones.  Two members of the of the Lycoris genus (Lycoris radiata and Lycoris aurea) also produce prolific blooms during the early days of the fall season.  Spider lilies (Lycoris radiata) are my personal favorite of the fall blooming bulbs.  All Lycoris bloom on top of a single, unadorned stalk after the first fall rains.  Because of this they are often called “Naked Ladies” or the “Surprise Lily”.  How can you not love their big, red, exotic looking heads?  Their curly petals burst open and arch backward to release long, curved stamens that look like the most gorgeous eye lashes imaginable.  I truly love these flowers!

These exotic looking  Japanese beauties have also been popular here for a very long time.  While they do not reproduce as rapidly as the oxbloods, Lycoris are tough and reliable.  These flowers are beautiful in their own right, but a mass of them is truly stunning.  If you want to see some of the best pictures of spider lilies that I have ever seen, be sure and catch this month’s issue of Southern Living.  My friend Dr. Bill Welch has an excellent article about them and the supporting photography is exceptional.

A stunning mass of Spiderlilies. Photo from The Southern Bulb Company

The blooms of the fall blooming bulbs of Central Texas last for only a couple of very short weeks.  Since they make terrible cut flowers and are almost impossible to dry, get outside in this amazing weather and enjoy them now.  These flowers make these fleeting early days of the Texas autumn truly special.

Since these flowers last for such a short time, be sure to give them ample water while they bloom.  This will extend their life by a few more precious hours. If you don’t currently have your own (or enough) fall blooming bulbs, contact my buddy Chris Wiesinger at The Southern Bulb Company.  Chris knows more about these charming antiques than anyone I know.  His bulbs are truly the best available anywhere.

This post has been shared on the Homestead Barn Hop and the HomeAcre Hop.  Be sure to check in on other homesteaders and organic gardeners!

P.S. Bulb blooms aren’t the only way I know fall has finally come to my garden.  Each year around this time I begin to see Green Tree Frogs all around the beds and borders of my property.  I don’t know where these guys hide the rest of the year, but the cool fall weather seems to erase their shyness.

This cute little fellow thought the cushion of one of our rocking chairs was a great place to hide.