Poppies, Potatoes and Protecting Squash by Patty G. Leander

Patty-Leander-Spring-Garden

I sure don’t need a calendar, computer or even a meteorologist to tell me it’s spring. Anytime I am outdoors I can see it, hear it, feel it and smell it. Not to mention the chirp of crickets in the house!

There is so much happening in the vegetable garden this time of year that it is hard to narrow it down to just one topic but here are three that are currently at the top of my list.

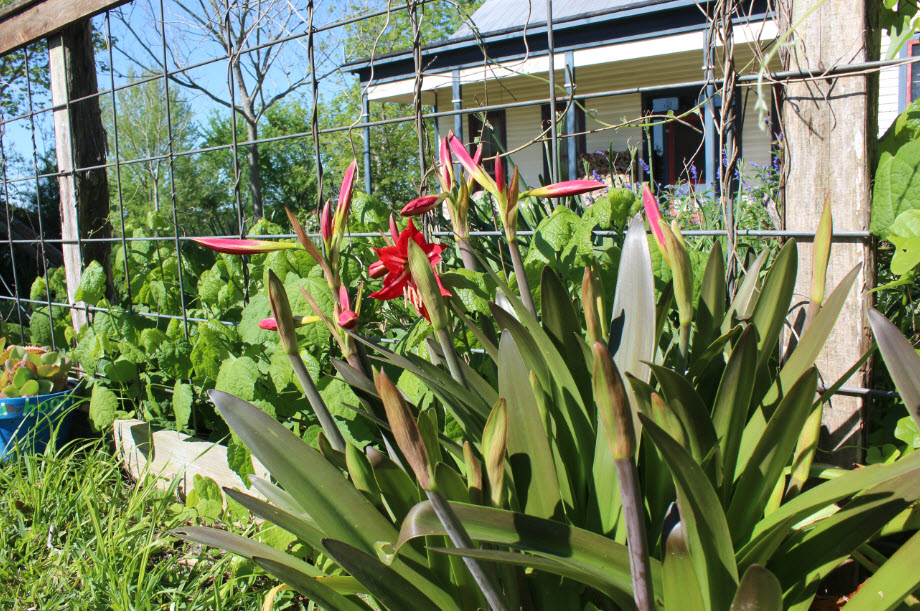
POPPIES: Jay has written about poppies before (https://masterofhort.com/2012/11/remembering-our-veterans-with-poppies/) but they are so lovely in spring they deserve another mention, especially since this is when we gather seeds for sowing next year. Poppies start to look a little ratty if left long enough to reseed themselves but a few seedpods will give you hundreds, if not thousands, of seed for sowing and sharing, so it’s not necessary to let ALL your blooms go to seed. Choose a few for saving and let the seedpods dry on the plant, long enough so you can hear the seeds rattle. Carefully snip off the seedpods (keep them upright so the seeds don’t scatter to the ground, unless that’s where you want them), remove the seeds and store them in a cool, dry location. Sow seeds in the fall for a spectacular spring display in 2017.

Patty-Leander-Poppies

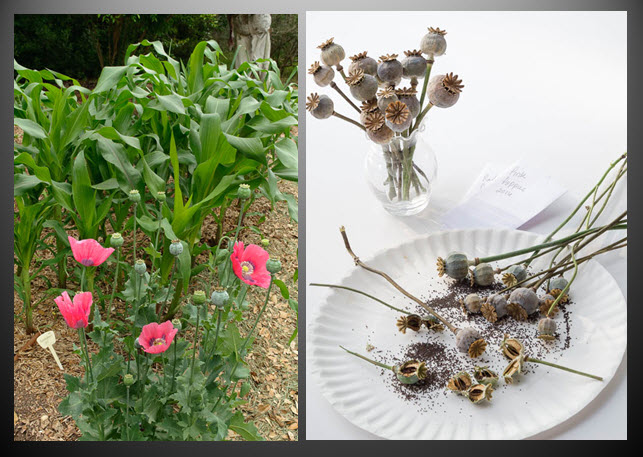
Save seeds from spring poppy blooms to plant in the fall.

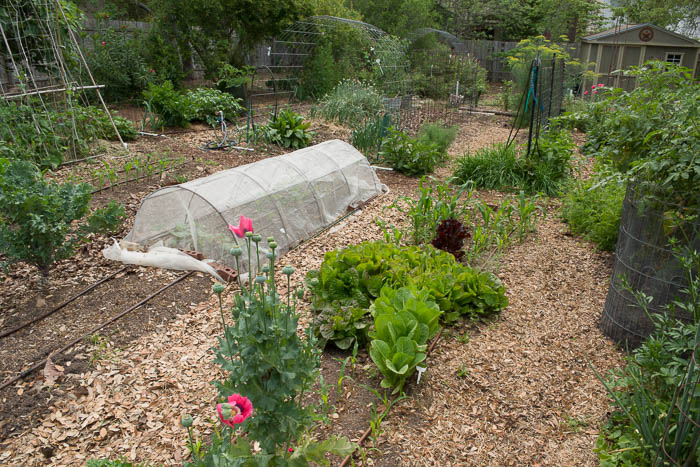
POTATOES: Potatoes are growing everywhere in my garden – under mulch, under hay, in cages and tucked in between other plants. My garden is big but it’s not big enough to grow bushels of potatoes and still have room for other favorite vegetables so I usually grow a few reliable favorites, like Yukon Gold and Red La Soda, along with a few less common selections. This year I have planted 8 varieties: Red La Soda, Austrian Crescent, Red Thumb, Russian Banana, Purple Majesty, Purple Viking, Russet Nugget and Lemhi Russet.

Patty-Leander-Potatoes

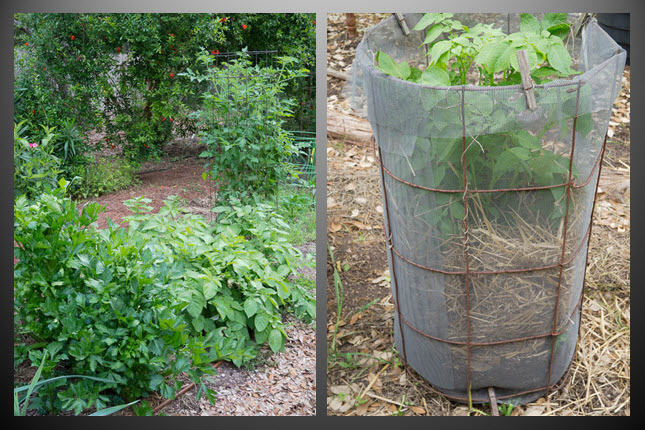
Potatoes go in where carrots came out, flanked by celery and tomatoes (left); on the right a fingerling variety grows under straw in a cylinder lined with fine mesh screen.

It sounds like a lot but I only purchase a pound of each variety since I am growing them more for fun and discovery than to fill a larder. I usually order my seed potatoes in December or January from Potato Garden in Colorado; they are one of the few places that will ship potatoes at the time we need to plant them here in Central Texas, which is mid-February. And they have an amazing selection of potatoes and growing information on their website (www.potatogarden.com).

Patty-Leander-Potatoes-2

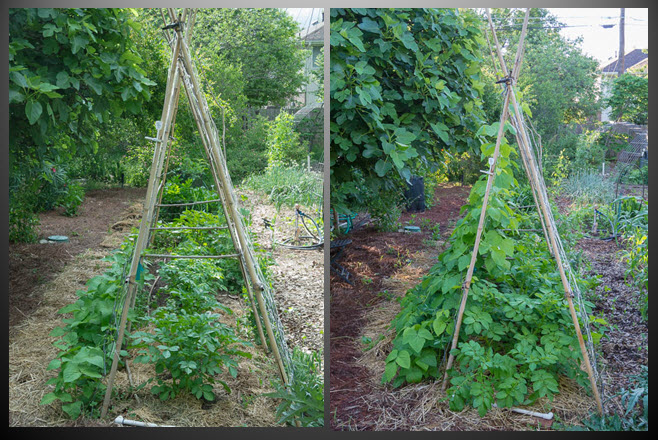
More potatoes tucked inside an A-frame constructed for pole beans and sugar snap peas (I wouldn’t recommend this unless you are petite in stature and into lots of bending, crouching and squatting – hey, this is how I get my exercise!). You can see their rapid growth from April 6 (left) to April 22 (right). As soon as the sugar snap peas on the right are done producing they will be removed to provide easier access to the potatoes.

Most of my potatoes were planted on February 26th, a little later than I would have liked, but the potatoes seem to be making up for lost time. Potatoes like people weather – mild days, cool nights, not too wet and not too dry – and so far Mother Nature has obliged.

Patty-Leander-Potatoes-3

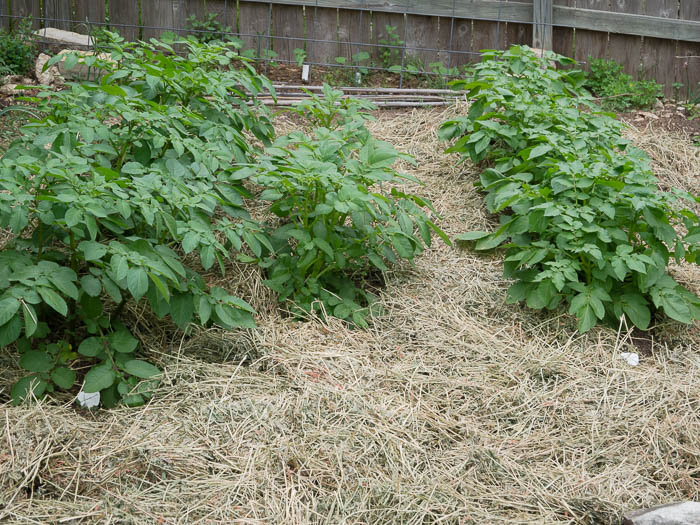
From left to right: Purple Majesty, Russet Nugget and Red Thumb on 4-10-16

Patty-Leander-Potatoes-4

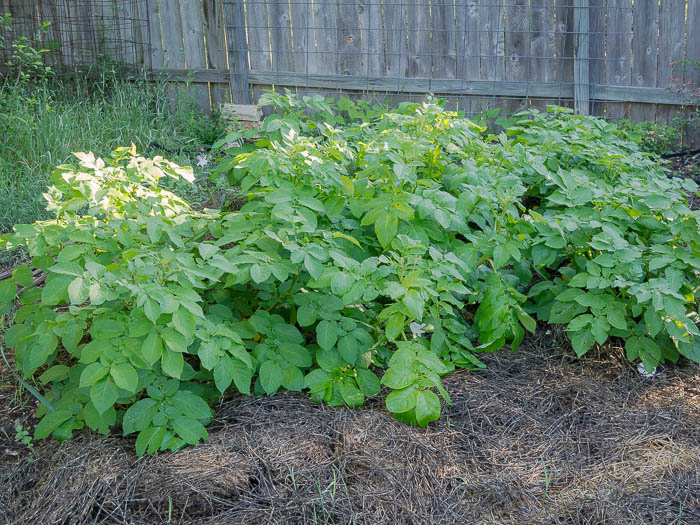
Growing by leaps and bounds: Russet Nugget (center) catches up to Purple Majesty and Red Thumb by 4-22-16

Growing potatoes means lots of surprises since you don’t get to see what is going on below ground. As the season progresses it’s hard for me to resist the temptation to dig around the base of the plants feeling for swollen tubers. Last week, much to my surprise and delight, I harvested 3 pounds of new potatoes from a planting of sorry looking Red La Sodas left over from my fall harvest.

Red-La-Soda-Seed-Potato

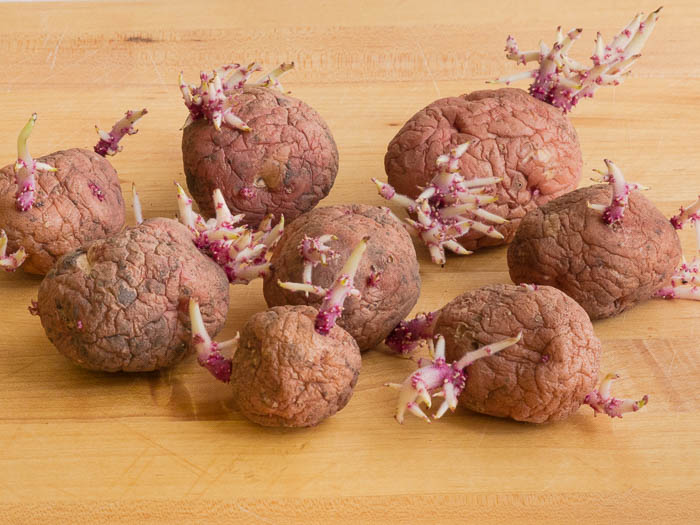
They may not look like much but these Red La Sodas had plenty of life yet to give

If you are growing potatoes be sure to keep the base of the plants mounded with soil, mulch or hay as they grow – it’s ok to bury some leaves in the process. The goal is to keep the tubers covered so they are not exposed to the greening effects of sunlight. And if you decide to start digging around to harvest some baby spuds remember that they do not store as well as mature tubers so eat and enjoy!

Red-La-Soda-New-Potatoes

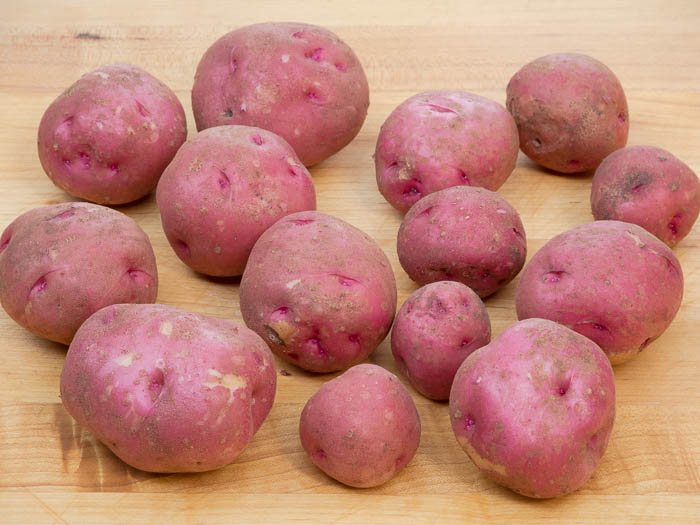
Surprise and delight: a little bit of careful digging yielded three pounds of new potatoes eight weeks after planting Red La Sodas left over from my fall harvest

SQUASH: Squash vine borer is a perennial problem for many gardeners but there is a new product to help battle this annoying pest. It is called Micromesh, and after using it the last couple of years I find that I like it better than floating row cover. It is available through the Territorial Seed catalog (www.territorialseed.com) and I have also seen it at The Natural Gardener in Austin. If you have seen this product at other Texas nurseries please share in the comments below.

Micromesh-Squash-Vine-Borer

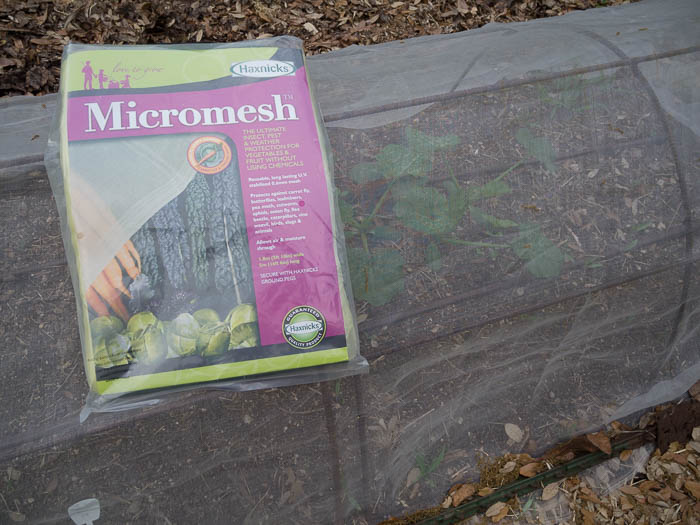
Micromesh: a new product to battle squash vine borer

Micromesh is a fine mesh netting used to keep bugs off of plants. It still allows water and light to pass but it is more see-thru than standard row cover and provides better ventilation, an important factor as the warm season progresses. I cover my squash plants as soon as they emerge and don’t uncover until I see female flowers. You can recognize a female flower because it has a small, immature fruit attached at the base of the petals. Once the flower gets pollinated the baby squash starts to develop, but if no pollination takes place the flower and the fruit shrivel and fall off. If you choose to keep your squash covered after female flowers appear you will have to perform the role of pollinator. Jay covered the how-tos in a previous post: https://masterofhort.com/2013/01/hand-pollinating-squash/.

Patty-Leander-Squash

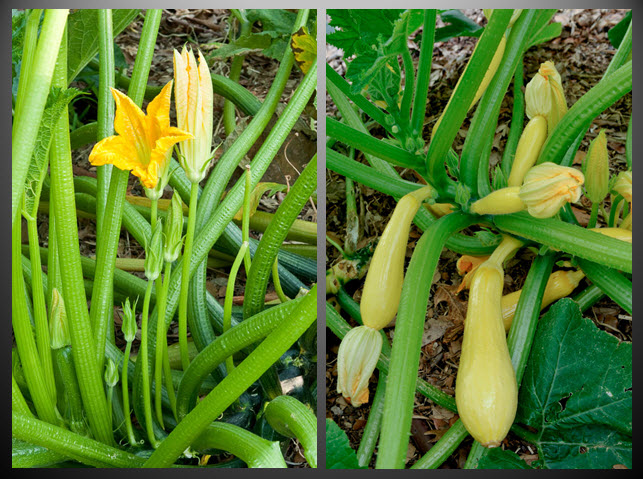
All types of squash produce both male and female flowers on the same plant; the male flowers generally appear first, followed by female flowers which have a tiny, immature fruit at their base

Hope you are having an awesome spring season in your vegetable garden! People pests (mosquitoes-grrrr),  plant pests, diseases and heat are lurking and soon enough will make their presence known, but for now we can give thanks for the rain, revel in the mild temperatures and watch in amazement as a seed becomes a plant and a plant becomes a harvest.

Grow Better Caladiums

Caladiums do well in the shady, sub-tropical yards of Texas and the Gulf South because they originated in the shady tropical forests of Amazon Basin in South America.  While these beautiful foliage plants have a reputation as shade loving plants, breeders have developed several strains that do well in part to full sun.  Today there are more than 1000 named cultivars of caladiums for growers to choose from.

Caladium-Border

Caladiums make a lovely statement on their own, but they also play well with other perennials. Thanks to Classic Caladiums for sharing these lovely pictures.

While the color patterns are quite varied, caladiums come in three distinct types and each performs slightly different.  Before planting your caladiums decide which type will best fit your need.  Fancy leaf caladiums produce large heart shaped leaves.  Most of these varieties like the shade and do best when planted in the ground.  These large scale plants make a huge impact when massed around a tree trunk, combined with perennial shrubs or mixed in beds with impatiens and begonias.  Strap leaf caladiums produce smaller plants with smaller foliage that is shaped more like a “spear point ” than a heart.  However, smaller does not mean less beautiful.  Strap leaf caladiums take the heat and sun better than the fancy leafed varieties.  Because of this they are a great choice for those of us in the more tropical parts of the South and they also work well in containers.  They also do extremely well in the ground, especially in areas that get six or more hours of sun.  Dwarf caladiums have heart shaped leaves but do not get as large as the fancy leafed varieties.  While beautiful in their own right, they pair well with the strap leaf varieties.  All three types of caladiums can be planted and cared for in about the same way.

Tiki-Torch-Caladium-Full-Sun

Tiki Torch is a Classic Caladium creation that can withstand full sun. Thanks to Classic Caladiums for sharing these lovely pictures.

Your caladiums will do best if planted in some shade, especially the fancy leaf varieties.  Caladiums planted in deep shade will actually get taller than those that are planted in dappled shade or sun.  While all caladiums appreciate some shade, most can take more sun than they are given credit for.  In fact, almost all commercially grown caladiums are grown in fields under full sun.  Caladiums grown in full sun will produce more vibrant colors.  However they will also require more frequent watering than those grown in shade.  If caladiums receive too much sun they can develop small holes along the veins and brown around the edges.  For this reason it is best to try and select a spot where the plants will get no more than 6 hours of sun a day.  It is better if this sun comes in the morning.  The hot evening Texas sun is hard on all plants.  It is especially hard on these large leafed beauties.

Mixed-Caladium-Border-3

Caladiums also pair well with many annuals. I really like the pairing here with the chartreuse coleus. Thanks to Classic Caladiums for sharing these lovely pictures.

If you are buying caladiums for the first time you need to realize that almost all caladiums are infected with one or several viruses.  While these viruses will not stop the tubers from producing well the first year, the size and color of subsequent years growth will diminish with each succeeding year.  To avoid this, ask your retailer if they buy their bulbs from Classic Calidiums.  Classic Caladiums has spent considerable time, effort and money to develop bulbs that are as disease free as possible.

When selecting where to plant your caladiums remember that caladiums like rich, moist, well-draining soil – but they don’t like to stay wet.  Caladiums also like organic matter as much as the next plant, so mix in some finished compost about a month before planting.  This will also help drainage if you have heavy clay soils. Caladiums grow best in slightly acidic soils.  Because of this they will benefit from a monthly sprinkling of bone meal.  If you use commercial fertilizers, be gentle.  Too much nitrogen will damage the tubers and affect the color of the foliage.  Slow release fertilizers like Osmocote work well.

Potted-Caladiums

Caladiums make excellent potted plants. Thanks to Classic Caladiums for sharing these lovely pictures.

If you are planting in containers, select a good quality potting mix.  While there are many mixes out there you want one that has a good amount of peat in it.  If the mix also has perlite or vermiculite in it, all the better.  All of these components increase the soils water holding capabilities.  That will be very important in July and August when you are trying to keep the soil moist in our 100 degree temperatures.  You should also mulch with pine needles or other high quality organic mulches to help regulate water loss.

If you are planting in containers, or you just want to get a jump on the season, you can purchase potted plants.  You can also get a jump on the season by starting your tubers inside four to six weeks before the last frost date.  If you are going to grow from dormant tubers look for firm roots that feel rubbery when squeezed.  Spongy roots are damaged and should be avoided.

Caladiums have one or more eye that is noticeably larger than the others.  These eyes will produce larger shoots than the other eyes.  If you want a nice rounded plant where all of the leaves are uniform in size, you will need to remove these.  De-eyeing is a relatively simple process.  You can take a small, sharp knife and remove about an 1/8th to 1/4th inch of material from the center of the large eye.  This is not brain surgery so you do not have to be incredibly accurate.  You just want to remove enough tissue to destroy the eye.  When doing this, be careful not to damage any of the surrounding smaller eyes.  If you damage too many eyes you will defeat the purpose.  Improperly de-eyed bulbs produce straggly plants.

Sangria-Leaves-Caladium

Mass caladiums like “Sangria Leaves” together to make bold color statements in your beds and borders. Thanks to Classic Caladiums for sharing these lovely pictures.

Caladiums tubers are generally sold by size.  If you have a choice, which you may not, (the garden center that sells me my tubers only sells one size) buy the largest tubers they have.  These will be called Number 1’s.  Quite simply, bigger bulbs perform better.  However, that doesn’t mean the smaller bulbs will not do well for you.

Once you have selected and de-eyed your tubers you are ready to plant.  Caladiums should be planted after all chances of frost have passed.  Even then you don’t want to plant them until the soil has warmed to at least 55 degrees.  If caladiums are planted too early they will rot.  Many caladium growers will tell you that you should never plant before Mother’s Day.

Plant your caladiums eye side up 1 ½ to 2 inches below the soil.  This is the same for both in ground plantings and in containers.  With smaller tubers it is often difficult to decide which side of the tuber is up.  If you cannot determine which side is up don’t worry too much about it.  Caladiums will grow regardless of which side you put down in the hole.  If the bulb is upside down it will just take longer for it to sprout.

Add caladiums to your potted arrangements to making stunning floral displays

Add caladiums to your potted arrangements to making stunning floral displays. Thanks to Classic Caladiums for sharing these lovely pictures.

One of the wonderful things about caladiums is how little maintenance they require.  Once you have planted them, all you have to do is keep them moist.  Because it gets so hot here, keeping soil moist can often be a challenge.  Because of this it is a very good idea to mulch your caladiums.  Earlier I mentioned mulching with pine needles.  As pine needles break down they will help lower the pH of your soil.  This is good as caladiums prefer a pH of 5.5 to 6.5.  However, if you don’t have ready access to pine needles, use any good organic mulch.  The important thing is applying enough mulch to cut your water loss.  Many people grow their caladiums in pots or hanging baskets.  Since both of these containers can dry out very quickly it is very good idea to deeply mulch them.  Regardless of how you grow or how much you mulch them, be aware that for optimal performance you will want to keep an eye on your soil moisture.  Caladiums do not like wet feet but they also should never be allowed to completely dry out.

Like other bulbs, corms and tubers caladiums are perennial.  However, they are perennial with a catch.  If you live south of Interstate 10, you can leave your caladiums in the ground year round, especially if you mulch.  I live just north of that line.  Since we had such a mild winter this year I probably could have left mine in the ground this year.  However, I didn’t.  Each fall I dig my tubers up and then store them for use next year.

"Aaron" looks lovely with impatiens.

“Aaron” looks lovely with impatiens. Thanks to Classic Caladiums for sharing these lovely pictures.

Most people dig their caladiums in late September or early October.  You will know it is time when the colors in the foliage begin to “fade” and the stalks begin to noticeably droop.  When this happens, take your spade or shovel and carefully remove the tubers with the leaves still attached.  Once you have them out of the ground find a covered place to lay them out and let them dry for several days.  Sometimes five days works but sometimes it takes up to two weeks before the leaves dry up and turn brown.  When the bulb is ready for storage the leaves will easily separate from the tuber exposing a dry and cured node where the leaf was attached.    Once the tubers are dry you can store them in sand, sawdust or peat.  Try and keep them around 60 degrees throughout the winter.

Few plants are as beautiful and carefree as caladiums.  These tropical plants are ideally suited for the Texas climate.  Even though they have a reputation for being shade lovers, breeders are constantly developing new varieties that make these reliable and pest resistant beauties available to a wider range of gardeners.   If you have never grown them before now is definitely the time to give them a shot.  New production methods and a certification program from Classic Caladiums will ensure that the tubers we buy this year will continue to thrill us now and well into the future.

I share these posts on Our SimpleHomestead Blog Hop.  Be sure to stop by.  The “hop” has tons of great information from gardeners and homesteaders all over the world!

A Garden Visit with Eli Kubicek

Each year I buy several of my ornamental plants from a small, independent grower named Eli Kubicek.  Eli has been organically growing and propagating vegetables and ornamentals in his Brenham gardens for 8 years.  Over the past few years Eli has developed quite a following of local people who literally line up to buy his high quality starts and transplants.  While it is not unusual for gardeners to line up to purchase high quality transplants from an organic grower, it is incredibly unusual for the producer of those transplants to be just 10 years old!

Eli Kubicek is a plant propagating 10 year old entreprunuer from Brenham, Tx

Eli Kubicek is a plant propagating 10 year old entreprunuer from Brenham, Tx

I met Eli three years ago when he was a second grader in my wife’s class at St. Paul’s Christian Day School.  For some occasion or another Eli presented her with a lovely pot of aloe vera that he proudly told her he had propagated himself.  Thanks to that gift I now have pots and pots of aloe vera all around my house.  We were so impressed with this plant propagating second grader that we have made it a point to buy from him each and every year.

Eli's skills are not limited to plant propagation. Here he proudly displays a birdhouse he designed and built.

Eli’s skills are not limited to plant propagation. here he proudly displays a birdhouse he designed and built.

Eli lives on six acres outside of Brenham with Dad Stan, Mom Becky and Duece, their flop eared, yellow guard dog.  The Kubicek’s live in a rambling farmhouse that started life as a two room home in the late 19th century.  Stan and Becky have spent years restoring the old house and cultivating some very attractive ornamental and vegetable beds around it.  When Eli came along, his parents included him in everything they were doing.  Around the time Eli turned two they noticed that he had a real affinity for plants.  Since that time they have encouraged his interest.  Both of his parents are what I would consider craftsmen.  Stan (who earns his living as a college math professor) is a fine furniture and cabinet maker .  Becky (who is a nutritionist by trade) has created some of the most beautiful cottage beds and garden rows I have ever seen.  Working alongside his parents, Eli has developed an eye for detail, an appreciation of hard work, the value of “re-use” and the confidence needed to tackle whatever issues he encounters while building a garden, a bird house or a remote control Lego car.

Eli recently installed his latest ornamental bed. He laid the the brick border himself and is filling the bed with several plants that he has divided or propagated

Eli recently installed his latest ornamental bed. He laid the the brick border himself and is filling the bed with several plants that he has divided or propagated

When it comes to plants, Eli now has free reign as far as his parents are concerned.  Each year he selects the plants from the garden he wants to propagate.  He and his dad then get a load of mulch from the local landfill.  To create his potting mix, and the compost for his gardens, Eli sifts the mulch with a slotted tray from the nursery that was used to hold 8 cell transplant packs.   The sifted compost fills his pots and feeds his gardens and the mulch is used to suppress weeds in those same plots.

Eli designed this lovely bed at the entrance to his house. He also grew all of the plants.

Eli designed this lovely bed at the entrance to his house. He also grew all of the plants.

Each year, Eli’s inventory and sales grow.  As he has gotten older he has learned to propagate more and varieties.  This year, I went to buy my annual “Eli Plants” at the Brenham Christian Academy Bazaar.  His booth was lovely and it was stocked with figs, Turk’s Cap, rosemary, several salvias and lots of succulents.  He also had some of the most beautiful Hardy Amaryllis for sale that I have ever seen.  Since my wife is an amaryllis lover we came home with all he had for sale.

A clump of Hardy Amaryllis in that Eli divides and sells at his annual plant sale

A clump of Hardy Amaryllis that Eli divides and sells at his annual plant sale

Eli’s enthusiasm for growing and propagation has been an inspiration for me.  While I love to garden it is always refreshing to find someone who shares your loves and passions.  Eli is an outstanding young man with so much promise and potential.  I am truly glad our paths have crossed and I can’t wait to see where all of his gifts and talents take him.

Name:  Eli Kubicek

Location:  Brenham, Tx

Years gardening in this location: 8 years (80% of my life!)

Favorite thing to grow:  Snapdragons and perennials in general

Eli has several varieties of salvia that he propagates each year. This year he added pineapple sage to his list of offerings

Eli has several varieties of salvia that he propagates each year. This year he added pineapple sage to his list of offerings

Best growing tip:  Don’t “over tend” your garden.  In my garden I don’t do much except weed, fertilize twice a year and water when necessary

Best pest control tip:  We don’t have a big problem with pests.  However we have had grasshopper problems in the past.  For those I pick and smush or let our guinea take care of them.  For slugs I pick and smush with a stick.  I have a good guard dog name “Duece” who takes care of armadillos and other big pests.

Best weed control tip:  Yank ‘em out before they spread

Biggest challenge:  Covering and uncovering all of the plants I am propagating before and after a frost or freeze.  I also have a problem keeping the guinea (grasshopper control) away from the melons,strawberries and persimmons

Favorite soil amendment:  Fresh compost which I make myself!  I don’t use that bagged stuff.

Preserving the harvest:  Some vegetables don’t make it to the house.  They are just too tempting and I eat them immediately.  For example, carrots (I just brush off most of the soil and munch away), green beans and bell peppers .

Favorite advice:  Don’t let weeds get out of control!

Eli with mom Becky and dad Stan in front of a bottle tree that they made by wiring together old Christmas Tree trunks

Eli with mom Becky and dad Stan in front of a bottle tree that they made by wiring together old Christmas Tree trunks


I share these posts on Our SimpleHomestead Blog Hop.  Be sure to stop by.  The “hop” has tons of great information from gardeners and homesteaders all over the world!