Poppies, Potatoes and Protecting Squash by Patty G. Leander

Patty-Leander-Spring-Garden

I sure don’t need a calendar, computer or even a meteorologist to tell me it’s spring. Anytime I am outdoors I can see it, hear it, feel it and smell it. Not to mention the chirp of crickets in the house!

There is so much happening in the vegetable garden this time of year that it is hard to narrow it down to just one topic but here are three that are currently at the top of my list.

POPPIES: Jay has written about poppies before (https://masterofhort.com/2012/11/remembering-our-veterans-with-poppies/) but they are so lovely in spring they deserve another mention, especially since this is when we gather seeds for sowing next year. Poppies start to look a little ratty if left long enough to reseed themselves but a few seedpods will give you hundreds, if not thousands, of seed for sowing and sharing, so it’s not necessary to let ALL your blooms go to seed. Choose a few for saving and let the seedpods dry on the plant, long enough so you can hear the seeds rattle. Carefully snip off the seedpods (keep them upright so the seeds don’t scatter to the ground, unless that’s where you want them), remove the seeds and store them in a cool, dry location. Sow seeds in the fall for a spectacular spring display in 2017.

Patty-Leander-Poppies

Save seeds from spring poppy blooms to plant in the fall.

POTATOES: Potatoes are growing everywhere in my garden – under mulch, under hay, in cages and tucked in between other plants. My garden is big but it’s not big enough to grow bushels of potatoes and still have room for other favorite vegetables so I usually grow a few reliable favorites, like Yukon Gold and Red La Soda, along with a few less common selections. This year I have planted 8 varieties: Red La Soda, Austrian Crescent, Red Thumb, Russian Banana, Purple Majesty, Purple Viking, Russet Nugget and Lemhi Russet.

Patty-Leander-Potatoes

Potatoes go in where carrots came out, flanked by celery and tomatoes (left); on the right a fingerling variety grows under straw in a cylinder lined with fine mesh screen.

It sounds like a lot but I only purchase a pound of each variety since I am growing them more for fun and discovery than to fill a larder. I usually order my seed potatoes in December or January from Potato Garden in Colorado; they are one of the few places that will ship potatoes at the time we need to plant them here in Central Texas, which is mid-February. And they have an amazing selection of potatoes and growing information on their website (www.potatogarden.com).

Patty-Leander-Potatoes-2

More potatoes tucked inside an A-frame constructed for pole beans and sugar snap peas (I wouldn’t recommend this unless you are petite in stature and into lots of bending, crouching and squatting – hey, this is how I get my exercise!). You can see their rapid growth from April 6 (left) to April 22 (right). As soon as the sugar snap peas on the right are done producing they will be removed to provide easier access to the potatoes.

Most of my potatoes were planted on February 26th, a little later than I would have liked, but the potatoes seem to be making up for lost time. Potatoes like people weather – mild days, cool nights, not too wet and not too dry – and so far Mother Nature has obliged.

Patty-Leander-Potatoes-3

From left to right: Purple Majesty, Russet Nugget and Red Thumb on 4-10-16

Patty-Leander-Potatoes-4

Growing by leaps and bounds: Russet Nugget (center) catches up to Purple Majesty and Red Thumb by 4-22-16

Growing potatoes means lots of surprises since you don’t get to see what is going on below ground. As the season progresses it’s hard for me to resist the temptation to dig around the base of the plants feeling for swollen tubers. Last week, much to my surprise and delight, I harvested 3 pounds of new potatoes from a planting of sorry looking Red La Sodas left over from my fall harvest.

Red-La-Soda-Seed-Potato

They may not look like much but these Red La Sodas had plenty of life yet to give

If you are growing potatoes be sure to keep the base of the plants mounded with soil, mulch or hay as they grow – it’s ok to bury some leaves in the process. The goal is to keep the tubers covered so they are not exposed to the greening effects of sunlight. And if you decide to start digging around to harvest some baby spuds remember that they do not store as well as mature tubers so eat and enjoy!

Red-La-Soda-New-Potatoes

Surprise and delight: a little bit of careful digging yielded three pounds of new potatoes eight weeks after planting Red La Sodas left over from my fall harvest

SQUASH: Squash vine borer is a perennial problem for many gardeners but there is a new product to help battle this annoying pest. It is called Micromesh, and after using it the last couple of years I find that I like it better than floating row cover. It is available through the Territorial Seed catalog (www.territorialseed.com) and I have also seen it at The Natural Gardener in Austin. If you have seen this product at other Texas nurseries please share in the comments below.

Micromesh-Squash-Vine-Borer

Micromesh: a new product to battle squash vine borer

Micromesh is a fine mesh netting used to keep bugs off of plants. It still allows water and light to pass but it is more see-thru than standard row cover and provides better ventilation, an important factor as the warm season progresses. I cover my squash plants as soon as they emerge and don’t uncover until I see female flowers. You can recognize a female flower because it has a small, immature fruit attached at the base of the petals. Once the flower gets pollinated the baby squash starts to develop, but if no pollination takes place the flower and the fruit shrivel and fall off. If you choose to keep your squash covered after female flowers appear you will have to perform the role of pollinator. Jay covered the how-tos in a previous post: https://masterofhort.com/2013/01/hand-pollinating-squash/.

Patty-Leander-Squash

All types of squash produce both male and female flowers on the same plant; the male flowers generally appear first, followed by female flowers which have a tiny, immature fruit at their base

Hope you are having an awesome spring season in your vegetable garden! People pests (mosquitoes-grrrr),  plant pests, diseases and heat are lurking and soon enough will make their presence known, but for now we can give thanks for the rain, revel in the mild temperatures and watch in amazement as a seed becomes a plant and a plant becomes a harvest.

Week 33 Tips for the Zone 9 Garden

As I write this I am sitting on an incredibly comfortable 75 degree back porch in Oklahoma City.  Sally and I came north to spend a little time with our grandson (and his parents).  Since this weekend is the official kick off of the Fall garden season I will be driving back on Saturday so I can begin planting my garden in the 100+ temperatures that we are expecting this weekend.

Roger and I having a little fun while mom and Nana do a little shopping

Roger and I having a little fun while mom and Nana do a little shopping

Vegetables

  • Plant the following from seed – While it is still too hot for transplants, there are many things you can plant this weekend from seed. Below is what I will be planting (don’t forget to check our planting calendar to get a complete list of what you can plant from seed this weekend):
    • Green Beans
    • Black eyed peas
    • Beets
    • Carrots
    • Kale
    • Collards
    • Mustard Greens
    • Squash (both summer and winter varieties)
    • Chard
    • Lima Beans
  • Prepare beds for transplants – By September 1 you can plant most transplants. Get your beds ready now by removing all weeds, rebuilding the row or beds and then applying a deep layer of compost.  Once this is done mulch heavily and begin watering on a regular basis
  • Plant tomato transplants ASAP – I know I said wait until September 1 to plant transplants, but tomatoes are an exception. Plant them as soon as they show up in stores.  Most tomatoes take so long to mature that you need to get them in the ground now if you want red fall tomatoes.  Baby them!  Give them a little shade cloth, lots of water and mulch heavily with finished compost.  Then feed them with liquid fertilizer.  Fall tomatoes need to establish quickly and start putting on flowers early in the fall season.
Now is the time to spend money on compost.  Everything in your Fall garden will benefit from the addition of compost

Now is the time to spend money on compost. Everything in your Fall garden will benefit from the addition of compost

Ornamentals

  • Prepare beds for fall – Flower beds need the same work as the vegetable garden. Remove weeds now.  Fertilize heavily with finished compost and mulch.  Begin watering regularly to encourage fall blooming bulbs to sprout
  • Plant from seed – This weekend is a great time to plant more zinnias, cockscomb, marigolds and sunflowers from seed
  • Plant from transplant – While it is too hot to plant transplants in the vegetable garden, garden beds that get some shade can receive several great transplants. Some of my favorites are pentas and angelonia
  • Refresh potted plants. If summer has zapped the plants in your pots I recommend redoing them.  Throw away spent plants and soil.  Replace with a high quality planting mix that has perlite or other water holding components.  When watering in plants use a water soluble fertilizer mixed to 50% of package recommendations.  Some of my favorite fall potted plants are coleus and portulaca
coleus-potted-plant

Coleus and portulaca are some of my favorite potted plants

Trees and Lawns

  • Prepare trees and shrubs for transplant – if you have a tree or shrub that needs to be moved, now is the time to start getting ready. The larger the tree or shrub is the more preparation it needs.  Start giving it a slow, soaking watering every third day.  This will assure the plant is full hydrated before its move
  • Continue to water trees and shrubs deeply – If your trees or shrubs are shedding leaves now there is a good chance they are suffering root stress. It has been very hot lately.  This is very hard on young trees and woody perennials.  Mulch heavily, water deeply and regularly and feed with a slow release fertilizer.


I share these posts on Our SimpleHomestead Blog Hop.  Be sure to stop by.  The “hop” has tons of great information from gardeners and homesteaders all over the world!

The $70 Vegetable Garden

I recently read the 2009 survey results of the gardening world by the National Gardening Association (http://www.garden.org/).  One of the stats that I found very interesting was the amount of money the average person reportedly spends on their food garden.  According to the NGA survey, the average vegetable gardener only spends $70 per year on their garden.  Now I realize that I am not the average gardener, but $70?  Really?  I spend an average of $30 per month on just compost.  So this got me thinking.  Could I create a vegetable garden (on paper) with just $70 worth of supplies?

There really is nothing better than home grown tomatoes

To do this, I had to make some assumptions.  Using the NGA data, I decided to be average.  According to their report the average vegetable garden in the US is 600 square feet.  Using this I decided to have a 21’ X 30’ (I know that is 630 square feet, but go with me) virtual garden.  This garden would contain 4-30 foot rows.  Each row would be 3 feet wide and there would be 3 feet wide walk paths between the rows.  In this space I would plant the Top Ten vegetables grown in US gardens (based on results from the same survey).  Those vegetables are tomatoes, cucumbers, sweet peppers, beans, carrots, summer squash, onions, hot peppers, lettuce and peas.  I also assume that this $70 experiment only covers the spring garden.  Finally, since I garden organically, my $70 garden will use organic principals as well.

Below are the four rows that I have designed.

Row 1 –English peas the 10th most grown veggie in the American garden.  Normally I plant them in January.  For this garden, I am going to recommend putting them on Feb. 1.  A little late here, but this is just an experiment and they will probably still produce when planted this late (especially if you live north of Dallas).  Carrots can go in at the same time.  Beans are a little less cold hardy so I am going to virtually plant them Feb. 15.

All of these veggies will be planted by seeds.  The beans and peas will be spaced at 6” and I will get three rows in each three foot bed.  To plant this many beans and peas, you will need to buy two packs of seed for each.  I selected “Contender” bush beans from Baker Creek Heirloom Seeds.  They were $2 per pack so the beans will cost $4.  I found 100 “Green Arrow Peas” from Seed Savers Exchange for $2.75. The carrots will be planted in a staggered grid plan at 4” spacing.  You will need 2 packs of seed for this many carrots.  Since the seeds are so tiny it is difficult to get just one seed per hole.  I chose “Danver” from Seed Savers Exchange.  The two packs were $5.50.

Row 2 –Around here, we plant our onion sets in November or December.  For this garden, we are going to assume that we planted 300 10-15Y onions in November.  They are stagger planted 6” apart in three rows that are 20’ long.  This would require two bunches of sets and would have set us back about $6.  Now 300 is a lot of onions.  However, I love them and they keep well so I also plant a lot.  I planted the onions in the middle of the row.  This leaves two 5’ beds on either side.

In both of these beds I am planting lettuce from seed.  I love lettuce and there are a ton of varieties.  All do well in the cool season so you can plant whatever variety you choose.  I always plant two different varieties of leaf lettuce.  To plant beds this size, you will need about four packs of seeds.  At $1.50 each, that is another $6.

Row 3 – This whole row is dedicated to cucurbits.  30 feet is a lot of room for our squash and cucumbers,  especially since they are both so productive.  Each of these plants need about 3’ of space.  I will plant six  hills of squash (2-yellow crook neck, 2 zucchini, and two patty pan).  I will then plant four trellises of Poinsett cucumbers.  I grow these every year and they are awesome!  They are very productive and are great as slicers and for pickling.  I build thee-legged trellises for them out of cedar limbs.  Four trellises will allow us to have 12 vines.  This will be more than enough.  For this row we will be using 4 packets of seeds at $2.50 each so the whole row will cost just $5.

Row 4 –Tomatoes are the stars of most summer gardens.  They are the number one grown vegetable in the home garden. For the last row of our gardenwe will buy and plant six tomatoes, two Jalepenos and two Bell pepper plants.   I usually buy plants because it is much easier than planting from seed in January and then nursing to April.  I always plant my tomatoes and peppers the first week in April.  I usually make sure and plant at least two plants of each tomato variety that I select.  My favorite for slicing tomato is an heirloom called “Black From Tulia”.  I also usually plant a cherry variety and a grape variety.  We also love Romas so we grow a yellow variety called appropriately “Yellow Roma”.  I do not have a favorite Bell or Jalepeno variety.  I typically plant whatever they have at the nursery.  I buy well established tomatoes in quart containers.  Each of these usually cost about $4 a piece so you are going to have to part with $24 for this row.  I buy peppers in 4’ pots and they are usually about $1.5 a piece.

My little experiment has proven that you can have an average garden with the ten most common plants for under $70.  Including the 8.25% Texas sales tax, my total came out to $64.13.  That leaves enough for 5 bags of compost (which I highly recommend).  I know this doesn’t account for water or mulch or about a million others things you can spend your gardening dollars on, but it does prove that if you have decent soil you can have a very nice garden for a small amount of money.  According to the NGA survey, this $70 garden will produce $600 dollars worth of food.  So, this garden is good for both your health and your pocket book!  February in Central Texas means it is time again to go outside and get dirty!  Happy gardening y’all!

P.S.  If gardening stats fire you up then you can read my full analysis of the results of the NGA survey in next issue of Texas Gardener.

Friends and Fresh Cut Flowers

This past Friday, two very pleasant things occurred at the Yupneck’s house;  an unexpected visit from my youngest daughter and the first formal dinner party hosted in our newly remodeled farmhouse (celebrating the “almost end” of a five year remodeling project).  While visits from the kids are always welcomed, it is those rare, unexpected drop ins that I love the most.  Whitney is a senior at North Texas University.  She is also a very talented floral designer.  While there, she found out that we were hosting the renowned Master of Horticulture, Dr. William C. Welch (Bill) and his lovely wife Lucille.  She asked if she could make us some arrangements from the garden for the dinner.  Of course I said a most enthusiastic YES!!!!!

Whitney grabbed some shears and left the house for about 20 minutes.  When she returned, she had a large bundle of flowers and foliage from just about every plant on my property.  It was a joy to watch her sort, strip and prepare these cuttings for arrangement.  What happened over the next fifteen minutes was truly amazing.  In less time than it takes me to brush my teeth, she created three incredibly lovely arrangements that I felt I had to share.

Arrangement for the yupneck's table. Made with things from my gardens by my lovely and talented daughter.

The first was a large arrangement that she made for the center of the table.  If you look closely, you will see hollyhocks, love-lies-bleeding, salvia, dried yarrow, coral honeysuckle and PURPLE HULL PEAS!  Who puts peas in a floral arrangement?  A young Master of Horticulture, that’s who.  This arrangement was stunning!  I wish my camera skills did it justice.

Close up of the table arrangement. Notice the use of purple hull peas and coral honeysuckle.

Next, she made a small arrangement for the bath.  This arrangement was built in a small water pitcher.  She incorporated  tatume’ squash, zinnias, love-lies-bleeding and southern wax myrtle foliage. 

Lovely arrangement using zinnias, amaranth and a tatume' squash.

Finally, she turned a vintage Mary planter into another stunning arrangement.  Here she used zinnias, salvia, wax myrtle foliage and iris leaves for effect.  Beautiful!

A vintage Mary planter featuring zinnias and salvia.

Whitney’s arrangements were the cherry on the top of the truly fabulous meal that my lovely wife prepared for the Welch’s.  Mrs. Yupneck created a carmalized onion and goat cheese appetizer, steak with bearnaise suace, stuffed summer squash and a tomato and balsalmic salad.  This was washed down with a lovely red brought by the guests and finished with a decadant “mudslide” dessert.  The evening was perfect.  My wife and daughter’s combined skills came together to create a dinner that was memorable for all.

The yupneck with his very talented floral designer daughter and his equally lovely and talented culinary wife.

P.S.  My daughter is a very talented floral designer.  She has started her own business in the DFW/Denton area.  She will be more than happy to give you a bid on events of any size.  To see more of her work you can check her out at Arbor Floral.

P.S.S.  Since the dinner was to celebrate the almost completion of our FIVE YEAR LONG remodeling project here is a picture of the entryway.

The entryway of "The Nest"

Tatume’ – The wonder squash with many names

Some of the best things in the world happen by accident;  Post it Notes, potato chips, Reese’s Peanut Butter Cups and my discovery of Tatume’ squash.   While three of these accidental discoveries yielded vast quantities of money for their inventors, my discovery yields pounds and pounds of a fresh, flavorful, and versatile squash. 

Between work, grad school and the remodel of my house, my garden has not received the time and attention it normally gets.  Since it was a little late in the spring when I built my potager, I decided to speed things up a bit by purchasing established vegetable plants for my garden.  I bought my plants from the left over’s of the Texas A&M Horticulture Club’s Annual Plant Sale.  I bought several varieties of tomatoes, egg plant, watermelon, and fennel.  When I went looking for squash though, there were only two types left; white summer squash (we call it UFO squash in our house) and a variety that I had never heard of called Tatume’.  I grabbed the last summer squash and two of the Tatume’.

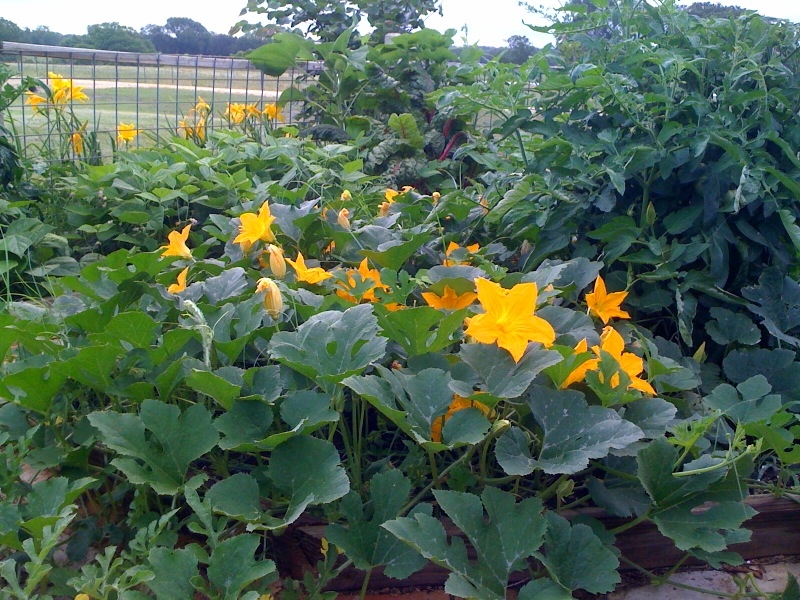
Tatume' vines and flowers in my potager

I soon realized that Tatume’ was no normal squash.  In a little over a week it has sent out vines that were over six feet long!  Everywhere a node lay against the ground, it rooted and sent out more shoots.  In two weeks time, half of my garden was over run by these two aggressive plants.  I was afraid it would cover the entire garden but I was comforted by how lovely it was.  The vines were covered with beautiful big yellow flowers.  Once it flowered, the growth rate decreased.  I decided to do some research and see what I had gotten myself into.

Most of the squash that we grow come from the species Cucurbita pepo.  Tatume’ is a variety of this species.  C. pepo is a native of Meso-America and archeological evidence shows that gardener’s there have been growing varieties of it for the past 8,000 to 10,000 years.  In America, squash is generally divided into two categories based on when they are harvested.  Summer squashes like yellow crook neck, zucchini, and pattypan (UFO) are harvested in their immature state.  Immature squash have a soft skin, seeds and flesh.  Winter squash like butternut, spaghetti, and acorn are simply squash that are allowed to ripen fully on the vine before they are harvested.  Winter squash have a thick hard skin and their flesh is generally firmer and sweeter than summer squash.  Tatume’ is one the rare varieties of squash that can be harvested as either a summer or winter squash.

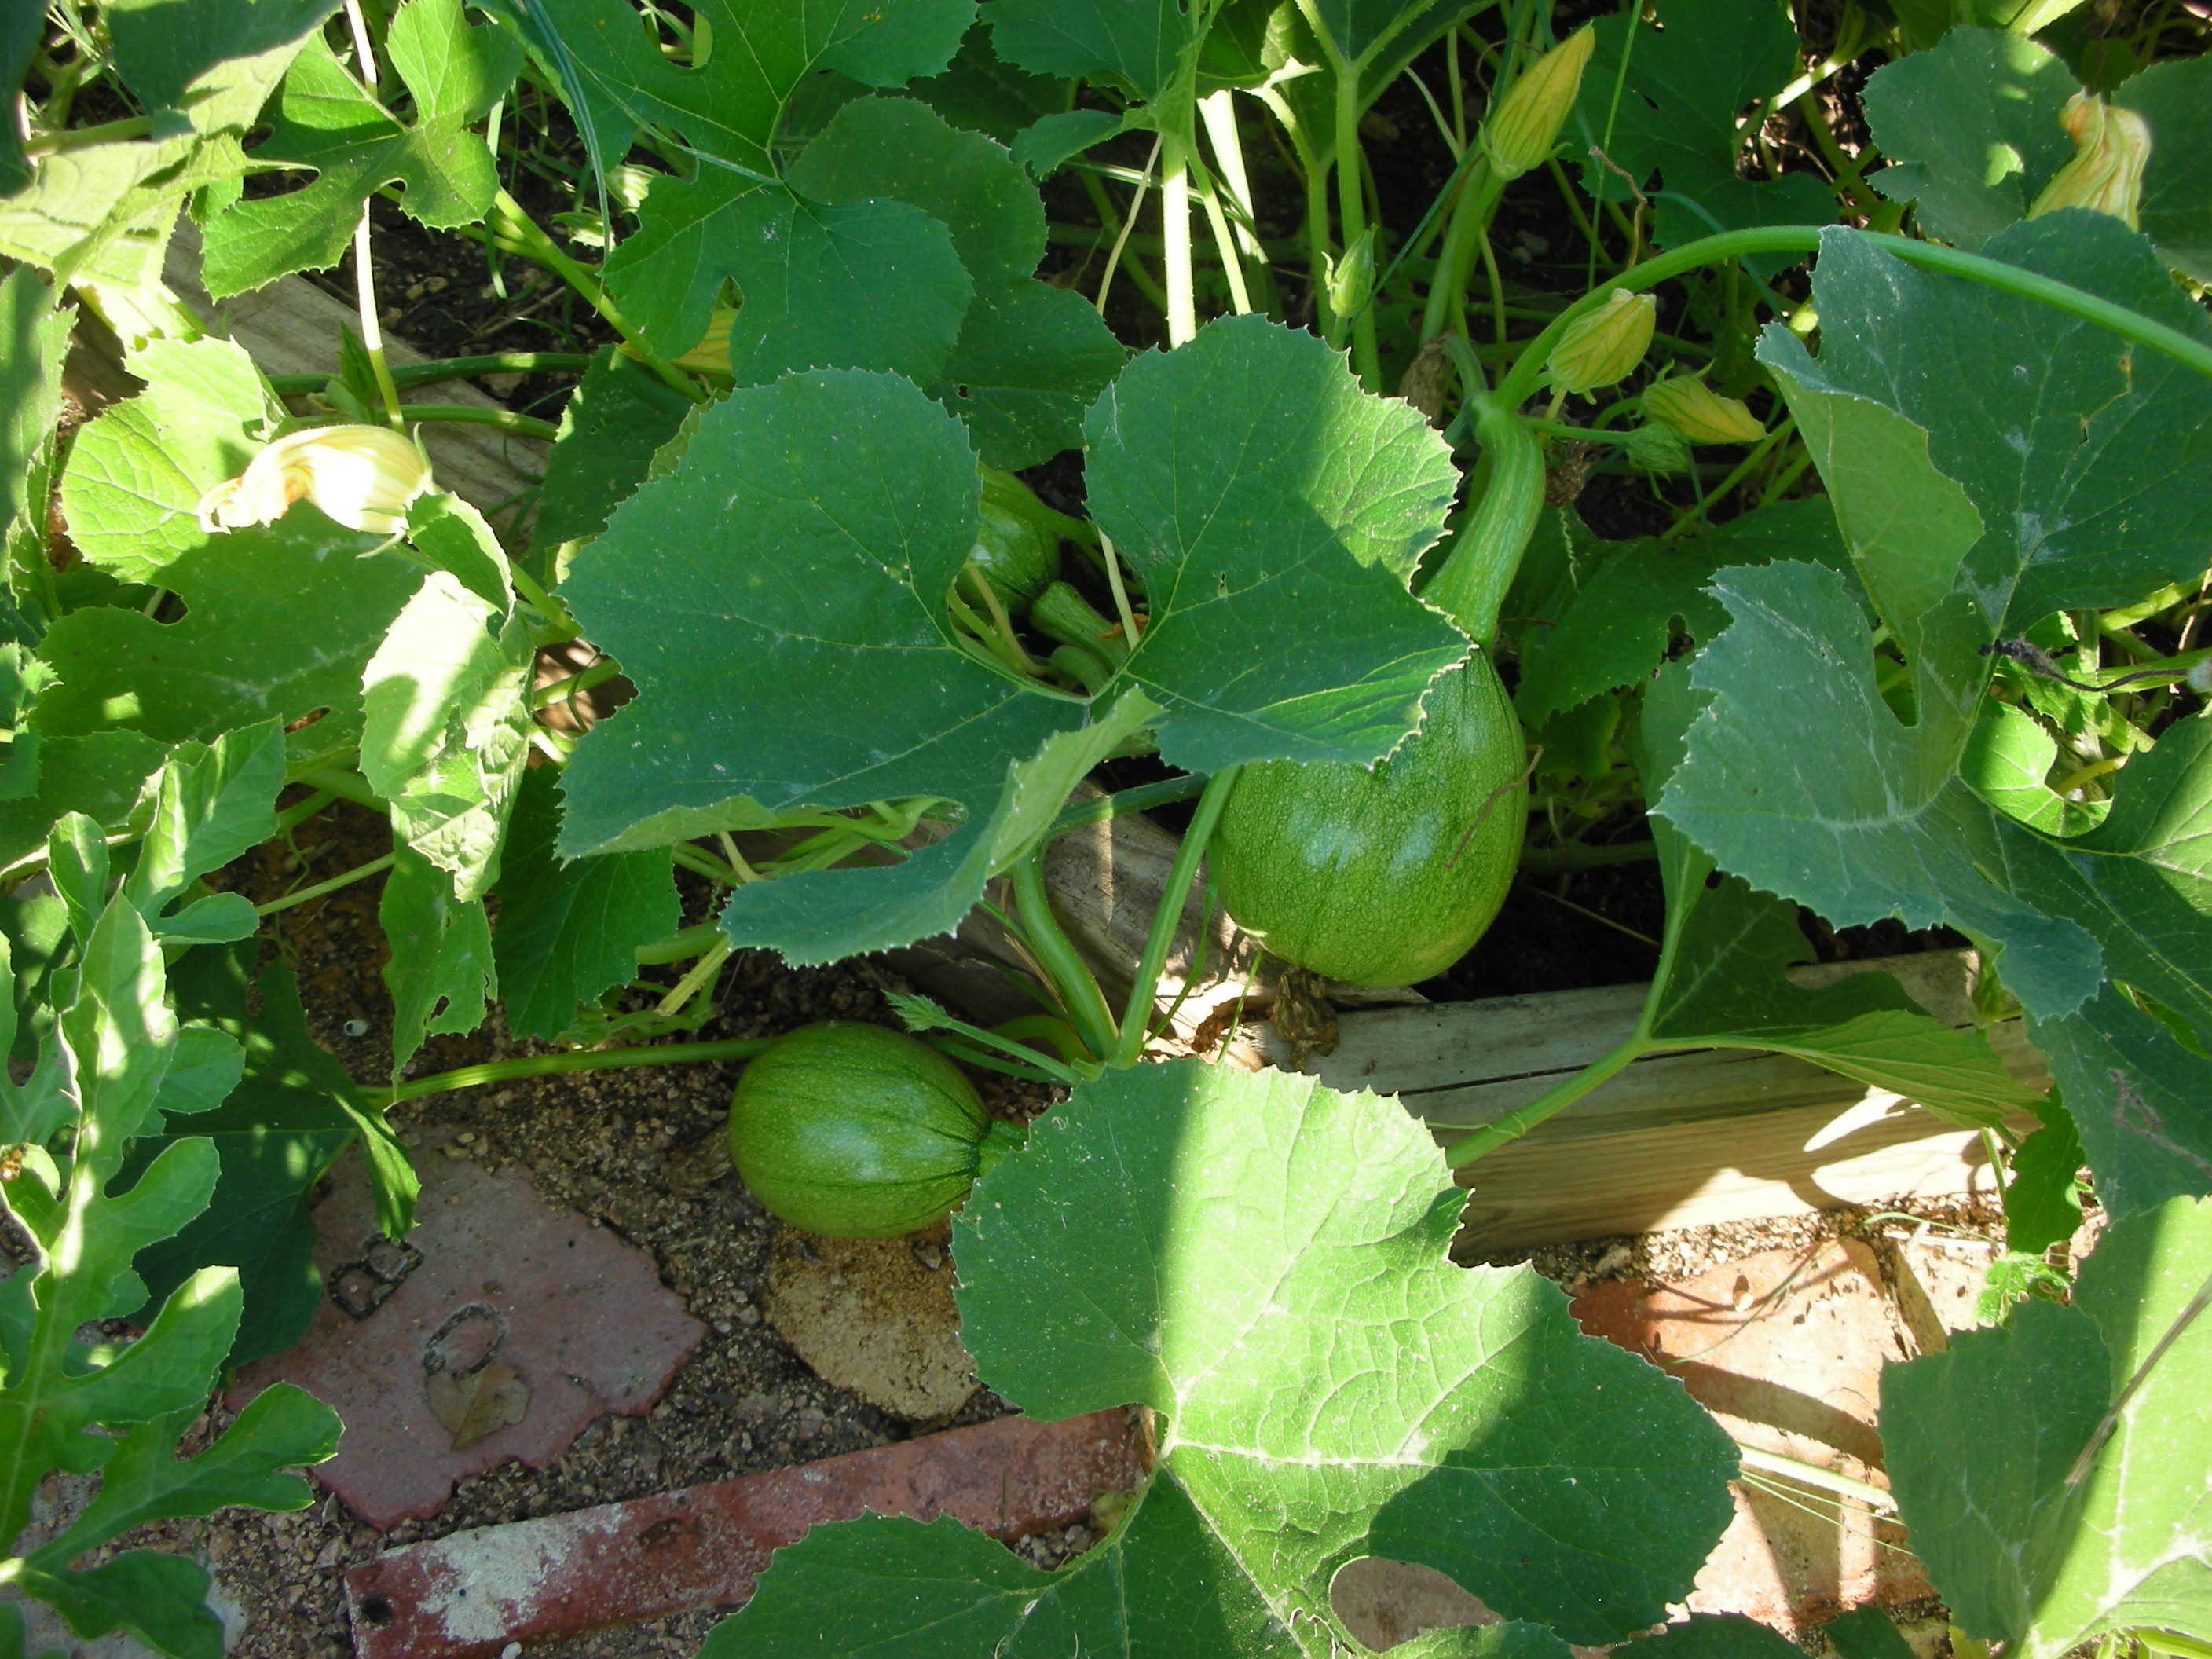
Young Tatume'

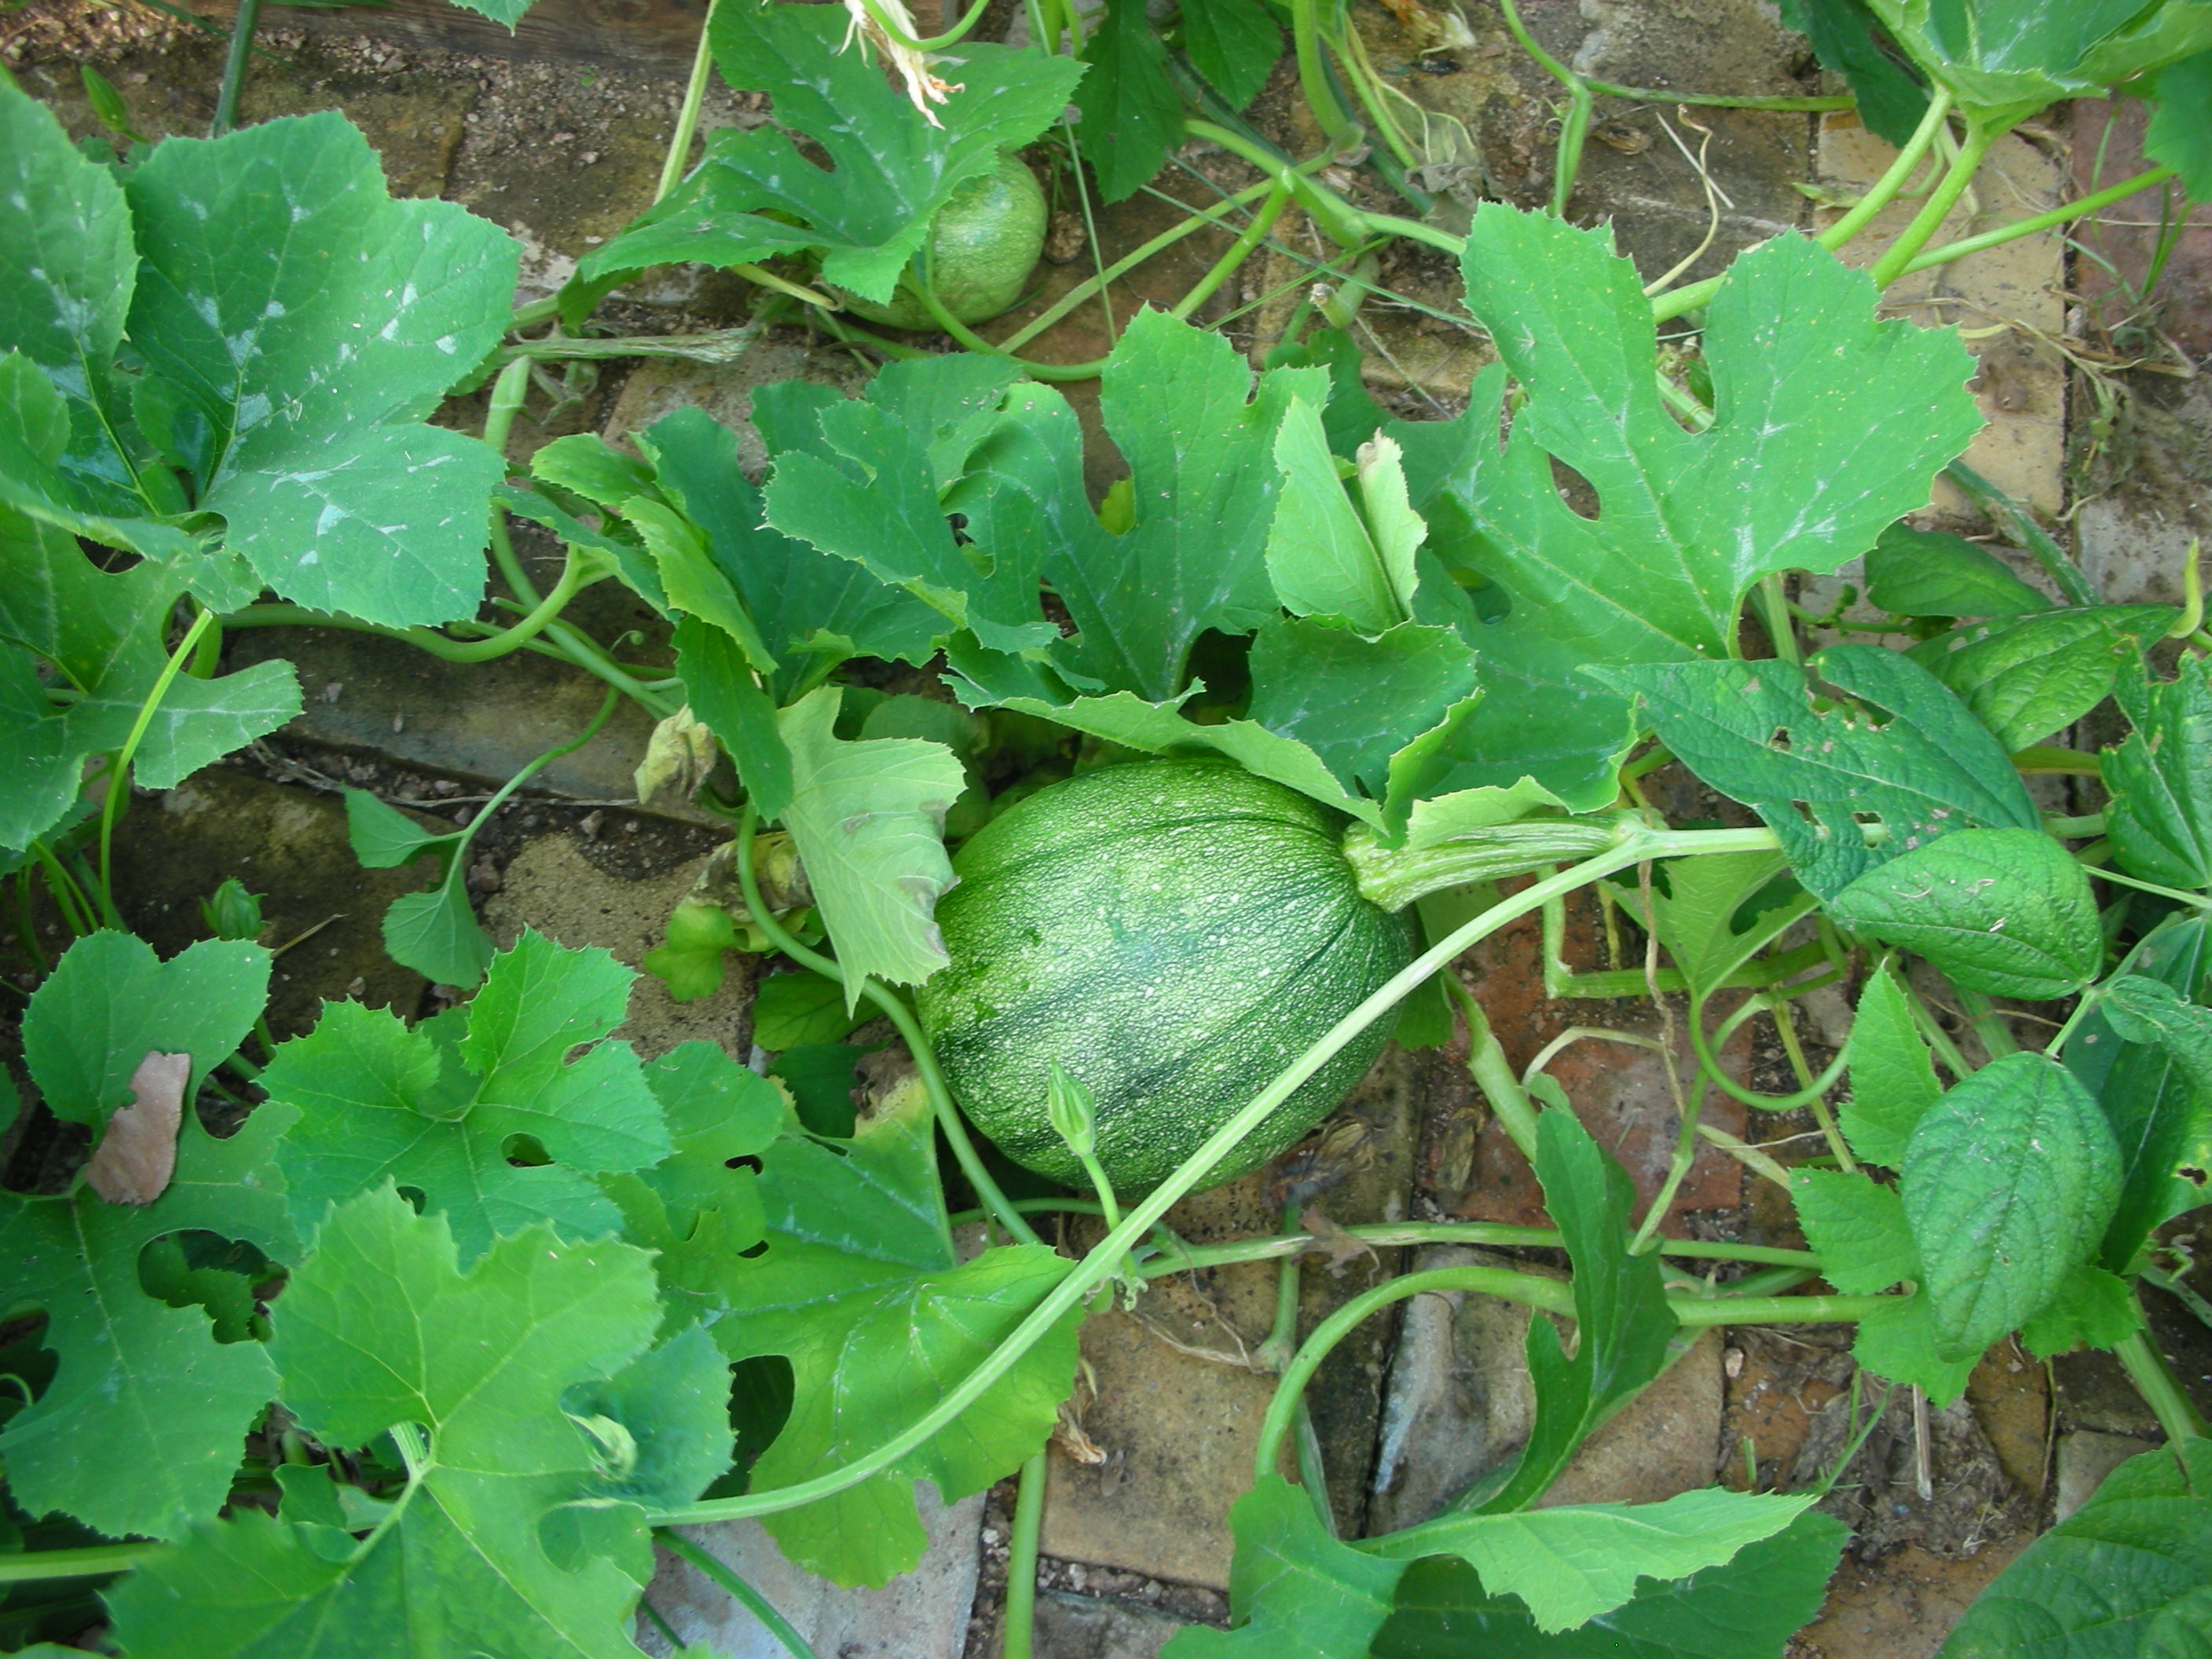
Tatume squash is an open pollinated variety (heirloom variety) so you can save the seeds from year to year.  The fruits are round or oblate in shape.  Their skin is stripped green and they resemble a small watermelon or pumpkin in there immature form.  It is best to harvest Tatume’ when it is about the size of baseball.  If left to mature, their skin will become a mottled deep green and they can grow to almost the size of a soccer ball. 

Tatume’ appears to be the squash of many names.  Many seed catalogs list it as Tatume’ or Tatuma but I have also seen it listed as round zucchini and Mexican zucchini.  In the markets of Mexico, it is most often called calabacita (little pumpkin). 

Whatever you call it, it is a very versatile and flavorful little squash.  It is a staple of Mexican cuisine.  Mexican cooks use this squash in soups, breakfast dishes, casseroles and as a stand alone side.  This year, my wife and I have used it in lieu of yellow squash in all of our squash recipes.  We have fried it, baked it, boiled it with onions and made it into a casserole.  We even harvested and sautéed the blossoms.  However, our favorite thing about Tatume’ is the way that it cooks on the grill.  Tatume’ is more flavorful than yellow squash and its flesh is much firmer.  Its round shape and firm texture allows it to be cut into thick round patties that are perfect for the grill.  A little EVOO, garlic salt, season salt and fresh ground black pepper make for a simple but delicious summer side dish.

A ripe Tatume' ready for the grill!


 Tatume’ is a squash variety that posses all of the traits that make squash one of my favorite summer vegetables to grow.  It is hardy and productive.  Its long vines produce a fabulous show of big yellow flowers that draw bees into the garden.  It is tasty and versatile in the kitchen.  My accidental experiment with Tatume’ has convinced me to add this to my keeper list.  I highly encourage you to try it in your garden as well!

*This article was published in the June 2010 issue of “Hort Update” (http://aggie-horticulture.tamu.edu/newsletters/hortupdate/2010/jun/)