Propagating Antique Roses

A sprawling Cherokee Rose at Peckerwood Gardens. Photo by Dr. Bill Welch

Two years ago, I was training for the MS 150 outside of Cat Springs, Texas.  As I turned a corner and started down a long straight path, I saw something very unusual up ahead of me; a cedar tree covered in big white flowers.  Well, I knew that couldn’t be right so I pedal closer.  When I got close enough to be able to tell what I was seeing, I was shocked to discover that the white flowers on the cedar tree were coming from an incredibly large rose-bush.  I am not kidding, this rose-bush had sent out runners that were 30 to 40 feet long.  They were so long that they went all the way up the back of the tree and hung over the front almost down to the ground.  I was excited. 

I wasn’t sure but I thought this lovely, five petaled white rose with the bright yellow stamens was an antique rose called “Cherokee”.  The Cherokee Rose is truly an antique rose.  It has been here so long that some think it originated here.  In fact, the people of Georgia were so certain it was native that they made it their state flower.  I quickly pulled out my pocket knife and took a dozen cuttings.  This is why I love “antique roses”.  You can be on a bike ride in the country, find one, take cuttings with a pocket knife, stick them in your back pack, leave them there for over two hours and still be pretty certain that they are going to root. 

Propagating antique roses from cuttings is a fairly easy process. 

  1.  As a general rule, you should cut new wood that has just finished blooming.  This is usually in the spring but can be in the fall.  The rose is not particular as to where you cut it.  I use sharp shears to make 45 degree cuts to create stems that are about 6″ to 8’’ long.  Leave a few leaves on the stem.
  2. Next, I fill four-inch pots with a good quality garden mix and wet it.  Some people root in pure perlite, but you will need to add a little fertilizer if you go this route.   Most cuttings need two things to be successful: moisture and root aeration.  The perlite provides excellent aeration to the roots.
  3. Stick the cutting in the pot.  Many people like to dip the cuttings in a rooting hormone.  This is your choice.  It can increase your chances of getting the cuttings to take.  However, I am not certain they are necessary.  Roses naturally produce auxins at the cut.  Auxins are hormones that stimulate root production.  I have used both methods and have had success both ways.  Also, some people like to “wound” the cutting at the base.  This involves making little cuts at the base of the stem.  Roots will grow from the wound sites.
  4. Place the well watered pot in a produce bag and seal with a tie wrap.  This will keep the humidity high as the plant roots.  Open the bag every few days and make sure the soil stays moist (not wet). 
  5. Roses love the sun so find a place that is sunny but gives some shade during the hottest part of the day.  Since they are in the bag, it is very easy for them to get over heated.

Propagating plants is undoubtedly my favorite task in the garden.  Roses (especially old varieties) are very tough and very easy to grow from cuttings.  Don’t get too bogged down in the details.  Just go for it!  Remember, many of these antique roses came here in a box of dirt on the back of a covered wagon with mason jars stuck over them.  If they survived that, surely they can survive anything we do to them!

Weed Free-Organically

The cover of this month's Texas Gardener magazine. In it you will find my first "published" piece, "Weed Free-Organically".

Well, this is a banner day for the yupneck.  My first published piece came out today in Texas Gardener magazine (http://texasgardener.com/).  My article is entitled “Weed Free-Organically”.  It is a pretty in-depth piece on controlling weeds in your flower beds and vegetable gardens without the use of chemicals.  Of course my wife, kids and mother think it is the best thing they have ever read.  I hope you buy a copy and let me know if you agree with them.  It will be available on news stands by February 28th and also on the web around the same time.

Texas Gardener is the second largest gardening magazine in Texas.  It was started in 1981 by Chris Corby in Waco, Texas.  For thirty years now he has been providing gardening advice to Texas gardeners by Texas gardeners.  Chris has built an impressive stable of very well-respected garden writers.  Their articles provide invaluable tips and tricks for growing things in the wildly variable and difficult Texas climate.  This month, he is doing a special promotion with the garden centers in over two hundred Texas Wal-Marts.  Look for your copy at the check out stand.  You can also find copies wherever magazines are sold.

When I started my master’s degree at A&M, I had no idea what I would do with it.  Thanks to some prodding and encouragement by some very special people, I may have found my niche.  Seeing my work in print is very exciting.  I am humbled to know that some people think that other’s might actually enjoy reading the things I write.  I would like to say a special thanks to my wife.  Without her encouragement, none of this would have happened.   I would also like to thank Cynthia Mueller for asking me to write for HortUpdate (http://aggie-horticulture.tamu.edu/newsletters/hortupdate/).  That first potager piece led to my blog and now this.  Also many thanks to Dr.  Bill Welch and Dr. Doug Welsh for their support and encouragement.  My son-in-law, Ramez Antoun is a very talented photographer.  His photos made this article and my blog come alive.  Thanks Moose!  And finally, thanks to my kids.  You always read what I write.  And even if you think it is boring, you never let it show!  I love you all!

Winter Chores in the Potager

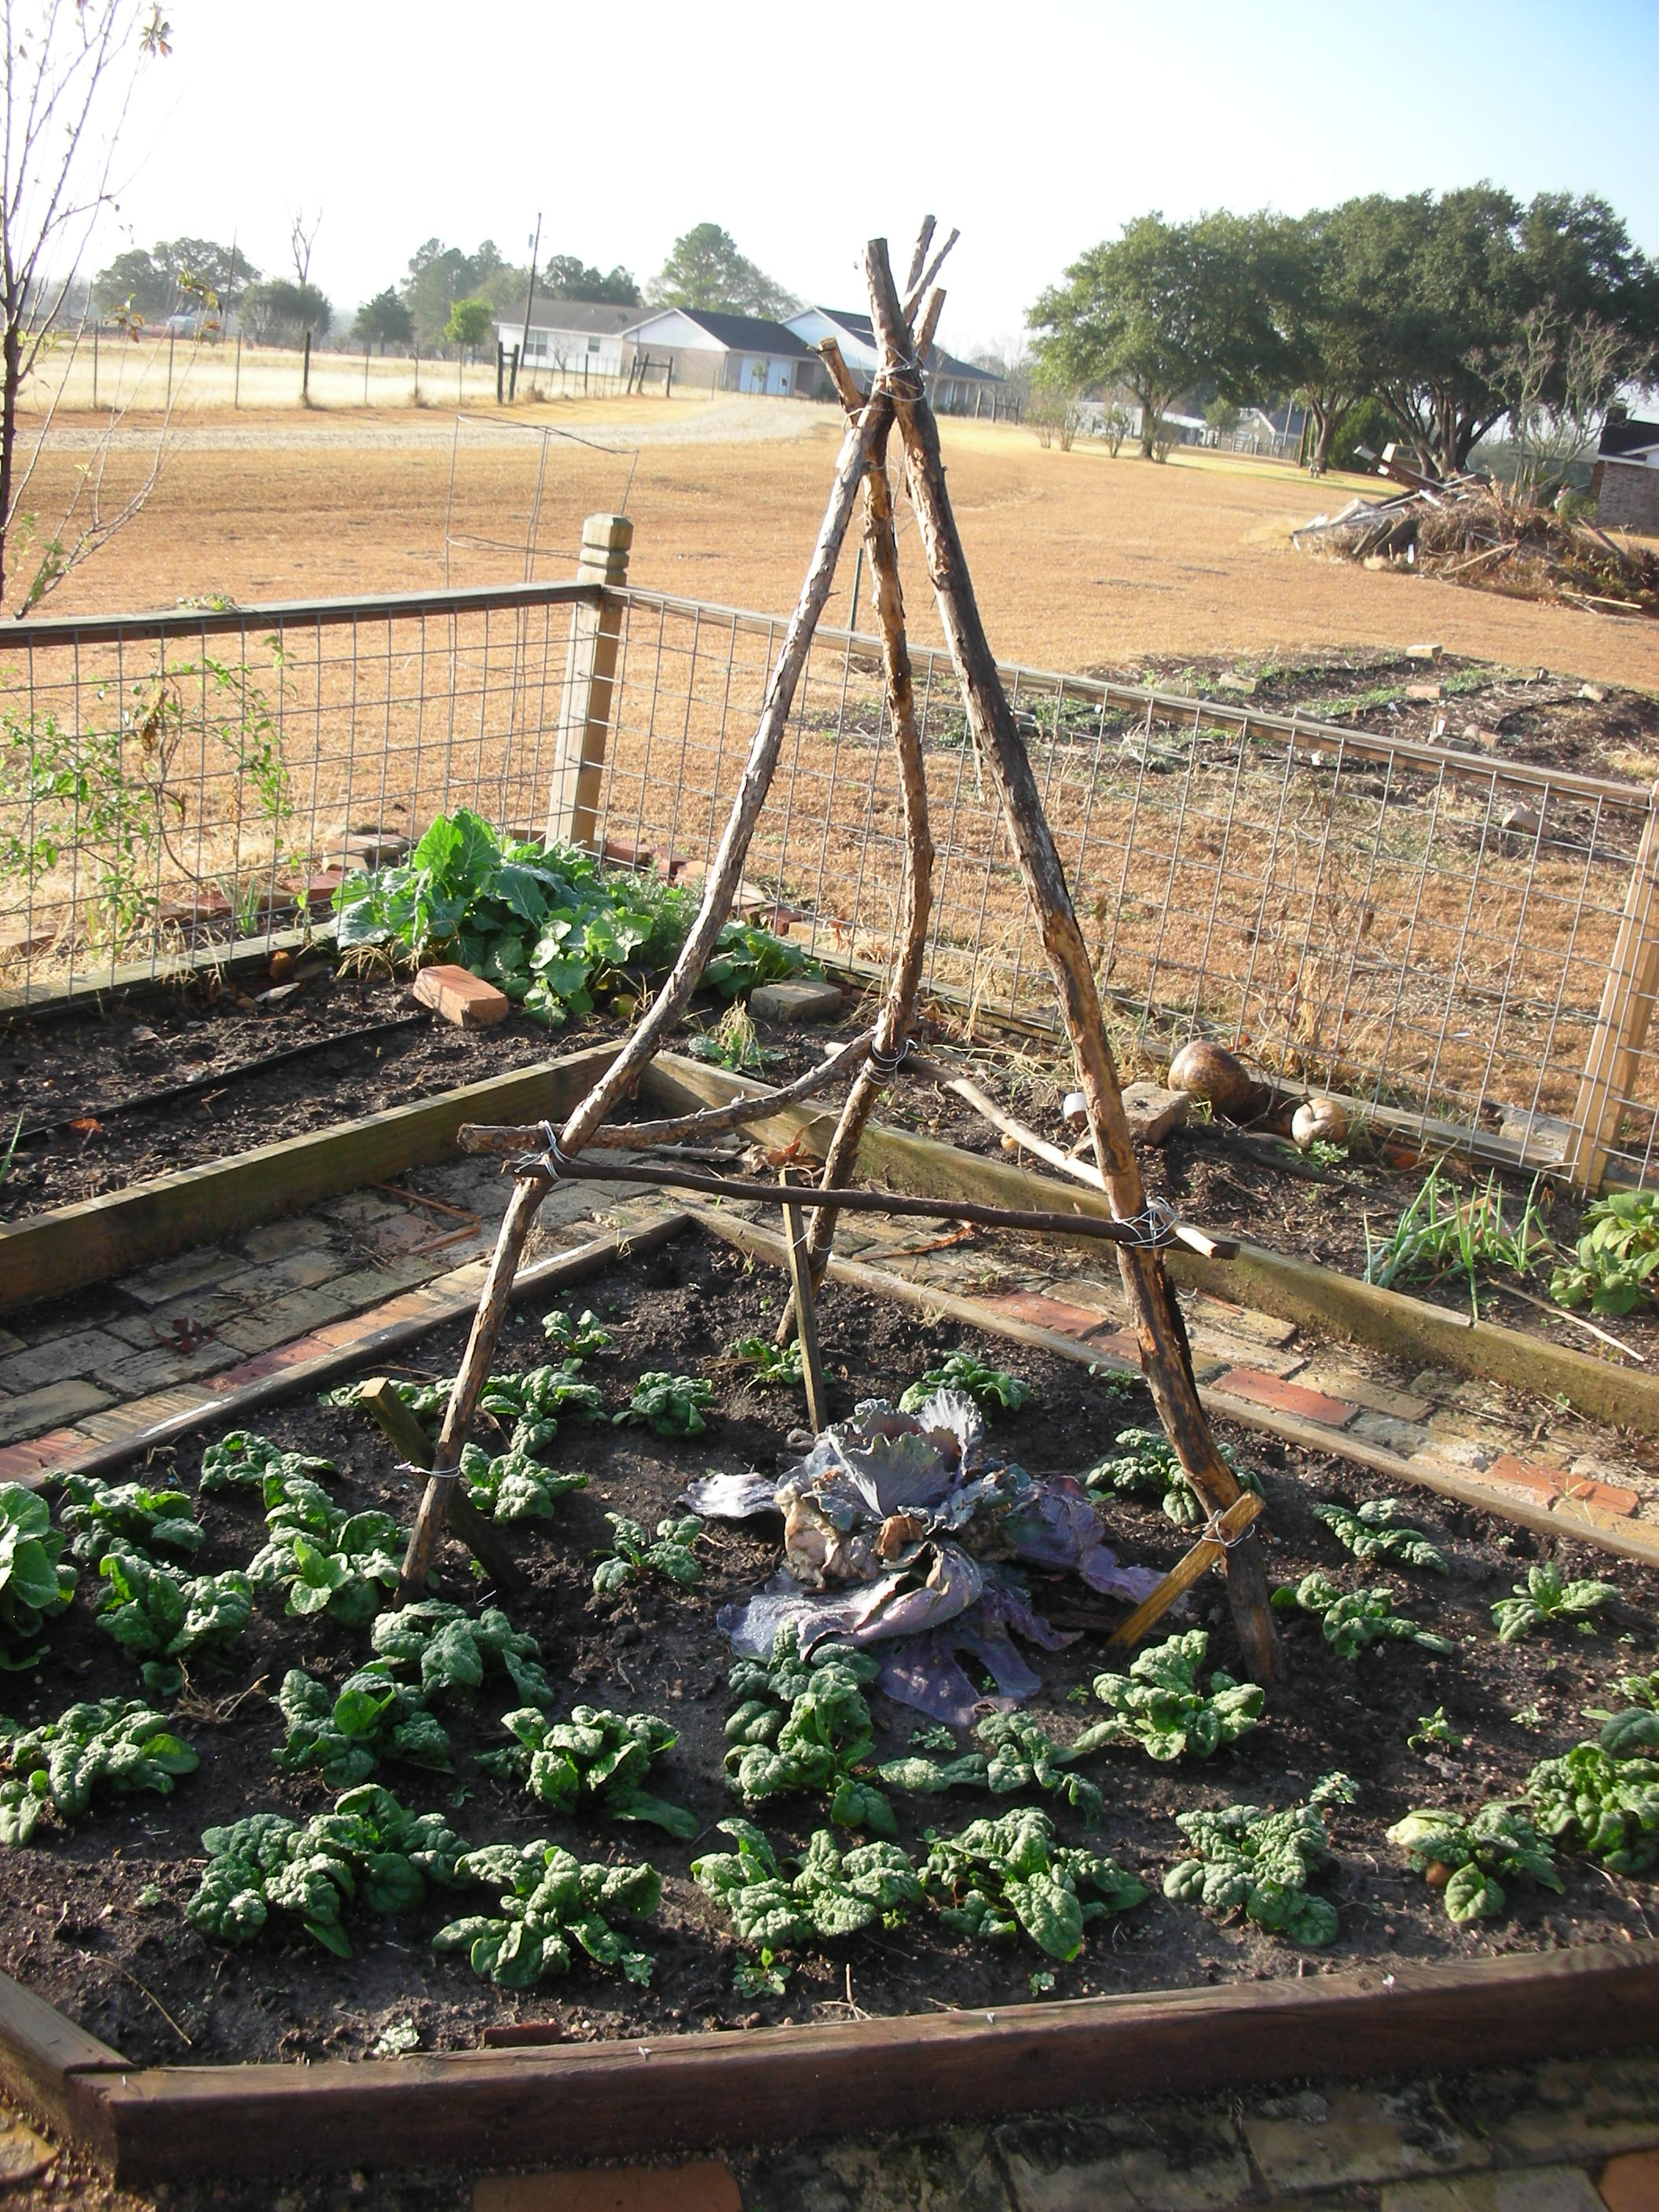
The potager in January

The weather has been so nice this holiday season that my wife and I decided to do some much needed maintenance in potager.  The Cypress vine that brought us so much joy in the summer had to come down.  The same plant that had covered our fence and trellis in beautiful red flowers and drawn so many hummingbirds and butterflies into our lives was now just an eyesore.  So, with pruners in hand, my wife and I cut, chopped and pulled down all remnants of the vine.  It came down very easy, but it covered us in tons of tiny black seeds.  You know what that means.  More Cypress vine than I will know what to do with in this spring!  

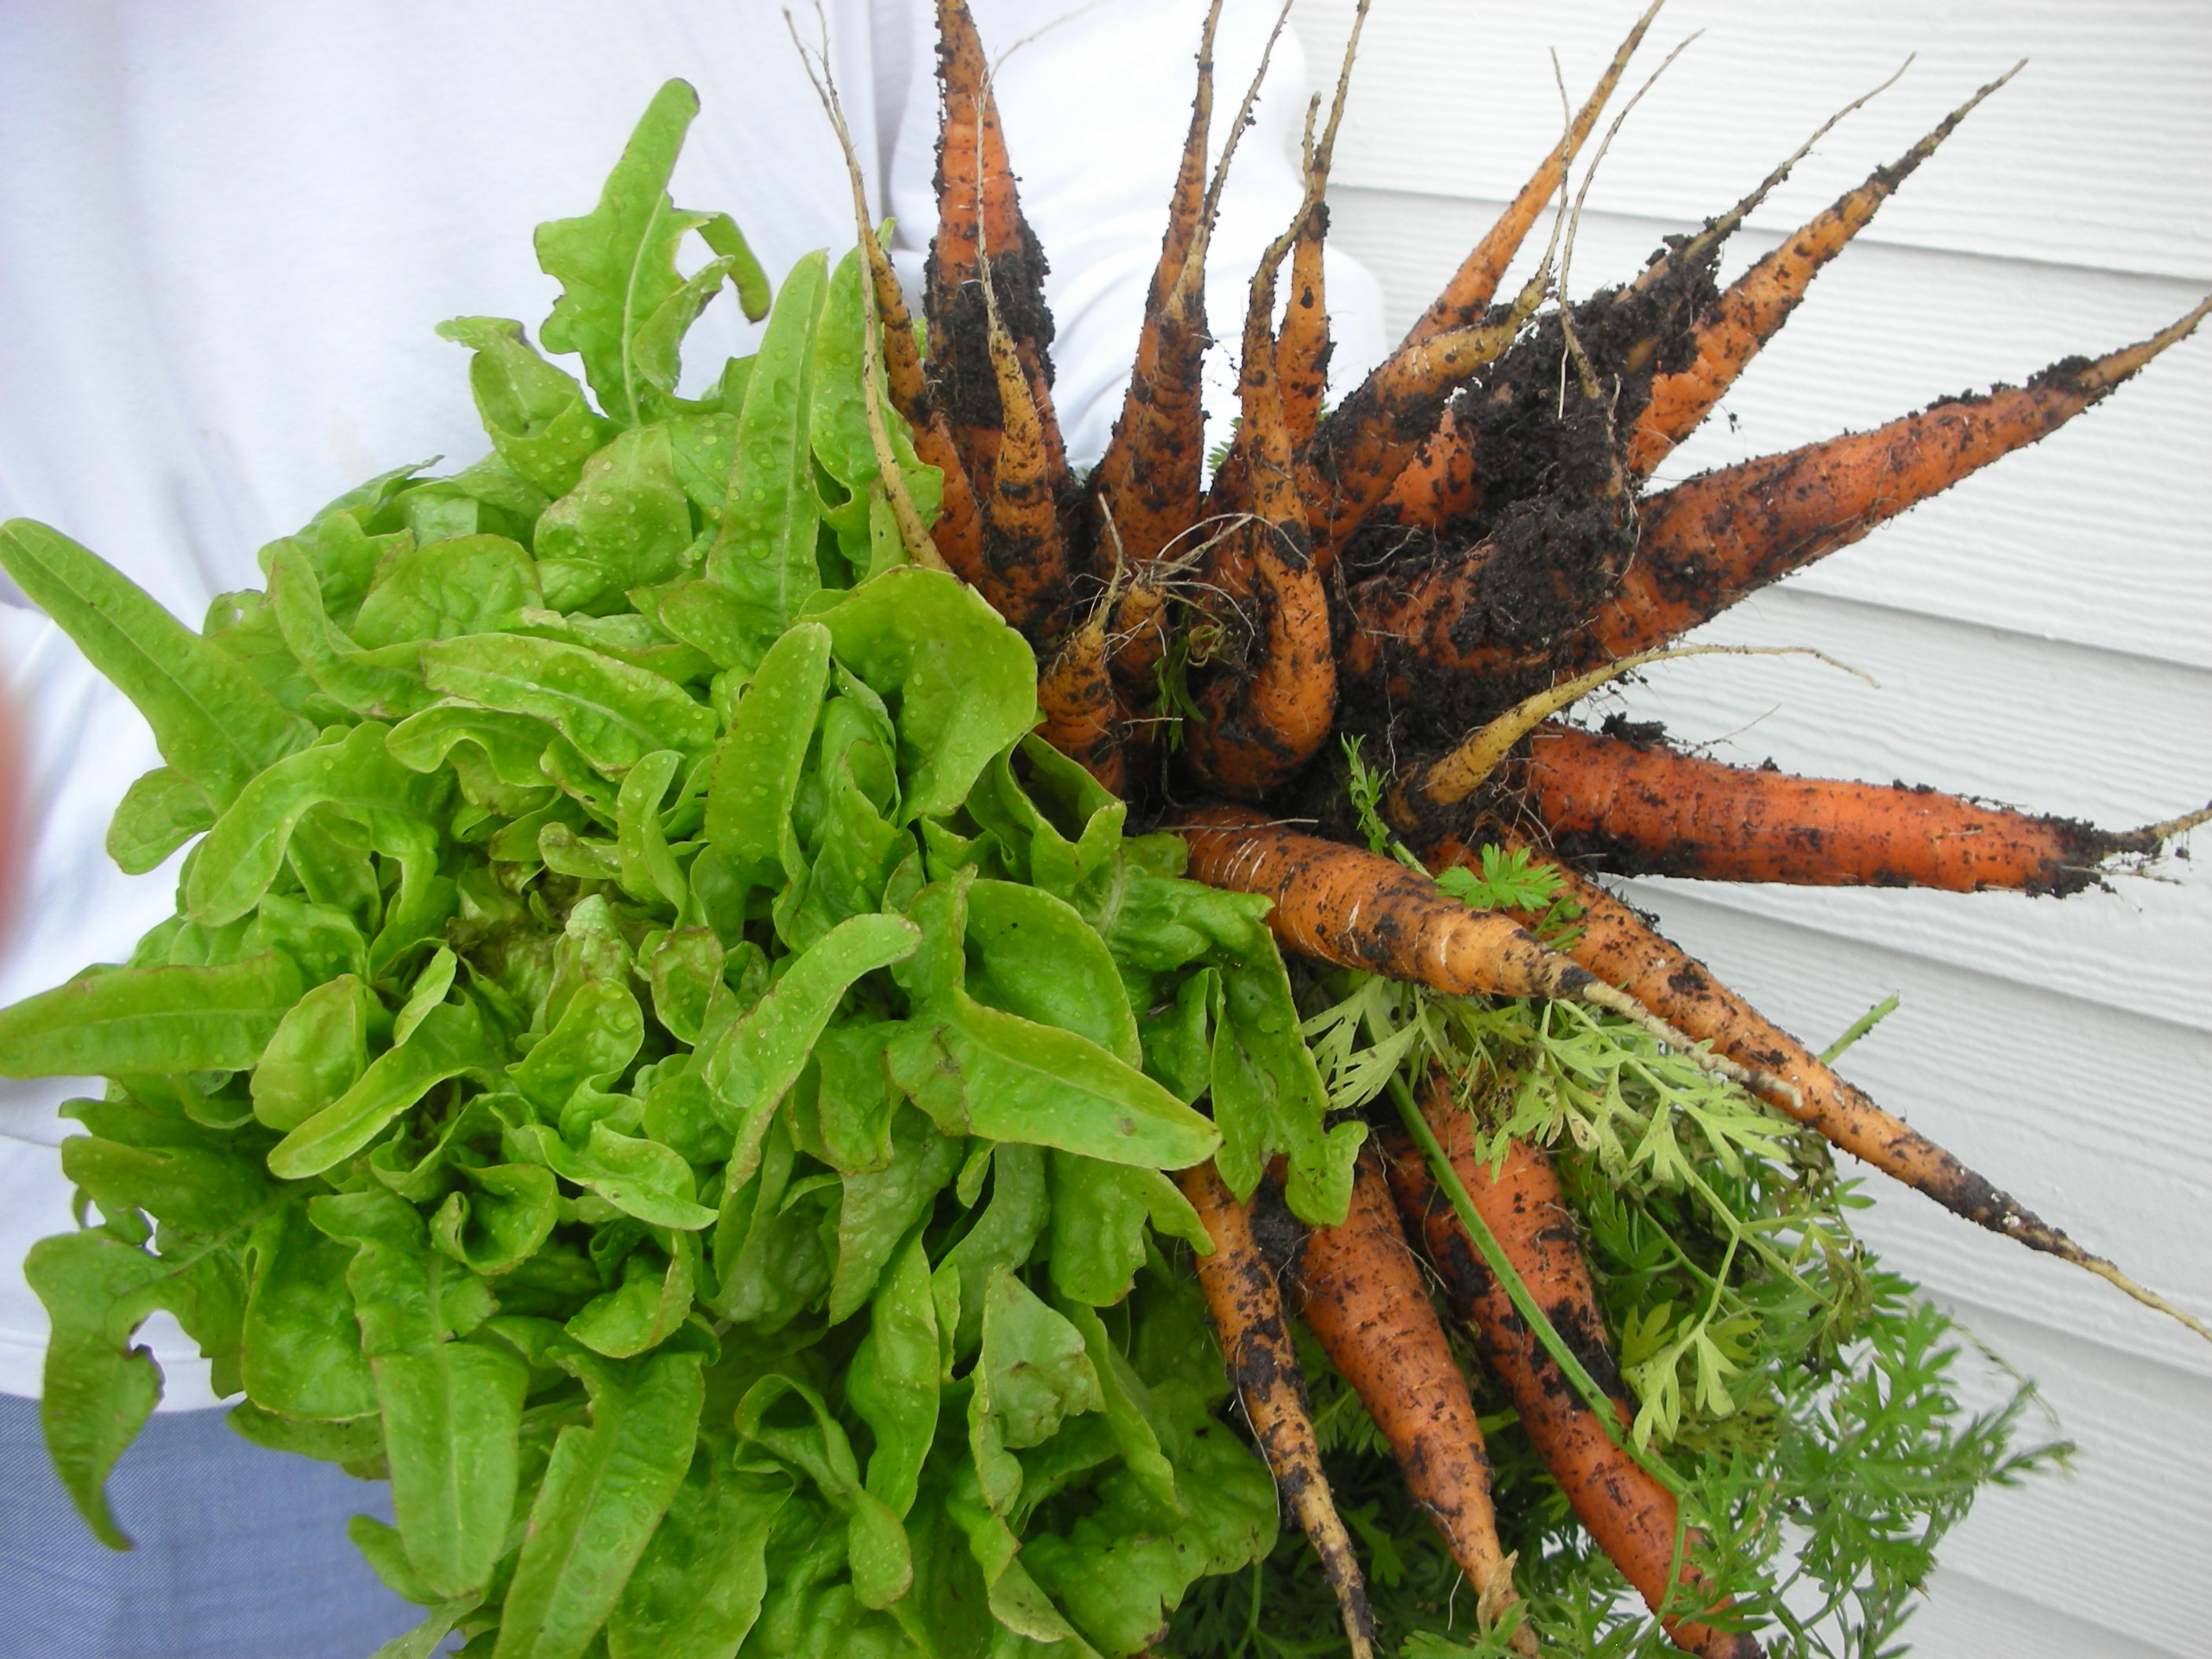
Carrots and lettuce from the potager

Once the fence and trellis were clear it was time to move inside the potager.  First, we harvested.  We pulled carrots, turnips, spinach and butter crunch lettuce. In addition to the lettuce, spinach, carrots and turnips, I have Egyptian Walking Onions, shallots, 10/15 onions, collards, chard, lemon grass, rosemary and purple cabbage.  Man do I love winter in the South!  Where else can you have so many vegetables thriving in the garden in January.

One of the trellises that we built to support the peas

After the harvest we got back to work.  We took the pruners to our lemon grass, uchuva and salvia.  Then we built four, three-legged trellises out of cedar limbs.  We anchored these in the middle of the four odd-shaped beds in the center of the potager.  After they were secured, we planted Little Marvel Peas at their base.  According to my Aunt Sara, peas are best planted either the last week of the year or the first.  We will see.  I have tried to grow them before and they just didn’t pan out for me.  I really hope they do well this year.  I have worked really hard at improving my soil this past year and my wife and I worked very hard on the little trellises. I can just see them covered in pea vines in early March.  Once the peas were planted, we finished up by planting some French breakfast radishes and some Chioggia beets that I got from rareseeds.com

The central bed in the potager. It is full of carrots, poppies and byzantine gladiolus.

While we are talking about the potager, let’s not forget all of the flowers that I have planted in it.  Right now, my red poppies are up and my Byzantine Glads are beginning to make a show.  The foxgloves and Hollyhocks look terrific.  A mermaid rose that I found while riding my bike two years ago has finally taken hold and is beginning to send out canes all along the south fence.  I am going to plant a row of red sweet peas along this fence in hopes that the mixture of red flowers with the white  roses will be stunning.  I also have lots of strawflower, statice and salvias that seem to be thriving.  Check back in the spring to see what will hopefully be my best pictures ever!

Cooking Up A Mess Of Greens

Cooking greens is one of my favorite fall and winter activities.  I can’t wait for the first good

A mess of collards on the stove with smoked pork

cold snap so I can go out to my garden and bring in a “mess of greens”.  I grow and cook collard greens, turnip greens, mustard greens, kale and chard.  While cooking up a “mess of greens” is thought of as a Southern tradition, it is beginning to catch on all across the country.  The health benefits associated with “greens” are encouraging both professional and amateur chef’s to add these traditionally Southern treats to their regular menus.  Here’s how I do it.

I wait until after the first frost to harvest my greens.  The freeze is supposed to remove some of the bitterness.  For my first harvest, I cut a few stalks from each of the plants.  I then bring them in, strip the leaves from the stalks and wash them. After they are good and clean, I set them aside and proceeded to make a stock. This stock is often called pot liquor (or pot likker) and it is what makes the greens taste amazing.

Collards from the potager served with our homemade pepper sauce

To make the stock, I chopped up one whole yellow onion and four pieces of thick cut bacon. I cook the bacon and onions until the onions become soft.  If you have some vegetarians in the house (as I often do), substitute three tablespoons of EVOO for the bacon.  Next, add three cups of water and 1 teaspoon (tsp) salt, 1 tsp Zattaran’s Cajun spice and fresh ground black pepper to taste.  Bring it all to a boil. Let it boil for about 3 minutes then reduce it to simmer and cover.

While the stock is simmering I put another big pot of water on to boil. I fill this pot half full of water and add 1 tablespoon (tbsp) of salt. While this is coming to a boil, I take a small handful of greens and roll them up like a cigar. I cut the roll into about 1/2” strips. Once the green are all cut up I add them to the rapidly boiling salt water. I boil them for three minutes and then pour off the water. This removes some of the bitterness associated with the greens. Finally, I added the drained greens to the stock and let them simmer for an hour. OMG!!!!! These things are wonderful.

Country As A Turnip Green

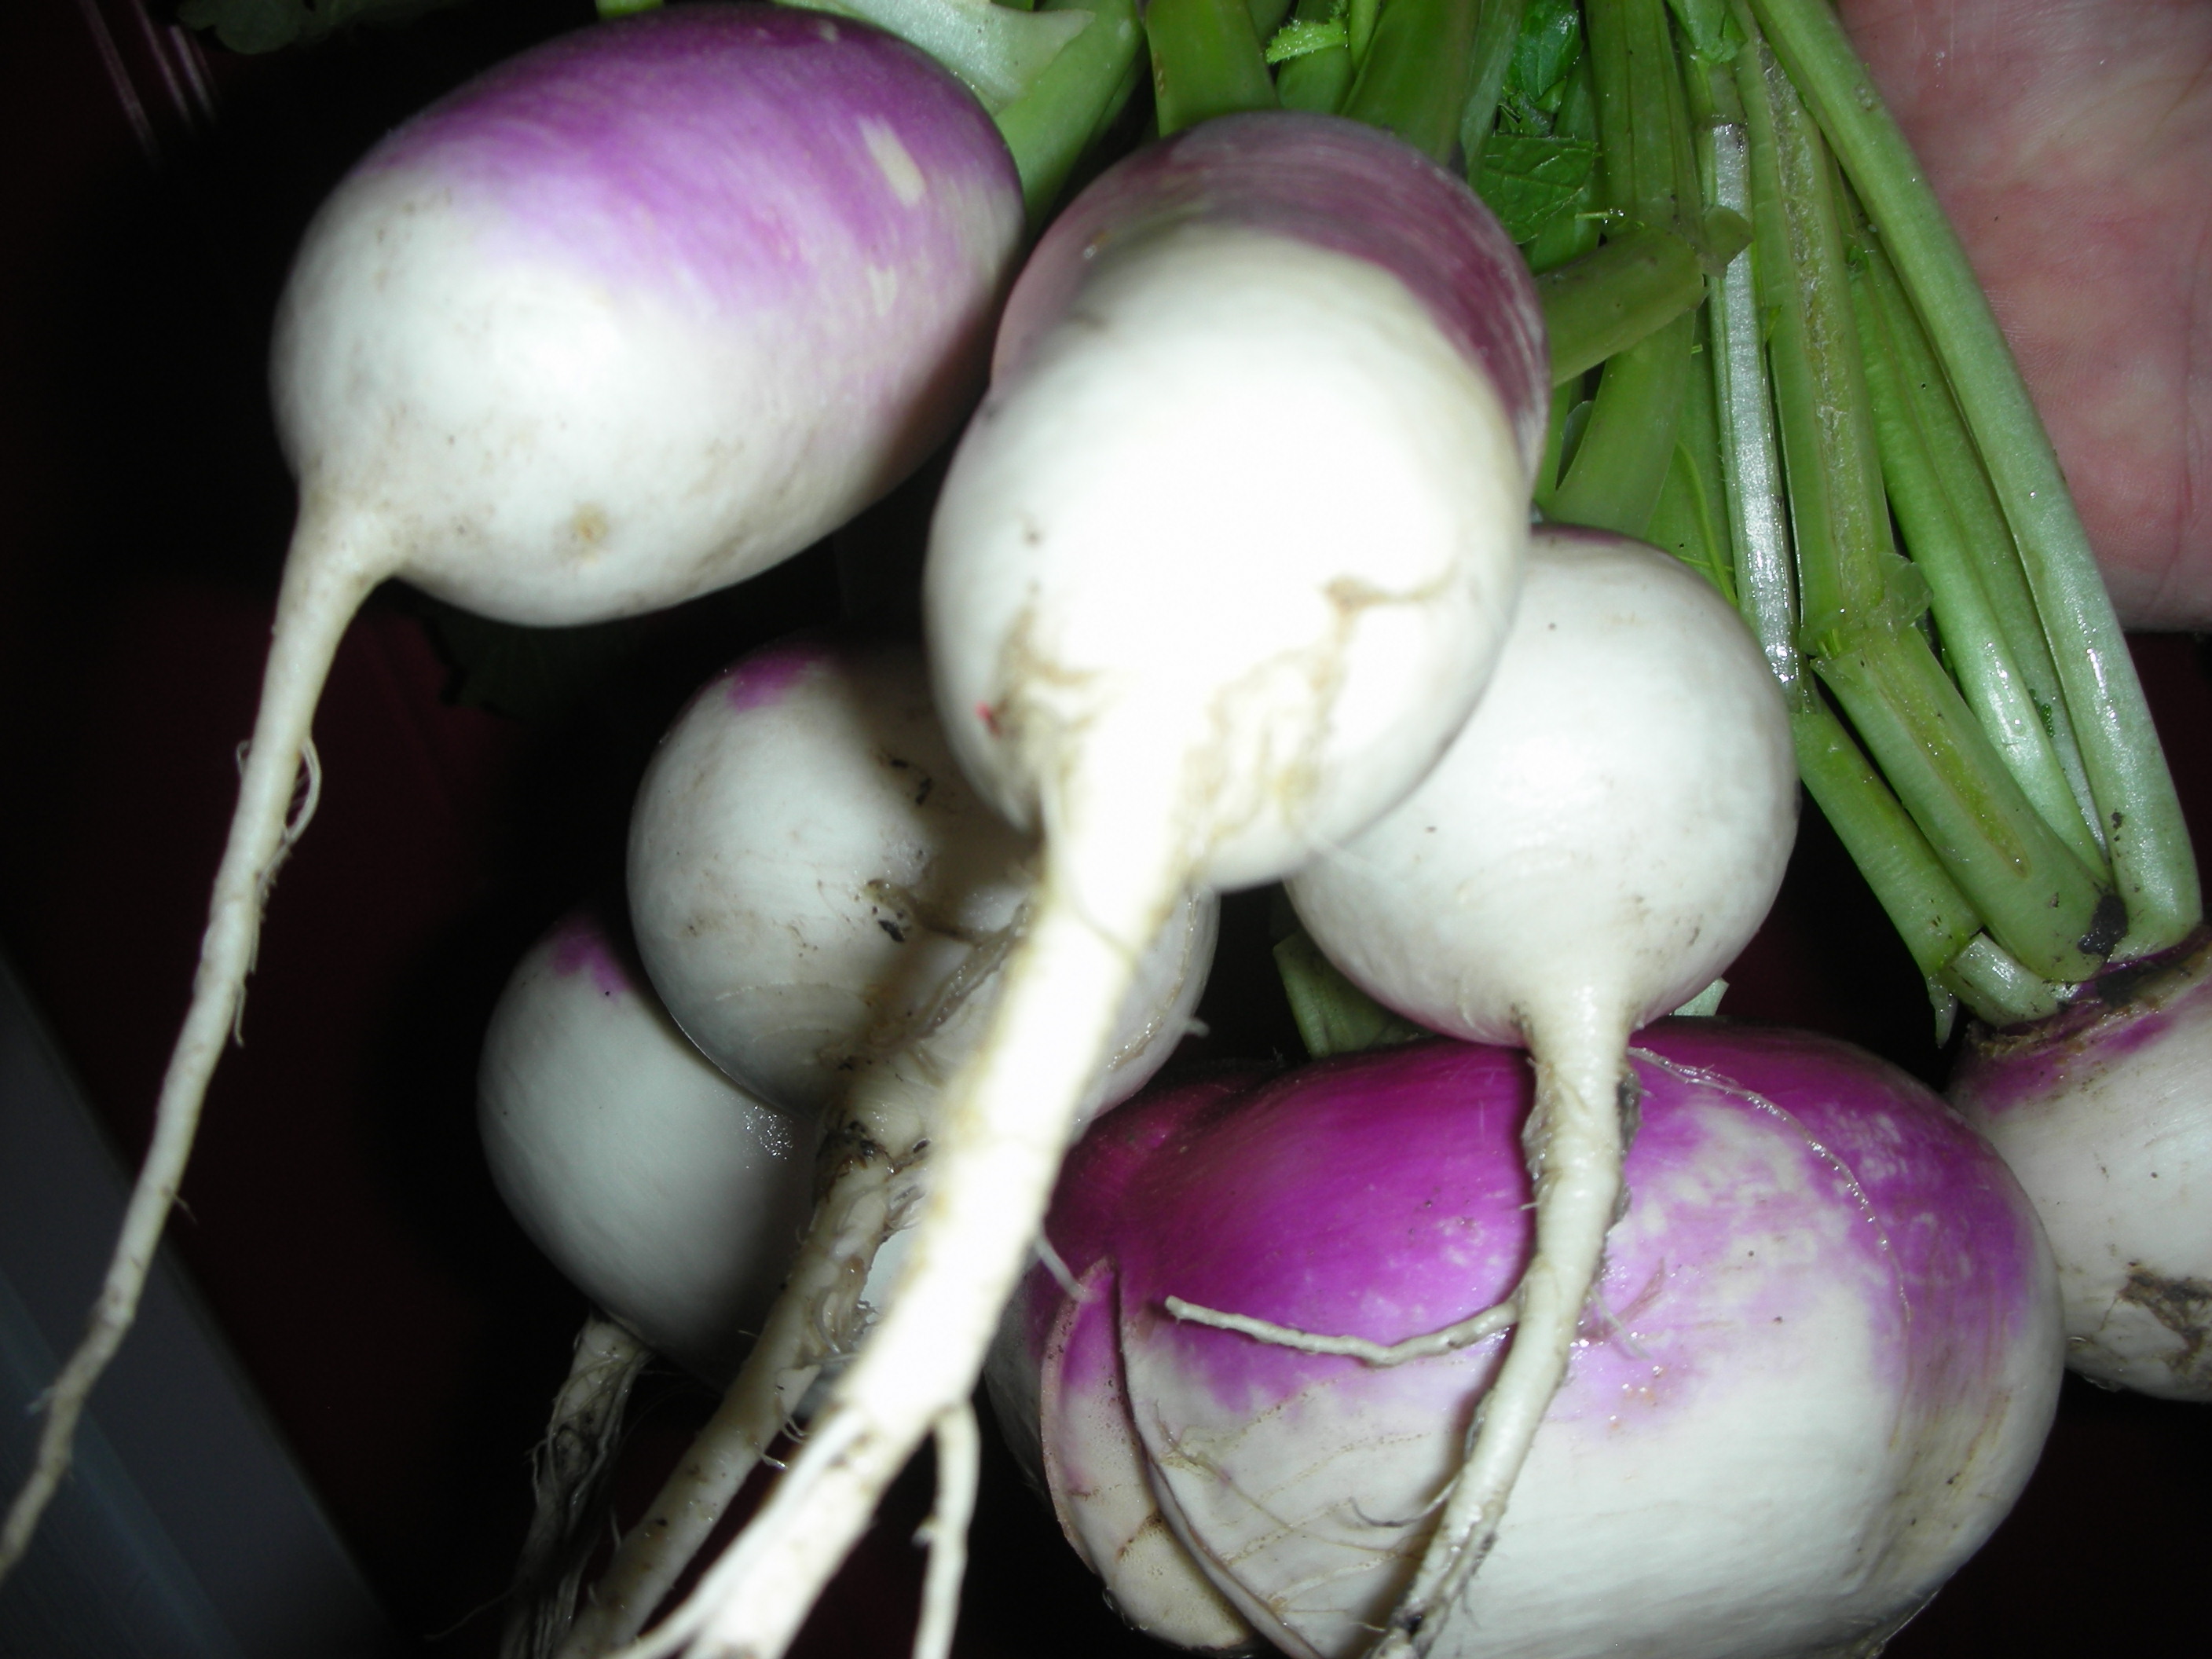
Turnips from my potager

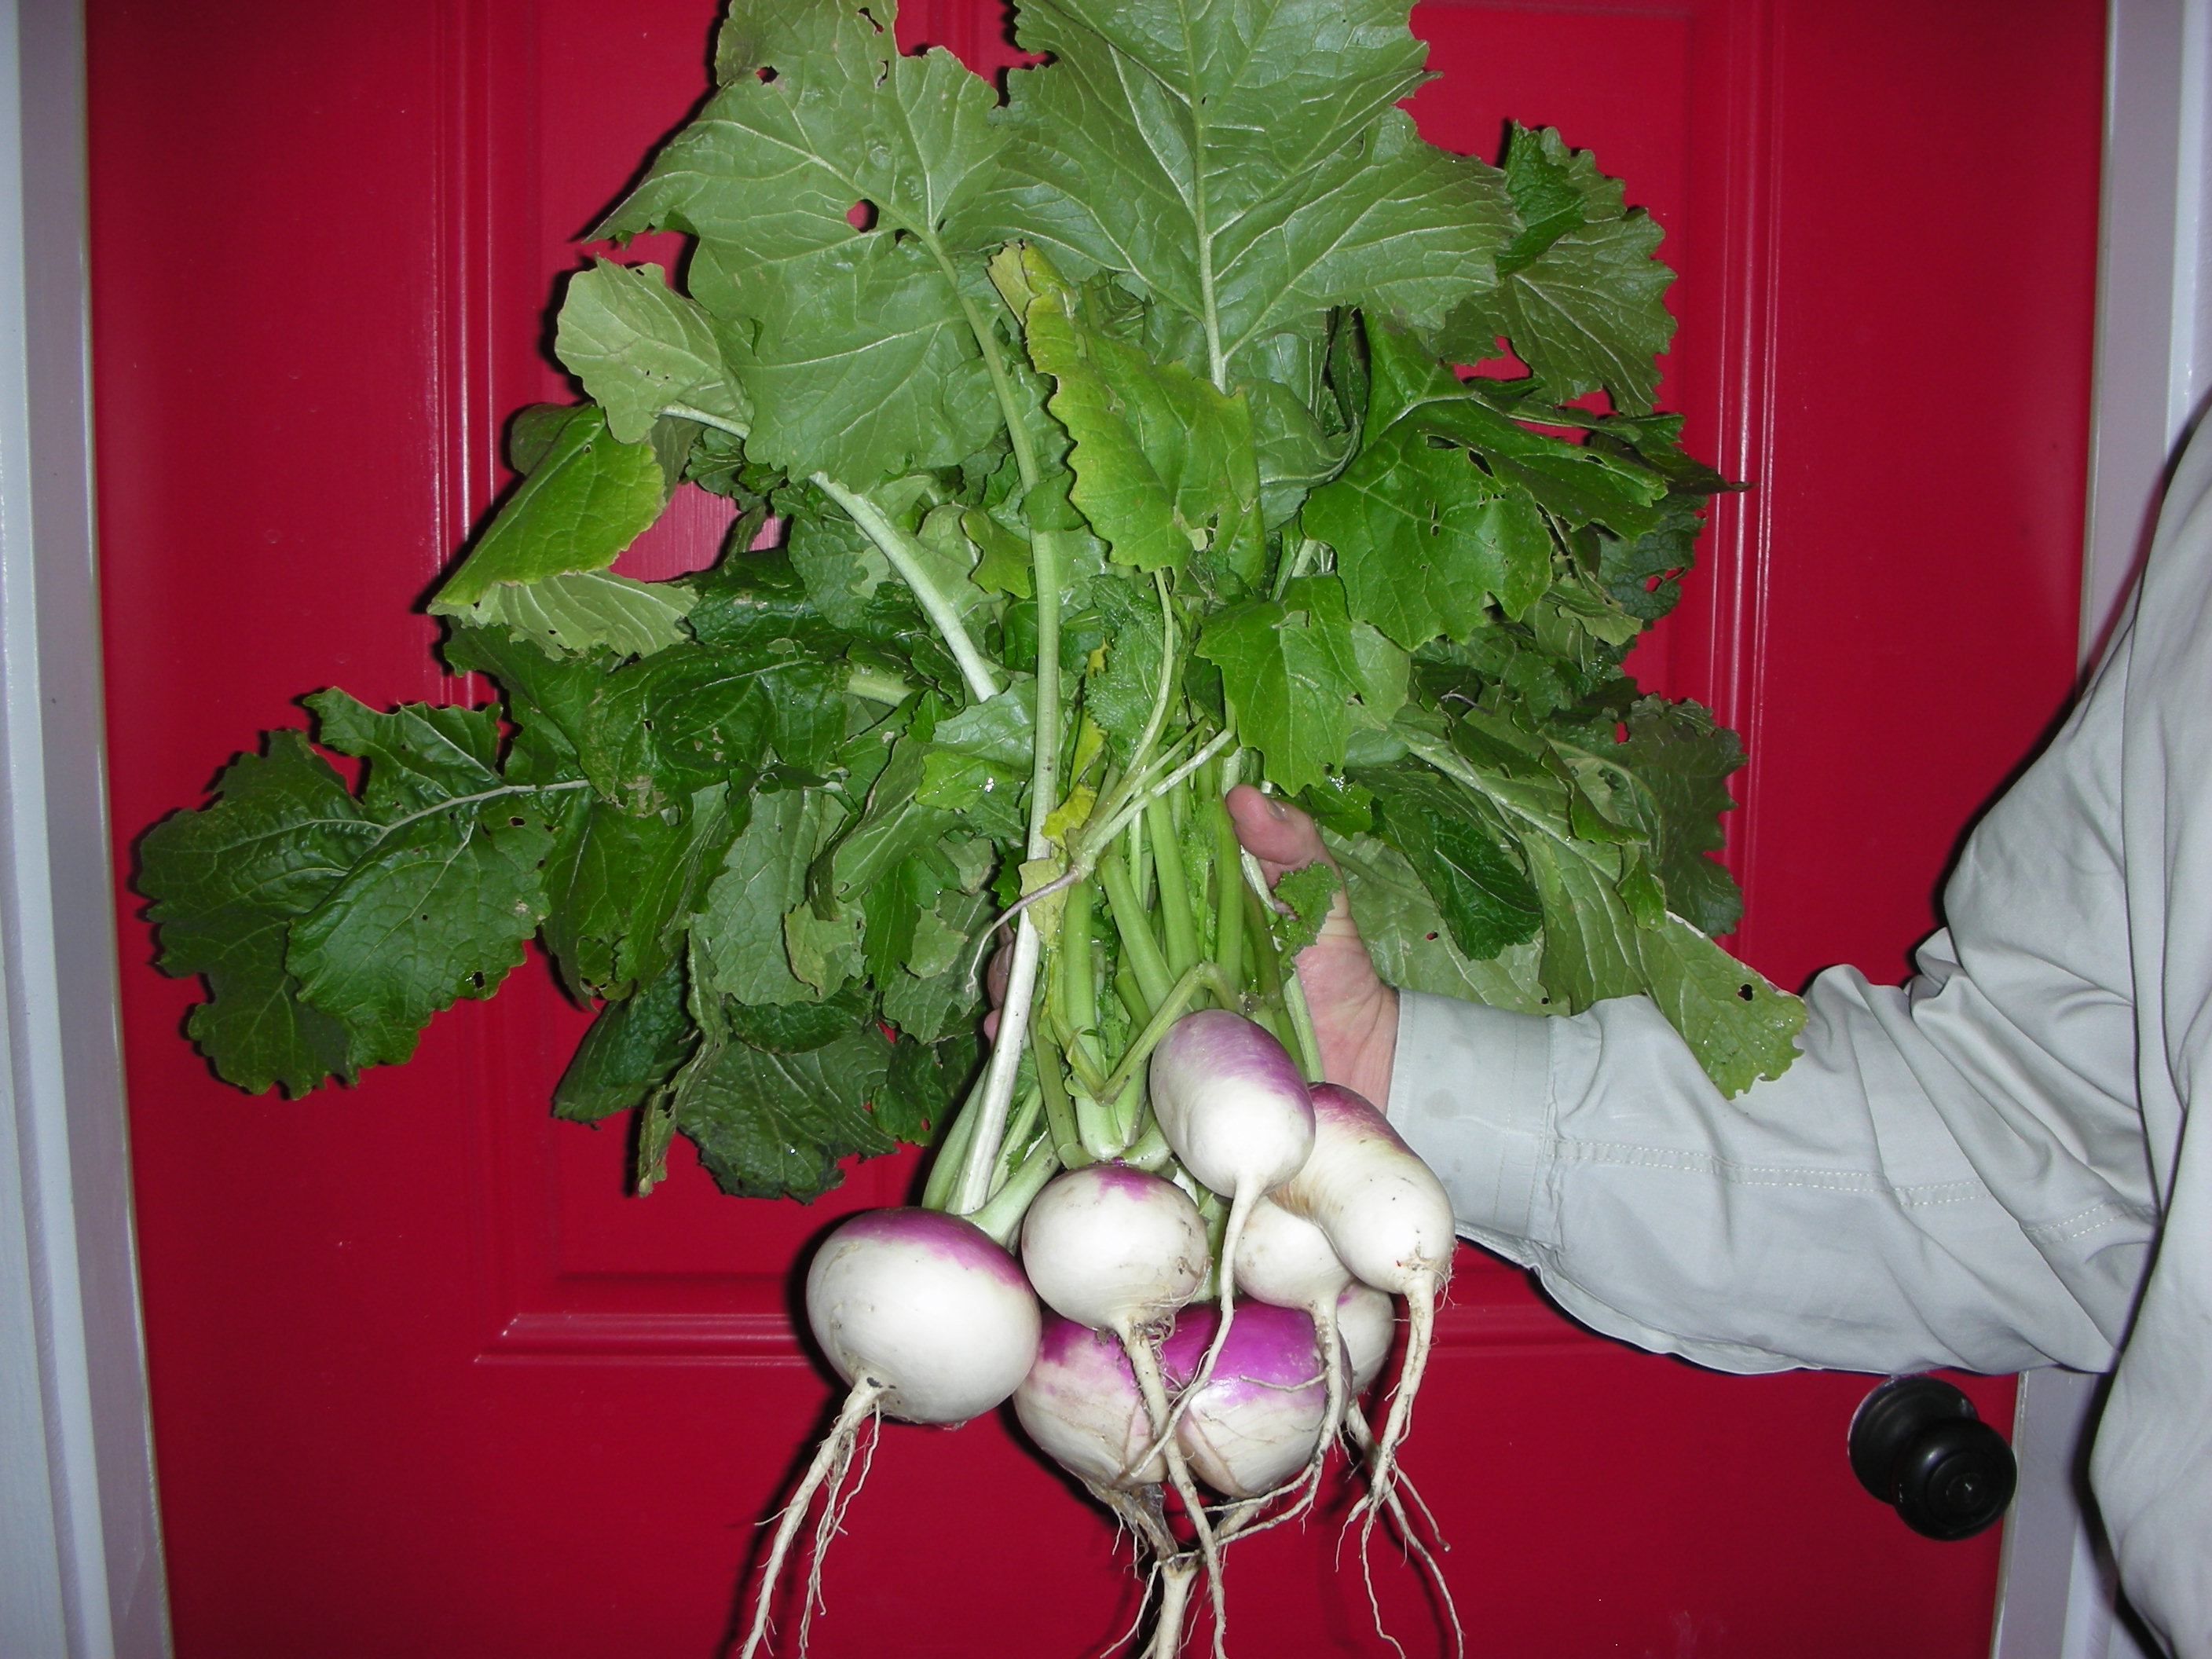
If you listen to Mark Chestnut’s song “Daddy’s Money” you will discover that his girlfriend is “country as a turnip green”.  Well, if liking turnip greens makes you country then I am definitely “country”.  I love turnips and I love their greens (fresh and cooked).  They taste great and they are good for you.  The root is high in vitamin C and the greens are loaded with vitamins A, C, K and calcium.  How many other vegetables do you know that can provide you with two sides for a single meal?   

People (and not just country people) have been enjoying turnips (Brassica rappa) for a very long time.  The Romans loved them.  Since they were a staple of the Roman diet, we can surmise that they have been in cultivation for well over 2000 years.  They were also staples in the Irish diet long before the potato arrived.  The tradition of the “jack-o-lantern” started with the turnip.  Legend says that an Irish thief named Jack tricked the devil out of taking his soul.  When Jack died, he was too sinful to go to heaven but, because of his deal with the devil, he couldn’t go to hell either.  So, he was cursed to wander in darkness forever.  On All Hallow’s Eve, the Irish would carve out a turnip and place a small candle or ember inside to help this crafty folk hero find his way to the after life.

Turnips are very easy to grow.  Around September, I plant my first row of turnips.  I add

A two course meal

another row in October and still another in November.  This will keep me in turnips and greens right up until March.  To plant, I dig a shallow furrow with a long screw driver, scatter the seeds, cover and water.  Within a few days, they sprout.  In fact, so many little plants pop up that I am convinced they have about a 110% germination rate!  Once the true leave form, I start thinning them to about 4” apart.  Their thick, green, leafy tops make a very attractive border in my potager. 

You can eat every part of the turnip.  The young greens add a sharp taste to fall salads.  The more mature greens are wonderful cooked (if you like greens) and the root tastes an awful lot like a potato (with a little extra zip).  Because of our nation’s new found interest in healthy living, turnips and turnip greens are enjoying renewed popularity.  Many top restaurants (not just Southern restaurants either) now regularly serve greens to their well healed customers.  I have even seen bunches of turnips and their greens for sale at Whole Foods.  At this rate, greens won’t be just for country folk much longer!

If you would like to see how I prepare my greens, be sure to read the next post.

MiMi's flowers

An arrangement from our fall garden

Right now the weather is so nice that I want to be outside all of the time.  So far this fall I have planted the potager and the row garden.  I have divided and moved perennials and I have also divided and moved my spring bulbs.  I have started stem cuttings of my coleus, begonias and geraniums.  I have been so busy preparing things that I almost failed to step back and enjoy what was already there.  This Saturday, my wife asked me to go outside and pick a few roses for her mother.  As I went out to cut the roses I noticed all of the really lovely things that were still growing in our garden.  I decided that MiMi would get more than just a few roses.  The arrangement you see is composed of a spider lilly, salvia, turk’s cap, zinnias, roses, rosemary and okra.  I am so glad that I took the time to look around and enjoy what was right under my nose.  I really enjoyed putting this together and sharing a little of what we love with someone we dearly love.

Cypress Vine – The hummingbird magnet!

Hummingbird migration season is upon us.  Because of this, we have so many ruby throated and black chinned hummers in our yard that my wife is filling our two feeders everyday.  While the hummers seem to appreciate the sugar syrup that she makes for them, they always head first to the only thing that is still really blooming in my garden; cypress vine.


Cypress vine flowers on my potager fence. Photo by Ramez Antoun

Cypress vine (Ipomoea quamoclit) is a member of the morning glory family and as such grows very well in our hot Texas summers.  It is a tropical plant that is native to Mexico and Central America.  It is a lovely vining plant that can grow 20 feet or more in a single season.  Cypress Vine has loose, feathery foliage that is covered with hundreds of tiny, tubular flowers.  The star shaped flowers can range in color from deep red to almost white and they are irresistible to butterflies and hummingbirds.  Other common names for this plant include Hummingbird Flower, Star Glory, and Cardinal Plant.

 Cypress vine is very easy to grow.  Start seeds when the soil has warmed up to around 70 degrees. It prefers full sun but can tolerate light shade.  Cypress Vine likes to be kept in moist, rich, well drained soils but it will grow in just about any type of soil and will tolerate some dry periods.  Cypress Vine is a quick grower and can produce blooms in as little as 45 days.  You can fertilize with a high phosphorus fertilizer right before the first bloom to enhance its flowering.   Cypress vine readily reseeds itself so once established you will be able to enjoy this plant year after year. 

Cypress Vine on the arbor

Because of its vining habit, Cypress Vine needs support.  I planted mine against the western fence of my potager.  This fence has an arbor over the gate and I wanted it to spread over both of these structures.    All of the growth you see in these pictures came from two vines.

Unmanaged, Cypress vine will grow in and over anything that is in its way.  Since mine is on a fence, I trained it to grow up and out toward the arbor.  This kept most of the runners in check.  Some runners did grow down into my daylilies but I simply pulled them off.  The plant did not seem to mind one bit.  Cypress vine is also an aggressive self seeding annual.  All of those lovely flowers produce tons of little black seeds. So, if you plant Cypress Vine, be prepared to have lots of it in years two and three.

All of this from two vines in the first season!

Cypress Vine is a very lovely and very hearty plant that thrives in our climate.  It is easy to grow and looks great on a fence, trellis or arbor.  This self seeding annual is relatively disease and pest free and will provide you with a flush of blooms from May through late fall. If you can tolerate its aggressive growth habit it will reward you with a beautiful late summer garden full of butterflies and hummingbirds.

*This article was published in the September issue of “Hort Update” (http://aggie-horticulture.tamu.edu/newsletters/hortupdate/2010/sep/)

Tatume’ – The wonder squash with many names

Some of the best things in the world happen by accident;  Post it Notes, potato chips, Reese’s Peanut Butter Cups and my discovery of Tatume’ squash.   While three of these accidental discoveries yielded vast quantities of money for their inventors, my discovery yields pounds and pounds of a fresh, flavorful, and versatile squash. 

Between work, grad school and the remodel of my house, my garden has not received the time and attention it normally gets.  Since it was a little late in the spring when I built my potager, I decided to speed things up a bit by purchasing established vegetable plants for my garden.  I bought my plants from the left over’s of the Texas A&M Horticulture Club’s Annual Plant Sale.  I bought several varieties of tomatoes, egg plant, watermelon, and fennel.  When I went looking for squash though, there were only two types left; white summer squash (we call it UFO squash in our house) and a variety that I had never heard of called Tatume’.  I grabbed the last summer squash and two of the Tatume’.

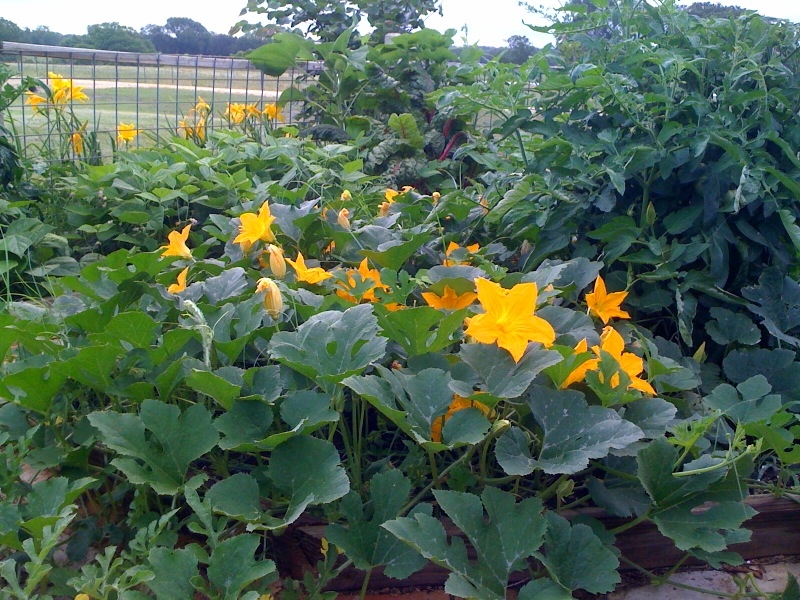
Tatume' vines and flowers in my potager

I soon realized that Tatume’ was no normal squash.  In a little over a week it has sent out vines that were over six feet long!  Everywhere a node lay against the ground, it rooted and sent out more shoots.  In two weeks time, half of my garden was over run by these two aggressive plants.  I was afraid it would cover the entire garden but I was comforted by how lovely it was.  The vines were covered with beautiful big yellow flowers.  Once it flowered, the growth rate decreased.  I decided to do some research and see what I had gotten myself into.

Most of the squash that we grow come from the species Cucurbita pepo.  Tatume’ is a variety of this species.  C. pepo is a native of Meso-America and archeological evidence shows that gardener’s there have been growing varieties of it for the past 8,000 to 10,000 years.  In America, squash is generally divided into two categories based on when they are harvested.  Summer squashes like yellow crook neck, zucchini, and pattypan (UFO) are harvested in their immature state.  Immature squash have a soft skin, seeds and flesh.  Winter squash like butternut, spaghetti, and acorn are simply squash that are allowed to ripen fully on the vine before they are harvested.  Winter squash have a thick hard skin and their flesh is generally firmer and sweeter than summer squash.  Tatume’ is one the rare varieties of squash that can be harvested as either a summer or winter squash.

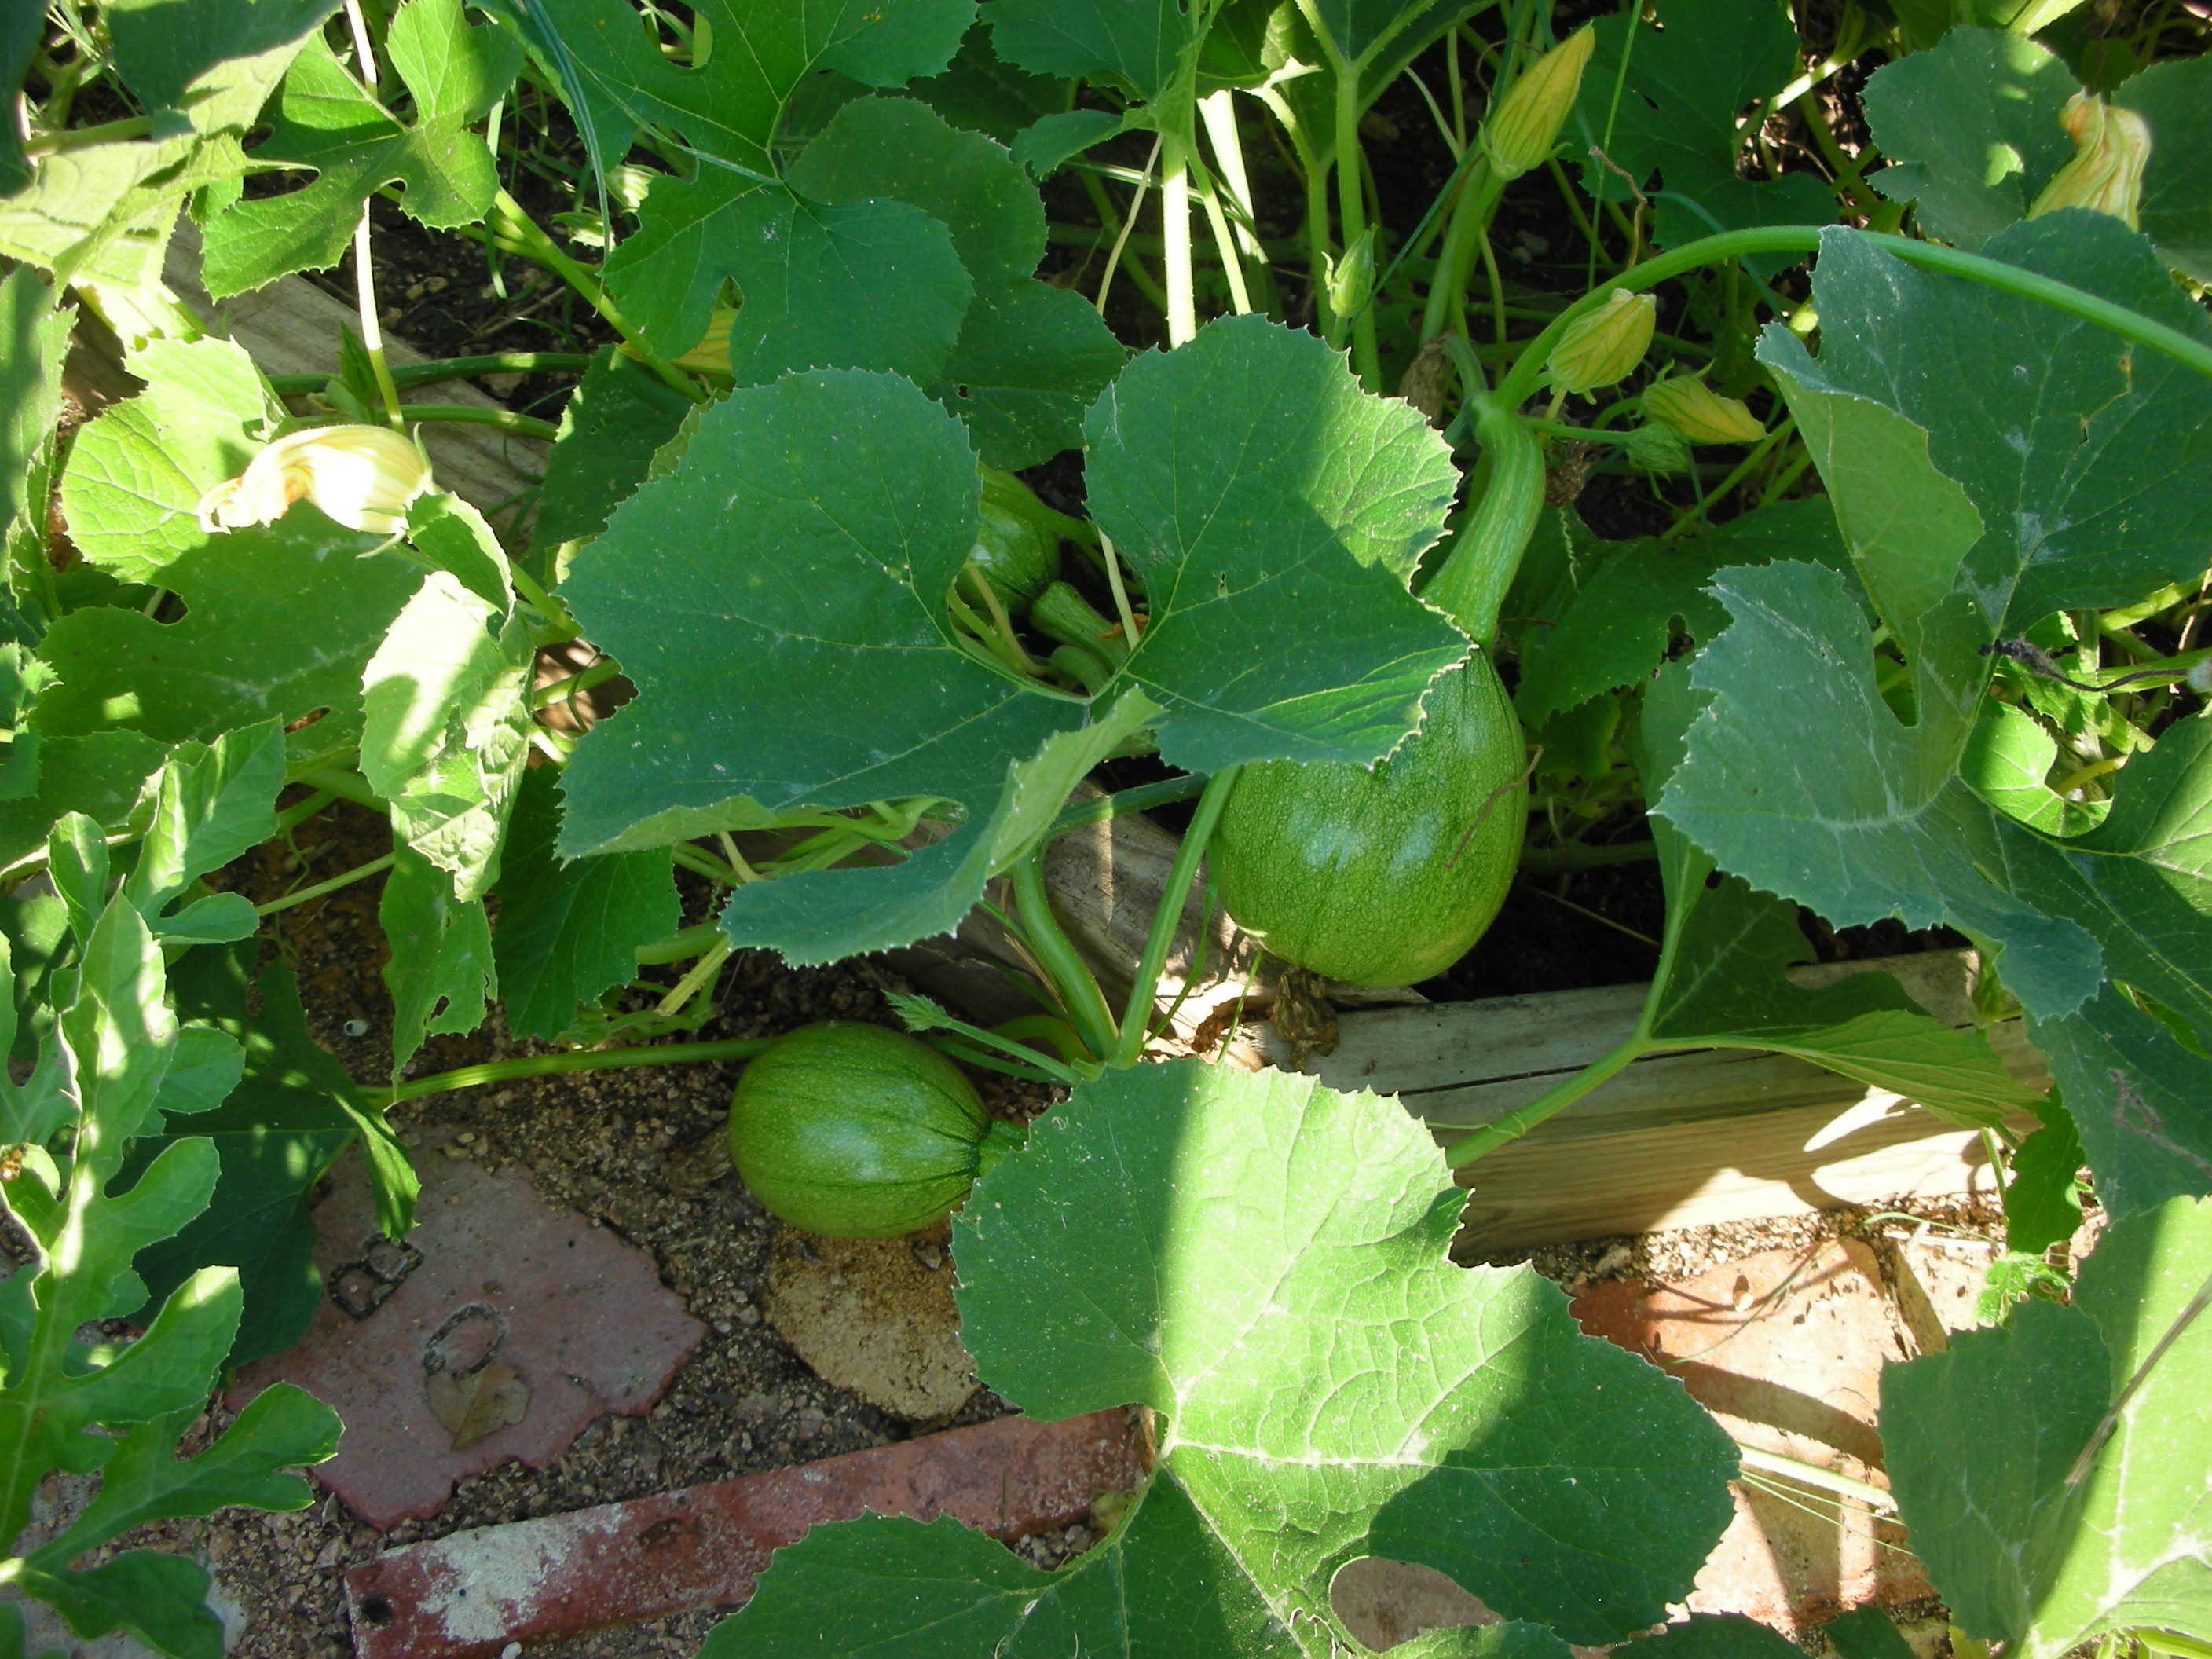
Young Tatume'

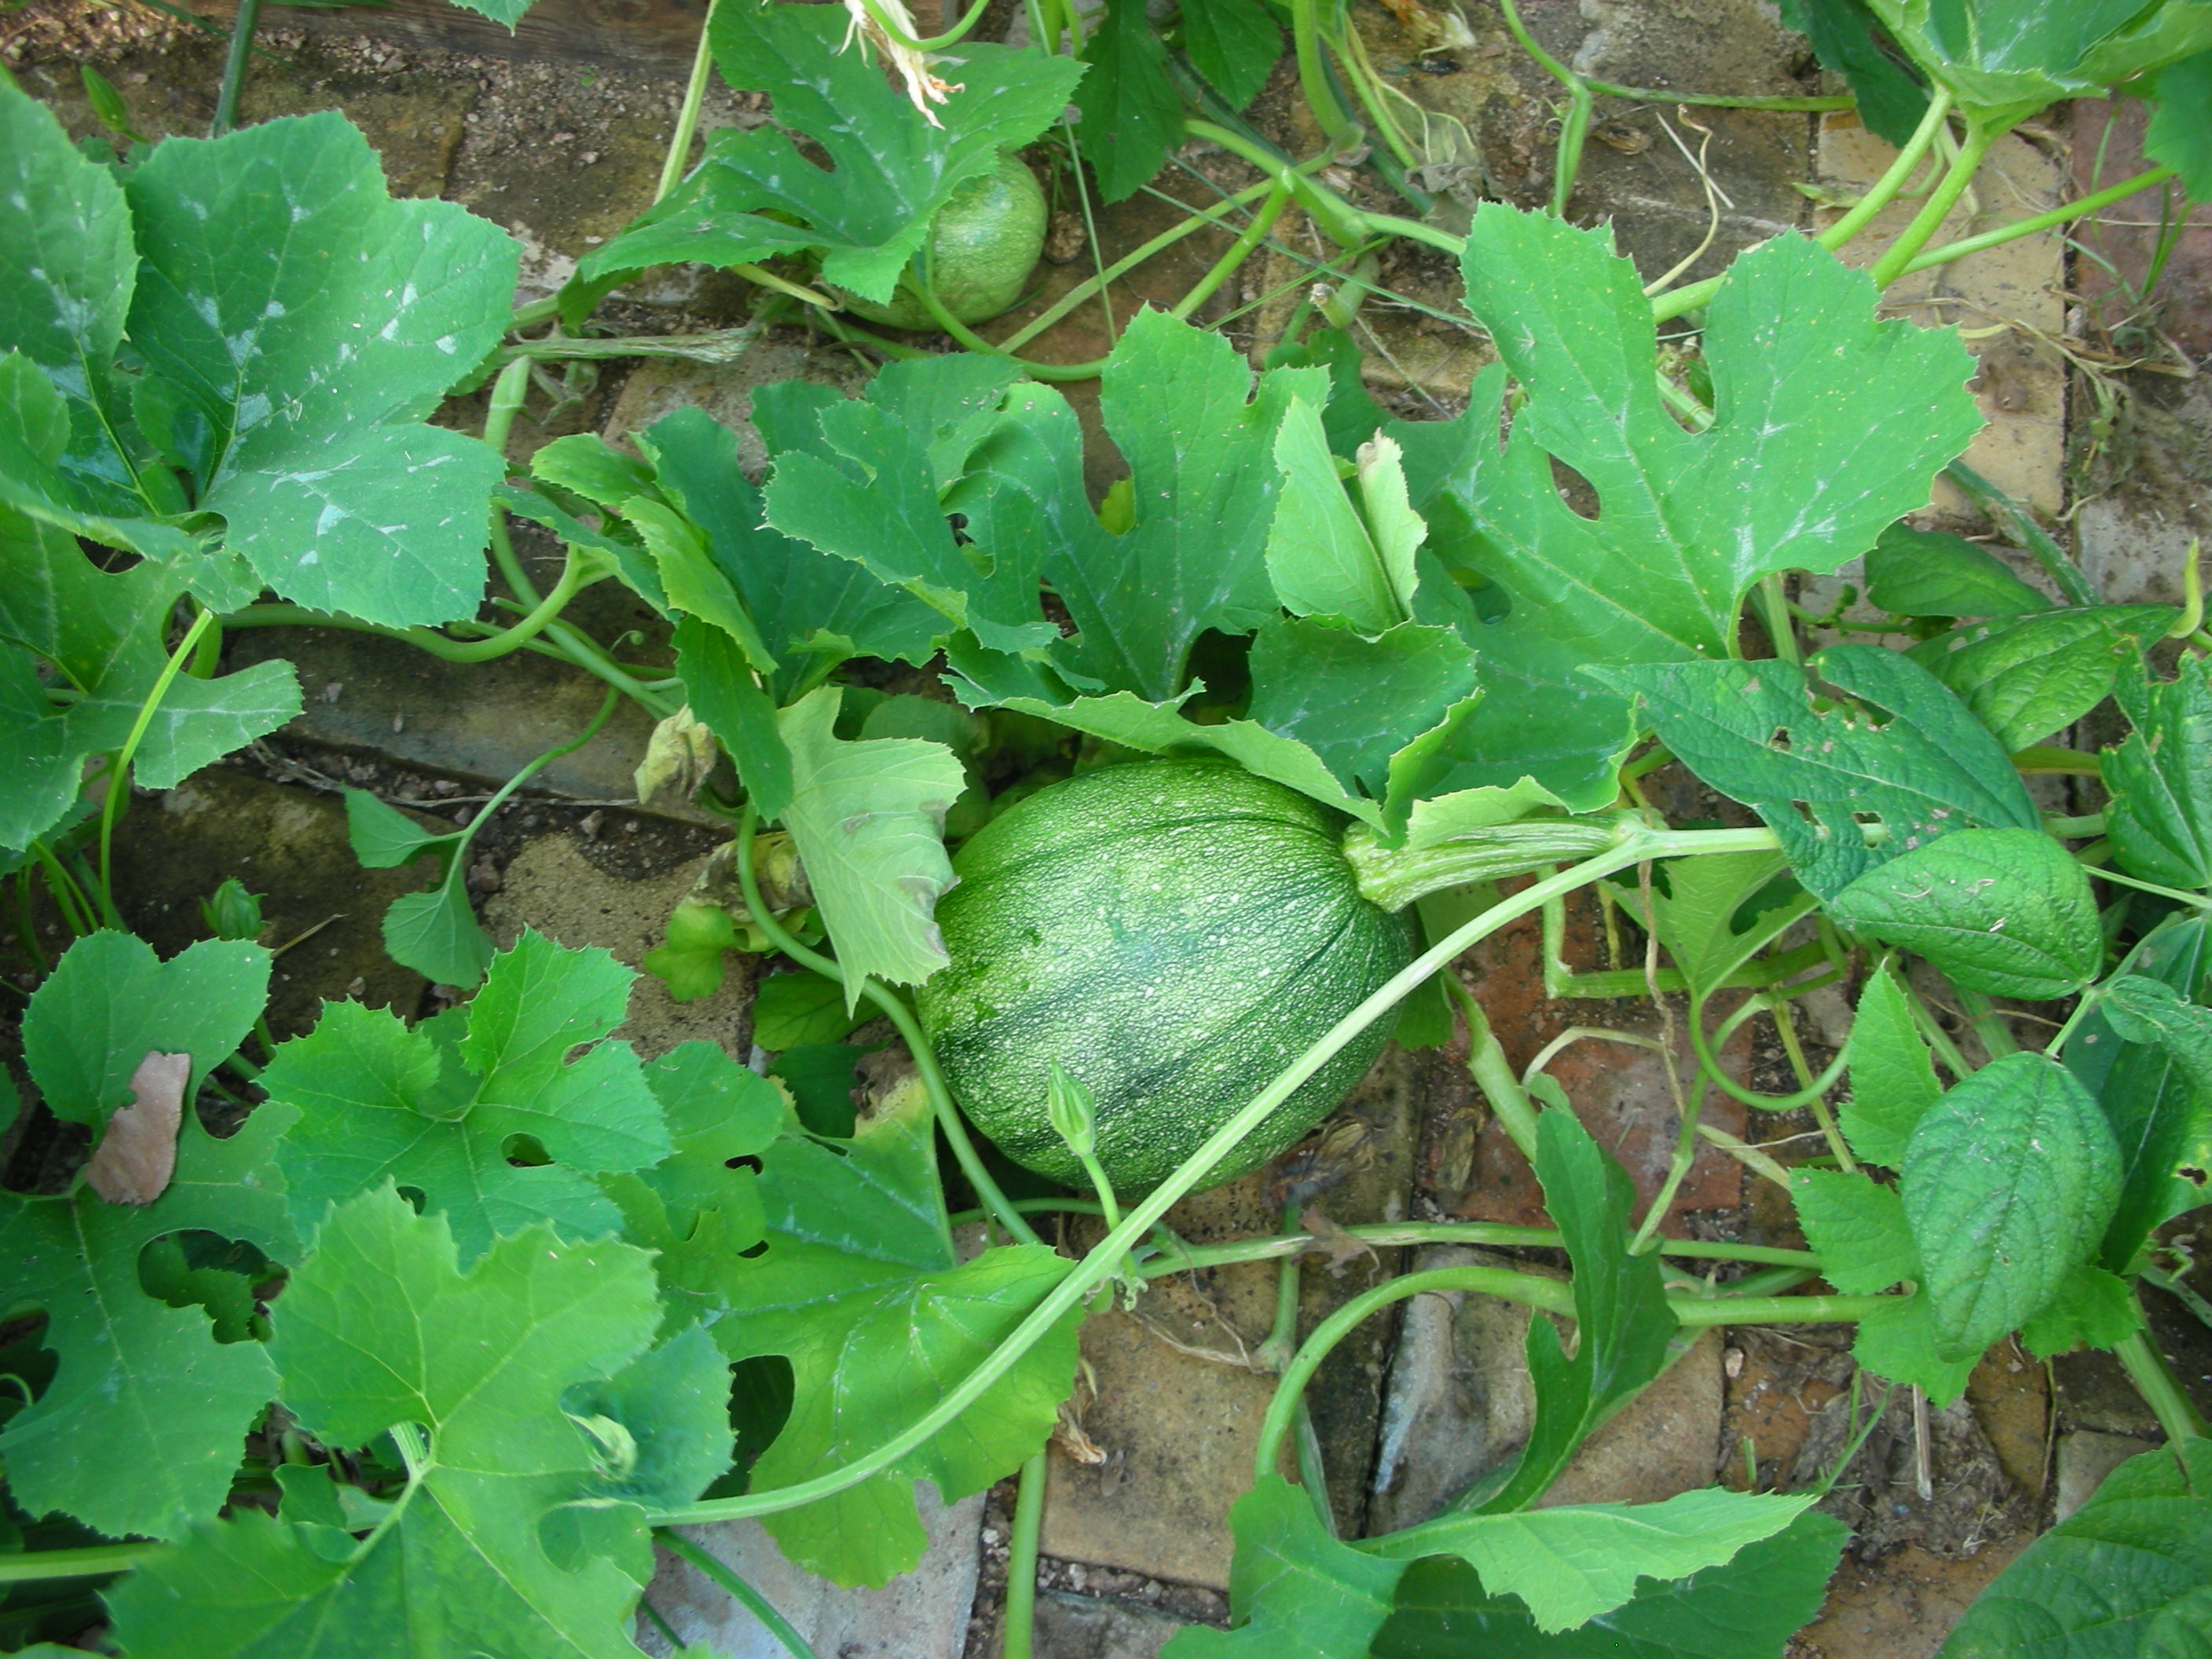
Tatume squash is an open pollinated variety (heirloom variety) so you can save the seeds from year to year.  The fruits are round or oblate in shape.  Their skin is stripped green and they resemble a small watermelon or pumpkin in there immature form.  It is best to harvest Tatume’ when it is about the size of baseball.  If left to mature, their skin will become a mottled deep green and they can grow to almost the size of a soccer ball. 

Tatume’ appears to be the squash of many names.  Many seed catalogs list it as Tatume’ or Tatuma but I have also seen it listed as round zucchini and Mexican zucchini.  In the markets of Mexico, it is most often called calabacita (little pumpkin). 

Whatever you call it, it is a very versatile and flavorful little squash.  It is a staple of Mexican cuisine.  Mexican cooks use this squash in soups, breakfast dishes, casseroles and as a stand alone side.  This year, my wife and I have used it in lieu of yellow squash in all of our squash recipes.  We have fried it, baked it, boiled it with onions and made it into a casserole.  We even harvested and sautéed the blossoms.  However, our favorite thing about Tatume’ is the way that it cooks on the grill.  Tatume’ is more flavorful than yellow squash and its flesh is much firmer.  Its round shape and firm texture allows it to be cut into thick round patties that are perfect for the grill.  A little EVOO, garlic salt, season salt and fresh ground black pepper make for a simple but delicious summer side dish.

A ripe Tatume' ready for the grill!


 Tatume’ is a squash variety that posses all of the traits that make squash one of my favorite summer vegetables to grow.  It is hardy and productive.  Its long vines produce a fabulous show of big yellow flowers that draw bees into the garden.  It is tasty and versatile in the kitchen.  My accidental experiment with Tatume’ has convinced me to add this to my keeper list.  I highly encourage you to try it in your garden as well!

*This article was published in the June 2010 issue of “Hort Update” (http://aggie-horticulture.tamu.edu/newsletters/hortupdate/2010/jun/)

Building a Potager

I have a problem.  Actually, I have two BIG problems; black clay and coastal Bermuda grass. These two things have been a pain in my gardening side since the first time I tried to till a portion of an old coastal field and turn it into a vegetable garden. I live on a patch of blackland praire in Washington county Texas between Brenham and Burton.  Over the years I have tried everything to tame the grass and improve the clay. All of my efforts have fallen woefully short. The clay is still either sticky or hard as a rock, and the grass always returns.

Two years ago, I began experimenting with raised beds. I tilled up the clay and added about four inches of mushroom compost. This improved things somewhat but I still could not keep the grass out of the rows, and ultimately the beds. At this point I should point out that I try to be an organic grower. I am not yet 100% weaned off of my traditional ways, but I am now using about 90% organic methods to try and control my weeds and bugs.

My first raised beds

Last year, the additional organic material really started to pay off. The vegetables were great. I simply planted and applied a heavy layer of hardwood mulch. Then I declared war on the weeds and that sticky mud that invariably happens when you water around black clay. I laid down weed paper in the rows and covered this with bricks. I also tilled in beds around my garden fence. I filled those beds with daylilies and petunias and large planters. I also added the weed paper and hardwood mulch to these outside beds. The bricks worked great for controlling the mud. But the Bermuda came back with a passion. Evidently Bermuda and many other weeds, enjoy a little organic matter as much as the tomatoes.

I was now thoroughly frustrated with my grass problem. However, I did note my two big successes. The additional organic material was definitely paying off and the bricks had solved the sticky mud issues. Now I was determined to figure out how to get the weeds under control.

I started reading and I came upon two concepts that I hoped my help me solve both of my problems: square foot gardening (the Mel Bartholomew method) and potagers. Mel Bartholomew and his method of creating super rich soil and close quarter plantings seemed to hold some promise. As I read more about both topics, I began to feel that combining Mel’s ideas about soil and close quarter plantings with the French concept of a kitchen garden might finally give me dominion over the weeds and the mud.

A real French potager

The term potager comes from the French term jardin potager. The potager is designed to provide all of the vegetables, herbs and flowers for a household. The potager is not just functional; it is expected to be beautiful as well. Because of this, annual and perennial flowers are grown right along with the vegetables. Plants in the potager are often selected as much for their form and texture as they are for their nutritional value.

Another thing that I have learned about gardening (or any other endeavor for that matter) is that it helps to have a plan. Since the creation of my potager would require an investment of time, talents and money, my wife insisted I have a detailed plan. I was lucky on this one. I am currently taking a Landscape Design class with Casey Krueger at Texas A&M. With his help, I created a very respectable and doable design for my potager.

Day 1 – Armed with my plan and an army of future son-in-laws (I have four daughters so I really do have a small army of future son–in-laws), we literally dug-in and started to build. First, we built the forms for my raised beds. This required a few carpentry skills, a few basic math skills, and a lot of manual labor.
Day 2 – Since the beds were now in place, we began to dig out about five inches of soil from the bottom of all of the walk paths. After this was done, we covered the walk paths with approximately 8 layers of newspaper and five inches of decomposed granite (take that weeds!). We then laid the bricks. Once the bricks were in place, we added a thin layer of decomposed granite to the top and used a broom to work the granite dust into the gaps between the bricks. After a good watering, the unplanted potager was ready to go.
Day 3 – This was the day for soil preparation and planting. To prepare the beds I used a modified version of Mel Batholomew’s formula. Since my clay has no problem holding water, I left out the suggested vermiculite and peat moss. What I did add was compost peat, cotton bur compost, farm style composted cow manure, mushroom compost, and an alfalfa and humate mix. I bought all of these items from the Plants N Things nursery in Brenham, Texas. We mixed all of these ingredients together on a couple of big tarps. Once it was mixed we wheel barrowed it into the raised beds. Finally, we used my Mantis tiller to mix it all into my existing soil. Now it was time to stick things in the ground. I planted tomatoes, squash, watermelon, and bronze fennel that I had purchased from the Texas A&M Horticulture Club’s Annual Plant sale. I also planted Contender bush beans, Swiss chard, sunflowers, apple and egg gourds, Chinese long beans, and Hyacinth beans for the trellis. One bed stayed intact throughout the build. In it I have onions, shallots, radishes and lettuces. Once all of the seeds are up I will again put down about six inches of hardwood mulch.

My unplanted potager

I am very excited about the promise my new garden. I am hopeful that the granite base and the bricks will keep the weeds and the mud at bay. I also believe that if a few weeds do pop up in the raised beds they will be easy to pull. Remember how I said I was about 90% organic? Well I hope to keep that percentage. However, after all of the time and effort that went into this potager, I have decided that organic or not, at the first sign of a weed invasion I am buying weed killer!

A version of this article was published in the May 2010 issue of “Hort Update” (http://aggie-horticulture.tamu.edu/newsletters/hortupdate/2010/may/)