Daylilies-A Month of Blooms

One of the daylilies that was passed along to me from my wife's grandmother

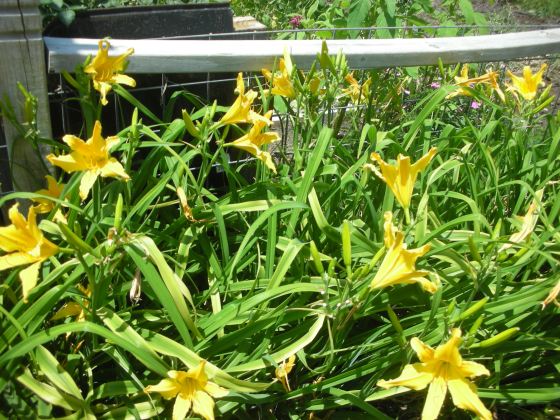
Very few plants in my garden give me as much enjoyment as my daylilies.  Early in April, I start watching them.  I am looking for that first sign of stalks. When I see these I know that soon, the green border around my potager will be covered in bright yellow flowers.

A masss of Nana's daylilies border my potager

My daylilies were passed to me by my wife’s grandmother.  Not directly, though.  A few years after she passed, we dug them up from her home place in the sandy loam of East Texas and moved them to the black clay of Washington County.  This sentence should tell you a lot about daylilies.  First, they lived at Nana’s for several years with absolutely no care.  So, daylilies are tough.  They also survived being dug out of a beautiful loamy soil and moved to a not so wonderful black clay.  So, daylilies are adaptable.  Throw in the fact that they are absolutely reliable, pest free and beautiful and you begin to understand why so many people love them.

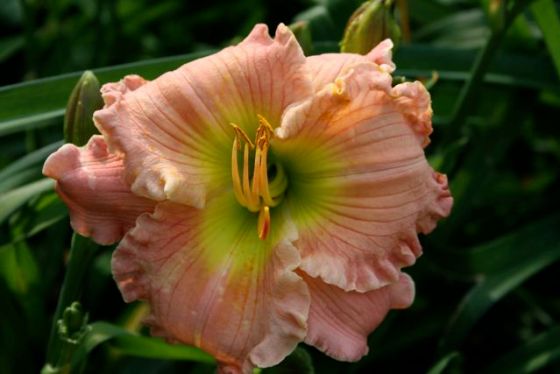
A lovely daylily bred by Chris von Kohn. You can buy this and others from him. All of his contact info is at the bottom of the post.

History – Daylilies originated in China, Korea and Japan.  They found their way to the Americas by the 1700s.  The Tawny Daylily was one of the first.  It quickly escaped cultivation and is now so common on the east coast that many think it is a native wildflower.  This flower was often planted close to outhouses and so it derived the very unfortunate common name of “Outhouse Lily”.  Daylilies began to lose their popularity in the US in the 1800s.  In 1920, the “Hyperion” daylily was introduced.  This began the resurrection of the flower as a major bedding plant in American gardens.

Despite their name, they are not true lilies.  Daylilies belong to the genus Hemerocallis and there are over 60,000 registered cultivars.  Their name is derived from Greek and literally means “beautiful day”.  Since the 1950s, the US has been the world leader in daylily hybridization.  I have a young friend at A&M named Chris von Kohn.  He has already created over 1000 daylily hybrids.  He hasn’t gotten one named yet, but he is only 22!  Chris is an up and coming Master of Horticulture and I am betting that we are going to be hearing a lot more about him in the years to come.  Thanks to the efforts of people like Chris, you can now own daylilies in every color except blue.  Some have  a strong fragrance and others have none.  There are daylilies with ruffled petals and multi-colored petals.  Some have “eyes” and still other sparkle with “diamond dust”. 
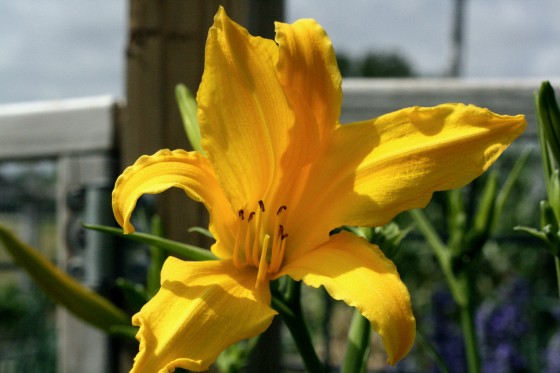
Another lovely daylily bred by Chris von Kohn. He is about to start grad school so he will greatly appreciate every order. All of his contact info is at the bottom of the post.

Planting – Daylilies are incredibly easy to grow.  Plant them in direct sun (or dappled shade) in well worked soil.  Dig a hole about 8” deep and make a small mound in the center of the base.  Spread the roots of the plant over this mound and backfill to a point where there is no more than 1” of soil over the crown.  If the roots of the plant are too big for the hole, trim them.  Water them in and then apply mulch (but not around the crown).  Water regularly for the first year.  After that, the daylily should be able to survive with minimal amounts of supplemental water.

Dividing – Daylilies reproduce rapidly.  If their clumps become too dense, they will begin to flower less and less.  Because of this, you need to divide them every two or three years.  This is best done in late summer or early fall.  Also, it is a good idea to give your plants a good watering the day before you do your dividing and transplanting. 

There are two ways to divide your plants.  The easiest is to just stick your shovel in the middle of the clump and remove half of the plant.  Since they have an extensive root system you may need to push your shovel all the way into the soil.  Use the shovel to work around the new clump and remove.  Replant in a prepared hole at the same depth as the original plant and water.  Place them about two feet apart.

Another creation of Chris von Kohn. You can buy this and others from him. All of his contact info is at the bottom of the post.

If you want to get individual plants, you can use a sharp knife to divide your clump into fourths.  Once this done, you can begin to remove individual fans.  Replant these fans like previously described.

Very few beautiful plants are as hardy or as easy to grow as Daylilies.  There are varieties that are hardy from zones 1 to 11.  Once established, they have a low water requirement and they are relatively pest free.  On top of all of that, they are incredibly diverse in color and form.  With so much to offer there is no reason for you not to grow daylilies in your own garden.

Buy Your Daylilies Here – Chris von Kohn will be selling some of his creations this fall.  They are incredible!  He is currently taking orders.  They are in bloom now so if you live in the Arlington/DFW area you can go by and pick your favorite.  He will mark it and save it for you and you can pick it up in the fall.  You can reach Chris at cvk007@earthlink.net or you can give him a call at either 817-269-7474 or 817-483-5146.   If you don’t live in the DFW area, just drop him an e-mail and he will be happy to send you pictures and then ship your plants when they are ready.

The yupneck with Chris von Kohn. He has just been awarded the outstanding senior agriculture student for horticulture by Gamma Sigma Delta, The Honor Society of Agriculture.

Love-Lies-Bleeding

For me, growing new things is a big part of the fun in gardening.  Each year, I like to try at least one new vegetable and one new flower.  Sometimes the new things work out and sometimes they don’t.  This year, one of my flower experiments has yielded a keeper: Love-Lies-Bleeding (Amaranthus caudatus).

Love-Lies-Bleeding flower heads just beginning to form

Love-Lies-Bleeding (and all amaranths for that matter) is easy to grow, tolerant of poor soils and incredible to look at.  In less than three months, mine have gone from seed to eye catching three foot tall plants covered in long red inflorescence that cascade almost down to the ground.  These plants have been grown for ornamental purposes for a very long time.  A. caudatus was included in a plant survey found in Colonial Williamsburg and it was very popular in Victorian English gardens.

Love-Lies-Bleeding is member of the amaranth family.  Amaranths are a diverse species with plants whose foliage and inflorescence range from yellow to red to deep purple.  In addition to producing very showy inflorescence, amaranths are edible.  Both the leaves and the seeds are harvested as food all over the world.  The leaves are used much like spinach and the seeds are used as grains.  However, since amaranths are not in the grass family, their seeds are gluten free.  Amaranth was a very important crop for both the Aztecs and the Inca.  To this day, the seeds are still “popped” like popcorn, mixed with honey, molasses or chocolate and sold as snacks on the streets of Mexico.

Up close on the developing flower head

The botanical name of Love-Lies-Bleeding derives from Greek and means “unfading flower”.  This is an accurate description as the flowers are very long lasting cut flowers and they can be easily dried  to extend the amount of time that you get to enjoy them.  For fresh flower arrangements, cut amaranths when ¾ of the flowers are open on the stem.  They will last 7-10 days in a vase.  If you want to dry them, harvest when the seed begin to set and the flowers are firm to the touch.  Cut and hang upside down for at least 10 days.  This is great for Texas as high heat during the drying process allows the flowers to better retain their color.

Love-Lies-Bleeding is easy to grow and extremely well suited for our hot Texas climate.  Plant seeds when the soil is around 70 degrees.  It is tolerant of both drought and poor soils.  In fact, too much nitrogen and the flowers will not be as bright.  Give it too much water and the plants may break.  Water deeply but infrequently.  It does not like wet feet.  Once it sprouts, thin to about 18” since it is not uncommon for these plants to reach five feet in height and spread to over two feet.

This is what the flower head looks like two weeks after the first picture was taken. Notice how the flower color has begun to fade. The soil in my potager has too much nitrogen for this plant that loves marginal soils.

Like all things that are easy to grow, Love-Lies-Bleeding does have its problems.  Since each plant can produce over 100,000 seeds, it can be a bit invasive (it is in the same family as pigweed).  However, when young, the plants have a shallow root system and are very easy to pull.  And, since I know I am going to have to pull weeds anyway, I might as well pull something that will grow into a beautiful plant if I miss it!

How to Harvest and Cure Onions

This past weekend, I pulled up 52 pounds of 10/15 onions.  Definitely my best onion harvest ever.  Now the question is, “What do I do with 52 lbs of onions”?  Since my wife and I are empty nesters, it is going to take us a while to eat all of those onions.  Especially when you take into account the fact that I just harvested an apple box full of shallots and I am still growing Egyptian Walking Onions.  I am sure we will be sharing with our kids and neighbors, but we are still going to have to preserve a large number of these onions.  Here’s how we preserve our onion crop:

10/15 onions in the potager two weeks ago

First, if you are new to gardening, you may wonder when to harvest or pull your onions.  The general rule is “Pull when the tops fall over”.  Below is a picture of what that looks like.  I believe in letting nature take its course.  I do not pull until 75% or more of the tops have fallen.  Once they fall, you can leave them in the ground for a week to ten days.  This starts the natural curing process.  However, do not leave them in the ground much more than ten days as that makes them susceptible to soil borne pathogens that can cause mold and rot in storage.  Just a little note,  I have heard several people say you have to cure onions before you can eat them.  This is not true.  Onions can be eaten at any time in their growth cycle (tops and all).  You only have to cure onions that you want to preserve.

The same onions from the first photo after their tops have fallen over

Once you have pulled your onions, spread them out in the sun.  Make sure they have room between them for air circulation.  I put mine on an old screen door up on saw horses.  The length of time varies.  If you pull them on a dry, hot day in Texas, then a few hours should be sufficient.  If it has rained recently, the onions moisture content will be higher and you will need to leave them out until the roots become noticeably harder than when they were harvested. 

Once they have completed this initial drying period, place them in a dry, shady place to allow them to complete the curing process.  Many people put them on their porch.  If you do not have room on your porch or in your garage, put them outside on a board or screen door to keep them off of the ground.  Place a sheet over them for shade.  Do not use plastic or canvas as this traps moisture.  You can cut the tops off at this time if you wish but if you do, leave about one inch of top on the onion.

Placing the onions on an old screen door. Allow plenty of space around them so they will cure properly.

While they are drying, turn them every few days to make sure they are drying evenly.  This part of the process can take two or three weeks.  You will know they are ready when the outer skins are papery and the roots are dry and brittle. 

Once your onion’s have cured, you can place them in mesh bags (or braid their tops together) and hang them in the garage for a little more drying.  If you are going to put them in a root cellar where humidity is high, you want to make sure they are as dry as possible.  Properly cured onions can keep for several months.  Check them often and discard any that are becoming soft.  If you see any sign of sprouting, eat them immediately, replant, or discard.

Surviving the 2011 Drought

Right now it is so dry at my house that when I went fishing the other day I had to throw everything I caught back because all the fish were infested with ticks!  Now that ‘s dry!  Seriously though, it is dry at my house.  In fact, according to the US Drought Monitor (http://www.drought.unl.edu/dm/monitor.html) it is EXCEPTIONALLY dry at my house.  Exceptional is the highest drought rating assigned by the US Drought Monitor.  If you look closely at the map below you will note that Washington County and half of Harris County are experiencing an exceptional drought.  The last time it was this dry was the drought of 1917-1918.  While this is extremely bad news for farmers and ranchers, it is pretty bad news for us gardens and yardners as well.  Hello high water bills!  If I were a betting man, I would be willing to bet that forced water reductions are on the way for many of us in Central Texas.  Since it is so dry, I thought this would be a good time to review some watering best practices.


How Much

As a general rule, most vegetables and flowers (and your yard too) need about an inch of water per week.  How do you know if you are putting out an inch of water?  The best way is to measure.  If using a sprinkler, put several cans out in various places under the sprinkler’s pattern.  Let it run for 15 minutes and measure the water in the cans.  Average those numbers.  If those cans averaged ¼” of water in 15 minutes then you will need to run that sprinkler for one hour. When measuring flow for soaker hoses or drip lines it is better to use tuna cans.  Also, if using soaker hoses do not use more than 100 foot runs.  The average garden faucet can push water through 600’ of hose.  However, at distances of greater than 100’ pressure drops drastically beyond that 100’ point.

When to Water

Most experts suggest watering in the early morning.  Especially if using sprinklers.  Winds are lower in the morning, humidity is high and temperatures are low.  This is the ideal time to maximize water usage and minimize loss to evaporation.  Also, many plants are prone to disease if their foliage stays wet.  Watering in the morning will let the foliage dry up rapidly as the day warms up.

Mulch

You know the yupneck loves his mulch.  In addition to reducing evaporation and keeping the soil cool, mulch suppresses those pesky weeds that compete for your plants water.  One thing to remember, mulch not only helps keep water in, it can keep it out too.  A deep layer of mulch can trap alot water if it is applied from above.

Mulch and soaker hoses in the yupneck’s 2010 fall garden

Soaker Hoses and Drip Irrigation

I love soaker hoses.  They are cheap, easy to use and they put the water where it is needed.  If you use soaker hoses, you can water anytime you want since you are not going to be wetting the plants foliage.  Place your soaker hoses under a good layer of mulch and you will be doubling the benefit.  Drip irrigation works the same way.  The only thing I don’t like about drip systems is the cost and maintenance.  That is a personal thing though.  I know lots of folks that swear by their drip systems.

Trees and shrubs

Watering trees is considerably different than watering veggies or flowers.  While most garden plants need one inch of water per week, most trees need gallons of water.  A mid-sized fig tree needs at least five gallons of water per week.  Also, you shouldn’t water a mature tree at the trunk.  Use a sprinkler or drip hoses to saturate the area under the trees drip line.  Water to runoff and quit.  This deep watering should get the tree through about 10 days.  If the ground around a tree stays too wet for too long you can kill young roots.

Newly planted trees and shrubs should be watered differently than mature ones.  While trying to get these plants established it is alright to water right at the trunk.  Water to run off every five days.  Here is a trick I learned from my wife’s very frugal and very Czech grandmother who believed in wasting nothing (especially not water).  Take an empty 5 gallon bucket and drill a hole in the side right above the bottom of the bucket.  After planting the tree, put this bucket beside the tree so that the hole is pointing toward the base of the tree.  Now, simply fill the bucket once a week during the hottest part of the year.  As the bucket drains it will give exactly 5 gallons of water to the new tree.

Time to Mow the Bluebonnets

I’ve gotten a lot of querries about when to mow bluebonnets.  Well, if you live in Washington County, Texas, the time is now. If you live somewhere other than Brenham, you can ldetermine when to mow them by looking at the seed pods of your bluebonnets.  If most of the pods have opened and curled up, it is time to mow.   Here are a couple of not so great pictures to illustrate what I am talking about:

Here is what a seed pod looks like before it shatters. Notice it is still green and the pod is closed.

In  the following picture, note how the pod is opened and the sides have curled up.  This curling of the pod helps to disperse the seeds. Sorry for the poor focus. Look closely and you can see the empty pod.

Sunflowers (Helianthus Annus)

 Sunflowers and long beans at Boggy Creek Farms in Austin.  Photo from their website

How many flowers do you grow that reach heights of ten feet, look great in the garden, last forever in a vase, and then feed you when it dries out?  As far as I know, there is only one; sunflowers!

Sunflowers are native to North America.  Indigenous people have grown them for thousands of years.  Archeological evidence shows that tribes in Arizona and New Mexico were growing them around 3000 B.C.  It is thought that the sunflowers were domesticated by Native Americans before corn.  The Aztecs were so impressed with sunflowers that they actually worshipped them.

Even though Native Americans grew them first, the Russians are responsible for producing what we most often think of as sunflowers today.  At last count, there are 82 species of sunflowers and countless numbers of varieties.  According to the USDA, in 1991, 2.7 million acres of sunflowers were grown in the U.S.   Commercial production is mostly for oil but considerable amounts are processed for human consumption, bird seed and cut flowers.


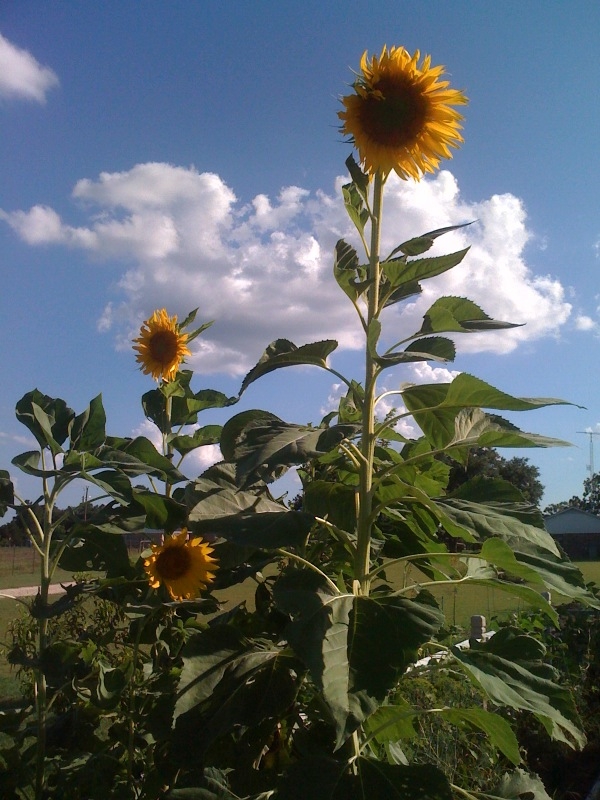
“Mammoth” sunflowers in the yupneck’s 2010 summer garden

How to Grow:  If you want to grow really big sunflowers, plant your seeds as soon as night time temperatures do not drop below 50 degrees.  Sunflowers love full sun.  In fact, the more sunlight they get, the bigger the seed heads they will produce.  6 to 8 hours of sun is the minimum.  Plant your seeds 1” deep in clumps of 5 or 6 that are spaced about 6” apart.  These “clumps” should be spaced about 20” apart.  Sunflowers are heavy feeders so make sure your bed is deeply worked with compost.  Water your seeds regularly.  With proper moisture, the seeds will sprout in 5 to 10 days.  As your seedlings emerge, slowly begin to thin them.  Cull the first bunch when the plants reach 6” in height.  Leave about four plants.  Cull the next bunch when the plants reach about a foot, leaving your best two.  When those plants get 2’ tall leave only the best.  If your sunflowers are grown to close together, they will produce shorter stalks and smaller heads.  Plant them too far apart and they may get so tall that the stalk will not be able to support the weight of the seed head.

Very few plants in my gardens give me as much enjoyment as sunflowers.  To me nothing says “summer in the country” better than a galvanized bucket full of the bright yellow heads on our dining room table.  I am fast approaching the age when grand children will soon begin to follow me into my garden.  Sunflowers will be the first plant that I use to get the next generation of gardeners in our family excited about growing things.  I can’t wait to see the wonder in their eyes as they watch that tiny little seed turn into a mighty sunflower!


Blooms in the Potager

Over the past year I have slowing been shifting the focus of my potager from veggies to herbs and flowers.  Because of this, the potager is now lovelier than it has ever been.  Here are a few pics of some of the things that are blooming (or beginning to) in my little kitchen garden.

First up are the poppies.  I got the seeds from Carol Ann Sayle at Boggy Creek Farm in Austin.  As you can see, they are beautiful.

Here’s another shot

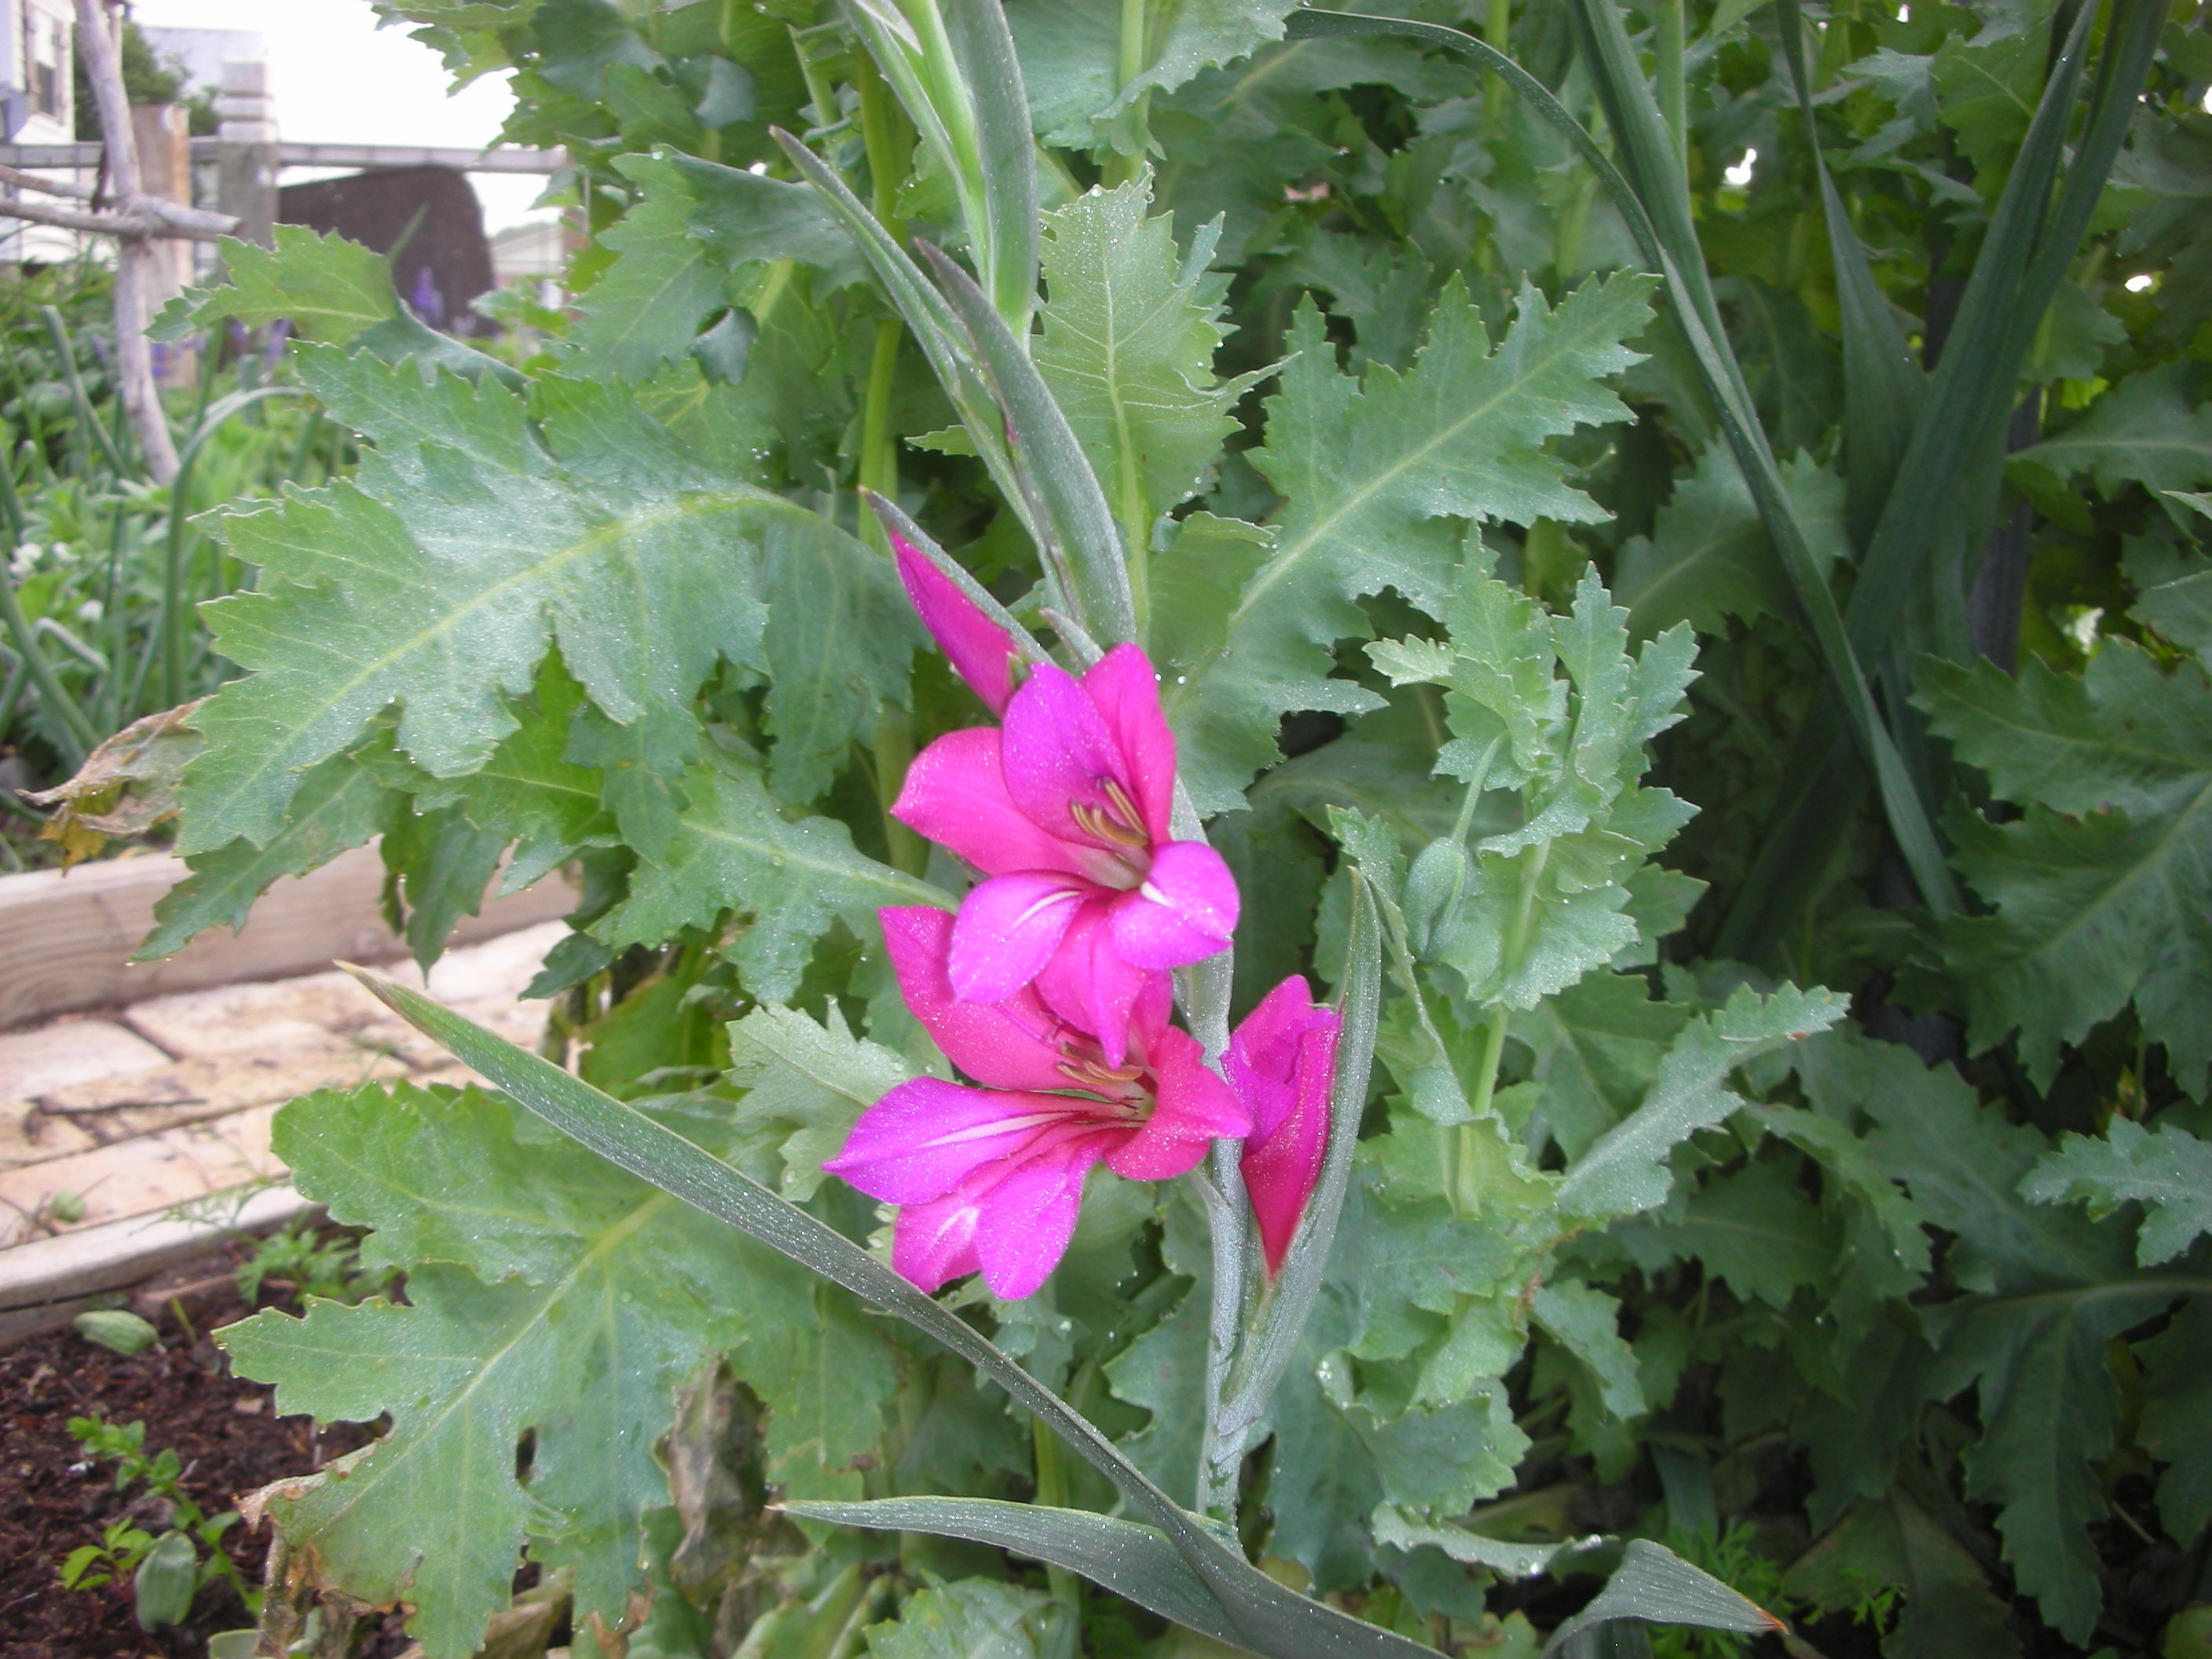
Mixed in with the poppies are some Byzantine gladiolus. 

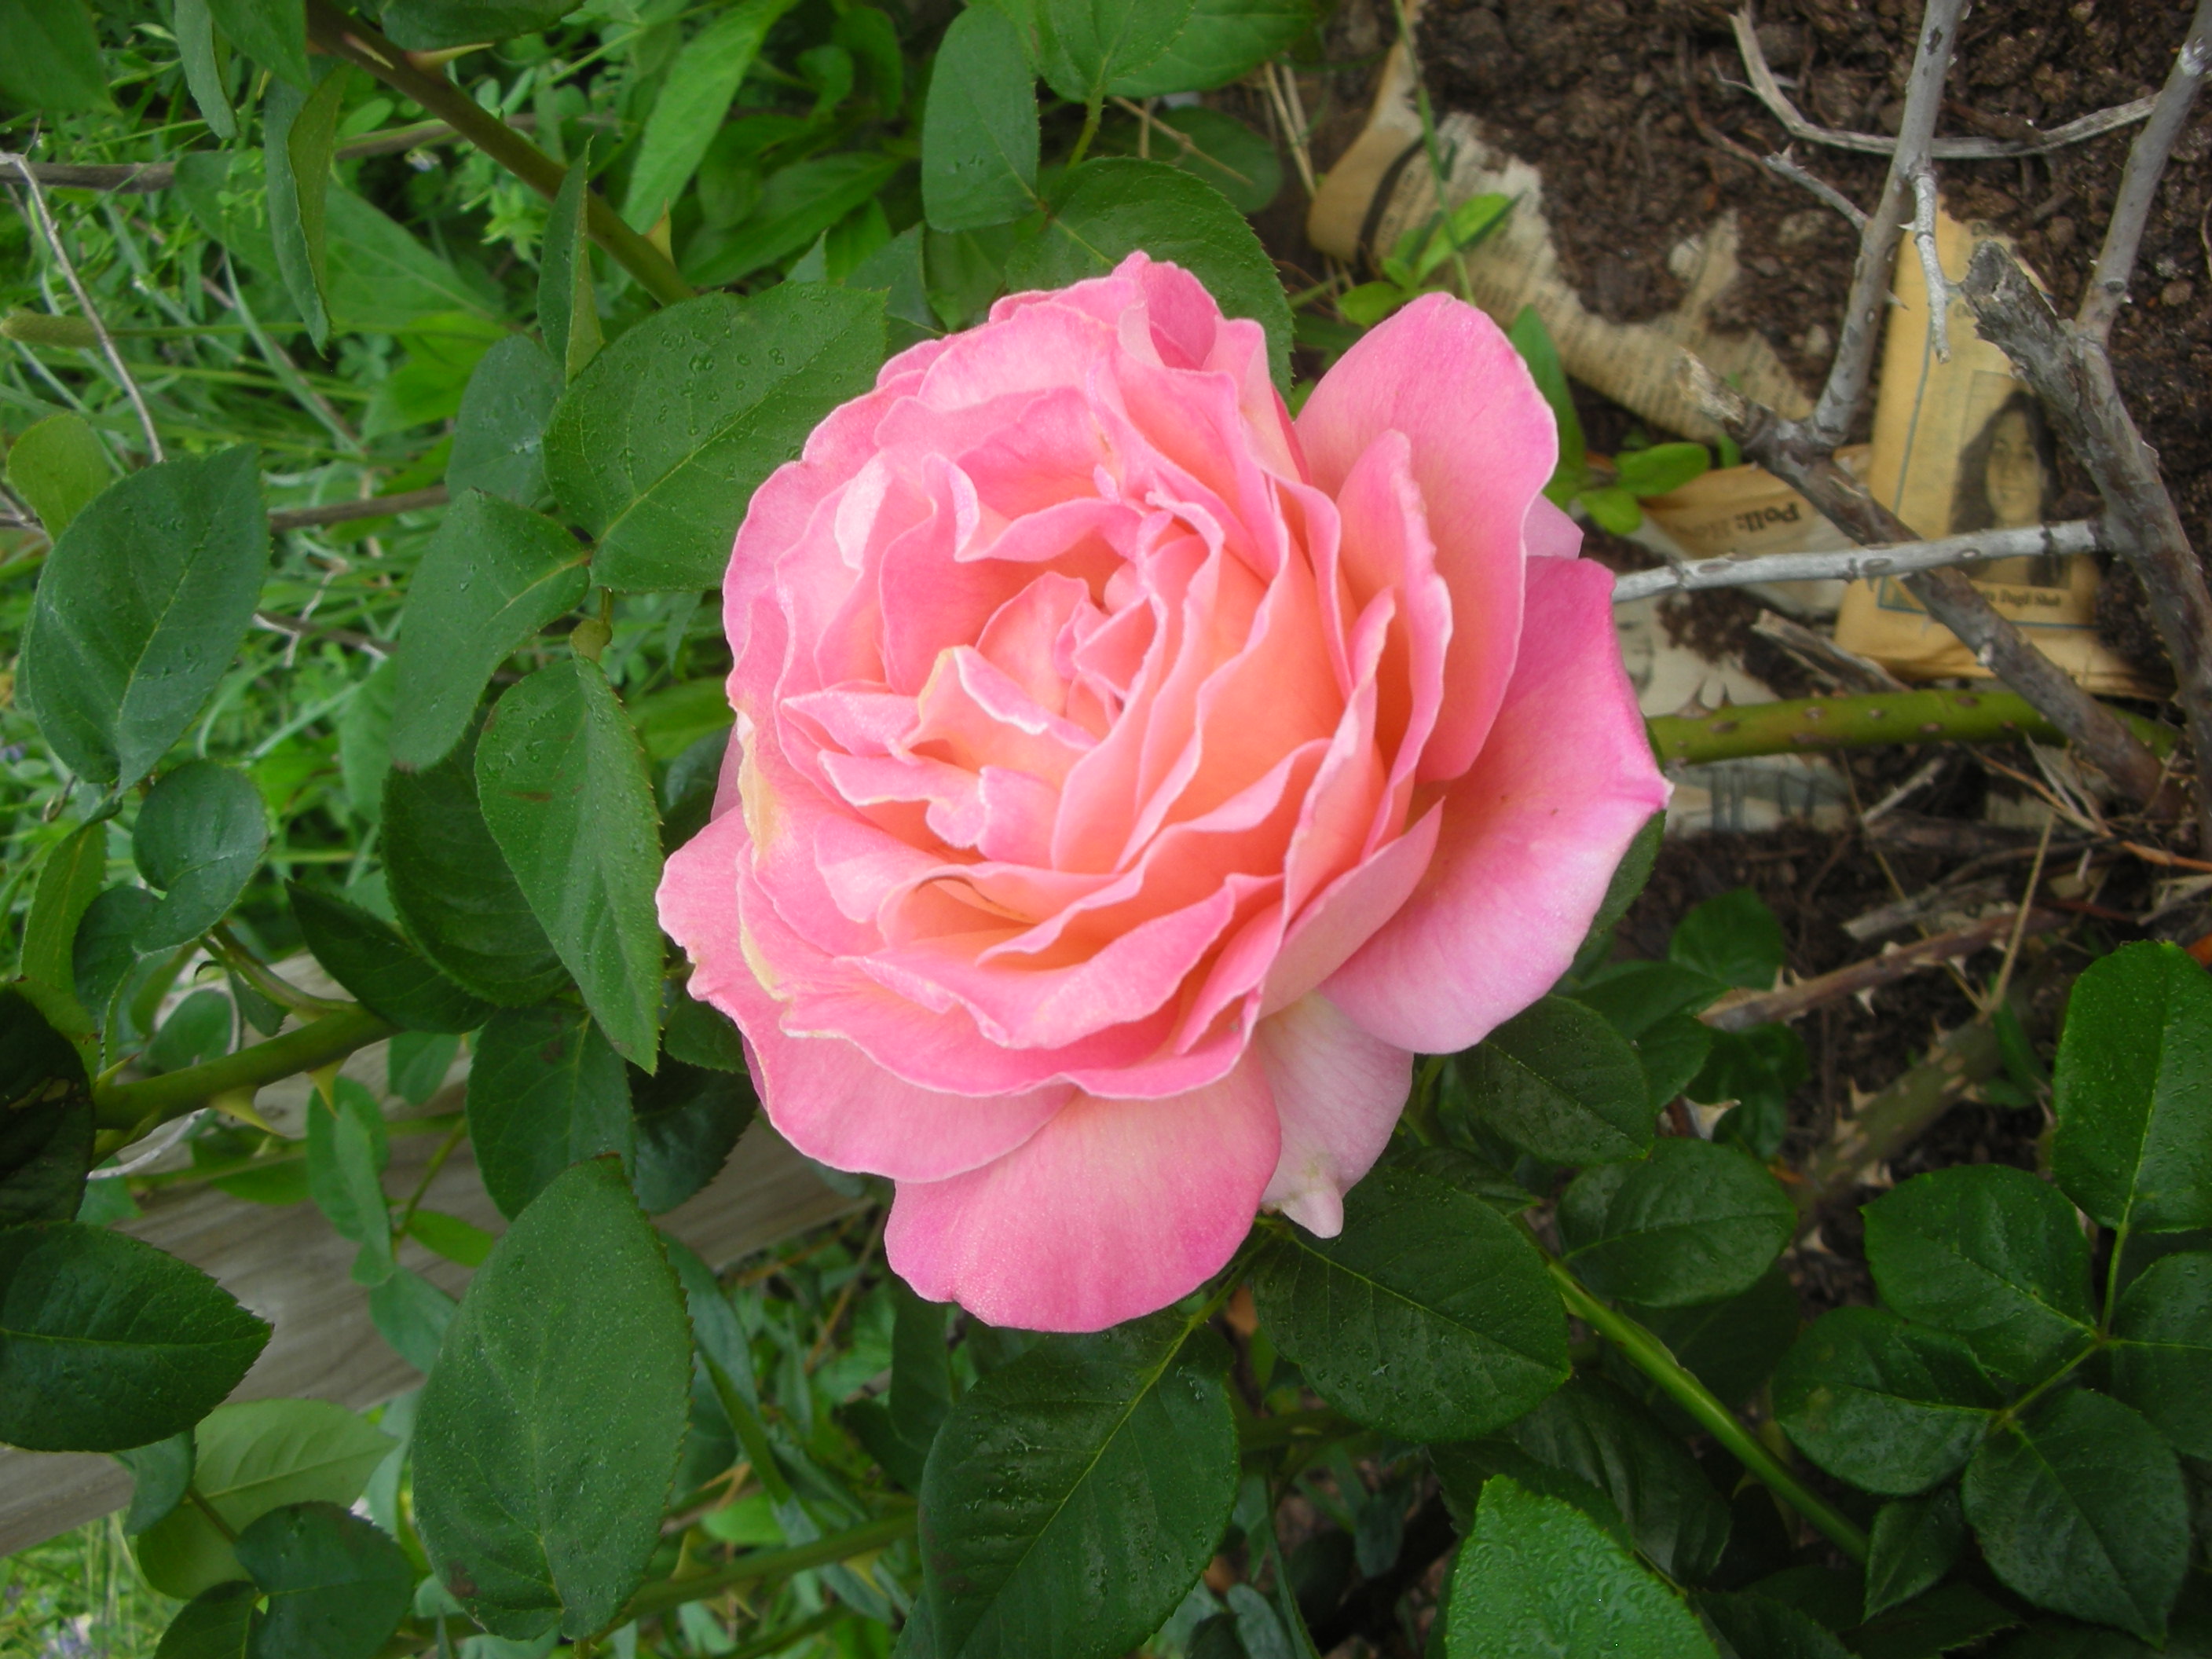
Here is an un-named rose that I got from my sister.  She lost her battle with ALS two year’s ago.  Everytime this rose blooms I think of her and smile.  Since we don’t know what it is, we call in “Ginna’s Rose” in her honor.

My “Victoria” salvia is thriving after the harsh winter.  There is lemon grass in the white pot behind it

I bought these and they were labeled “strawflower”.  They look alot like dianthus to me.  Whatever they are, they are lovely and they last forever as a cut flower.

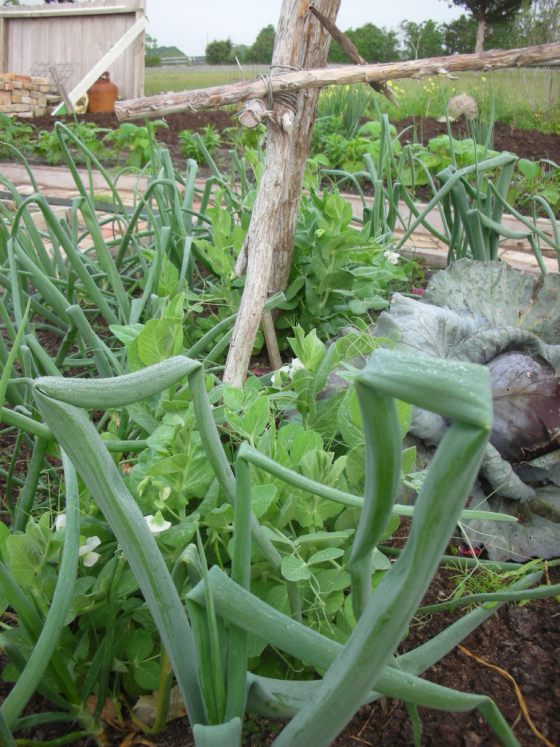
There are still a few veggies in the potager.  Here are some 10/15 onions, purple cabbage and English peas for the trellis

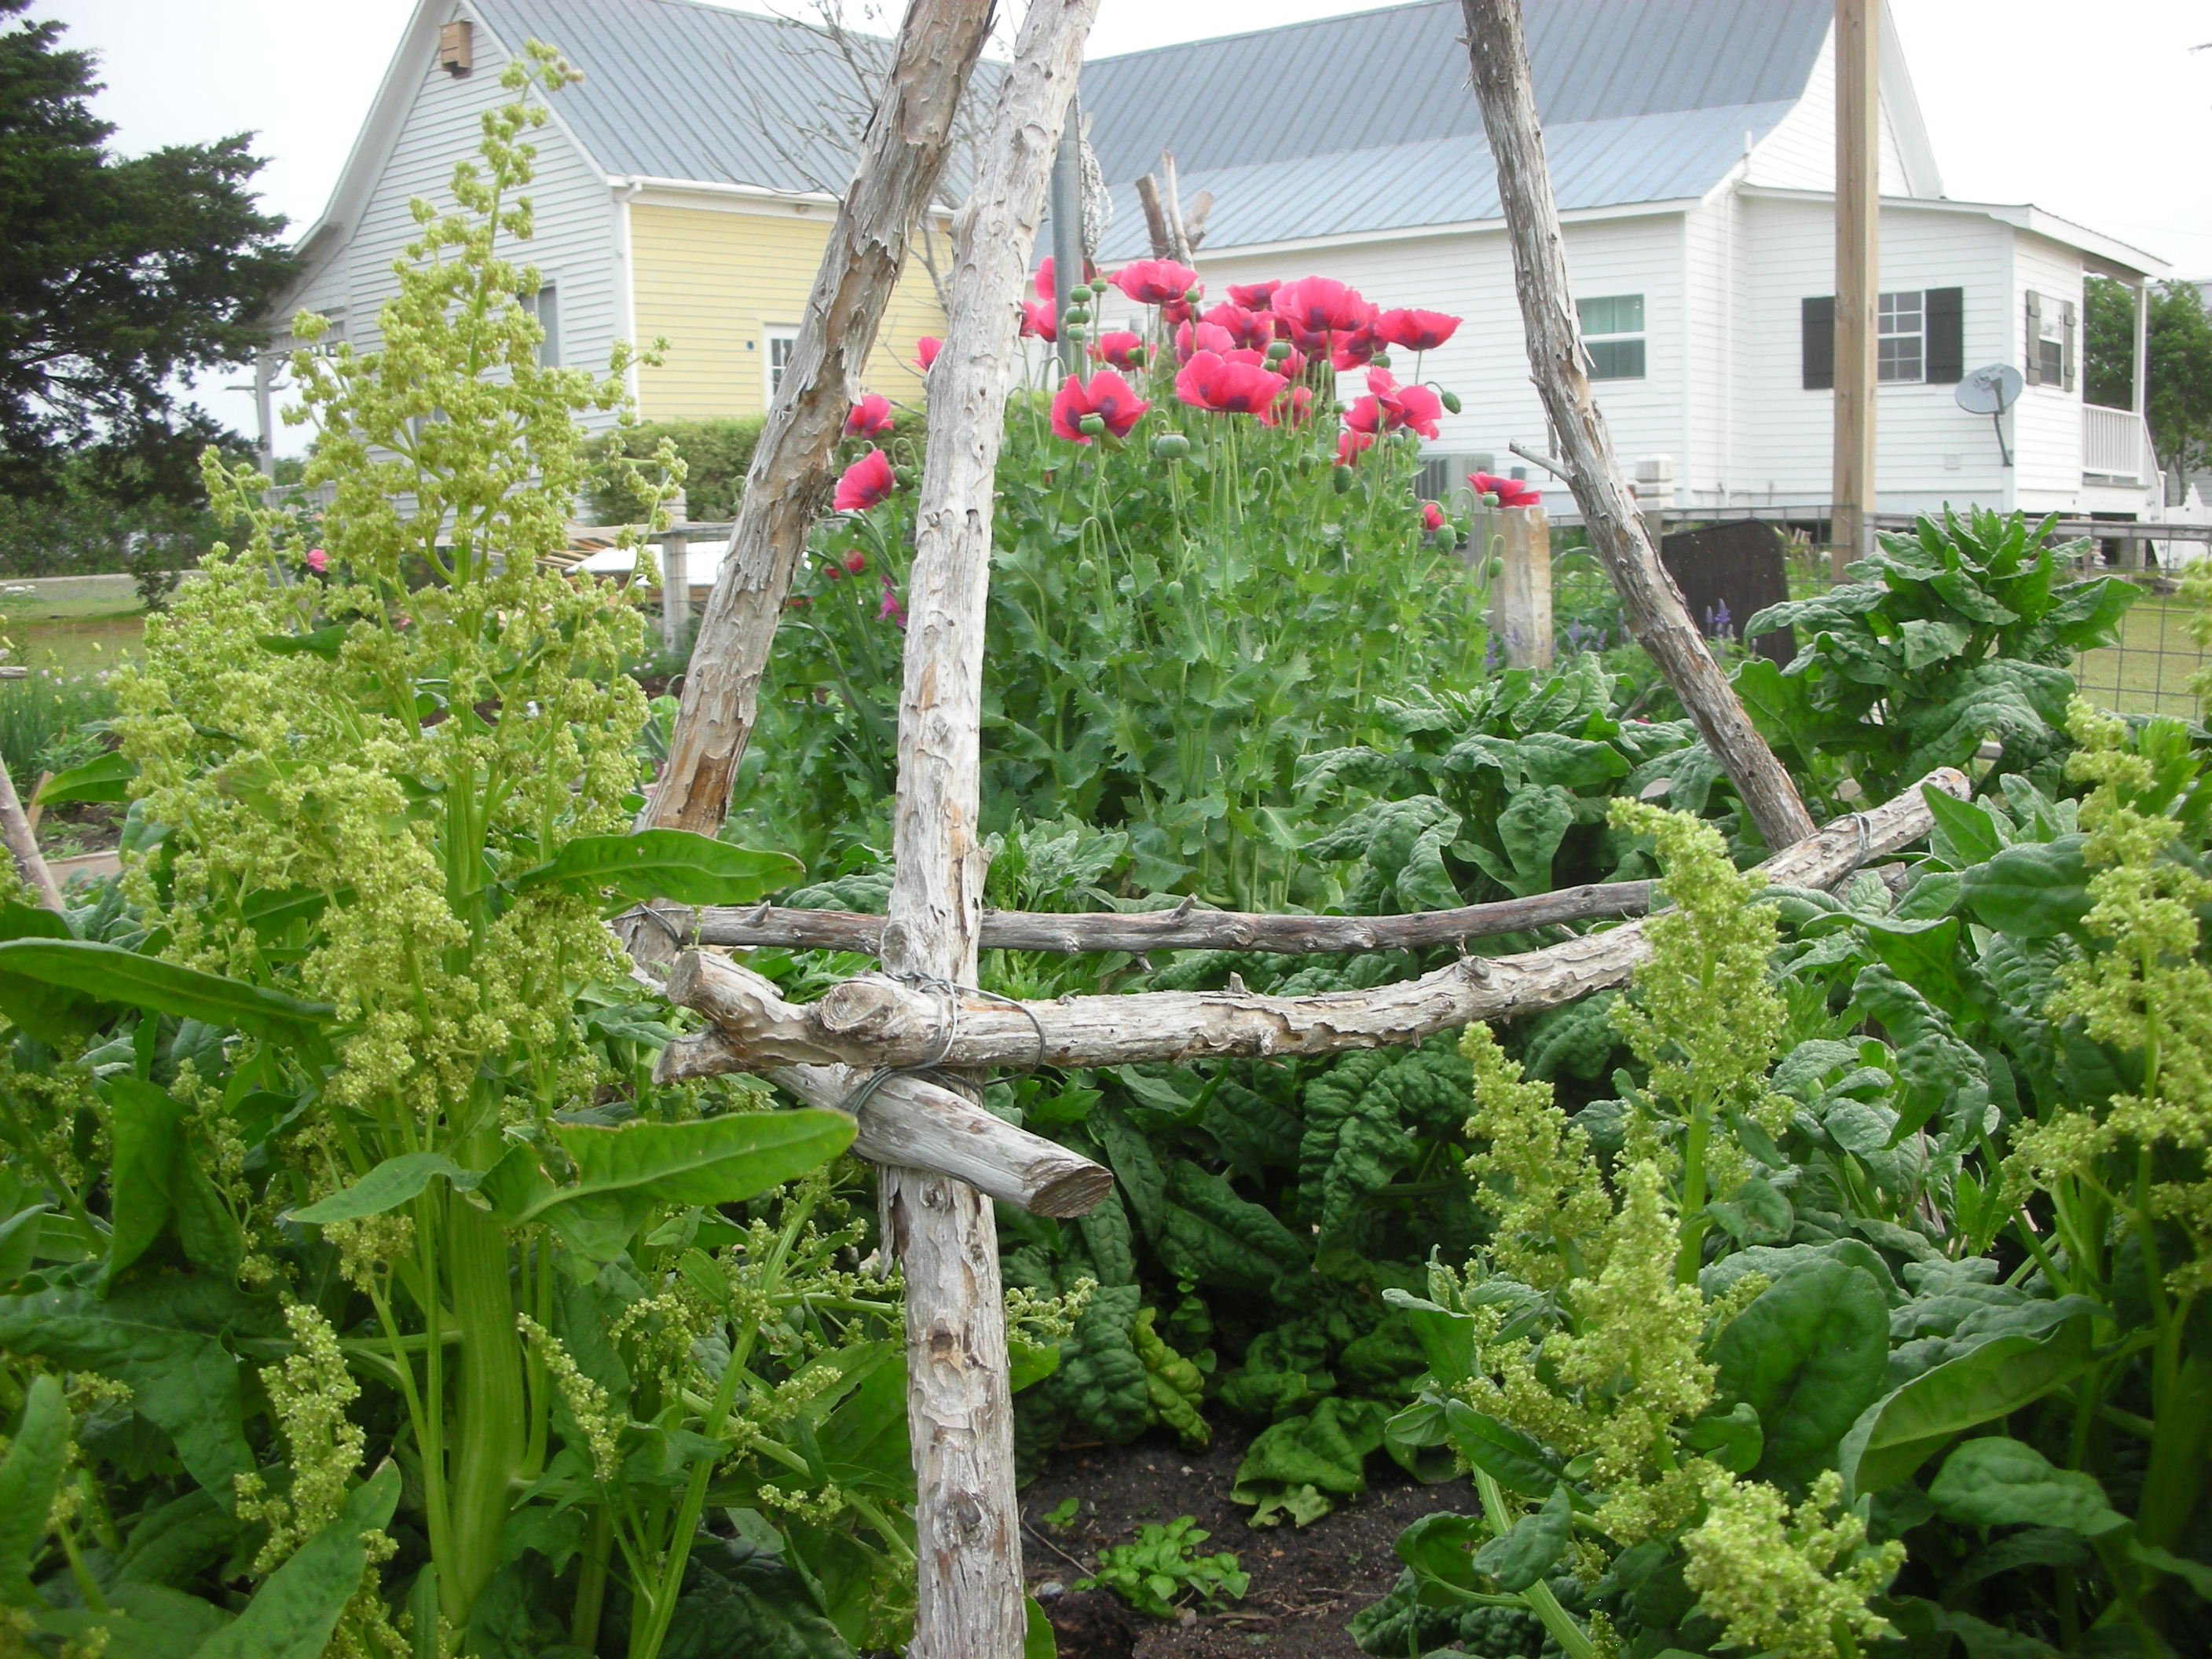
Here is what happens when you let spinach bolt.  I had never let it go this far before but I thought it made an attractive shot. 

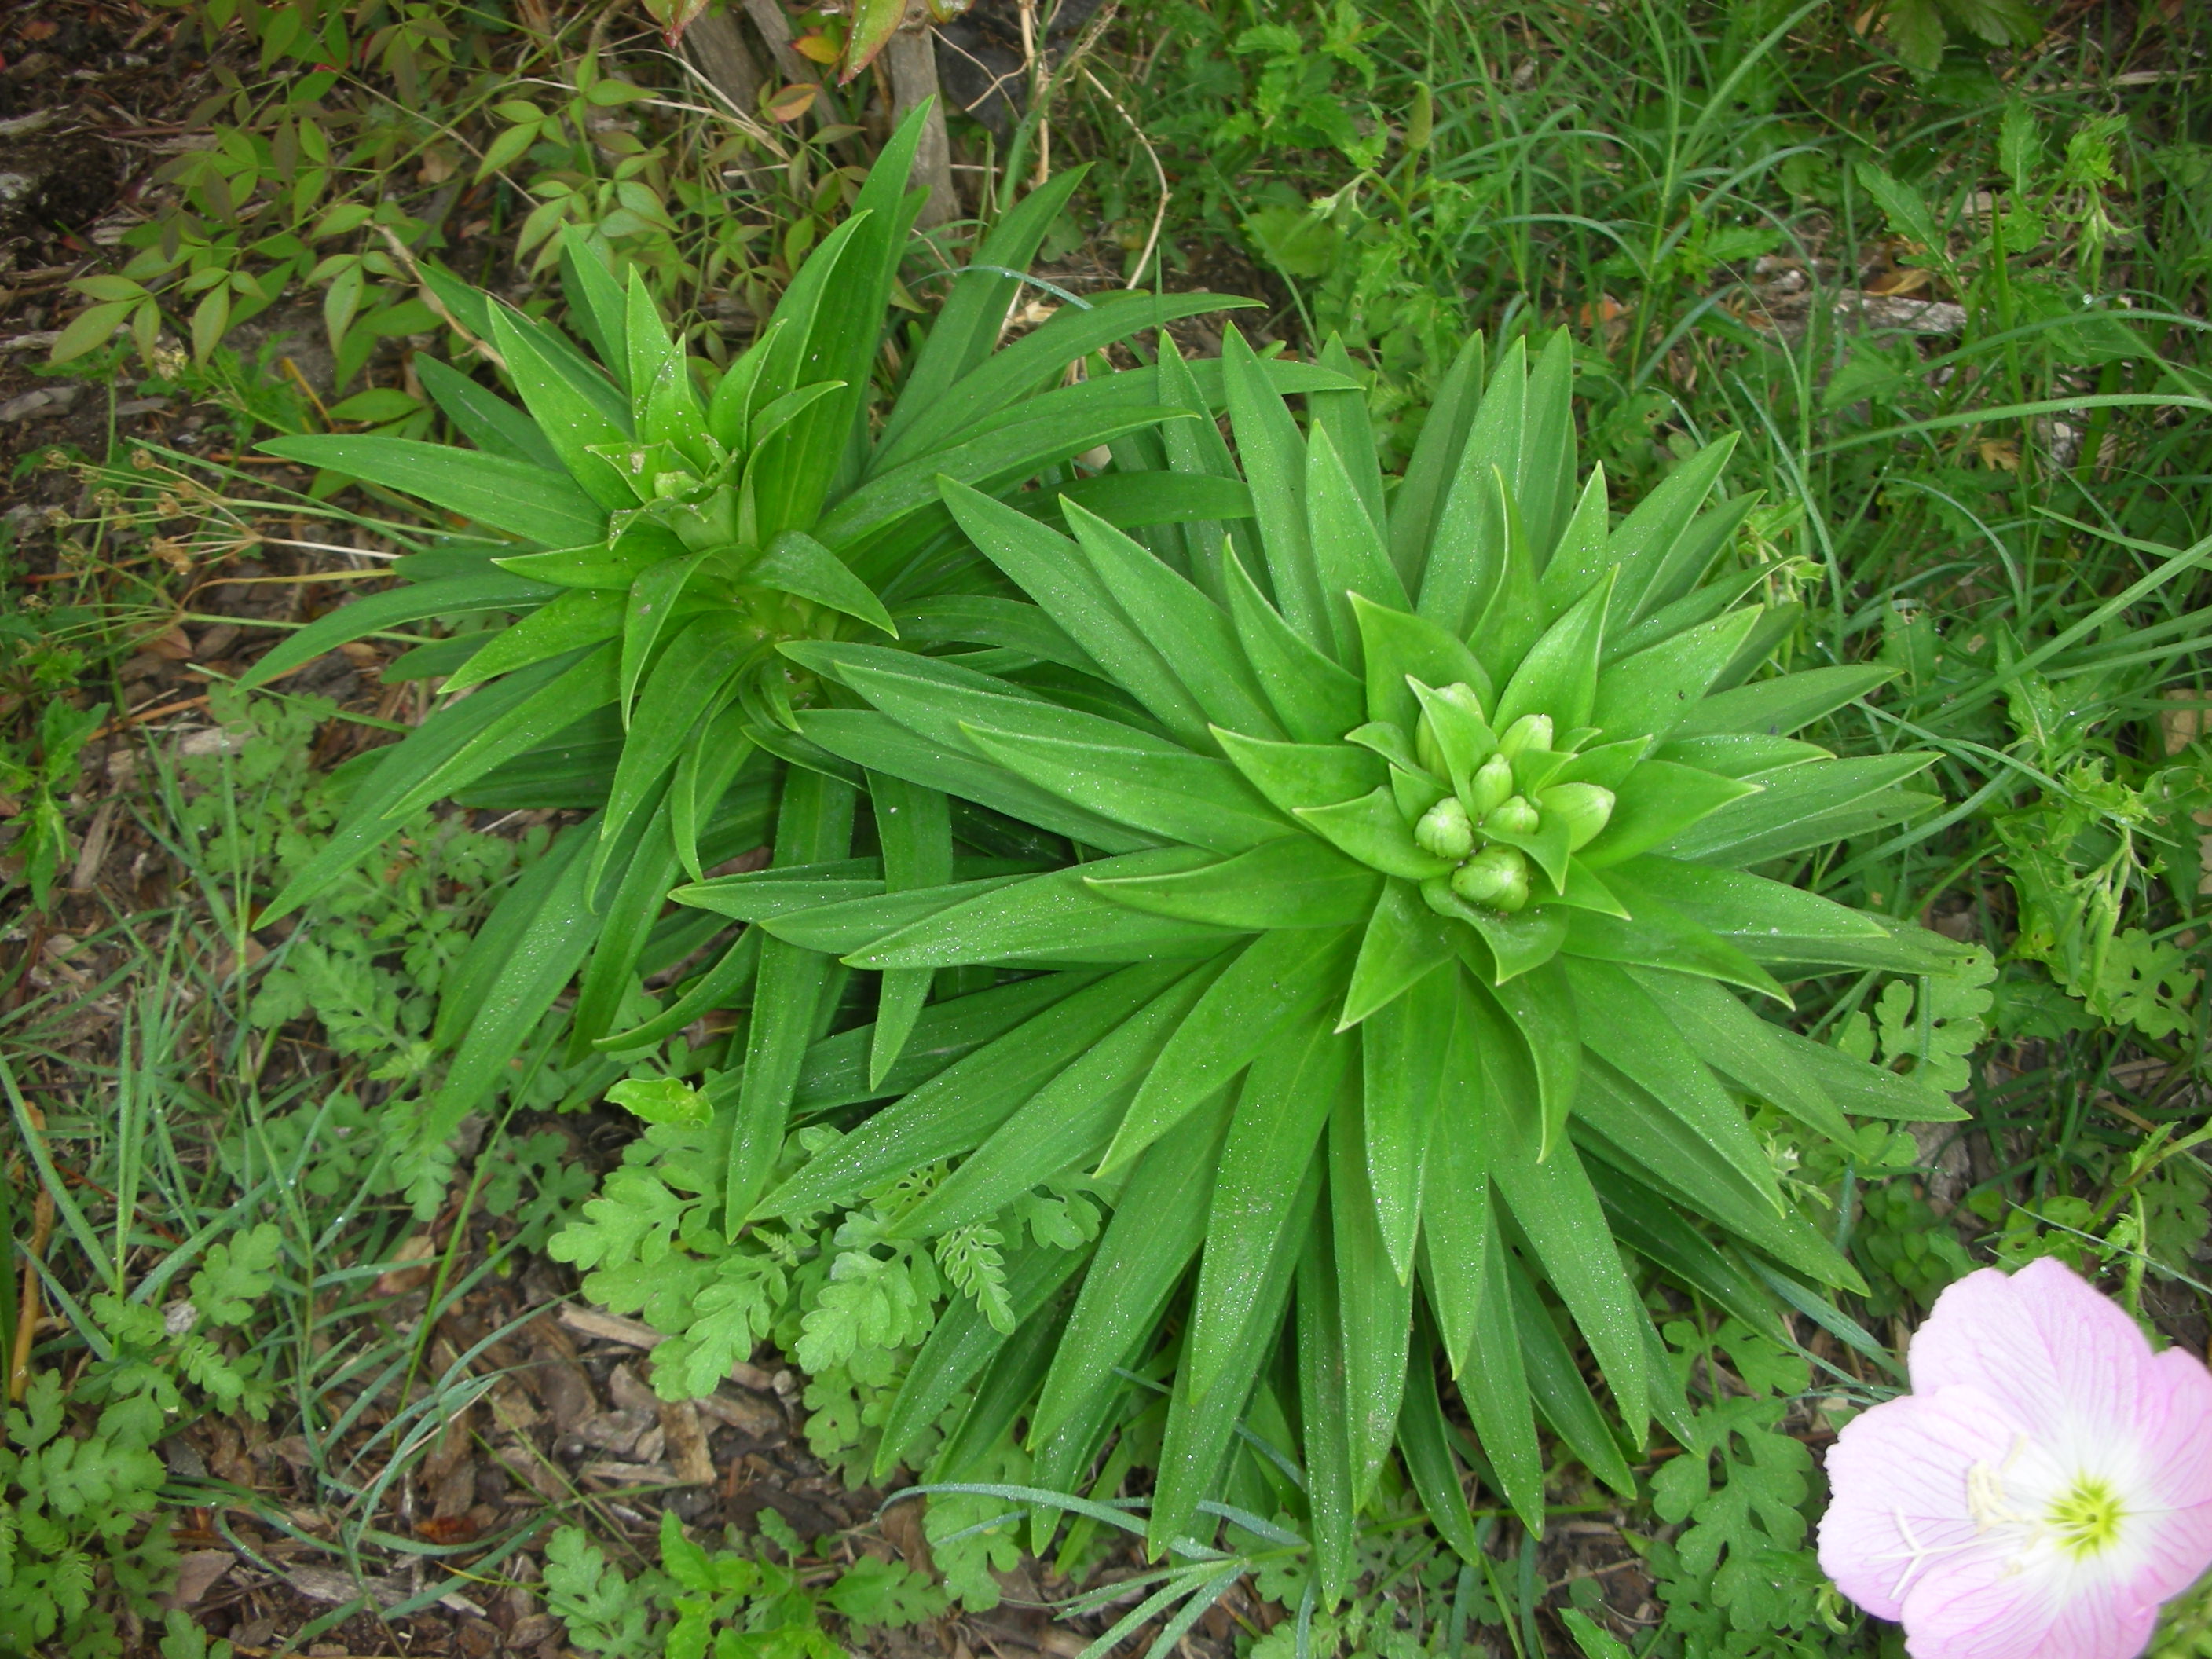
Here are some Easter lilies that may actually bloom by Easter

And finally, a lovely spring bouquet from the potager (if you say that with a french accent it rhymes )

A Garden Shower

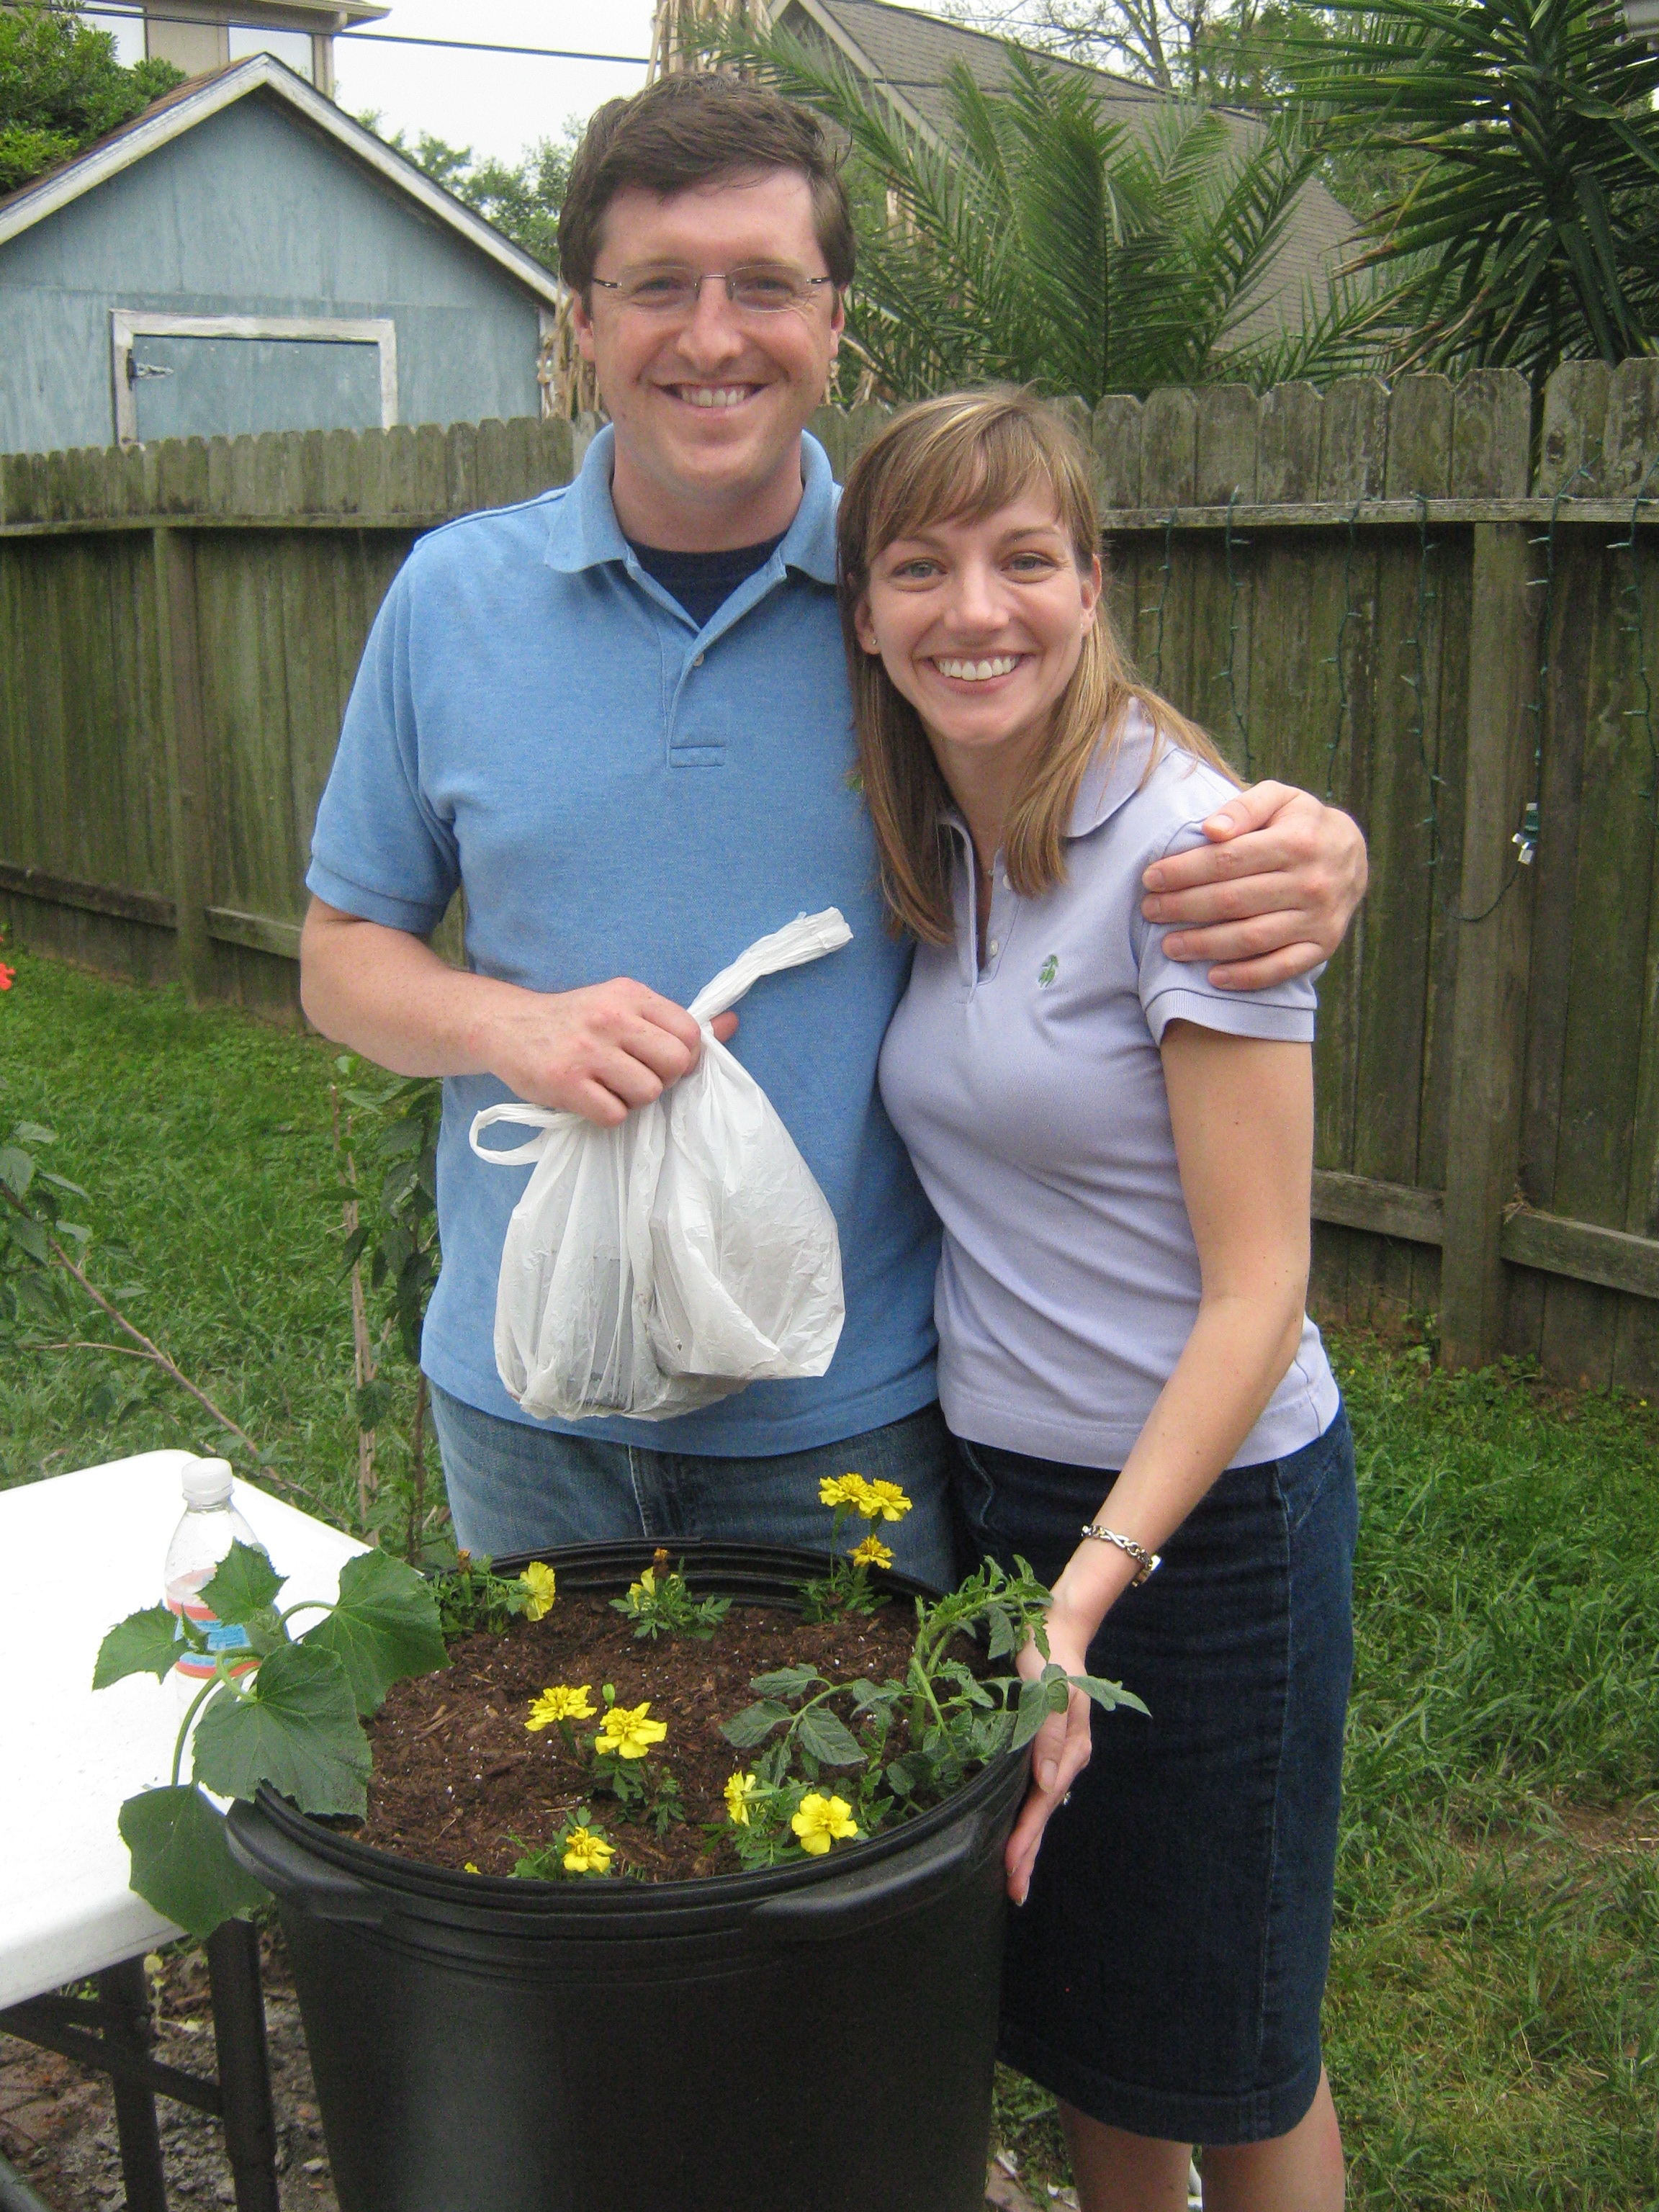
Andrew and Bridget with their new container garden

Bridget O’Brien and Andrew Hoyt are getting married!  Bridget is the Tours Program Manager at the Museum of Fine Arts Houston and her betrothed is an English teacher at the Christo Rey Jesuit College Preparatory School in Houston.  To celebrate their upcoming nuptials, my daughter Heather and her friend Lindsey Smith threw them a “Garden Shower” this past weekend.  Now from what I gathered, a “Garden Shower” is much like any other bridal shower.  Invitations were sent, punch was made, cakes were baked and gifts were presented.  However, where this one differed was in the entertainment.  Now I have to admit, I have never actually been to a bridal shower before.  But, from what I am told, the entertainment usually takes the form of silly party games.  Not this one.  This shower, being garden themed, featured a very engaging, entertaining and educational garden speaker. 

If you haven’t guessed by now, that garden speaker was me.  While I am not really all that famous, I do love talking to others about gardening.   Most of the attendees were young museum professionals that have the desire to garden but are somewhat lacking in the space.  So, we covered several topics related to container gardening.  As one of Andrew and Bridget’s gifts, the group worked together to create a 15 gallon veggie/flower garden that they got to take home.  In that garden, they will be growing and harvesting tomatoes, cucumbers and marigolds. 

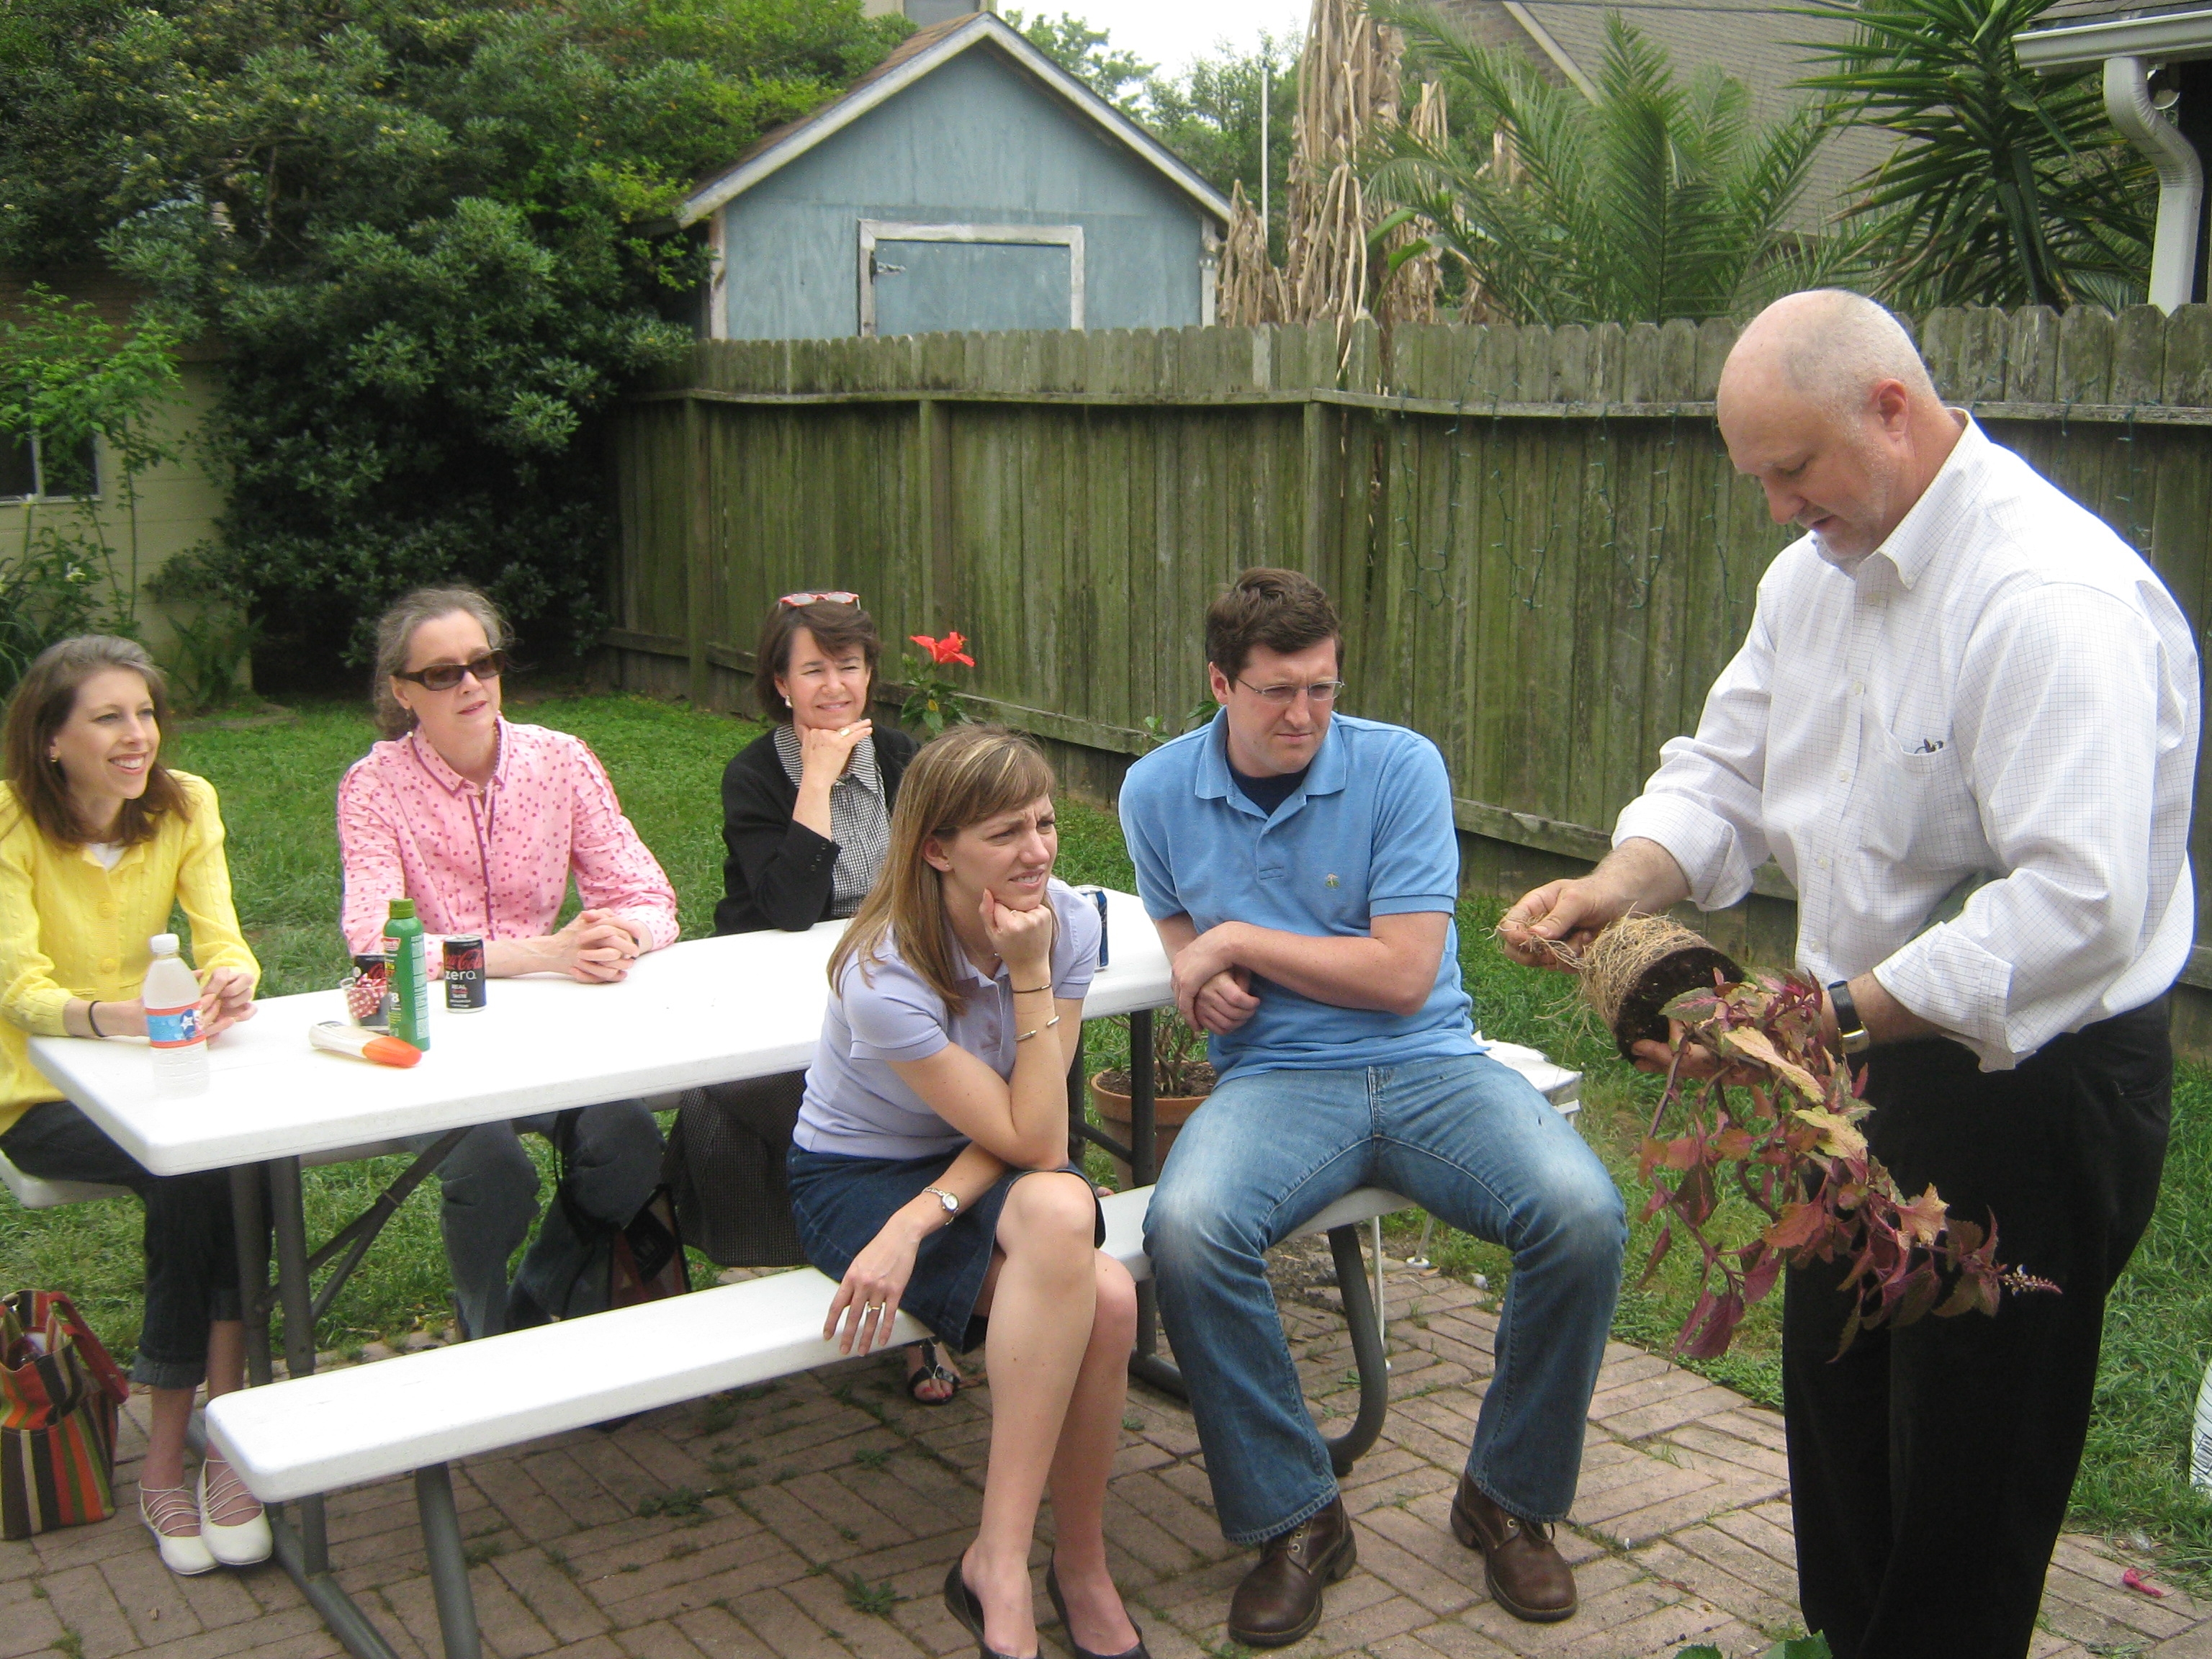
The yupneck explaining the finer points of plant selection

Most of the attendees are recent college graduates that work for non profits (translation-they are still poor), so we also talked quite a bit about plant selection and propagation.  My friends at A&M donated a very large coleus that we proceeded to chop up and turn into about 20 new plants.  Each guest got the opportunity to take cuttings and root them in their own 5” bio-degradable peat pot. 

The betrothed and a large portion of the Education Department of the MFAH. From left to right: Andrew Hoyt, Bridget O'Brien, Lindsey Smith, Sarah Wheeler, Margret Mims and Heather White

All in all, it was a lovely event.  We laughed, we learned and we gardened; a perfect afternoon!  I would like to thank everyone that came and say a special thank you to my daughter for inviting me to participate in this celebration.  Andrew and Bridget, I wish you all the best.  May your life and your garden be bountiful!

Garden Experiments

I love to experiment in my garden.  Every year, I grow something that I have never grown before or I try to grow an old stand-by in a new way.  This year, I am doing both.

My first experiment this year is potato boxes.  I am currently growing white potatoes (Kennebec) and new potatoes (La Soda) in wooden boxes that I “add to” as the potato plants grow.  According to the website that I found (http://www.re-nest.com/re-nest/gardening/how-to-grow-100-pounds-of-potatoes-in-4-square-feet-081760), these 2’ X 2’ boxes can yield about 100 pounds of potatoes each.  While I am a little skeptical of these numbers, I will let you know how accurate that estimate is in a few weeks. 

One of my two potato boxes

The process for this is pretty simple (see the drawing below).  Basically, make four corner posts 33” long ( I used 4X4’s).  Cut two 1X6’s 24” long and two more 25 ½ “ long.  Screw them to the corner posts.  Place your seed potatoes (I used 12 whole potatoes) in the bottom of the box and cover with soil (I used mushroom compost).  As the plants grow, keep covering with soil or compost so that no more than 6” to 12” of plant is showing.  As the planting area gets full of soil, add another row of 1X6’s and continue the process until the box has sides that are 33”.  Once the box is full and plants are coming out of the top, you can remove the bottom layer of 1X6 and harvest as you need. 

 So far, my experiment seems to be working just as it has was described.  The Kennebecs are doing great.  I already have three layers of 1X6 in place and I will probably have to add another this weekend.  The new potatoes had a slow start but they are beginning to take off now.  I can’t wait to finally weigh my harvest and report my results back to you.

 I am also trying an experiment with my tomatoes.  Normally, I plant my tomatoes in my potager.  However, since I have decided to grow mostly herbs and flowers in the potager, I moved my tomatoes to the row garden.  While visiting with my friend Bill Adams, I learned that he grows his tomatoes in pure mushroom compost.  Since Bill is a true Master of Horticulture and the undisputed Tomato King, I decided to follow his lead and do the same thing.   I took my Mantis tiller and dug a furrow about 9” deep.  I then took my tomatoes out of their pots and placed them in the bottom of the furrow.  Next, I back filled with the compost and watered them in.  I am supporting them with a cattle panel and I gave the whole area a thick layer of straw mulch.  So far, everything looks like it is doing great.  I planted the same varieties this year as last so I will have some ability to judge which method did the best.  (Check out Bill’s book “The Texas Tomato Lover’s Handbook –http://www.amazon.com/Handbook-AgriLife-Research-Extension-Service/dp/1603442391). 

In addition to these two “method” experiments, I am  growing three new vegetable varieties this year.  The first are daikon radishes that were given to me by blogging friend “The Gracelss Gaijin”.  Daikon is a staple of Asian cuisine and I can’t wait to try them.  I am also growing “Chinese cucumbers” that were given to me by my friend Emy Chen.  This variety of cucumber is supposed to have a very mild skin that makes it great for slicing.  Can’t wait.  My final “new veggie” for this year is the “Tigger Melon”. 


I got my seeds from Baker Creek Heirloom Seeds (http://rareseeds.com/shop/).  Tigger is a small melon with very sweet, white flesh.  These one pound melons have a great aroma and taste and are perfect for a single serving.  However, the most exciting thing about this melon is it’s orange and yellow stripped skin.  This heirloom has such a cute name and attractive wrapper that my wife had her second graders plant it in their school garden.  Check back in the summer to find out how these experiments went.

Bluebonnet season is here!!!


Bluebonnets and Indian Paintbrushes in the Yupneck's yard. Photo by Ramez Antoun

“The bluebonnet is to Texas what the shamrock is to Ireland, the cherry blossom to Japan, the lily to France, the rose to England and the tulip to Holland.”

That quote from Jack Maguire comes closer to describing the way we Texans feel about our state flower than anything else I have ever read.  The bluebonnet is as much a symbol of Texas as is the Alamo or the Texas flag.   The bluebonnet was selected as our state flower in large part because it is uniquely Texan.  The two most common varieties (Lupinis texensis and Lupinis subcarnosus) grow natively here and nowhere else.  This plant is so well loved that each year, millions of Texans load up their cars with kids and camera equipment and head out into the country.  I truly believe that no one in Texas has ever avoided being photographed in a field of bluebonnets.  

A yupneck family picture in our bluebonnets

I am fortunate enough to live in one of the best bluebonnet counties in Texas.  I live on two long, skinny, Washington county acres.  Because of the shape of my property I have about 600’ of road frontage.  My wife has worked very hard to ensure that every inch of that 600’ is covered in bluebonnets.  I am pleased to say, she has succeeded!  In fact, she has been so successful that we have actually come home and found complete strangers in our yard taking pictures.

The Farmall Cub that I bought to mow the dead bluebonnet foliage

While bluebonnets are definitely the most fabulous native flower ever created, they do have their problems.  Unless you have ever grown bluebonnets you may not be aware of what happens after the blooms fade.  Bluebonnet foliage can grow to about 2’ in height.  After they set seed the foliage and the seed pods begin to dry out and die.  This creates a very unattractive, “weedy” look in the yard.  However, no matter how bad it looks, you cannot mow them until the seed pods “shatter” and release their seeds.  Mow too soon and you will not have bluebonnets next year.  This “weedy” appearance in the yard requires very patient and very understanding neighbors.  Luckily for us, the people of Washington County are serious about their bluebonnets and no one would ever complain about our “seeding” bluebonnets (at least not to our faces).  One the bright side, the dry bluebonnet clumps are so thick and hard they almost ruined our John Deere riding mower.  So, in order to save the John Deere from the bluebonnets, my wife let me buy a 1946 Farmall cub with a shredder to handle this once a year job.

A slightly blurry but very cute picture of my wife in our bluebonnets

If you want some bluebonnets of your own, they are very easy to grow.  Just throw some seeds out in your yard in October or November.  Timing is everything.  They must go out at this time if you want them in the spring.  Bluebonnets have a relatively low germination rate.  So, to increase your success rate, mow your grass very close to the ground before sowing.  Once you have spread the seed, walk around on them and try and ensure that they have good contact with the soil.  Water them in.  After watering, you can forget about them until spring.  Only apply supplemental water if you do not receive average fall and winter rainfall.  Bluebonnets are very drought tolerant (they are a Texas native after all).  Over watering will kill them quicker than anything.

This weekend, my wife and I found the first bluebonnet flower in our yard.  Because of this, I am pleased to announce that Bluebonnet season is here again.  It is time to enjoy some of the best weather and scenery that Texas has to offer.   So, load up your kids, drive out in the country and make your kids endure the same spring rituals that your parents made you endure.  They will thank you later. 

P.S.  Don’t  go onto other people’s property without asking.  If you do, you may get to experience another Texas tradition – shooting trespassers!  Happy Spring Y’all!!!!