Friends and Fresh Cut Flowers

This past Friday, two very pleasant things occurred at the Yupneck’s house;  an unexpected visit from my youngest daughter and the first formal dinner party hosted in our newly remodeled farmhouse (celebrating the “almost end” of a five year remodeling project).  While visits from the kids are always welcomed, it is those rare, unexpected drop ins that I love the most.  Whitney is a senior at North Texas University.  She is also a very talented floral designer.  While there, she found out that we were hosting the renowned Master of Horticulture, Dr. William C. Welch (Bill) and his lovely wife Lucille.  She asked if she could make us some arrangements from the garden for the dinner.  Of course I said a most enthusiastic YES!!!!!

Whitney grabbed some shears and left the house for about 20 minutes.  When she returned, she had a large bundle of flowers and foliage from just about every plant on my property.  It was a joy to watch her sort, strip and prepare these cuttings for arrangement.  What happened over the next fifteen minutes was truly amazing.  In less time than it takes me to brush my teeth, she created three incredibly lovely arrangements that I felt I had to share.

Arrangement for the yupneck's table. Made with things from my gardens by my lovely and talented daughter.

The first was a large arrangement that she made for the center of the table.  If you look closely, you will see hollyhocks, love-lies-bleeding, salvia, dried yarrow, coral honeysuckle and PURPLE HULL PEAS!  Who puts peas in a floral arrangement?  A young Master of Horticulture, that’s who.  This arrangement was stunning!  I wish my camera skills did it justice.

Close up of the table arrangement. Notice the use of purple hull peas and coral honeysuckle.

Next, she made a small arrangement for the bath.  This arrangement was built in a small water pitcher.  She incorporated  tatume’ squash, zinnias, love-lies-bleeding and southern wax myrtle foliage. 

Lovely arrangement using zinnias, amaranth and a tatume' squash.

Finally, she turned a vintage Mary planter into another stunning arrangement.  Here she used zinnias, salvia, wax myrtle foliage and iris leaves for effect.  Beautiful!

A vintage Mary planter featuring zinnias and salvia.

Whitney’s arrangements were the cherry on the top of the truly fabulous meal that my lovely wife prepared for the Welch’s.  Mrs. Yupneck created a carmalized onion and goat cheese appetizer, steak with bearnaise suace, stuffed summer squash and a tomato and balsalmic salad.  This was washed down with a lovely red brought by the guests and finished with a decadant “mudslide” dessert.  The evening was perfect.  My wife and daughter’s combined skills came together to create a dinner that was memorable for all.

The yupneck with his very talented floral designer daughter and his equally lovely and talented culinary wife.

P.S.  My daughter is a very talented floral designer.  She has started her own business in the DFW/Denton area.  She will be more than happy to give you a bid on events of any size.  To see more of her work you can check her out at Arbor Floral.

P.S.S.  Since the dinner was to celebrate the almost completion of our FIVE YEAR LONG remodeling project here is a picture of the entryway.

The entryway of "The Nest"

Castor Bean-Not a Bean At All

Who would think that these plain little flowers would produce the deadliest plant toxin on earth?

Castor Bean plants (Ricinus communis) are the source of two of the nastiest substances on earth.  The first, is castor oil.  YUCK!  This nasty substance has been used to treat “digestive issues” for a long time.  The taste of this stuff is so bad that it will make full grown men cry.  I only had to take it once, but it is a memory that still haunts me.  The other really bad thing that comes from this plant is ricin.  Ricin is a by product of the process used to make castor oil.  It is the most toxic substance on earth derived from a plant.  This stuff is so toxic that a TINY amount of refined ricin was used to kill a Bulgarian defector in 1978.  Georgi Markov was “shot” with a modified umbrella in the back of his leg with a tiny pellet the size of a pinhead.  This tiny pellet had two holes drilled through it to form a tiny “X’ through the center.  That space was filled with ricin.  Within three days, that tiny, tiny amount of ricin had killed Georgi.  Even though the ricin was not detected until after the autopsy, it would not have mattered.  There is no antidote for ricin poisoning.  Here is another scarey fact.  Quantities of refined ricin were found in caves in Afghanistan right after the invasion. 

If you decide to grow Castor Beans, you really need to be aware that every part of the plant is toxic.  This includes the stems, leaves and the seeds.  One bean (really a seed) is enough to kill a child.  Two or more will kill most adults.  If you have a dog that likes to chew plants, then don’t grow them where the dog can get to them.  I would also not grow them if there are small children in the vicinity.

These are the "spikey balls" that contain the seed. These dried pods are designed to stick to the fur of passing animals to add in dispersion.

I grow and love this dangerous plant at my house.  However, I have no pets or kids.  I love them for several reasons.  First, they are as lovely as they are dangerous.  Most varieites will grow over 6′ in a single season.  The large, eight lobed leaves provide a somewhat tropical effect.  This look is often difficult to obtain in locations that have high light and low water.  Castor Bean loves both of these conditions.  They also come in a wide range of colors.  Some varieties are a pale green, while others are very deep purple.  In fact, one of the most stunning plant combinations I have ever seen was a large mass of the purple variety growing behind a huge stand of thornless prickly pear cactus at Dr. Bill Welch’s weekend place in Washington County.

The flower of the Castor Bean is lovely but not that impressive.  The plant sends up spikes that develop small, pink flowers that attract a lot of pollenators.  This year, they seem to be drawing more yellow jackets than bees.  The base of the flower turns into a round, spikey ball.  This ball contains the very deadly seeds.  When the balls dry out, they fall to the ground.  The spikes are designed to attach to the fur of wandering critters.

The foliage of the Castor Bean is lovely. This large scale plant can be used to cover that "empty spot" in your garden.

Castor Beans are also incredibly easy to grow in our climates.  They love full sun, can take the heat and can survive low water once established.  Originally native to the Mediterranean Basin, Africa and India, their use as an ornamental has now allowed them to spread to most tropical areas in the world. 

Castor bean seeds are available from most seed companies.  I get mine from Baker Creek Seeds (rareseeds.com).  Plant the seeds about a half to one inch deep in full sun when the soil has warmed up to about 70 degrees.  They are fairly heavy feeders and like a rich soil thoroughly worked with compost.  They do take a while to germinate so be patient.  Water regularly to get them established.  Once the plant is about a foot tall, they will survive and thrive on 1 inch or less of water per week.  They get tall quickly so you may need to stake them.  Also, the large leaves are susceptible to wind damage.

Caster Beans have been grown in the south for a very long time.  My grandparents grew them and their grandparents probably did as well.  They are hardy, beautiful and a few plants can fill up a relatively large area in a garden with big, bold, vibrant foliage.  If you take care to plant these where curious pets and children can’t get to them, you will enjoy a lush, tropical look in the yard in the driest of times.

Lavender Fest at the Living Kitchen CSA

The view from the porch of the Living Kitchen CSA

I love the CSA movement.  If you are not familiar with the CSA concept here is a brief run down.  CSA stands for Community Supported Agriculture.  Basically, the CSA is an arrangement between a farmer and their customers.  The members of the CSA agree to pay a weekly fee to the farmer in exchange for an equal share of their harvest.  This arrangement ensures that the farmer has the resources needed to keep the farm going and the members get a steady supply of fresh, healthy (generally organic), locally grown vegetables for their families.  I really love this movement because it allows a lot of people to make a living farming on a relatively small scale.  I am a firm believer that what we put in our mouths really matters.  The people that operate CSAs feel this way as well.  That’s why this arrangement works.  Good people who love agriculture and taking care of the earth provide great food to people that care enough about what they feed their families that they are willing to support the producers.  Everyone wins!

Linda Ford hard at work distributing shares to her members at the Tulsa Farmer's Market

Two weeks ago my wife and I visited The Living Kitchen Farm and Dairy (http://livingkitchen.homestead.com/) in Bristow Oklahoma.  This CSA is run by two of the hardest working entrepreneurs I have ever met.  Linda Ford and Lisa Becklund run a thriving business that combines vegetable production, a goat dairy, mutton production, egg production, artisanal cheese making, farmer’s market and fine dining experiences.  WHEW!  I am exhausted just telling you about all they do!  Their CSA model is a little different than most.  In addition to fresh vegetables, they also provide fresh eggs to their members .  They also intend to add mutton to the mix in the near future.  It is their ultimate goal to provide 75% of their member’s food needs.

Our Chef and hostess, Lisa Becklund, with Mrs. Yupneck

Running an operation this diverse does require some help.  The girls employ seasonal labor and are assisted by several volunteers.  This summer, they also have two college interns that are helping them with the just about everything.  Kathleen Airola (B.S. in Horticulture, University of Arkansas) and Josey Hoelscher (B.S. Animal Science, Purdue) are providing assistance in all aspects of the farm’s operations.  Young people like this are the future of Agriculture in our country.  I am excited to see such talented young people excited about a future in the agricultural world.  Both of these girls were extremely knowledgeable and personable and I enjoyed visiting with them immensely. 

The Living Farm interns: Kathleen Airola and Josey Hoelscher. Also pictured is Living Farm volunteer Cara Johnson. Special thanks to Cara as it was her and her mom that rescued the yupneck and his party when we became lost on our way to the farm!

Even though I am incredibly interested in all thing horticultural, what brought us to Living Kitchen was the birthday of a dear friend.  My wife was looking for something “different” to give her friend for this birthday.  The Living Kitchen Lavender Festival is what she came up with.  In addition to their agricultural events, Linda and Lisa sponsor monthly dinners (in the non-freezing months) that feature whatever is in season on the farm.  We were lucky enough to be there for the “Lavendar Festival”.  Every dish and drink had culinary lavender used in its preparation.  Lisa is a trained chef and her skills were apparent.  Everything that entered out mouths was outstanding. 

Flat bread made in the farm's "cob oven". The bread was perfect with the homemade chevre made right on the farm.

Atmosphere always plays a huge part in the fine dining experience.  Lisa and Linda have a log cabin on their property that they use to host their dinners.  This cabin looks like it is straight off the pages of a magazine.  We enjoyed our Lavendar Feast on the screened in porch of this rustic home with 29 other lovers of good food.  We ate, laughed and made new friends.  All in all, it was a perfect day.  My hat is off to these two outstanding young women.  Together they have built a business that feeds both the stomachs and souls of their guests.
Linnaeus Teaching Garden

A statue of Carl Linneaus, the father of botany and the namesake of the Linneaus Teaching Garden

The Linneaus Teaching Garden in Tulsa is an incredibly beautiful place that was a gift to the citizens of Tulsa by the citizens of Tulsa.  The garden is the vision of a true Master of Horticulture named Barry Fugatt.   Mr. Fugatt is the resident horticulturist at the Tulsa Garden Center.  In 2005 he approached the director with a plan to create a garden that would educate the people of Tulsa on the horticultural possibilities for their own yards and gardens. 

A lovely bed as you approach the teaching center

Over the rest of 2005 and 2006, 3000 people contributed the $800,000 needed to get this project off the ground.  With funding secured, the city authorized the use of 1.5 acres in Woodward Park to be used as the home of what was to become the Linneaus Teaching Garden.  Industry sponsors donated the material and labor to build the structures and hardscapes.  This trend of giving has continued and the garden has now thrived for five years without the need to take any public money.

Summer phlox and a bumble bee

The center is staffed by a cadre of trained volunteers.  To work here, you must complete a 12 week course that covers everything from plant taxonomy to landscape design.  Once the course is complete, the volunteers agree to provide at least 40 hours of their time to the garden each calendar year.

In the yupneck’s humble opinion, this type of garden is needed in every city in America.  The gardens are beautiful and they are filled with plants that grow well in Tulsa.  There is no sales pitch.  If you want to beautify your yard or start a vegetable garden, then all you have to do is stroll around this 1.5 acre oasis.  Every planting is clearly marked and selected soley because it does well in the Tulsa area.  If you want to know more about the plants or the methods that have caught your eye, then you can ask any of the very friendly and well trained staff for the additional info.

Lovely water feature

The Linneas is not just about ornamentals.  The vegetable garden was just as lovely as the beds.  I loved the extensive use of containers.  As more and more urban dwellers catch the gardening bug, container gardening is going to become a much more common way of growing veggies.  Containers are easy to get started and easy to maintain.  In fact, a container filled with the appropriate media (soil) will generally have fewer weeds, require no chemical fertilization and use much less water than a traditional, in the ground, row garden.  One complaint I have often heard people make about container gardens is that they cannot grow big vegetables like corn.  The Linneaus has obviously disproved this urban legend.

I have never seen corn grown in a container. Very interesting. I also liked seeing the whiskey barrels reused as very attractive container gardens.

With the feel of a public garden and a mission of education, this garden is an incredibly rare and valuable resource for the gardeners of Tulsa.  The fact that it is completely funded by private donations and staffed by people that are as passionate about horticulture as I am makes me love it even more.  I wish I had something like this in my neck of the woods.

Pansies in the middle of June! I don't think were in Zone 9 any more!

The Gardens of the Philbrook

Mrs. Yupneck entering Villa Philbrook. If you think the front is impressive, wait until you see the backyard!

This past weekend, the yupneck and his lovely wife took a much-needed break.   We headed to Tulsa, Oklahoma for a little R&R.  If you have never been to Tulsa, you should make a goal to go.  I have been several times now and each time I discover something more amazing than I did the time before.  This city is truly a gem.  With a population of approximately 250K, it is the perfect size to provide you with all of the big city amenities while maintaining the feel of a small town.

Tulsa used to be the oil/energy capital of America long before Houston took the title from them.  Because of this, there is still a very large oil and gas presence (and money) in the area.  All of that oil money has blessed Tulsa with an incredible collection of Art Deco buildings and a thriving arts culture.  However, I did not come to see buildings or art.  I came to see plants.  And boy am I glad I did.  Horticulturally, Tulsa is a beautiful city.  It is dotted with lovely parks, beautiful public gardens and absolutely fabulous neighborhoods.  Those folks in Tulsa evidently love their plants as much as the yupneck.  I saw so much beautiful stuff that I cannot include it all in a single post.  So, here is the first installment of the Great Tulsa Escape Weekend.

The "backyard" of Villa Philbrook

Our first stop was the Philbrook Museum of Art.  This Italian Renaissance Mansion was a gift to the city of Tulsa from Waite Phillips.  The mansion is spectacular and the art amazing.  However, it was the 23 landscaped acres surrounding the property that really got me going. 

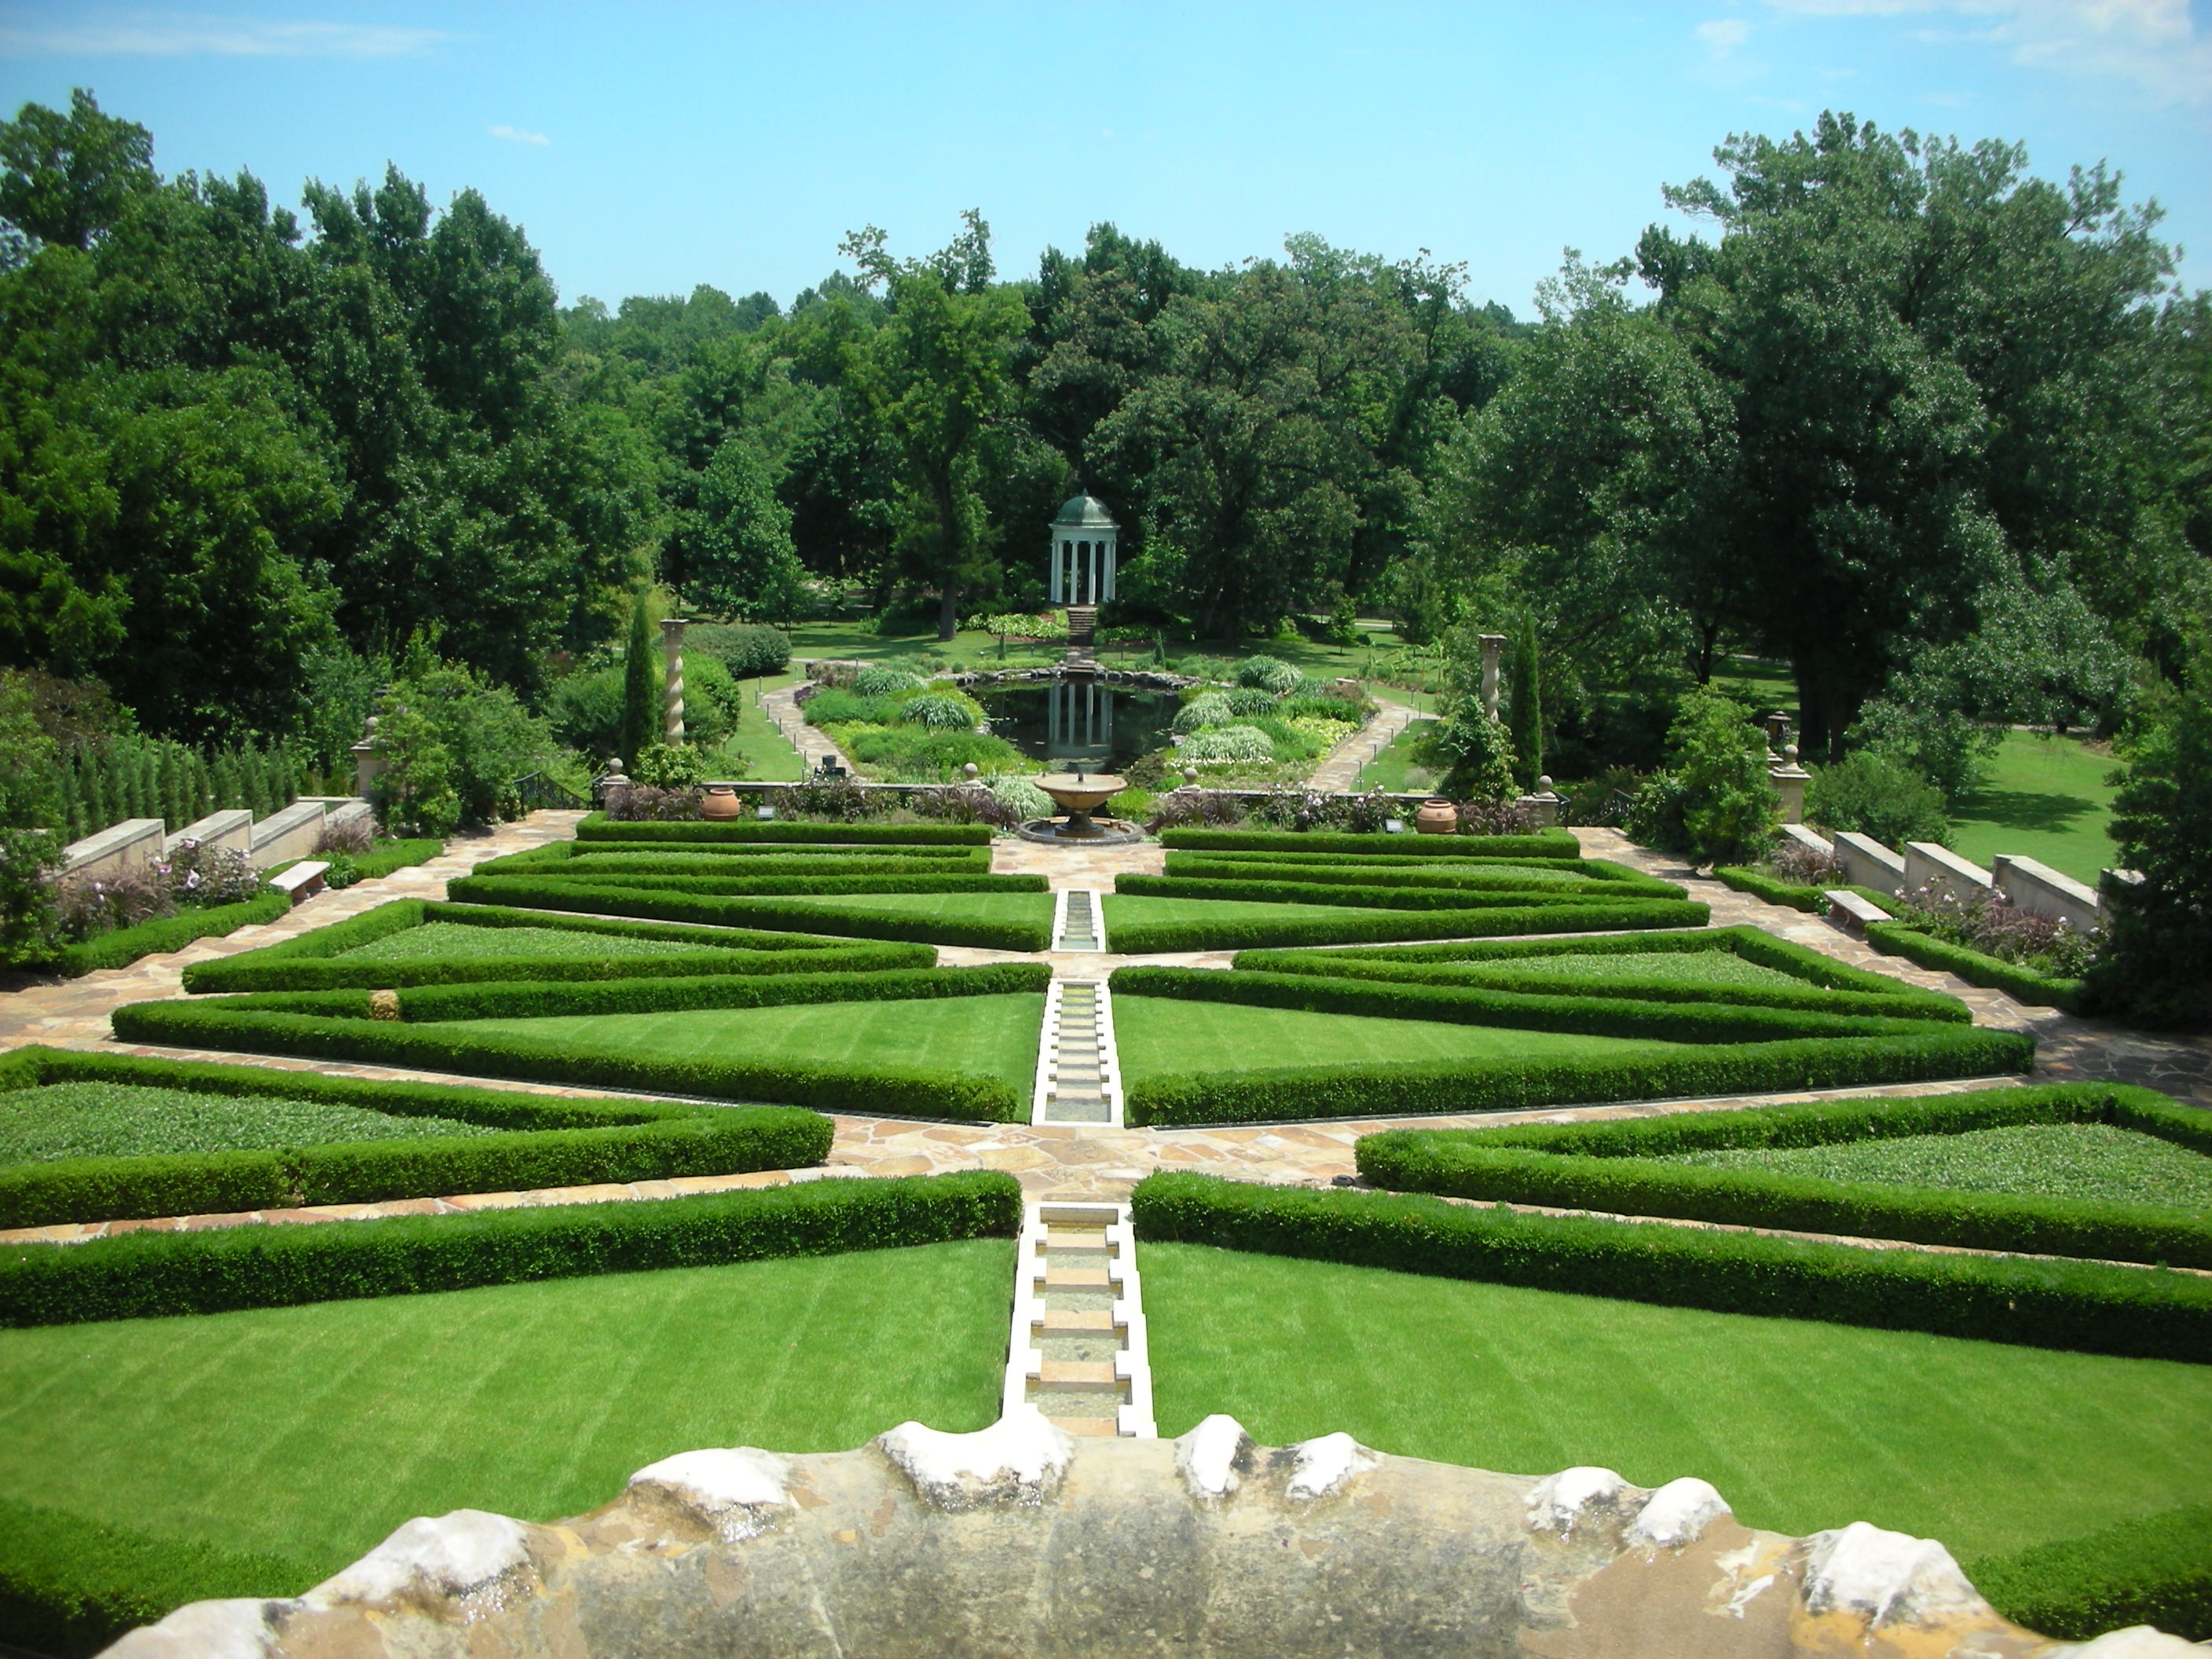
After passing through the central gallery, you quickly come to the center of the museum.  It is from here that you get your first view of “the backyard”.  To say it is impressive is a huge understatement.  The Italianate Garden was designed and installed with the house in the 1920s. 

One thing I have begun to notice as I have toured gardens and landscapes this summer is how simple the plantings are.  Mass and repetition are two of the founding concepts of landscape design; and they have been used exquisitively in this garden.  Above, notice that the majority of the picture is made up of just three plants: boxwood, grass, and jasmine.  These three elements are strikingly combined in the parterre.

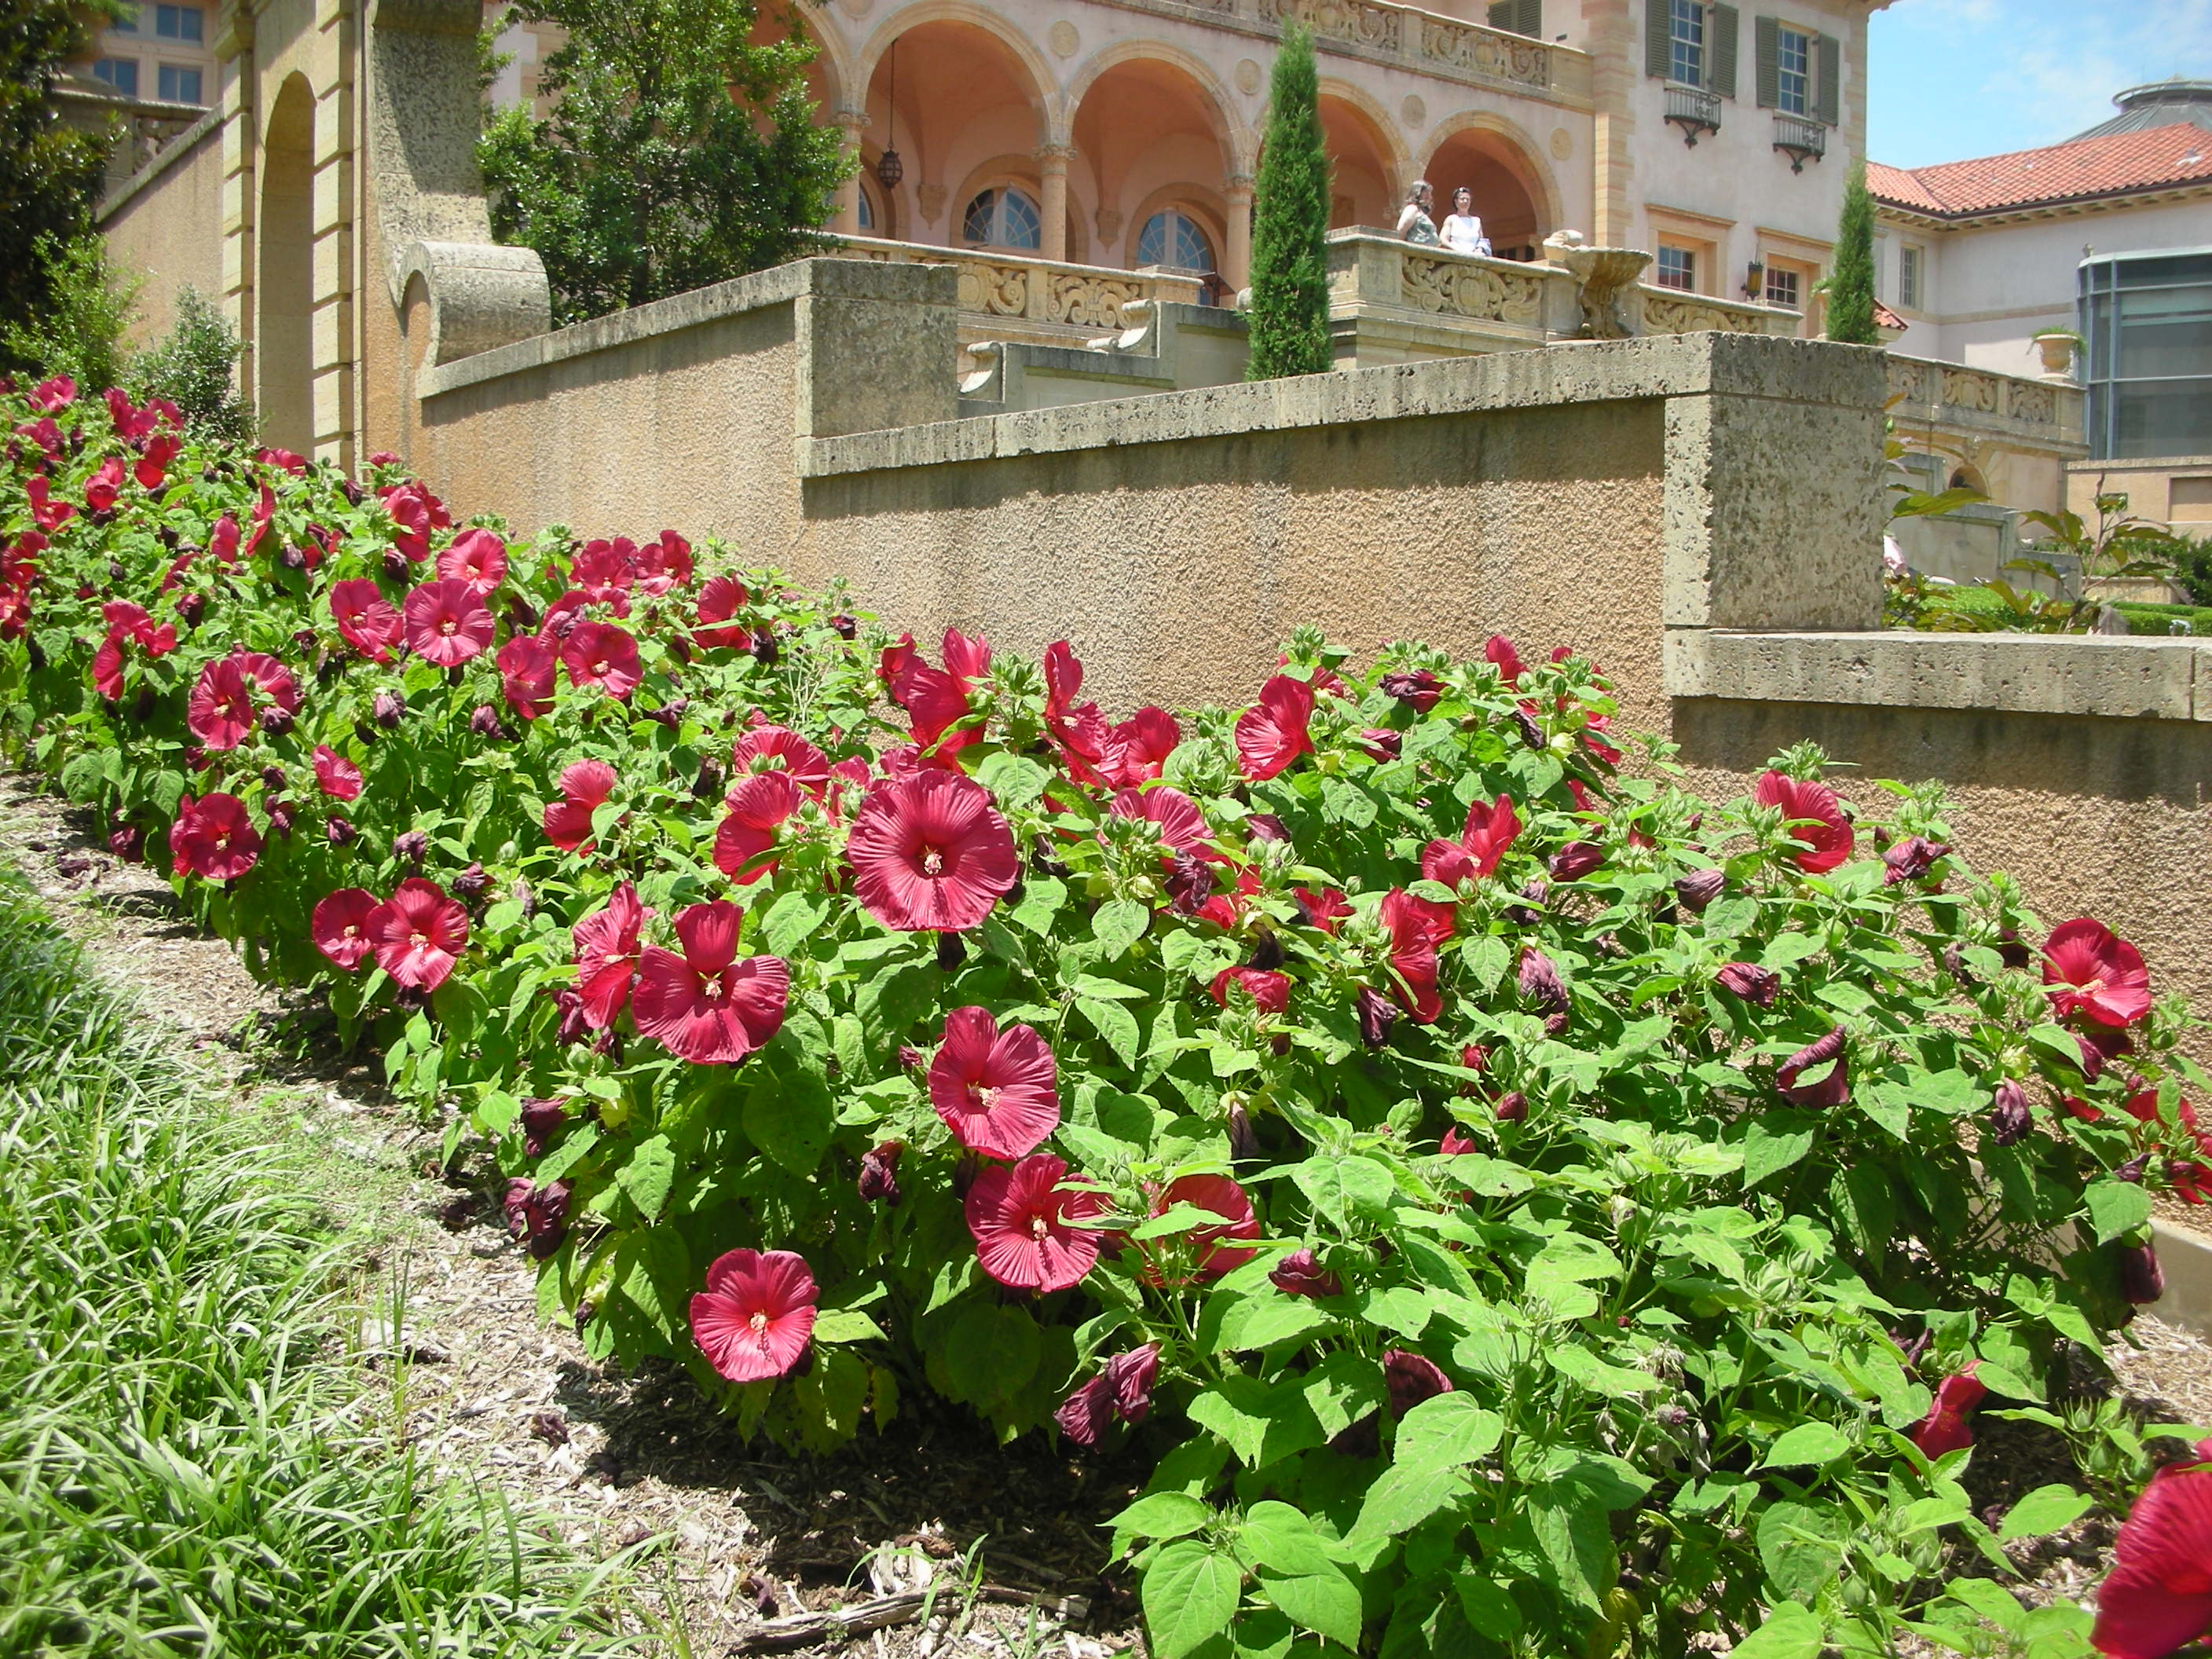
A mass planting of hardy hibiscus makes a lovely hedge at the Philbrook

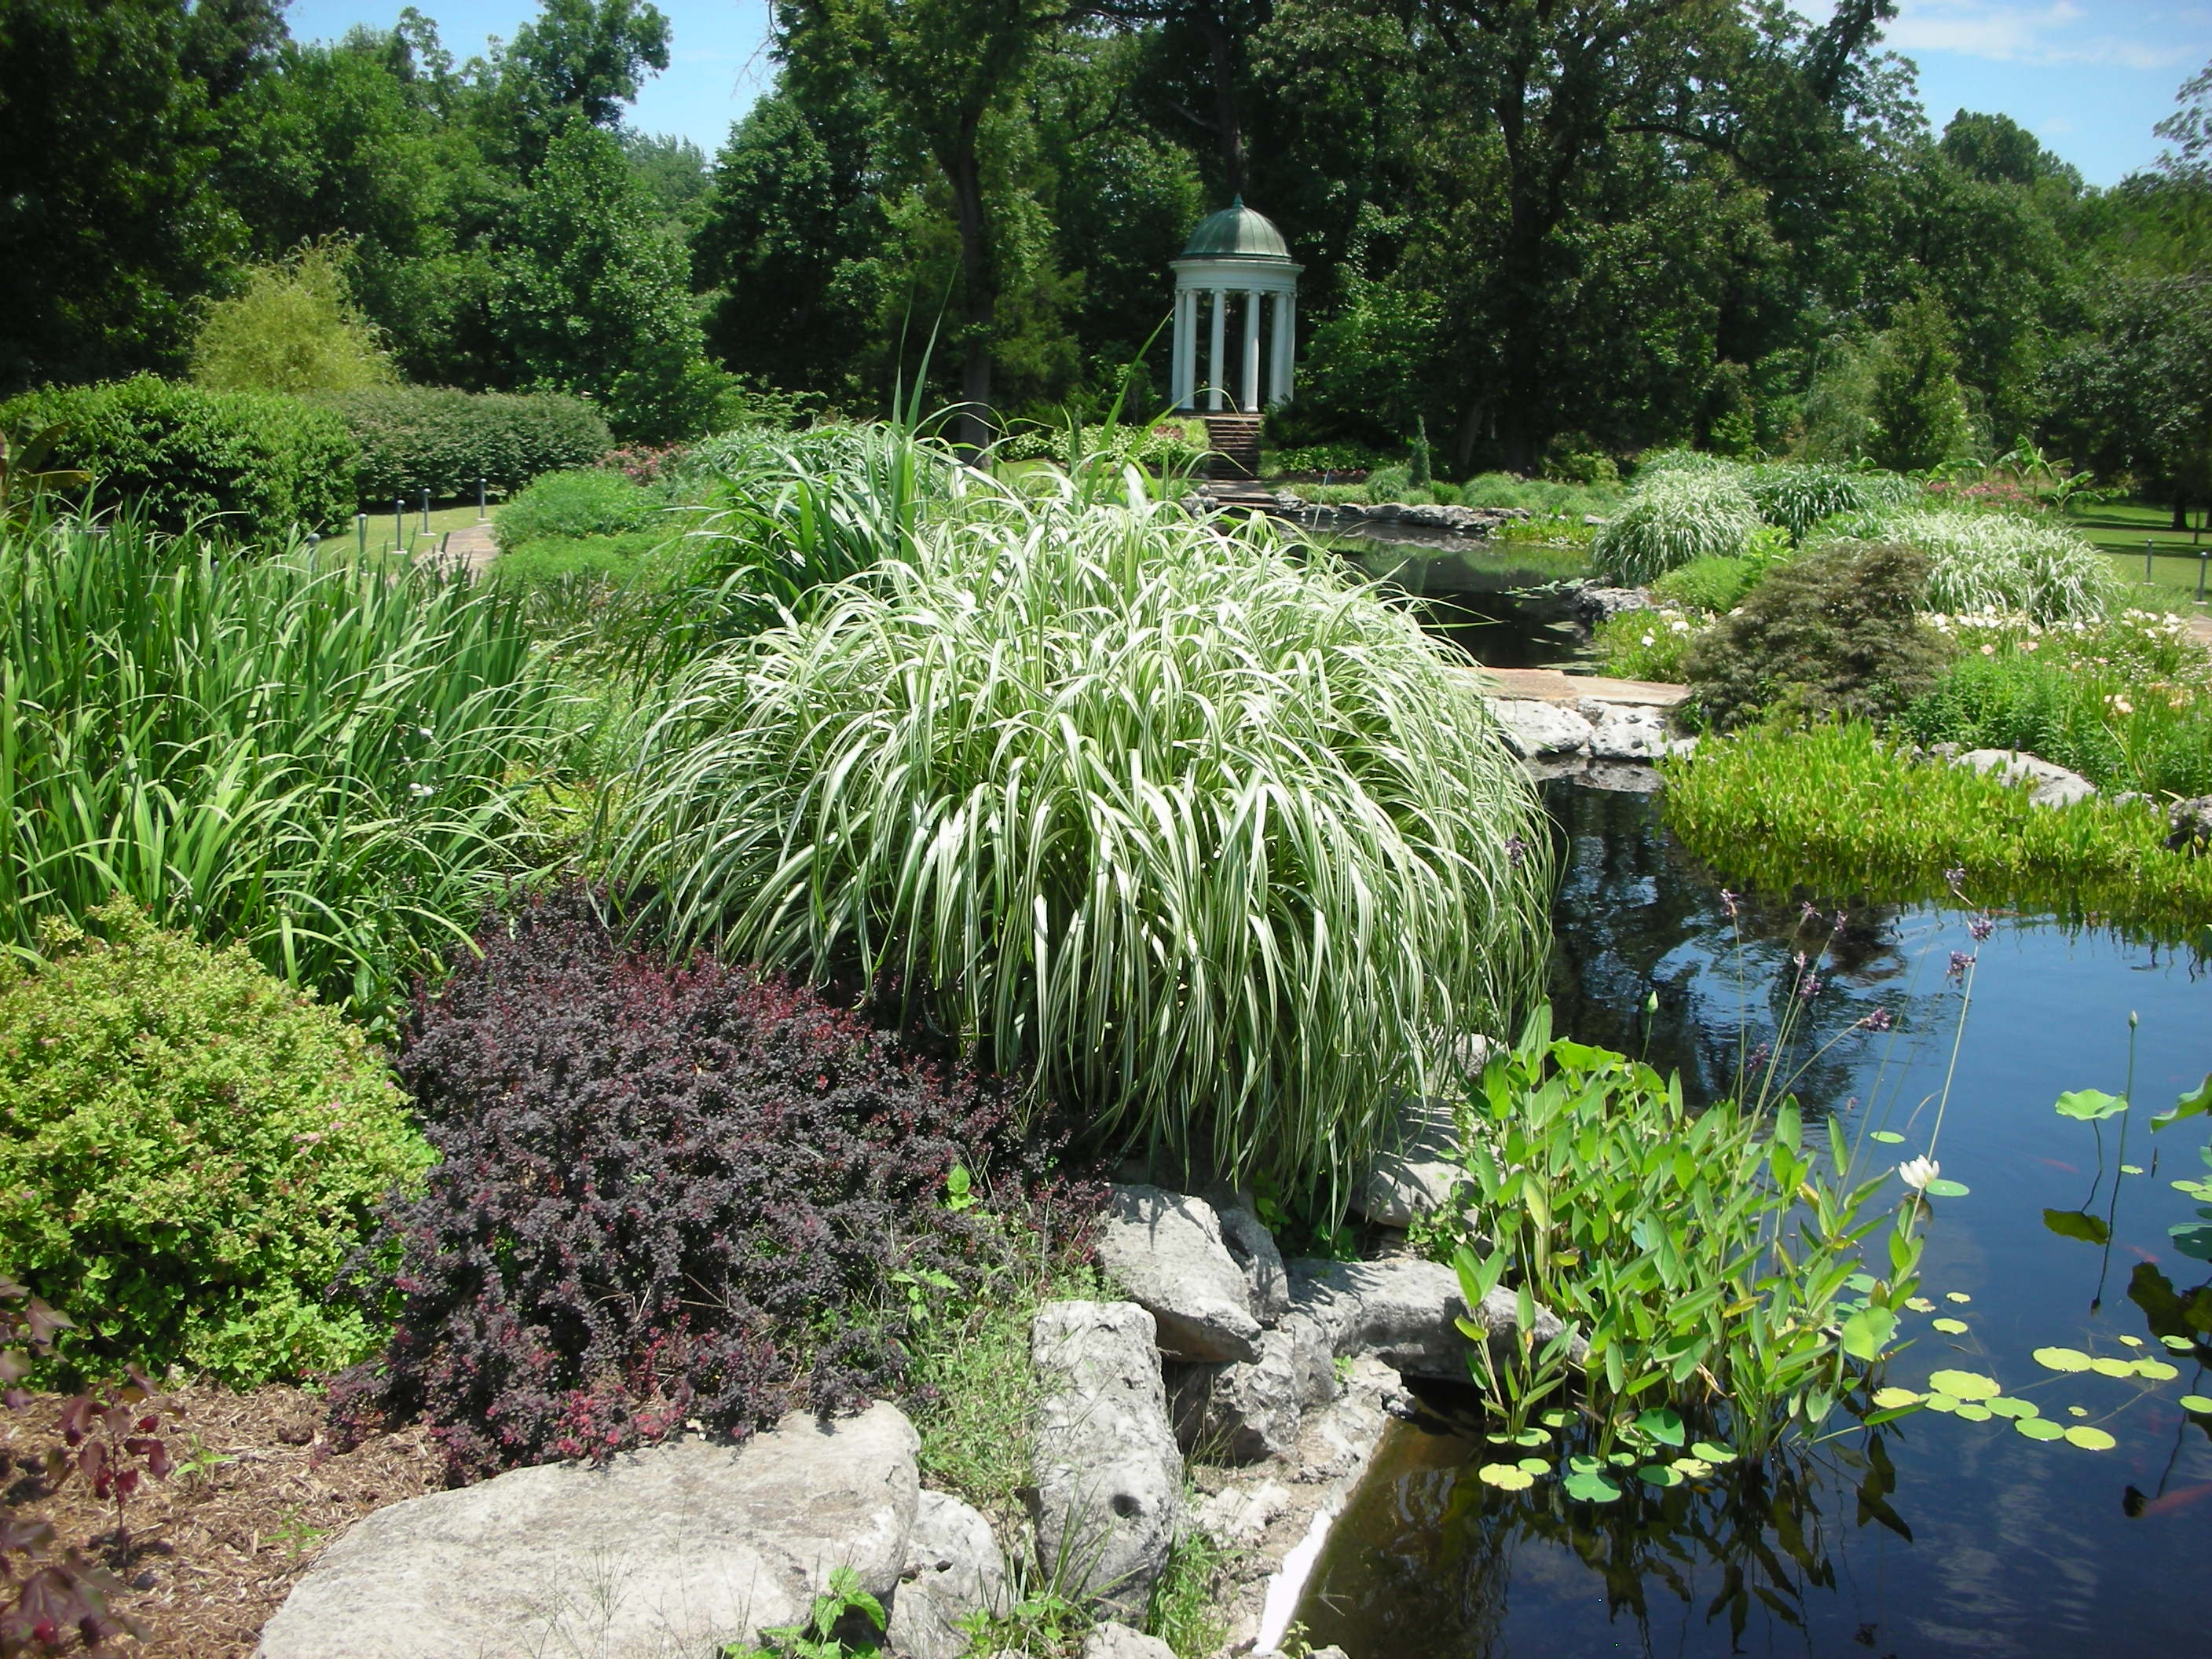
As you walk down the hill, you leave a formal parterre and enter the water garden.  While water is a constant theme of the entire garden, the pond in the lower garden is the focus.  Here plantings were selected to give a more “wild” or natural appearance.

Lovely combination of variegated miscanthus and barberry

 The lower garden is flanked by a very lovely structure called “The Lover’s Chapel”

The Lover's Chapel

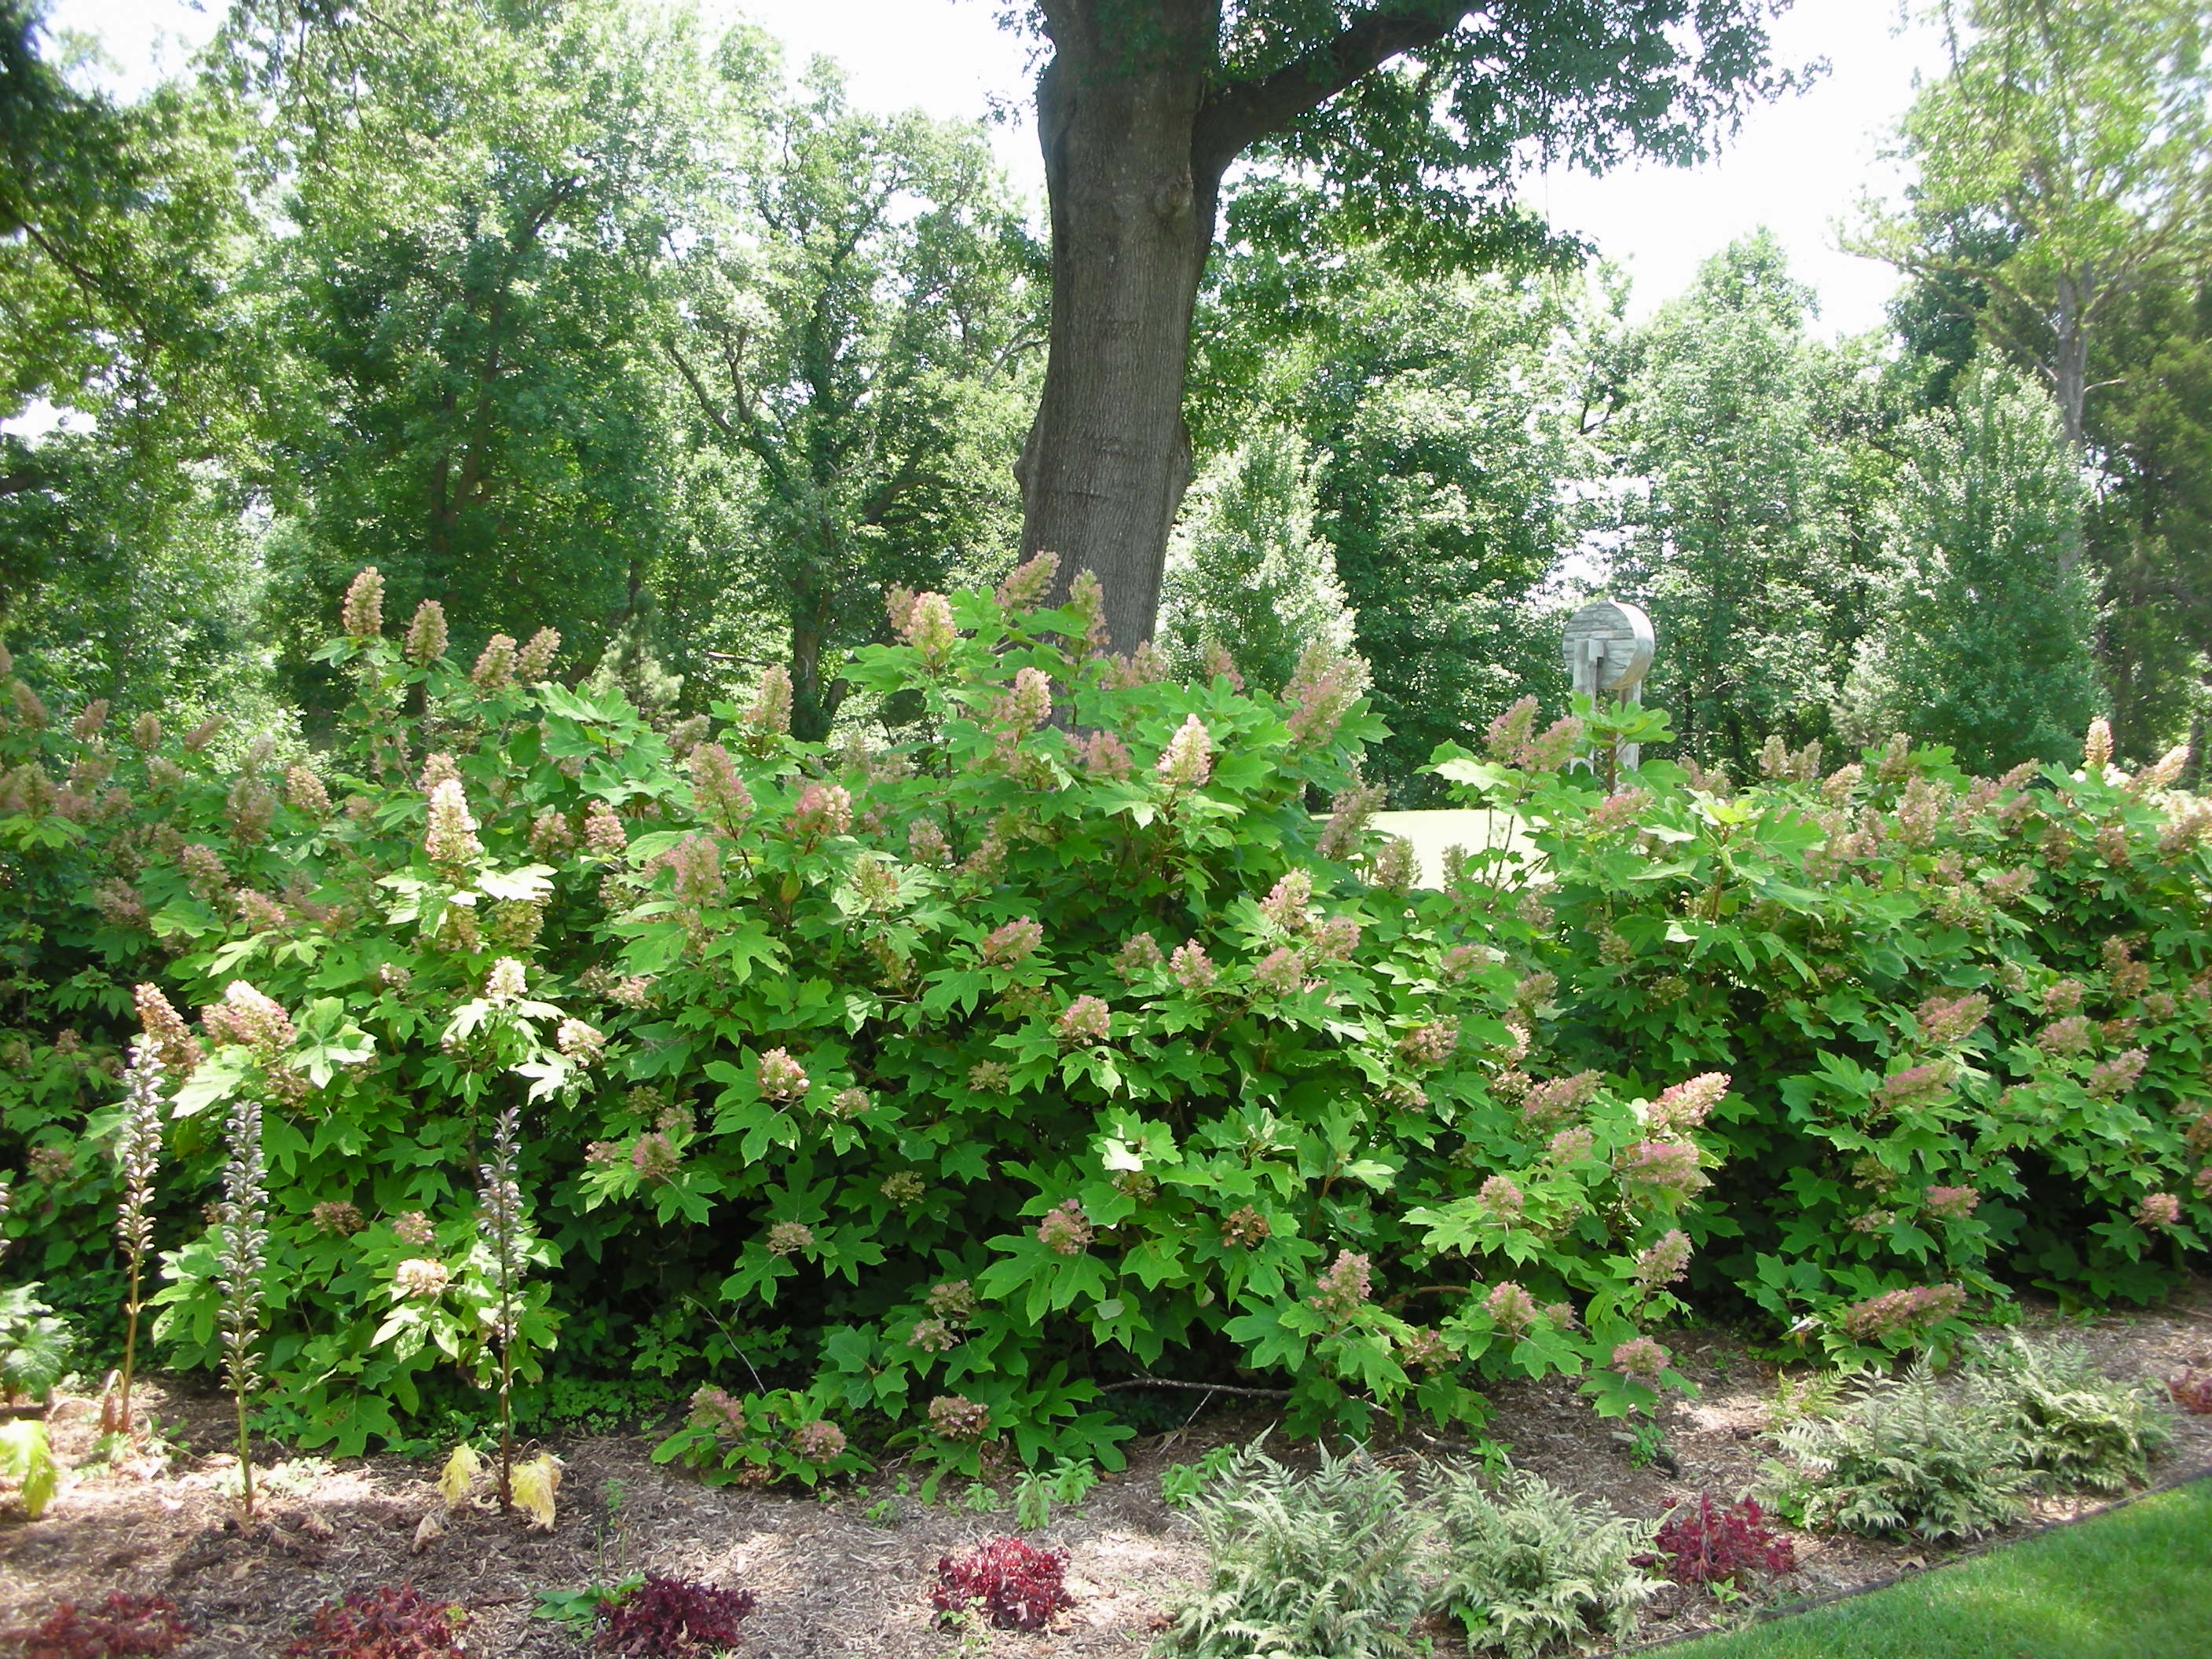
I was amazed by all of the plants that they can grow in Tulsa that i just have had very little to no luck with.  Lots of hydrangea.  Here is a very beautiful mas of oak leaf hydrangea

Oak Leaf Hydrangea and Bears Britches

There were a few things growing at Philbrook that I have in my garden.  Below is a picture of a couple of things that are very common in our part of the world.

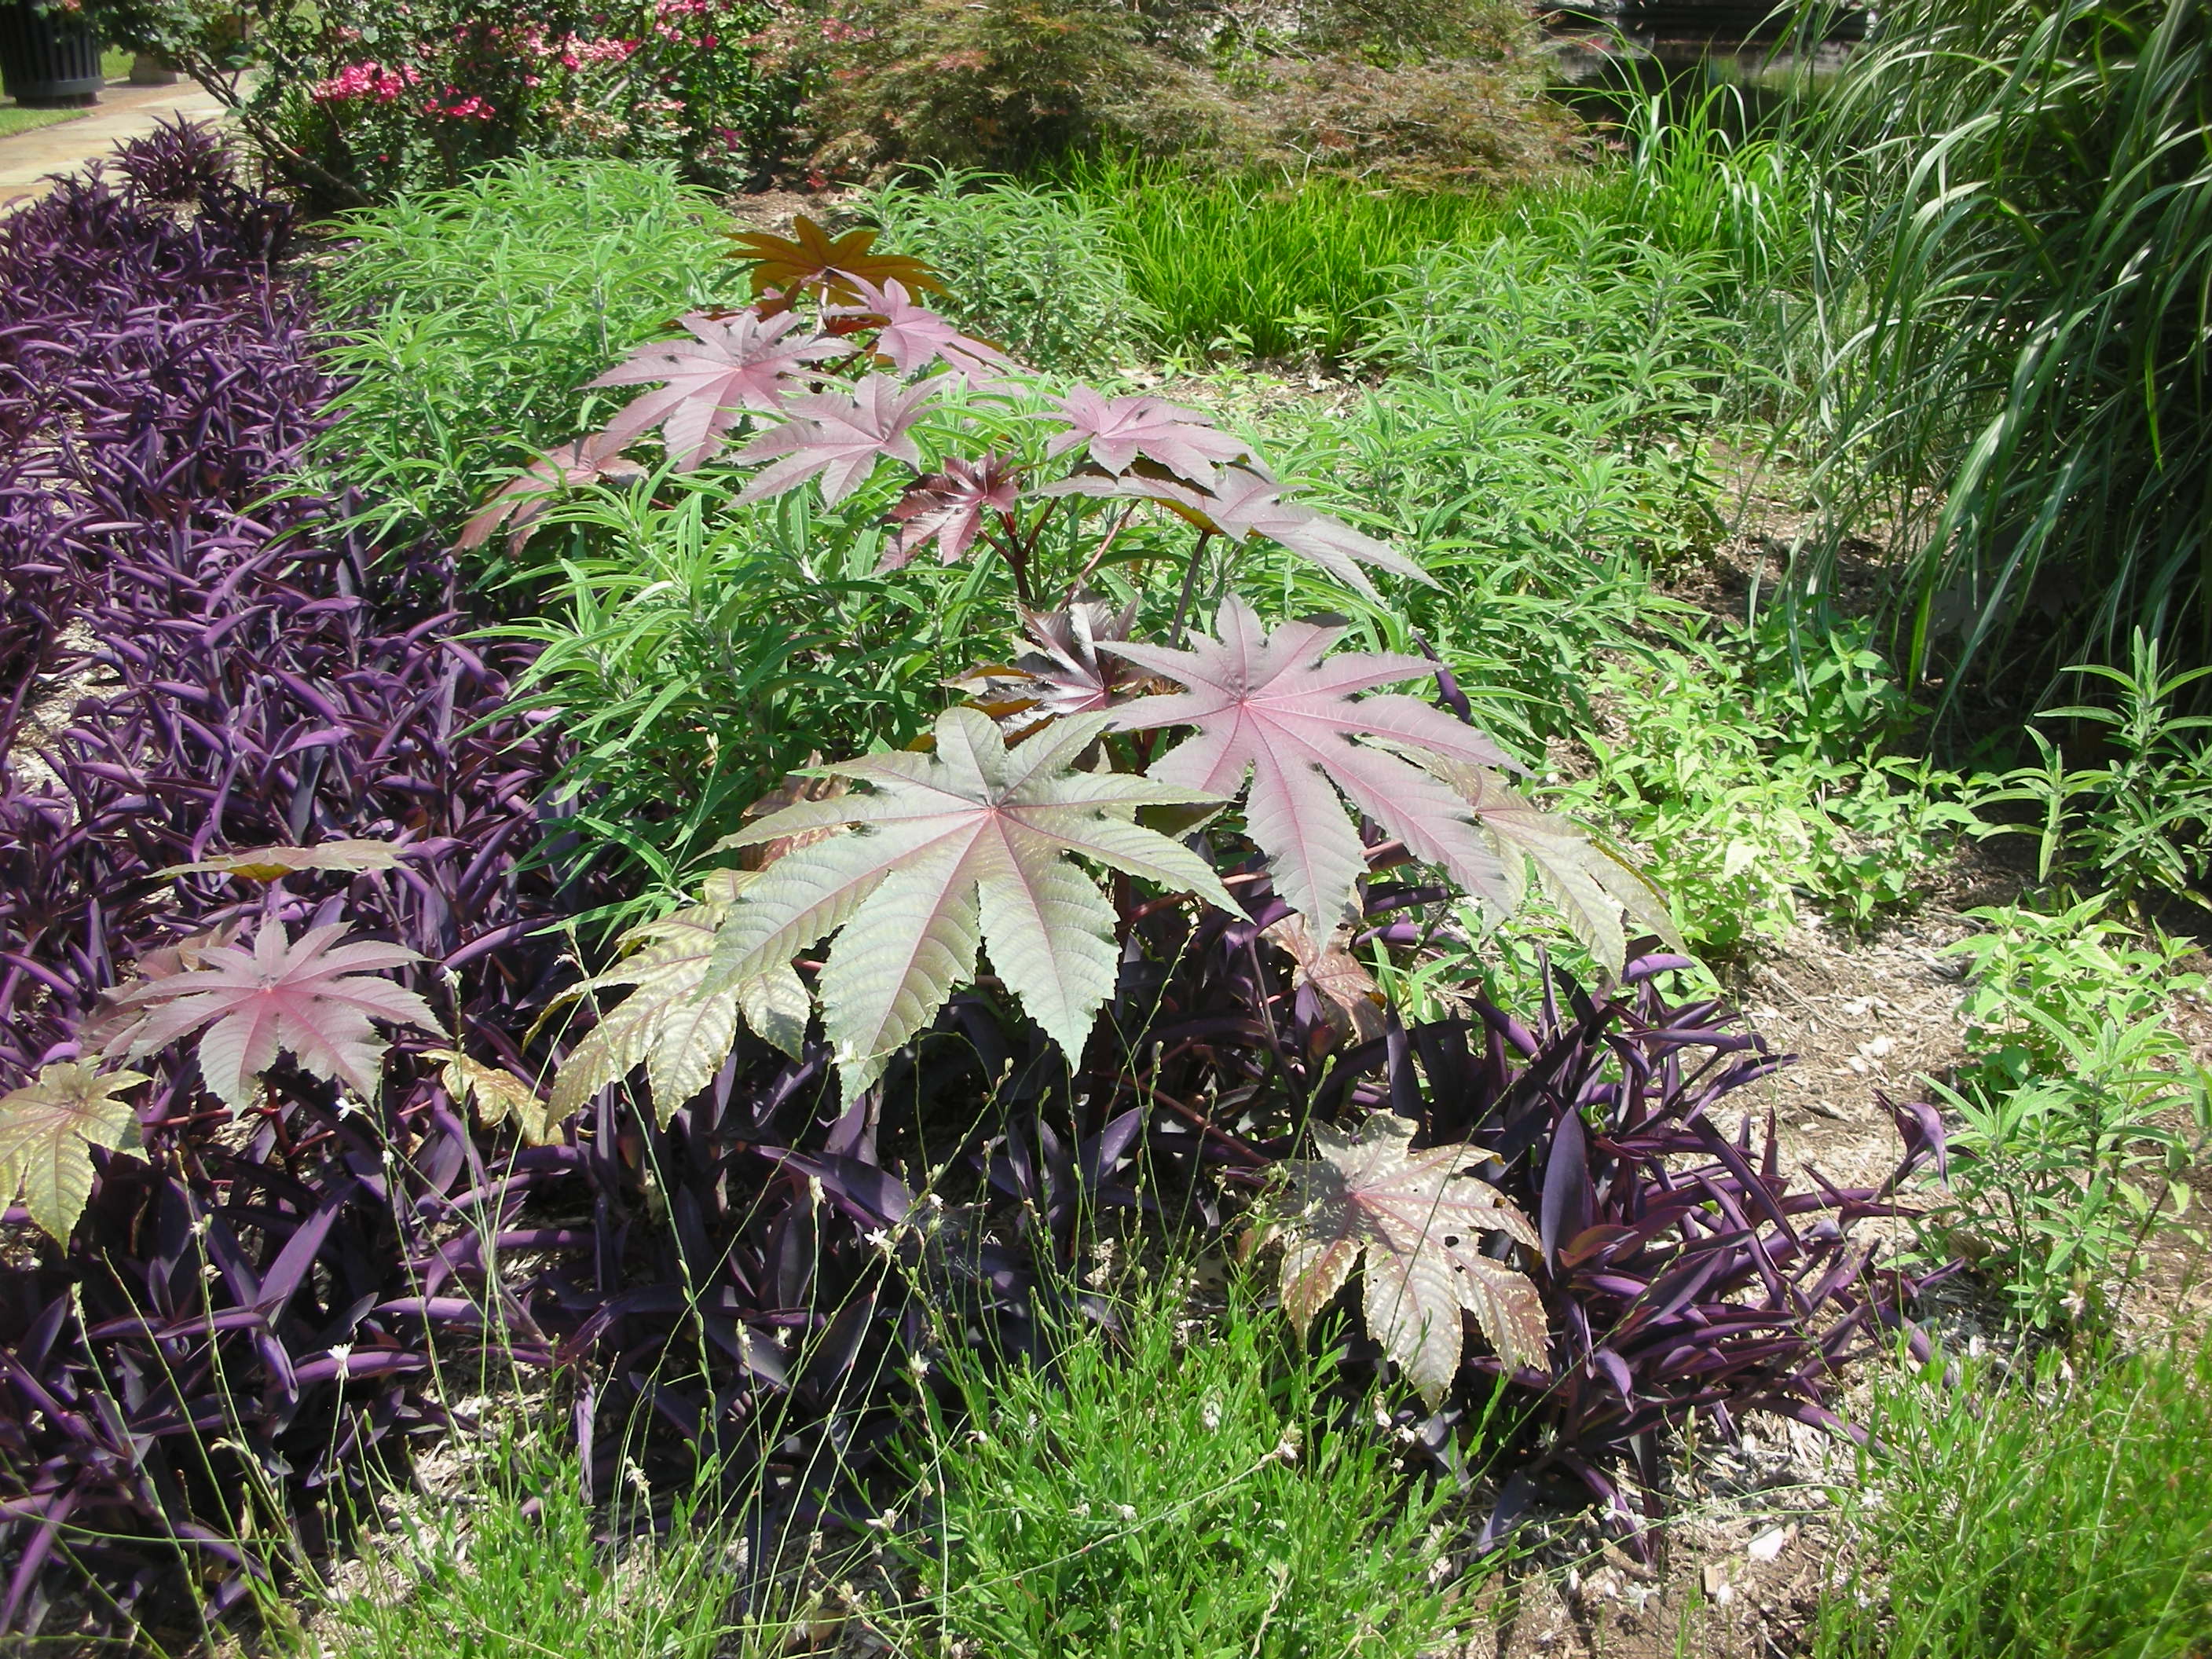
Castor bean and purple heart

 I really want a pond in my own garden.  The Philbrook’s ponds only made me want one more.

Koi and water lilies at the Philbrook

And finally, I will leave you with a view of Villa Philbrook looking up from the lower garden.

The Potato Box Experiment Is A Complete Failure

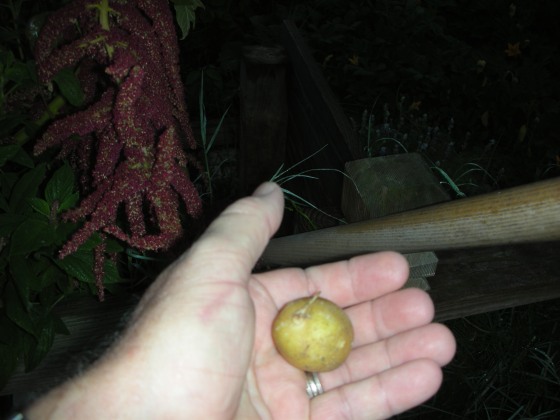
This is what failure looks like. Out of two large potato boxes, this is all I got.

Well, all of the foliage of the potatoes in my potato box died so I decided to take the boxes apart and harvest my 200 lbs of potatoes.   Imagine my shock when I took the sides down from the box growing the red La Soda’s and found — NOTHING!!!  That is right, nothing.  Not a single little potato.  So, much discouraged, I proceeded to take apart the box containing the white Keenebec’s.  I was relieved to discover that this box was not a total failure.  I found one tiny little potato, smaller than a ping pong ball.  So, I am calling both boxes failures. 

I don’t yet know what went wrong.  I followed the instructions that I found on the web very carefully.  I spent quite a bit of time, effort and money on this and it was a complete and total disaster.  I will be doing some research to see if I can get to the bottom of this mystery.

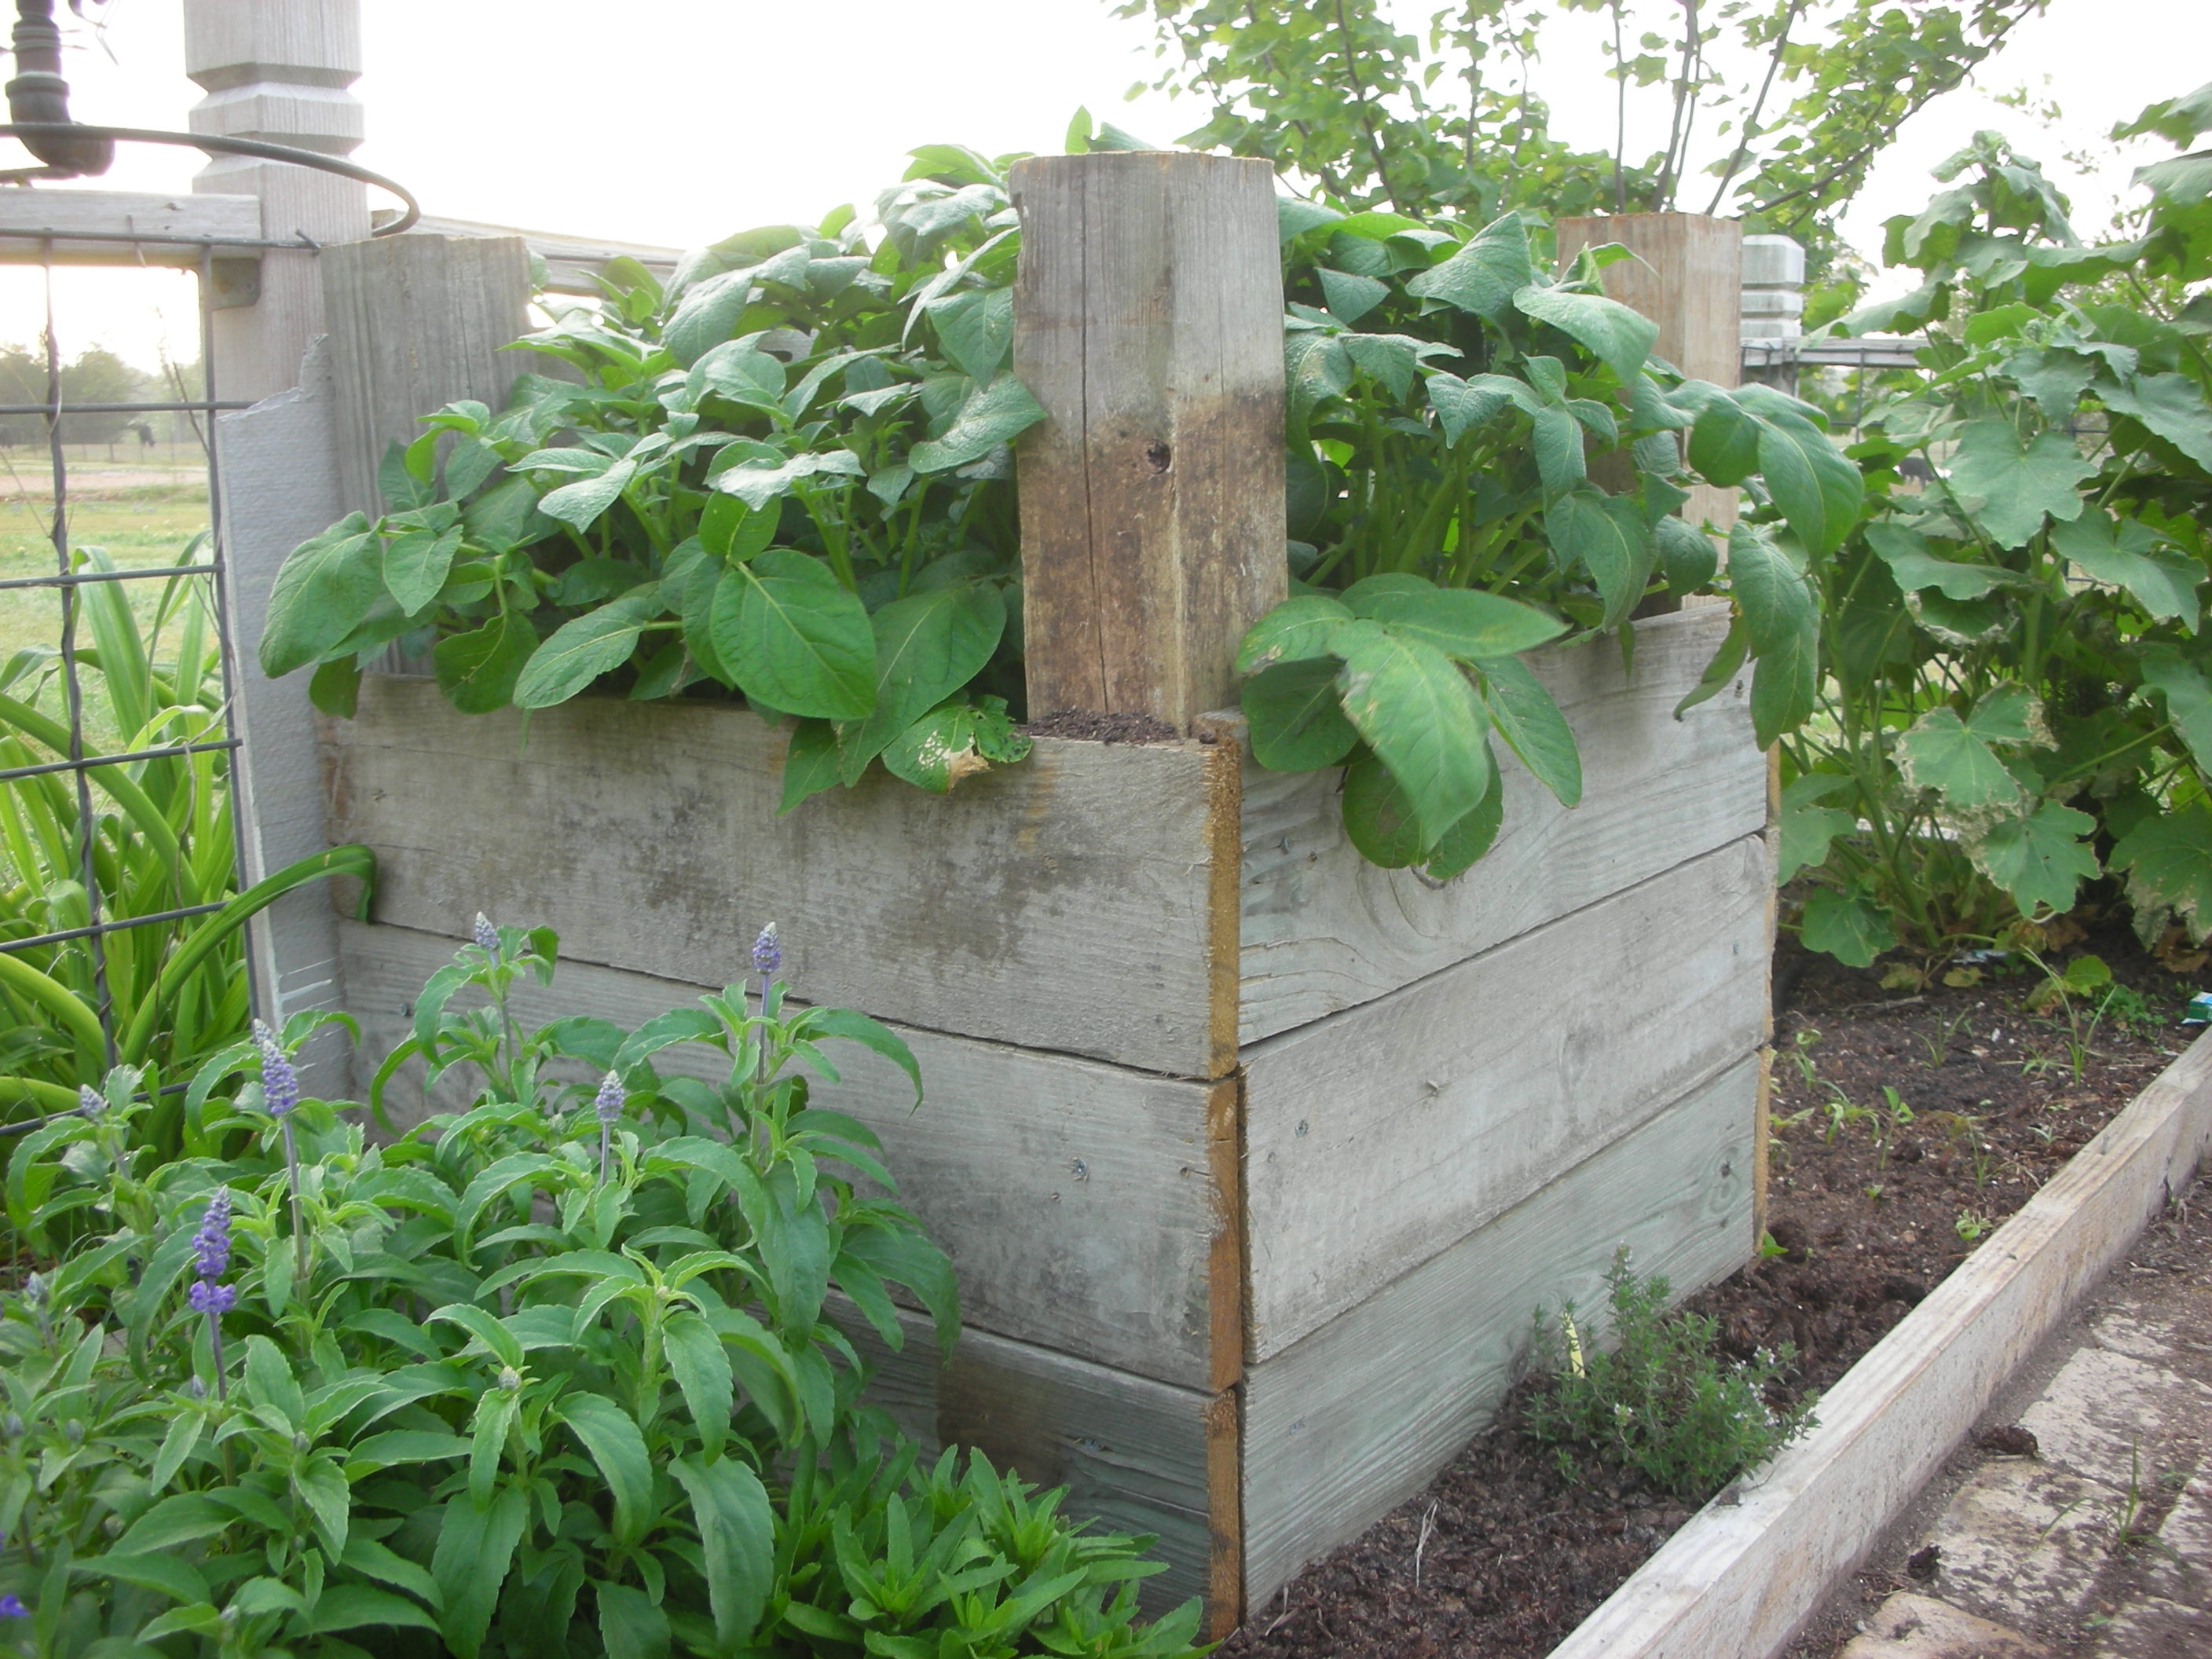
Everything looked so good in April. I really cannot figure out what went wrong.

I just cannot yet accept that this is a bad method for growing potatoes.  There are just too many magazine articles and web posts about it for it to be an unsound method.  Right now, I am going to write this off to a bad year.  My friend Cynthia Mueller tried to grow several varieies of potatoes in her BCS garden and she had dismal luck as well.  As I have talked to other gardeners I have found that this was a hit and miss year for potatoes in general.  Some folks did well, but many folks that I have talked to have not had any luck either.

I am not a quitter.  I will try this experiment again in the fall. Fall potatoes are a bit trickier than spring potatoes but I am going to try nonetheless.

Save Money On Perennials Now!

Lovely vitex that I got for $17 at Wal-Mart's summer close out. This tree was marked $69.99. It was very root bound so I did a lot of root spreading and trimming. Also trimmed back the top. You can see, it was well worth the $17 and the extra effort.

This may sound funny, but I hate buying plants.  You see, I am cheap and plants are expensive.  Even though I love getting new plants for the garden, I just cannot bring myself to pay what most nurseries want for their plants.  Don’t get me wrong.  I know a lot about the horticultural world and I know very well how much it costs to grow, market and ship a plant.  The horticultural world has done a great job at keeping the prices for their products down.  In fact, when you adjust for inflation, there has been no real growth in the price of bedding plants in the last ten years.  However, I still hate paying full price.  So, I don’t.  I am constantly on the look-out for ways to increase my garden without depleting my checking account. 

A $5 ornamental plum. My wife got two of these at Wal-mart during their end of season.

In the last month, I have purchased a lovely 7’ foot tall, three trunked Vitex (Vitex agnus-castus), two 7’ ornamental plum trees (Prunus cerasifera), two huge Southern wax myrtles (Myrica cerifera), three one gallon pots of variegated New Zealand flax (Phormium “Rainbow Queen”), three one gallon Purple Fountain grass (Pennisetum setaceum “Rubrum”) and a one gallon Broom plant (Genista racemosa).  While the list may or may not be impressive to you, what I paid for it should be.  I got all of these plants from the big boxes and I paid just $56!  That is not a typo.  I got five large trees and several large bedding plants for just $56.  That averages out to just $5.10 per plant.  How can that be?

I wish I could say that I was a master negotiator and I talked the owners of Wal-Mart and Lowe’s into selling me these fabulous plants for this ridiculously low price.  However, that would be a lie.  What really happened is this: Lowe’s and Wal-Mart are closing out their overstock from their spring buying.  I just happened to be in the stores when this was happening.

Plants I bought this weekend at the Lowe's summer close out. Total cost of plants shown: $10.34

Post season close outs happen twice a year at every nursery in America.  If you want to get the good deals, then you need to pay attention to when the stores receive their new stock — and then buy at another time.  In most of Texas, spring stock usually arrives around late February or early March and the fall shipments start coming by late August.  Armed with this knowledge, you can save a lot of money by purchasing your plants off peak. 

If you buy off-season, you need to keep a few things in mind.  First, you can realistically only buy perennials off-season.  Annuals (which usually mean Spring and Fall color) are only good for a short season.  It will not do you any good to buy pansies in July or mums in January.  However, if you want a good deal on loropetalum or New Zealand flax, then you can buy and plant them anytime of the year.  With a little care, you can plant perennials after their off-peak selling season and they will become beautiful, well established plantings in next year’s garden.

Look at the size of that Southern Wax Myrtle. I got two of these for $10 each.

If you buy off-season, you will have limited availability.  If there is a particular plant that you want and it absolutely has to be that plant, then you probably shouldn’t gamble that it will still be there at the end of the season.  Go ahead and buy it.  I have done it and there is no shame in paying retail.  However, if you garden more by form and color than by specific plant, there is a good chance you will find many things left in the nursery at the end of the season that will work somewhere in your garden.

One of my beds has wound up with a lot of purples in it: fall asters, liatrus and castor bean.  So I needed some yellow to compliment and break up all of that purple.  That is why I bought the variegated New Zealand flax.  The light green and yellow foliage and the upright, grass like form will be a great contrast to the mounding asters and the spiky liatrus.  This flax was $7.99 in March.  I got it $2 in June.

Another problem with off-season plants is the fact that they have been in the pot for so long.  When you remove these plants from their pot, many will be completely root bound.  That is no problem to the experienced gardener.  If you buy a root bound plant, simply unwind what you can and trim off the rest.  The plant will actually thank you for this.  Also remember that the top of the plant should be in balance with the bottom.  If you cut many of the roots you will need to prune the top as well.

Finally, if you buy off-season you are going to have to give these plants a little extra TLC once they are planted.  Once they are in the ground, make sure they receive enough water to keep them from going into stress.  If you give them a little extra care, they will grow and thrive just like the plants that your neighbors bought in season and paid full retail for.

There are many, many beautiful things to buy in the nursery.  I wish I could afford them all.  Since I can’t, I buy what I can off-season.  If you are willing to wait, are flexible in your design and willing to give your off-season purchases a little extra TLC then you can have a very full and beautiful garden that didn’t drain your bank account!

Daikon

The other day I was at lunch in BCS (that is Bryan-College Station for all you non-Aggies out there) with several Masters of Horticulture.  We were talking about our gardens and I mentioned that my daikon were doing really well.  To my surprise, not a single one of these PhD Horticulturists knew what a daikon was.  I found this somewhat amusing but I guess if you do not eat a lot of Asian food, then you would have no reason to know about daikon. 

Sydney Pickle, Hannah Michna and Lindsey Pickle pull the first daikon of the year from the yupneck's garden

If you are not familiar with daikon, here is a little background.  They are a root crop much like carrots or parsnips.  In fact, the Japanese translation of their name means “large root”.  Daikon is a radish and it is a staple of Japanese food.  They cook it, pickle it, stir fry it, stew it and eat it raw.  The Chinese, Koreans and Indians also eat a lot of this spicy root.  The greens are also edible.  One reason it is so popular in the Far East is it’s storage capabilities.  Unbruised daikon can stay fresh for three months in a root cellar.  When dried, they can last much longer.  This allows the Japanese to have a ready supply of a vitamin C throughout the long winters.  There are more acres of daikon in production in Japan than any other vegetable.

There are two varieties of daikon.  One looks like a big turnip and can grow to 100 pounds.  However, the one that I grow is much more common.  Raphanus sativus var. longipinnatus is a long white root that resembles a carrot.  It has white flesh and skin.  It can grow to lengths of 36” but is most often harvested when it is between 12” to 18” long and the diameter is between “1” and 2”.  Summer diakon have a sharper and spicier flavor than fall diakon.  Also, the taste of the daikon changes as you progress up the stalk.  The hottest (and most radish-ey tasting) part is near the tip.  The flavor becomes milder as you move up the root toward the greens. 

Daikon, Chinese cucmbers and volunteer zinnias in the potager

Daikon are very easy to grow.  They like rich, loose soil and full sun.  Plant at the same time as you plant other root crops.  They actually work best as a fall vegetable but do quite well in the spring.  Since they produce roots that weigh over a pound, a small amount of space will provide you with lots of radish. 

I work with several Indian and Chinese ex-pats so I grow enough to share.  This year, one of my friends took some home and had his wife make me pickles.  They are AWESOME!!!!  I have enjoyed these pickles so much that I am including the recipe here.  It is a simple and delicious recipe that will make a perfect side for all of your outdoor summer grilling.  Hope you enjoy!

Debbie Kwan’s Daikon Pickles

Slice the daikon and sprinkle with about 1 tsp of salt. Use your hands to knead the vegetables for about 3 minutes.  Place in fridge and wait about 15-30min until water has been expelled.  Drain in a colander and rinse under cold running water, then press gently to expel extra water.

 Combine 1/2 cup sugar, 1/2 cup rice vinegar and 1/2 cup of water in a pot on low heat until the sugar has dissolved. Let cool then pour over the daikon. The brine should cover the daikon. Add peppers of your choice to make it spicy.  Let it marinate in the brine for at least 1 day before eating. They will keep in the refrigerator for up to 3-4 weeks.

Daylilies-A Month of Blooms

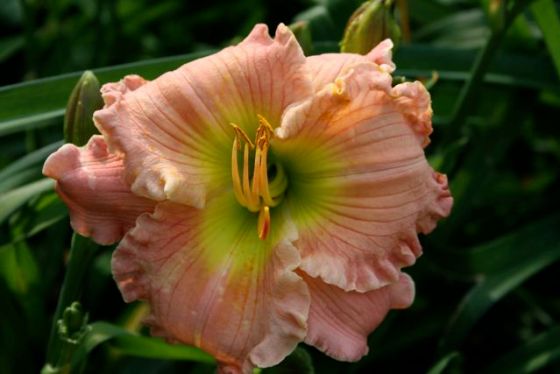
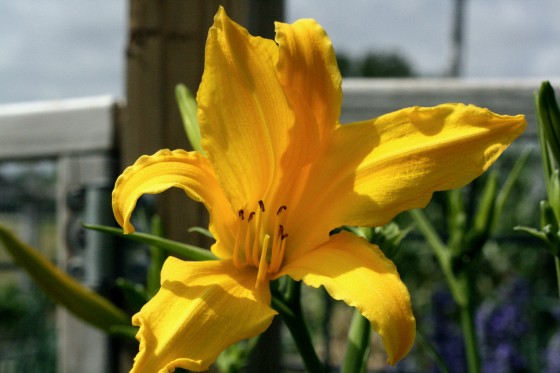
One of the daylilies that was passed along to me from my wife's grandmother

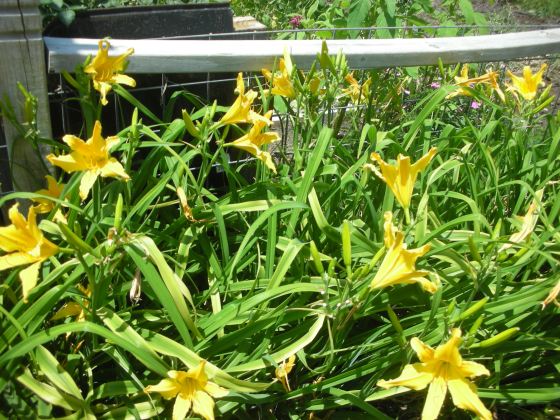
Very few plants in my garden give me as much enjoyment as my daylilies.  Early in April, I start watching them.  I am looking for that first sign of stalks. When I see these I know that soon, the green border around my potager will be covered in bright yellow flowers.

A masss of Nana's daylilies border my potager

My daylilies were passed to me by my wife’s grandmother.  Not directly, though.  A few years after she passed, we dug them up from her home place in the sandy loam of East Texas and moved them to the black clay of Washington County.  This sentence should tell you a lot about daylilies.  First, they lived at Nana’s for several years with absolutely no care.  So, daylilies are tough.  They also survived being dug out of a beautiful loamy soil and moved to a not so wonderful black clay.  So, daylilies are adaptable.  Throw in the fact that they are absolutely reliable, pest free and beautiful and you begin to understand why so many people love them.

A lovely daylily bred by Chris von Kohn. You can buy this and others from him. All of his contact info is at the bottom of the post.

History – Daylilies originated in China, Korea and Japan.  They found their way to the Americas by the 1700s.  The Tawny Daylily was one of the first.  It quickly escaped cultivation and is now so common on the east coast that many think it is a native wildflower.  This flower was often planted close to outhouses and so it derived the very unfortunate common name of “Outhouse Lily”.  Daylilies began to lose their popularity in the US in the 1800s.  In 1920, the “Hyperion” daylily was introduced.  This began the resurrection of the flower as a major bedding plant in American gardens.

Despite their name, they are not true lilies.  Daylilies belong to the genus Hemerocallis and there are over 60,000 registered cultivars.  Their name is derived from Greek and literally means “beautiful day”.  Since the 1950s, the US has been the world leader in daylily hybridization.  I have a young friend at A&M named Chris von Kohn.  He has already created over 1000 daylily hybrids.  He hasn’t gotten one named yet, but he is only 22!  Chris is an up and coming Master of Horticulture and I am betting that we are going to be hearing a lot more about him in the years to come.  Thanks to the efforts of people like Chris, you can now own daylilies in every color except blue.  Some have  a strong fragrance and others have none.  There are daylilies with ruffled petals and multi-colored petals.  Some have “eyes” and still other sparkle with “diamond dust”. 

Another lovely daylily bred by Chris von Kohn. He is about to start grad school so he will greatly appreciate every order. All of his contact info is at the bottom of the post.

Planting – Daylilies are incredibly easy to grow.  Plant them in direct sun (or dappled shade) in well worked soil.  Dig a hole about 8” deep and make a small mound in the center of the base.  Spread the roots of the plant over this mound and backfill to a point where there is no more than 1” of soil over the crown.  If the roots of the plant are too big for the hole, trim them.  Water them in and then apply mulch (but not around the crown).  Water regularly for the first year.  After that, the daylily should be able to survive with minimal amounts of supplemental water.

Dividing – Daylilies reproduce rapidly.  If their clumps become too dense, they will begin to flower less and less.  Because of this, you need to divide them every two or three years.  This is best done in late summer or early fall.  Also, it is a good idea to give your plants a good watering the day before you do your dividing and transplanting. 

There are two ways to divide your plants.  The easiest is to just stick your shovel in the middle of the clump and remove half of the plant.  Since they have an extensive root system you may need to push your shovel all the way into the soil.  Use the shovel to work around the new clump and remove.  Replant in a prepared hole at the same depth as the original plant and water.  Place them about two feet apart.

Another creation of Chris von Kohn. You can buy this and others from him. All of his contact info is at the bottom of the post.

If you want to get individual plants, you can use a sharp knife to divide your clump into fourths.  Once this done, you can begin to remove individual fans.  Replant these fans like previously described.

Very few beautiful plants are as hardy or as easy to grow as Daylilies.  There are varieties that are hardy from zones 1 to 11.  Once established, they have a low water requirement and they are relatively pest free.  On top of all of that, they are incredibly diverse in color and form.  With so much to offer there is no reason for you not to grow daylilies in your own garden.

Buy Your Daylilies Here – Chris von Kohn will be selling some of his creations this fall.  They are incredible!  He is currently taking orders.  They are in bloom now so if you live in the Arlington/DFW area you can go by and pick your favorite.  He will mark it and save it for you and you can pick it up in the fall.  You can reach Chris at cvk007@earthlink.net or you can give him a call at either 817-269-7474 or 817-483-5146.   If you don’t live in the DFW area, just drop him an e-mail and he will be happy to send you pictures and then ship your plants when they are ready.

The yupneck with Chris von Kohn. He has just been awarded the outstanding senior agriculture student for horticulture by Gamma Sigma Delta, The Honor Society of Agriculture.

Snake Bit (kind of) !!!

Yesterday evening was perfect.  A storm was rolling in so the weather was cool and the sunset was the most beautiful shades of pink, orange and red.  My wife and I strolled hand in hand through the yard and noticed all of the things that were blooming or emerging (castor beans).  We went into to the potager and watched the cotton tail that has taken up residence in our “vine garden” (watermelons and sweet potatoes).  While there, my wife noted that the yellow pear tomato was covered so we walked over.  She stood behind me as I gently pulled and handed her handful after handful of these sweet, succulent delights.  As I reached in for the third handful, BAM!!!!  Something hit me in the foot!  It felt like I had been kicked by a small child.  Confused, I looked down and there I saw this:

Turns out that little kick was no kick at all.  I had been struck by a very large and  aggressive Texas Rat Snake.  Now I am no herptologist, so if my i.d. of this snake is wrong please feel free to tell me. 

According to Houston Herpetological Supply this snake is good to have around as it eats primarily rats and mice.  However, it will also eat birds and bird eggs and it can climb trees to accomplish that feat.  Because it is often found around chicken coops, it is often called a chicken snake.  However, it doesn’t eat chickens and rarely eats their eggs (too big).  This snake can be aggressive when encountered in the wild.  It will coil up and strike.  It will also wiggle its tail in leaves so it sounds like a rattlesnake.  Also, it is the largest snake in Harris (and evidently Washington) county and it can reach lengths of over six feet.  This one must have been a teenager as I am guessing it was only four to five feet long.

I am growing my tomatoes on a cattle panel. They are heavily mulched with straw and have drip irrigation. This pic is from about a month ago. They have now formed a very thick and wide hedge that appears to be ideal for snakes to lay under.

Well, that explains it.  An aggresive Texas Rat Snake just did not appreciate me bothering his tomatoes.  Glad I am not afraid of snakes.  If this would have happened to my dad it would have probably killed him.  I was surprised at how determined this guy was to stay in my tomato bushes.  After striking me, he just laid there and looked at me.  He wasn’t moving.  So, I had a choice.  Catch it, kill it or just run it off.  I am not a snake hater so I just chased him off.  My wife was a little dismayed by the fact that he decided to run in the direction of the house. I ran in front of him and he turned and went under a woodpile. 

So, what have I learned from this?

1. Always take a hoe with you into the garden whether you are weeding or not

2.  Always wear shoes (or boots) when you are in the garden

3.  Look before you stick your hands into places you can’t see very well

4.  Snakes like tomatoes

5.  If you have rats in the house or attic, put a rat snake in there (learned this from the website).  They will eat them and then leave.