Gumbo Time! by Patty G. Leander

gumbo-104

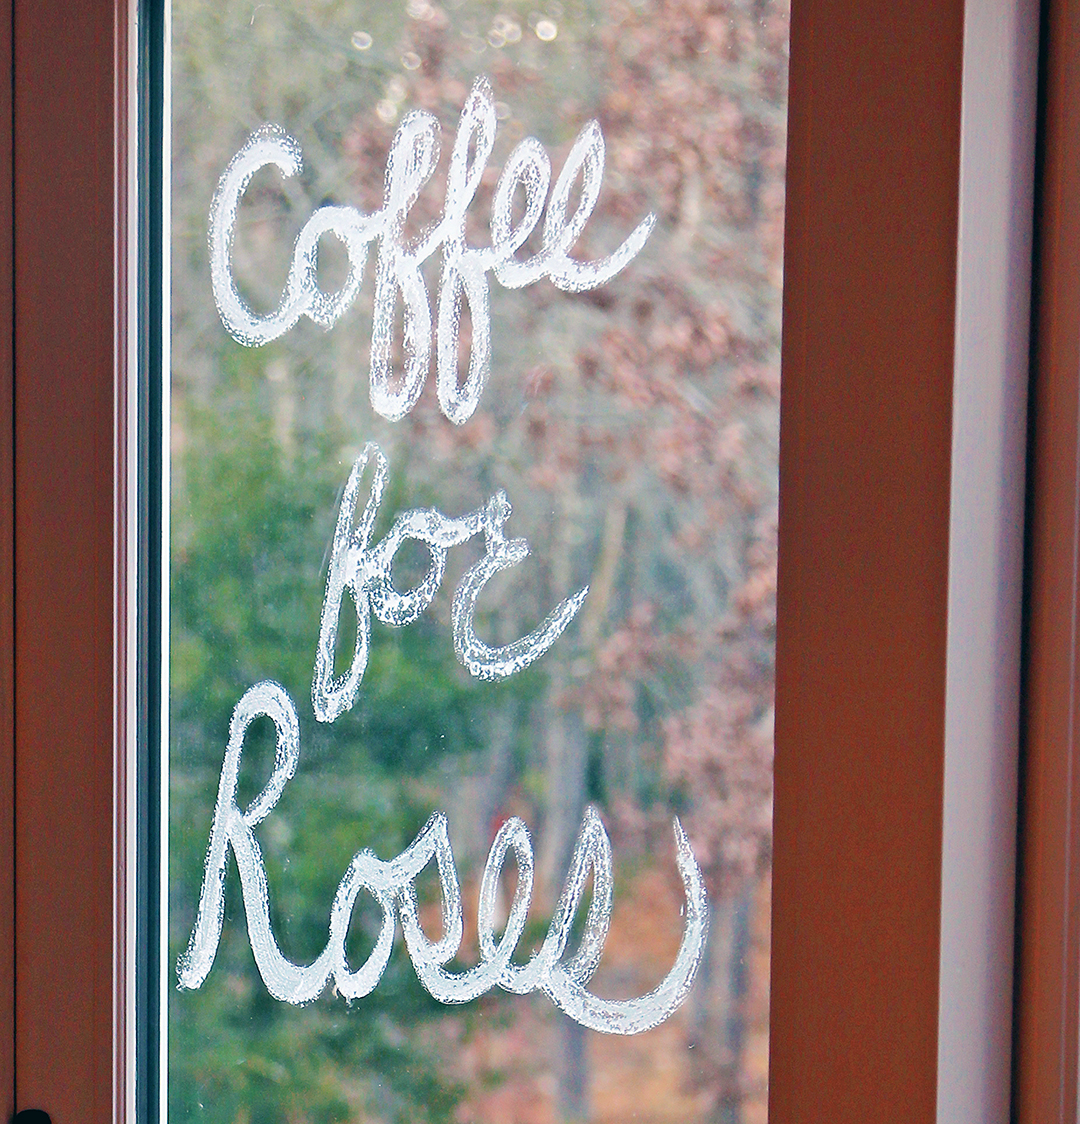
There is nothing better than a cup of hot gumbo on a cool fall evening!

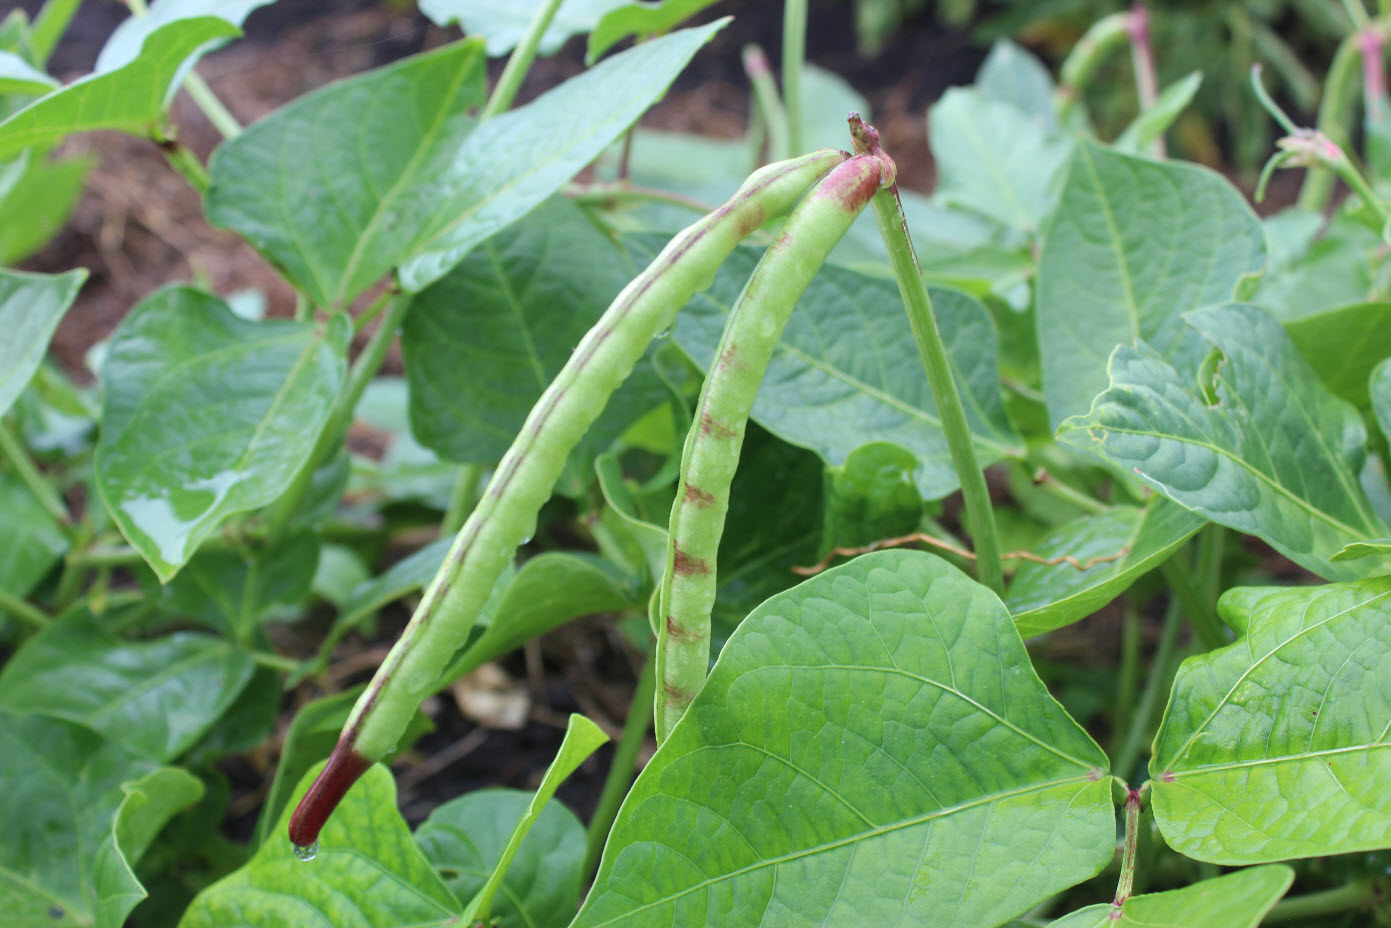
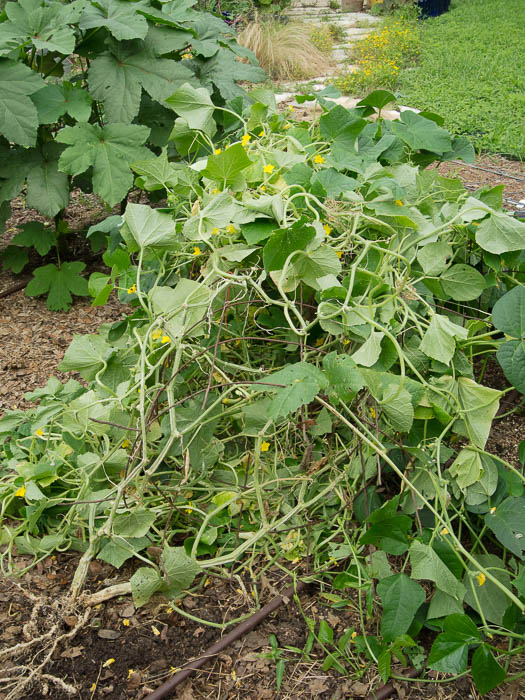
There are always a few things I can count on this time of year: shorter days, cooler temperatures, fewer bugs and either the Longhorns or the Sooners reigning over the Cotton Bowl till next year (congrats UT!). Plus a big pot of flavorful gumbo thickened with the last of the okra from the garden.

gumbo-089

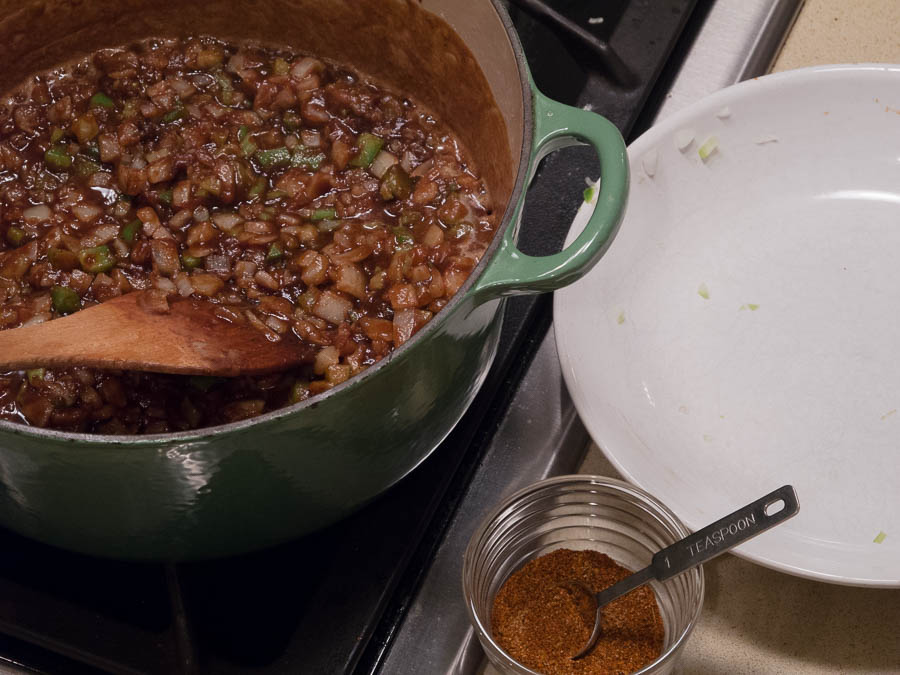
Cooking the roux while the Cajun trinity waits their turn to be added to the pot

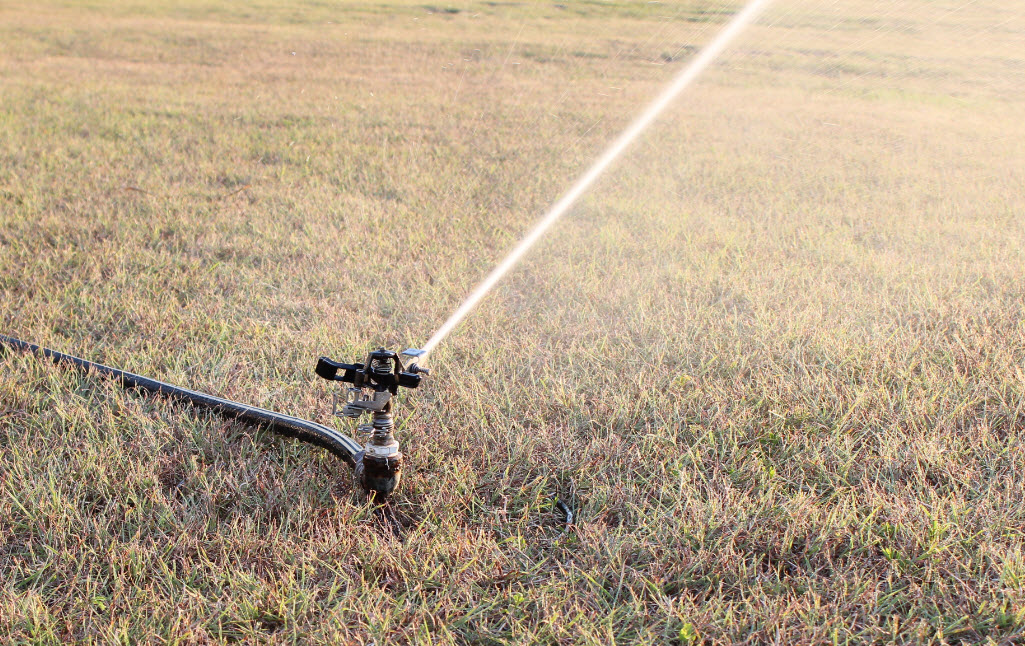
It is too dang hot to stand over a stove stirring a roux in the middle of summer when okra is at its peak, but in the fall, when the bell pepper plants are loaded and the green onions are big enough to harvest, I feel compelled to make gumbo just before okra gives up the ghost; a little for immediate consumption, a little for sharing and a little for the freezer to enjoy on cold winter nights in front of a cozy fire. A small disclaimer here – I am Texan and did not grow up making gumbo in a Louisiana kitchen.  If you grew up in the Gumbo State I bet you make amazing gumbo and I salute you, but for the rest of the readers out there, including my two daughters, here is a pretty good version that I have been making, sharing and enjoying for over 25 years.

gumbo-093

It really smells good now!


Chicken and Sausage Gumbo

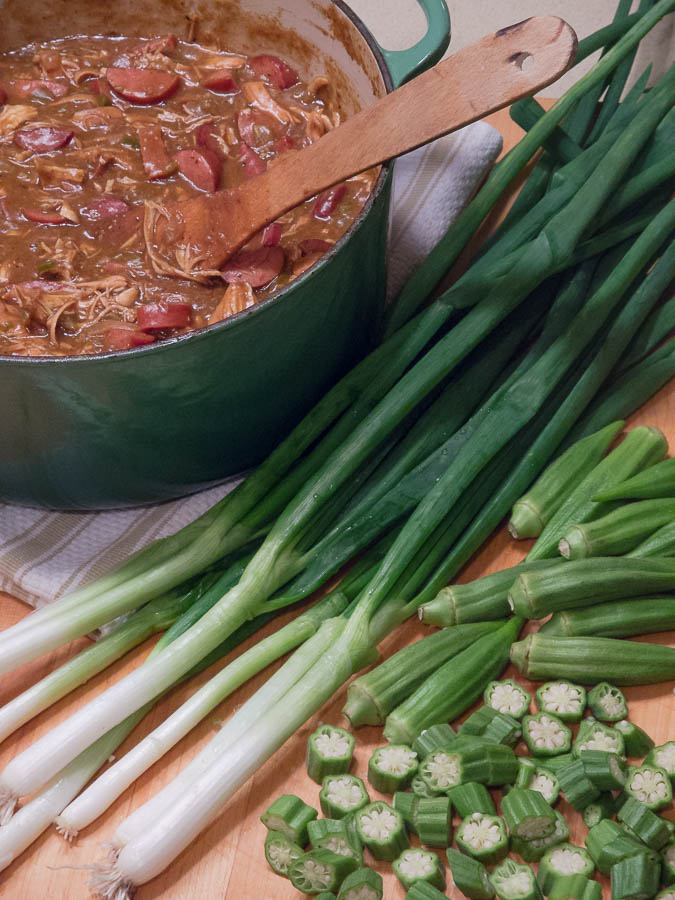
Gumbo contains onions, bell pepper and celery – the Cajun trinity.

1 pound andouille or spicy smoked sausage, cut in half lengthwise then cut into ¼” slices

4-6 bone-in chicken breasts, skinned

½ cup oil

½ cup flour

1 onion, chopped

1 bell pepper, chopped

2-3 stalks celery, sliced

2 cloves garlic, minced

1 tbsp Creole seasoning

2 bay leaves

1-2 tsp dried thyme

1 tbsp Worcestershire

1-2 tsp Tabasco

1½ quarts water or chicken stock, more if needed

1-2 cups okra, sliced

4-6 green onions, thinly sliced, plus more for garnish

Cooked rice

Cook sausage in a large Dutch oven until nicely browned (I usually cook half the sausage in a separate pan for more even browning). Remove to a paper towel-lined dish to drain. Add chicken to pan and brown on both sides in sausage drippings; remove and set aside. Add enough oil to Dutch oven to measure ½ cup; when heated through stir in ½ cup flour. Now get comfortable, roll up your sleeves and cook the roux, stirring constantly, for 20-30 minutes, until medium to dark brown. You may notice that my gumbo is not as dark as what you might be served in New Orleans – I may be a Texan but I am a chicken when comes to cooking a truly deep, dark roux. A darker roux gives a rich, smoky flavor but if you cook it too long or too fast or look way even for a second it can go from perfection to scorched and you will have to start over so pay attention!

Once your roux is toasty brown it’s time to add the trinity, but the roux is so hot I like to move the pan off the heat for a couple of minutes (this also prevents the roux from burning) then stir in the onions, peppers and celery and return to the burner. Cook over medium heat for 5-8 minutes. Add garlic and seasonings, cooking and stirring another 3-5 minutes.

Gradually stir in 1½ quarts of water/chicken stock and bring to a boil. Return chicken breasts to pot, lower heat and simmer 30-45 minutes. Remove chicken and allow to cool. Return sausage to pot along with okra and green onions and simmer for 30-45 minutes. Meanwhile bone chicken breasts and shred.  Return shredded chicken to pot and cook another 20-30 minutes until everything is hot and fragrant. Remove bay leaves and season, if desired, with salt and hot sauce. Serve with rice and fresh green onions.

gumbo-112

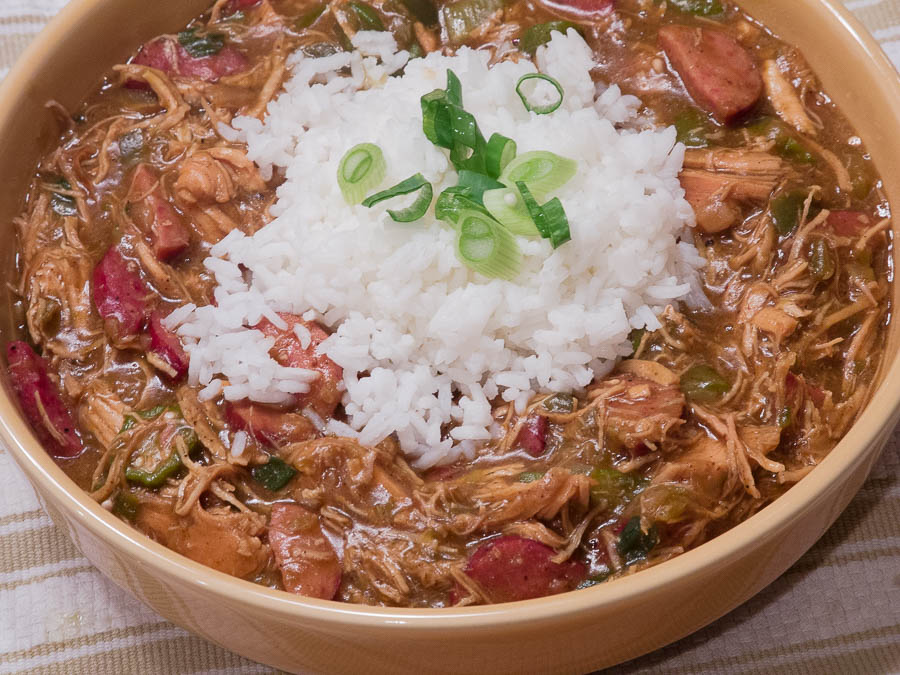
And finally, Chicken and Sausage Gumbo…enjoy!


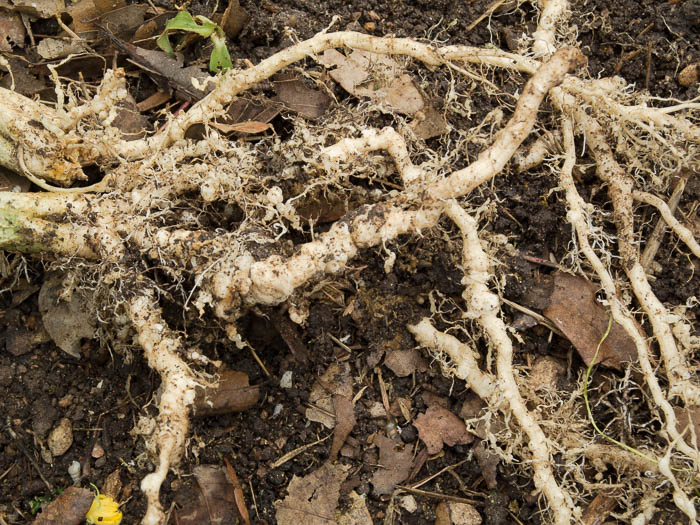
A couple of years ago I was fortunate to receive some bulbs for green multiplier onions from the publisher of Texas Gardener magazine. He received them from a reader in Houston, who explained that they migrated to Texas with Cajuns from south Louisiana who had been growing them for over 100 years. They grew them for use in their gumbo and refer to them simply as gumbo onions. I don’t know if this reader has a stockpile to share via this blog but if he does I will provide his name and address in a future post. These onions are dependable and tasty, but unfortunately I have given away most of my bulbs and am trying to build up my reserves.  In the meantime try asking long-time gardeners in your area if they have any multipliers to share or order some white multiplier onions from Southern Exposure Seed Catalog (www.southernexposure.com).

I share these posts on Our SimpleHomestead Blog Hop.  Be sure to stop by.  The “hop” has tons of great information from gardeners and homesteaders all over the world!

Week 42 Tips for the Zone 9 Garden

This past week, we buried my mother-in-law.  Patricia Ann Krischke was an amazing woman!  I have never known anyone that was so full of life.  She loved to laugh and sing and dance and she would do it any time she got the chance.  She truly lit up a room with her presence.  She spent the first part of her life being the perfect wife that raised four amazing children.  She was a constant volunteer, a devout Catholic and a hostess with a true gift for entertaining.  Once the kids were gone she went to work for Harris County where she was instrumental in getting the bonds passed for the Astrodome.  She was also a HUGE Republican and was very proud of the of the work she did on the campaigns of Ronald Reagan, Bush 1, Kay Bailey Hutchinson and countless other state and local officials.  In the end, there was only one thing she could not do – defeat Alzhiemers.  Please pray for my family and all families that are dealing with the horrible disease.  Rest in Peace Pat Krischke.  The world is a lot less bright without you in it.

In honor of Pat, I am going to talk about some fall crops (or crops that can be planted in the fall) that have been shown to prevent or fight Alzheimer’s Disease.

Patricia_Krischke

Alzheimer’s was the only challenge my mother-in-law, Pat Krischke could not overcome. Eternal rest grant unto her O Lord!

  • Strawberries – Plant Chandler, Douglas or Sequoia varieties now for a spring harvest. Strwberries will tolerate a lot of soil types and pH ranges.  However, it will not tolerate wet feet.  Plant in soil with excellent drainage.
  • Cucumbers with skins –. Fisetin is a plant compound that may prevent or fight plaque buildup in the brain. This compound is highest in the skin and area just between the skin and the fruit.  So, even if they make you burp, eat those cucumber skins!
  • cucumbers

    I am ready to to harvest my second crop of cucumbers of the year. Cucumbers contain the Alzheimer fighting chemical called fisetin. Photo by Bruce Leander

    Apples – Who doesn’t love fresh, crisp fall apples? Again, eat them whole to get the most Alzheimer’s fighting qualities.  Plant apple trees now.

  • Kiwi –Besides tasting great, science believes that kiwis possess a lot of healthful compounds. My friend Tim Hartman is currently doing his PhD work on the kiwi.  Pray that he finds something in these furry, green fruits that will finally cure Alzheimer’s and other diseases.
  • Peaches and plums – Both peaches and plums are great Alzheimer fighters.  It will soon be time to plant peach and plum trees so you can grow your own Alzheimer fighters at home!
  • Tomatoes – If persimmons and kiwis are not to your liking, just eat tons of tomatoes. The most popular vegetable in the world is packed with fisetin.
  • Onions – Onions are another garden staple that have great Alzheimer fighting characteristics. Right now, it is just about time to plant onions in south and central Texas.

I share these posts on Our SimpleHomestead Blog Hop.  Be sure to stop by.  The “hop” has tons of great information from gardeners and homesteaders all over the world!

Week 39 Tips for the Zone 9 Garden

Turns out I did not have to spray pesticides last weekend.  I discovered that the pest that was eating my brassicas was Gallus domesticas.  Gallus domestica is a large flying garden pest that is more commonly known as “the chicken”.  While my chickens have scratched things up a bit in the garden, they have never eaten the foliage of the brassica.  Guess they were looking  to expand their palate.  This weekend I will be replanting broccoli again (as I caught them eating the transplants I bought last weekend).  Below are some more things you can do in your garden this weekend.

Ameraucana-1

Turns out two legged pests can be more destructive then insects!

VEGETABLES

  • Plant Sugar Snap Peas – Now is a great time to plant the American version of English peas. Sugar Snaps are kind of like rye grass.  Plant them when day and night temperatures are about 20 degrees apart.  Sugar Snaps vine so be sure to plant on some type of support.  I grow mine on cattle panels.  However, they will grow over any type of support you supply
  • Plant root crops from seed –. Now is a good time to plant root crops like beets, turnips, rutabagas, carrots, daikon, parsnip and radish. Beets, turnips and radish mature very quickly so you can get in several crops between now and April.  Carrots, daikon and parsnip mature more slowly.
  • Plant leeks and garlic – Now is a good time to plant garlic and leeks. I have some heirloom “Old German” leeks I will be planting this weekend
  • Plant artichokes and spring blooming lavender now – Lavender and artichokes are perrinials. Because of that they will both reward you with beautiful flowers and edible parts for years  If you don’t already have these plants get some and get them in the ground now.
There are so many varieties of radish and they all mature very quickly.  why not try a French Breakfast or Icicle radish this fall.

There are so many varieties of radish and they all mature very quickly. why not try a French Breakfast or Icicle radish this fall.

ORNAMENTALS

  • Fertilize blooming plants now – Right now my yard is bursting with color. Cannas, lantana, bulbs, zinnia, cockscomb, bachelor buttons and roses are all blooming profusely.  Feed with compost tea or other organic fertilizers and compost.  If using blended fertilizer apply 1 cup per ten fet of bed of a fertilizer with low N and high P and high K.  Something like a 10-20-10 is ideal.
  • Water fall blooming bulbs – Right now I have spider lilies, lycoris aurea and oxbloods up. Theie blooms last only a few days.  Keep the bulbs well watered to extend the blooms for a couple of days.
My spidelilies are blooming right now.  Give yours lots of water to extend their bloom time

My spidelilies are blooming right now. Give yours lots of water to extend their bloom time

TREES and SHRUBS

  • Plant trees and shrubs now – Now is the absolute best time to plant ornamental trees and shrubs. Last year I planted two Empire Live Oaks for nationally known decorator Holly Mathis. Check out the post we did that explains how to properly plant all trees and shrubs.  One more thing, at this time of year many nurseries will have things like Vitex, crepe myrtles and wax myrtles marked down.  Visit your local nursery and look for deals.

Week 34 Tips for the Zone 9 Garden

Well, I learned an expensive lesson today.  If you water your black gumbo yard for 23 hours it still will not close up the cracks that the July and August heat have made!  Yep!  I ran the sprinkler ALL DAY,  And yes, my wife asked me if I had turned off all of the water before we went to bed last night.  Oh well, live and learn.  At least I know my trees and primrose jasmine are now DEEPLY watered as they head into fall.

Even though it is hot and dry, this is going to be a great weekend in the garden.  Forecast says highs in the low to mid 90s with a chance of showers. So start early, drink lots of fluids and get a big part of your fall garden in the ground.

Provide ample fertilizer and water to any veggies that are still producing

Provide ample fertilizer and water to any veggies that are still producing

Vegetables

  • Remove old mulch and burn it – I use spoiled hay to mulch my vegetable garden. Regardless of what you mulch with you will need to remove any that is left and bag it or burn it.  Do not put it in the compost.  Spent mulch is full of bug eggs and larvae.  A warm compost pile is the perfect place for garden pests to over winter
  • If its growing, feed it – I still have okra, purple hulls and tomatoes growing in my garden. This weekend is a great time to feed them.  Side dress with finished composed or give them a foliar application of fish emulsion or other water soluble product.  If using commercial fertilizers apply a high nitrogen blend at a rate of 1 cup for ten feet of row
  • Plant potatoes – You can plant potatoes now. It is better to plant small, whole potatoes, as opposed to cut up pieces, in the fall.  The extremely warm soil will rot potato pieces that are not thoutoghly scabbed.
yellow-canna

Cannas are great, heat tolerant plants that bloom all throughout the summer.

Ornamentals

  • Weed, feed, water and mulch – August is a tough time on existing plants and a tough time for establishing new bedding plants. Take advantage of slower growth rates to remove tough weeds like Bermuda.  Once an area is weeded, sprinkle a little fertilizer, mulch and water.  Water every three or four days.  This will get your beds in prime shape for planting later in the month

Trees and Lawns

  • Baby your pecans! – The shells of pecans are beginning to fill with fruit. Keep your pecan trees well watered to ensure your best possible crop
  • Cut out bag worms – If you see bag worms forming in your trees, cut them out before they get too big. If you have missed them and you have a large mass, use your long handled pruners to open up the webs to encourage the birds to come in and clean up larvae
  • Be on the lookout for chinch bugs – August is prime time for chinch bugs. While chinch bugs can definitely do a lot of damage to St. Augustine lawns, they can be controlled if caught early.  My buddy Randy Lemmon (host of Garden Line on KTRH) has a great article about how to identify and treat them.  Click here to learn more.

Pecans are filling their shells with fruit right now so keep your trees well watered!

I share these posts on Our SimpleHomestead Blog Hop.  Be sure to stop by.  The “hop” has tons of great information from gardeners and homesteaders all over the world!

Nematodes Put an End to Cucumber Season by Patty G. Leander

My thriving cucumber season came to an abrupt halt a couple of weeks ago. It started when a strong windstorm knocked over a cage of ‘Amiga’ cucumbers and uprooted the plants completely. All my other cages were staked so I can’t explain why this one was not but anytime you grow anything on a tomato cage, don’t forget to stake it!

Zeebest-Okra

Strong winds uprooted a cage of cucumbers but luckily did not damage the adjacent planting of ‘Zeebest’ okra

I was disappointed but not surprised to find evidence of root-knot nematodes on the roots (see photo). Though my plants had been producing well throughout June and early July I had begun to notice pale green leaves, misshapen fruit, reduced yields and general wilting, all signs of nematodes infestation.

root-knot-nematodes

Root-knot nematodes are microscopic but a heavy infestation on the roots is easily visible as swollen galls within the roots

Nematodes are soil-dwelling, microscopic, worm-like parasites that feed on plant roots, causing swelling or galls within the roots, impeding the flow of water and nutrients. They are most active in summer when soil temperature ranges between 85 and 95°F. Cucumbers, okra, squash, beans and non-resistant tomatoes are especially susceptible. Because nematodes are most active at higher temperatures they are not a serious threat to most cool season plants, the exception being carrots and beets which can have severe damage. Alliums and sweet corn are not affected by nematodes.

Nematode-beets

Most cool-season crops are not affected by nematodes but beets and carrots are an exception

Because nematodes can devastate a crop it’s important to take action if you discover them in your garden. Below are a few earth-friendly methods for battling nematodes; you may never completely eliminate nematodes but the following methods will help keep their numbers in check so that damage will be kept to a minimum. Note that nematodes can be spread by tools and soil so be sure to clean and disinfect tools after working in soil that contains nematodes, also be careful not to fling soil from infected roots to adjacent parts of the garden.

Summer Fallow:  Nematodes are most active in warm soils and they need water to thrive so take advantage of summer’s heat to wither them away. Withhold water from nematode infested areas of the garden and turn or till the soil every 7-10 days during the summer to expose nematodes to the drying effects of the sun.

Crop Rotation: Plant nematode susceptible crops where non-host crops such as onions, garlic and sweet corn were previously grown.

Plant Nematode Resistant Crops:  If your garden is too small for crop rotation look for plants that are bred to have nematode resistance. A tomato labeled with “VFN” indicates disease resistance: V= resistance to Verticillium wilt; F = resistance to Fusarium wilt; N = resistance to root-knot nematode resistance. Resistance doesn’t mean they won’t get nematodes but they are able to resist them enough to produce a harvest. Resistant tomato varieties include ‘Better Boy’, ‘Tycoon’, ‘Celebrity’, ‘Big Beef’, ‘Lemon Boy’, ‘Sweet Chelsea’ and ‘Supersweet 100’.

natural-nematode-control

French Marigolds and ‘Pacific Gold’ mustard can be used as cover crops to reduce nematode infestation

Plant Nematode Suppressive Crops: Certain types of marigolds (Tagetes patula) work by excreting a substance that is damaging to nematodes as well as trapping them in their roots and preventing reproduction. The key is to plant the entire area as a cover crop and leave it in place for several weeks to reduce nematode populations. A late summer planting of French marigolds can be left in place right up to the first frost; effective varieties include ‘Tangerine’, ‘Petite Harmony’, ‘Petite Gold’ and ‘Janie’. At the end of the season remove the tops and turn under the roots.  Elbon rye is an effective nematode control that can be planted as a cool-season cover crop that is turned under in early spring. Cut down or weed-whack the tops a couple of times during the growing season and either leave the tops in place as mulch or add them to the compost pile. ‘Pacific Gold’ mustard, also sold as Mighty Mustard®, contains high levels of compounds called glucosinolates that help suppress nematode populations. Cut down mustard before it sets seeds, add the tops to the compost pile and leave the roots to decompose in the soil. Both Elbon rye and ‘Pacific Gold’ mustard are available from Johnny’s Seeds (www.johnnyseeds.com).

rye-cover-crop

Cut down or weed-whack cereal rye a couple of times during the growing season

Biological Control: In 2010, Dr. Kevin Steddom, a plant pathologist with Texas AgriLife Extension, conducted a trial at the AgriLife Research Station in Overton comparing several products for nematode control. He found that of all the products he tested, which included two soil fumigants, a biological fungicide called Actinovate was the most effective in lowering nematode populations. A 2-ounce packet sells for $18-20 but you only need ½ teaspoon per gallon and it can also be use for powdery mildew, black spot, early blight and other fungal diseases.

natural-nematode-control

Secure clear plastic over very moist soil to create a greenhouse effect that will raise soil temperatures enough to kill nematodes.

Soil Solarization: Rake the soil so it is level and smooth, water well and cover with clear, UV resistant plastic (2-4 ml thick). Pull the plastic taut across the soil and secure or bury the edges with soil. Leave in place for 4-6 weeks, patching any holes with duct tape so heat cannot escape. This is often considered a last resort because the heat generated under the plastic kills everything, good and bad. It’s important to add organic matter at the end of the process; after removing the plastic do not work the soil for couple of weeks then top with a 2-3 inch layer of compost and water well before planting.

I share these posts on Our SimpleHomestead Blog Hop.  Be sure to stop by.  The “hop” has tons of great information from gardeners and homesteaders all over the world!

Week 29 Tips for the Zone 9 Garden

Last week my wife and I left blogging and gardening behind and headed to New England for a little R&R.  It was so cool and lush and beautiful.  I saw lots of beautiful landscapes and vegetable gardens.  I have to admit, everything up there was so pretty I had serious “garden envy”.

If you are a gardener then you know that July is the best time to leave your gardening chores behind for a while.  The temperatures right now are so hot that even the bugs and the weeds have decided to take a break.  Even though it is hot and dry there is still a lot that can be done in the July Texas Garden.

Sally and I spent a week in the Berkshires.  It was so lovely and so cool!

Sally and I spent a week in the Berkshires. It was so lovely and so cool!

Vegetables

  • Water correctly– It doesn’t matter how much rain we got in the spring, our gardens need watering now. Water deeply and more frequently.  Use drip or soaker hoses if possible.  Soaker hoses typically put out about an inch of water per hour.  In this heat you may need to apply an inch of water every second or third day
  • Stay Cool-This morning at my house it was 84 degrees at 8;00 am. If you are going to work outside take care to avoid heat exhaustion or dehydration.  Patty Leander wrote a great post a while back about keeping cool in the Texas heat.  Click on the link to read all of her tips:  No Rest for the Weary-Summer Gardening Chores by Patty Leander
  • Harvest okra, Southern peas, Malabar spinach and other heat loving veggies often– Some of these heat loving veggies are still producing. Pick often
  • Prepare beds for fall – This weekend I will pull out all of my spring cucumber vines. Once they are gone if will begin preparing the row for fall planting.  I remove all remaining weeds.  I also remove my old hay mulch and take it to the burn pile.  The old hay is full of bugs and their eggs.  Next I cover the entire row with about three inches of compost and then I cover everything with fresh hay.  Come planting time I will push back my hay mulch, give the row a light till and then plant
I have never been to New England.  I was impressed with all of the quaint cottages and lush landscapes.

I have never been to New England. I was impressed with all of the quaint cottages and lush landscapes.

Ornamentals

  • Water correctly and water frequently – If you see yellow or brown leaves, curled leaves, spotted leaves, etc. on your ornamentals, there is a good chance they have some water stress. The general rule of thumb in Texas is water deeply every five days.  During July and August you may need to up your frequency to every second or third day
  • Mulch, mulch, mulch!- I generally mulch my beds with finished compost. This gives me a two in one benefit.  Mulch conserves water and by using compost you feed your plants at the same time.
  • Control aphids and white flies – Use a strong blast of water to the underside of leaves or apply a mild horticultural oil like neem
We visited the FDR house, museum and library.  This is his horse stable.  Wish I could have been one of his horses!

We visited the FDR house, museum and library. This is his horse stable. Wish I could have been one of his horses!

Trees and Lawns

  • Water, water, water! – An inch of water every five days may not be enough for St. Augustine and Bermuda. Walk on your lawn.  If your grass does not bounce back and fill your footsteps quickly you need to water.  Trees and woody shrubs need frequent, deep waterings; especially ones that were planted in the last two years.  Check out this article on tree watering from Denton County Extension Agent Janet Laminack – Tree Watering Basics by Janet Laminack
  • Lift up the height of your mower deck – If you have been mowing at 3” raise it to 3 ½”. Taller grass will keep it and the soil cool
It is believed that these orange day lilies are the descendants of the first day lilies brought to the Americas.  They grow, and spread, with abandon which has led to their common name of "ditch lilies".

It is believed that these orange day lilies are the descendants of the first day lilies brought to the Americas. They grow, and spread, with abandon which has led to their common name of “ditch lilies”.

I share these posts on Our SimpleHomestead Blog Hop.  Be sure to stop by.  The “hop” has tons of great information from gardeners and homesteaders all over the world!


Tip of the Week – Week 10 in the Zone 9 Garden

Can you believe this weather?!?  Winter just does not want to let us go.  Hopefully this will be the last cold snap (but I doubt it).  As you all are well aware, March is the busiest time of the year in the zone 9 garden.  Here are some of things that I will be doing in the weeks to come:

peach-tree

Right now my peach trees are in full bloom.

Vegetables

This weekend is tilling time for me.  I am increasing the size of my garden this year so I will be tilling up an area that has never been planted before.  I do a deep till with my rear-tine tiller.  This usually takes a couple of passes.  Then I use stakes and string to lay out my beds.  I make 48” beds divided by 38” walk paths.  To make the beds I run my Mantis tiller up and down the walk ways and move the soil onto the bed.  After this is roughed in I take my rake and clean the walk paths, shape the beds and remove all excess vegetation.  Once done I top dress the beds with finished compost (this year I got a deal on composted cotton burr) and then cover everything in a deep layer of spoiled hay mulch.  I leave the beds alone until I feel the weather is going to be warm enough (for long enough) for me to plant.

rear-tine-tiller

This weekend I will begin tilling up a new part of my garden.

Ornamentals

This may be one of the best early weekends to get out of your own garden and go look at what God and other gardeners have done.  Right now in Zone 9 narcissus and daffodils are in full bloom.  Redbuds and peach trees are stunning and plum trees are beginning to show.  Lots of ornamental trees are in full bloom and my favorite spring shrb, Primrose Jasmine, is beginning to cover itself in lovely yellow blooms.  While all of these plants are lovely the real queen of early spring in the South is the azalea.  This weekend the River Oaks Garden Club is hosting their 80th Azalea Trail in and around River Oaks.  This is a huge event for buddy Bart Brechter, Curator of Gardens at Bayou Bend.  It is not often that I recommend not gardening on the weekend.  However, the Azalea Trail is such an awesome event I really recommend that you get your gardening fix by using camera to explore some magnificent gardens.

Houston isn’t the only place to witness beautiful azaleas.  Nacogdoches also has an Azalea trail.  Theirs lasts through all of March.  Head over there any weekend this month and be blown away by the variety and colors of these beautiful plants.

Be careful with the "weed and feed" that is currently in the stores.  It mostly likely contains atrazine.  This chemical can damage or kill many shrubs and trees -even some oaks.

Be careful with the “weed and feed” that is currently in the stores. It mostly likely contains atrazine. This chemical can damage or kill many shrubs and trees -even some oaks.

Lawns

Right now is an odd, in-between time for yardeners.  It is too late for weed control and too early for fertilize.  If we get lucky with temperatures, we may need to start mowing soon.  For these early mowings set your blade at three inches.  Mow again when the grass is about 4” tall.  It is recommended that you only remove 1/3 of the blade with each mowing.  Also, do not bag you clippings.  The grass clippings are a great source of nitrogen for the grass.  By April your grass will be actively growing so you will need to readjust the mower deck to the recommended heights for the various grass types.

Trees and Shrubs

Even though I don’t use commercial products in my landscapes, I know a lot of you do.  With that in mind I want to warn you about “Weed and Feed” products that are in the stores now.  Most these are high nitrogen fertilizers with atrazine for post emergent weed control.  Atrazine will harm or kill many of our shrubs and trees.  If you look at the label on these products it will tell you to avoid beds and not to apply under the drip line of trees.  I really advise staying away from these products.

****Be sure to check out my friend Bart’s blog (Our Garden View) for more great tips for the Central and South Central garden!

I share my posts on the HomeAcre Hop.  Be sure to stop by the hop.  It has tons of great information from gardeners and homesteaders all over the world!

Myth # 50 Use Epsom Salt on… By C.L. Fornari

Today’s post marks a huge milestone for the Masters of Horticulture—200 posts!  To celebrate this accomplishment I am sharing a guest post from noted horticulturist and radio personality C. L. Fornari. (http://www.gardenlady.com).  C. L.  has a new book coming out on May 16 called “Coffee for Roses” (http://amzn.to/1mhXAGq).  In it, she uses her witty writing style and in depth horticultural knowledge to dispel many common horticultural myths that often show up as “fact” in conversation and on Pinterest and FaceBook.  In her excerpt below, she explains when and why you should use epsom salts in your garden (if at all).

Myth # 50 Use Epsom Salt on…

coffee4roses2 When researching the use of Epsom salt in the garden I was reminded of an old Saturday Night Live sketch about “New Shimmer.” “It’s a floor wax!” the wife, played by Gilda Radner, insists. The husband, Dan Aykroyd, claims, “It’s a dessert topping!” Naturally, the product was both.

Although I haven’t seen Epsom salt recommended as either a floor wax or a dessert topping, it’s been suggested for just about everything else. Through the years, advice columns, books, and now Internet sites have advocated using Epsom salt for tile cleaning, splinter removal, bath soaks, foot treatments, as a hair curling agent, laxative, facial hair remover, curtain stiffening, insecticide, fertilizer, headache cure, sunburn relief, treatment for insect bites, and for creating fake frost on windows.

More about that frost recipe later, but if the same product is recommended for curling hair and removing it, shouldn’t that give a thinking person pause?

coffee4roses3 Epsom salt was named for a town in Surrey, England, where it was once produced by boiling down mineral-rich spring water. Although the crystalline structure looks rather like table salt, Epsom salt is actually magnesium sulfate and contains 10% magnesium and 6% sulfur.

When I’m asked if Epsom salt should be applied on lawns, around roses, in the vegetable garden, or on houseplants, my reply is always the same. “Is your soil deficient in magnesium?” Most people don’t know; they’ve heard that they can put Epsom salt on plants but they don’t understand what it is or why they might use it.

Let’s get down and dirty about this. Connecting back to the fictional New Shimmer dessert topping for a moment, we might think of soil as we would a recipe for sweets. The ingredients for a tasty dessert need to be in the right proportions to make something delicious. Add too much cinnamon, baking soda or salt and the results would be inedible.

Soil also needs to be kept in balance. It’s a complex community made of minerals, organic matter, fungi, bacteria, other microorganisms, air and water. Too much of any one of those elements can throw everything off so that plants don’t grow as well. Most plants need the magnesium and sulfur that’s in Epsom salt, but unless you’ve tested the dirt you don’t know if your soil already has these elements or not.

So why not just give a plant Epsom salts and see what happens? In response, I think of two popular sayings. The first is Barry Commoner’s second law of ecology: “Everything must go somewhere.” It’s important to remember that products we put in our yards and gardens don’t just vanish. When we put anything into our environment it ultimately ends up somewhere, and that’s often downstream. So, better not to use something in the garden unless we know it’s really needed.

The second phrase that comes to mind is, “If it ain’t broke don’t fix it.” If the plants are growing well, chances are they are happy with the current conditions. Should you see that your plants aren’t doing well, identify the problem first, and then consider all possible solutions. If you suspect the difficulty starts at ground level, have a compete soil test done before taking action.

When you’re unsure if your soils are lacking in any one element, use a complete, organic fertilizer. A balanced fertilizer with all the essentials that plants require is less likely to throw Mother Nature’s recipe off kilter.

coffee4roses4

Click here to get your copy of “Coffee for Roses”

Epsom Salts Window Frost

Because of Epsom salt’s crystalline nature, it will form frost-like patterns on windows or mirrors when dissolved in liquid and painted on glass. This can be fun for holiday decorating or creating winter scenes.

You’ll see many recipes for Epsom salt frost calling for beer as the liquid, but there seems to be no reason for this; perhaps someone was looking for a way to use up flat beer. The recipe works well with water so your house doesn’t have to smell like a brewery.

½  cup water

½ cup Epsom salt

3 or 4 drops dishwashing detergent (this helps the “frost” stick on the glass)

Bring the water to a boil in a saucepan. Remove from the heat and add the Epsom salt, stirring until it is completely dissolved. Add the drops of detergent and stir again. Let this mixture cool down before using or it will drip excessively, but apply before it starts to crystalize in the pan. Paint or daub it on your glass surface using a paintbrush, cotton ball, micro-fiber cloth, or even your finger.

coffee4roses1

It’s Tree Planting Time by Janet Laminack

There is an old saying that goes “The very best time to plant a tree was twenty years ago”. If you didn’t do it twenty years ago you can make amends by planting one now.  Fall is the perfect time for planting trees in Texas.  Fall planting allows a tree to establish itself in the cooler temperatures of winter and spring.

October is the best time of the year to plant trees in Texas.  This weekend, I planted two large Empire Live Oaks from Tree Town USA in the front yard of nationally known decorator Holly Mathis (http://www.hollymathisinteriors.com/).

October is the best time of the year to plant trees in Texas. This weekend, I planted two large Empire Live Oaks from Tree Town USA in the front yard of nationally known decorator Holly Mathis (http://www.hollymathisinteriors.com/).

When choosing trees, people often want a quick growing tree. Quick growing sometimes means quick dying, so it’s best to be patient and pick a quality tree. Some good choices for our area include oaks like burr, chinkapin, red oak and live oak. Lacebark elm and cedar elm do well and pecans also make nice shade trees. But pecans are not a good choice for planting over driveways or for the squirrel-adverse. You can also consider smaller trees or large shrubs such as redbud, crape myrtle, desert willow, and wax myrtle. True, these trees won’t be gigantic shade trees, but they can make a positive impact and might be more appropriate and attractive by staying in scale with your home and smaller urban lot.

When I plant a tree I use my shovel to get the hole width and depth correct.  Width should be 1.5 times as big as the pot and the depth should be 2 or 3 inches shorter than the soil depth in the pot

When I plant a tree I use my shovel to get the hole width and depth correct. Width should be 1.5 times as big as the pot and the depth should be 2 or 3 inches shorter than the soil depth in the pot

When deciding where to plant a tree, it’s essential to consider its mature size. Consider how big this tree will be in 10, 20, or 30 years. Make sure you don’t plant a tree too close to power lines, buildings or other trees. You also need to check that the tree isn’t too close to anything underground as well. Before you dig, call 811 to have the underground utilities in your lawn marked for free. Planting trees or shrubs might seem like minor digging, but not knowing where underground lines are could put you in danger or disrupt service in your neighborhood (or both depending on just how serious the sports fans are in your area!) For more information, visit www.call811.com.

The handle of my shovel was almost exactly 1.5 times as wide as the pot of my 45 gallon Empire Live Oak.  Note the black line on the handle.  This is how I determine the depth of the hole.

The handle of my shovel was almost exactly 1.5 times as wide as the pot of my 45 gallon Empire Live Oak. Note the black line on the handle. This is how I determine the depth of the hole.

Trees can increase the value of a home’s resale. Properly placed trees can also help with heating and cooling expenses of the home. A deciduous tree (one that loses its leaves in the winter) placed on the south or west side of a home provides shade and cooling in the summer and allows for warming up in the winter.

A big tree requires a big hole and some help.  I had two grown men help me with my 45 gallon Empire Live Oak.

A big tree requires a big hole and some help. I had two grown men help me with my 45 gallon Empire Live Oak.

I’d recommend doing some research on your own in order to pick your tree. Online sources such as the Texas Forest Service Tree Selector (http://texastreeplanting.tamu.edu/) and the Earth-Kind Plant Selector (http://earthkind.tamu.edu) can provide you with much more information on the particular traits of trees that work well in North Texas.

When back filling the hole, it is a good idea to fill 1/3 of the whole the with soil and then saturate.  Use the handle of your shovel to tamp in the soil.  Then add 1/3 more soil and repeat.  This will remove any root killing air pockets.

When back filling the hole, it is a good idea to fill 1/3 of the hole with soil and then saturate. Use the handle of your shovel to tamp in the soil. Then add 1/3 more soil and repeat. This will remove any root killing air pockets.

As far as planting trees a very common mistake is planting a tree too deep.    Keep the same soil line on the trunk when it’s in the ground as it was in the container. If this kind of exactness makes you nervous, place the tree slightly higher. Some settling may occur and it is very important to make sure the tree is not too deep.  Once the tree is planted, don’t forget about it. For the first three years it will need more care while it gets established such as supplemental water and reducing the competition of weeds and grass. For more details on proper tree planting and more tree choices for our area, check out www.dcmga.com, email us at master.gardener@dentoncounty.com or call 940.349.2892.

This post has been shared on the Homestead Barn Hop.  These’s hops are a great way to gather tons of great info from bloogers around the country.  Be sure to visit!

Tree Watering Basics by Janet Laminack

Jay recently contacted me about a question he received on his blog from Gabriel Saldivar.

“I am worried about our Burr oak tree. We planted a 95 gallon burr oak in February of this year in Comal County.  Its leaves turned yellow then brown. We got a heavy wind and rain this summer and most of the leaves fell off. I’m worried that it may be in shock and do not know what I can do to help it along the way. I’ve watered it twice a week since we have had it. I do see some new life with some newer leaves coming out. If anyone has any suggestions or know when I should really worry, please let me know.”

As a county agent, I hear questions like Mr. Saldivar’s fairly regularly.  Since it is August and many of you are experiencing similar issues, I thought this would be a great time to review the proper way to water your trees.

trees Trees can be the most valuable asset in the home landscape. They add resale value to the home and they can reduce heating and cooling expenses. Since trees add so much to your landscape (and they are expensive to replace) it is important to learn how to water them correctly. Trees in Texas definitely need supplemental irrigation and they definitely need to be watered differently than the way you water your lawn.

Tree roots are opportunistic and the largest number of roots will be in the location that is most likely to receive rain or irrigation. In most situations, this means roots will be at the drip line, which is out at the edge of where the tree canopy or branches end.  Think about where most of the rain will fall when the tree is covered with leaves.  Watering right next to the trunk or spraying the leaves of the tree is not as beneficial as watering where natural rainfall would be, a few inches inside and beyond the drip line.

Water tree a few inches inside and outside of their natural drip line

Water trees a few inches inside and outside of their natural drip line

An efficient way to water is by using a soaker hose or drip irrigation. These methods lose very little water to evaporation. Sprinklers work as well, but will need to be adjusted to sufficiently water a tree deeply as compared to watering a lawn. Also, laying down a water hose and letting it slowly run works great, but you will need to move it around the tree periodically to ensure that all areas get sufficient moisture.

Soaker hoses are a great way to deeply water your trees

Soaker hoses are a great way to deeply water your trees

In order to create a healthy root system, trees should be watered deeply and infrequently.  When watering, put down an inch of water at a time or ensure that you have watered to a depth of between 6 to 10 inches.  This may sound difficult, but it’s actually very simple to make sure you are getting enough water to your trees. After watering, stick a screwdriver or a shovel into the ground. In most of our soils, it will only go easily in when the soil is moist. If you are using a sprinkler, put out rain gauges or catch cans (use tuna cans) and measure one inch of water being applied.

sprinkler How often should you water? If we are not receiving adequate rainfall, established trees need a deep watering at least twice a month.  Check the soil with your screwdriver.  If your twice a month waterings are not doing the trick, increase the frequency.

One more note.  The tips listed above are most effective for established trees. Newly planted trees need to be watered more frequently for the first three years of their life. Use your screwdriver to check newly planted trees every week.  If the soil around them dries out completely between waterings it can send them into a shock that they may never recover from.

Here is a great video from The Texas A&M Forest Service that highlights the proper tree watering techniques discussed above.

I share these posts on Our SimpleHomestead Blog Hop.  Be sure to stop by.  The “hop” has tons of great information from gardeners and homesteaders all over the world!