How to Harvest and Cure Onions

This past weekend, I pulled up 52 pounds of 10/15 onions.  Definitely my best onion harvest ever.  Now the question is, “What do I do with 52 lbs of onions”?  Since my wife and I are empty nesters, it is going to take us a while to eat all of those onions.  Especially when you take into account the fact that I just harvested an apple box full of shallots and I am still growing Egyptian Walking Onions.  I am sure we will be sharing with our kids and neighbors, but we are still going to have to preserve a large number of these onions.  Here’s how we preserve our onion crop:

10/15 onions in the potager two weeks ago

First, if you are new to gardening, you may wonder when to harvest or pull your onions.  The general rule is “Pull when the tops fall over”.  Below is a picture of what that looks like.  I believe in letting nature take its course.  I do not pull until 75% or more of the tops have fallen.  Once they fall, you can leave them in the ground for a week to ten days.  This starts the natural curing process.  However, do not leave them in the ground much more than ten days as that makes them susceptible to soil borne pathogens that can cause mold and rot in storage.  Just a little note,  I have heard several people say you have to cure onions before you can eat them.  This is not true.  Onions can be eaten at any time in their growth cycle (tops and all).  You only have to cure onions that you want to preserve.

The same onions from the first photo after their tops have fallen over

Once you have pulled your onions, spread them out in the sun.  Make sure they have room between them for air circulation.  I put mine on an old screen door up on saw horses.  The length of time varies.  If you pull them on a dry, hot day in Texas, then a few hours should be sufficient.  If it has rained recently, the onions moisture content will be higher and you will need to leave them out until the roots become noticeably harder than when they were harvested. 

Once they have completed this initial drying period, place them in a dry, shady place to allow them to complete the curing process.  Many people put them on their porch.  If you do not have room on your porch or in your garage, put them outside on a board or screen door to keep them off of the ground.  Place a sheet over them for shade.  Do not use plastic or canvas as this traps moisture.  You can cut the tops off at this time if you wish but if you do, leave about one inch of top on the onion.

Placing the onions on an old screen door. Allow plenty of space around them so they will cure properly.

While they are drying, turn them every few days to make sure they are drying evenly.  This part of the process can take two or three weeks.  You will know they are ready when the outer skins are papery and the roots are dry and brittle. 

Once your onion’s have cured, you can place them in mesh bags (or braid their tops together) and hang them in the garage for a little more drying.  If you are going to put them in a root cellar where humidity is high, you want to make sure they are as dry as possible.  Properly cured onions can keep for several months.  Check them often and discard any that are becoming soft.  If you see any sign of sprouting, eat them immediately, replant, or discard.

Surviving the 2011 Drought

Right now it is so dry at my house that when I went fishing the other day I had to throw everything I caught back because all the fish were infested with ticks!  Now that ‘s dry!  Seriously though, it is dry at my house.  In fact, according to the US Drought Monitor (http://www.drought.unl.edu/dm/monitor.html) it is EXCEPTIONALLY dry at my house.  Exceptional is the highest drought rating assigned by the US Drought Monitor.  If you look closely at the map below you will note that Washington County and half of Harris County are experiencing an exceptional drought.  The last time it was this dry was the drought of 1917-1918.  While this is extremely bad news for farmers and ranchers, it is pretty bad news for us gardens and yardners as well.  Hello high water bills!  If I were a betting man, I would be willing to bet that forced water reductions are on the way for many of us in Central Texas.  Since it is so dry, I thought this would be a good time to review some watering best practices.


How Much

As a general rule, most vegetables and flowers (and your yard too) need about an inch of water per week.  How do you know if you are putting out an inch of water?  The best way is to measure.  If using a sprinkler, put several cans out in various places under the sprinkler’s pattern.  Let it run for 15 minutes and measure the water in the cans.  Average those numbers.  If those cans averaged ¼” of water in 15 minutes then you will need to run that sprinkler for one hour. When measuring flow for soaker hoses or drip lines it is better to use tuna cans.  Also, if using soaker hoses do not use more than 100 foot runs.  The average garden faucet can push water through 600’ of hose.  However, at distances of greater than 100’ pressure drops drastically beyond that 100’ point.

When to Water

Most experts suggest watering in the early morning.  Especially if using sprinklers.  Winds are lower in the morning, humidity is high and temperatures are low.  This is the ideal time to maximize water usage and minimize loss to evaporation.  Also, many plants are prone to disease if their foliage stays wet.  Watering in the morning will let the foliage dry up rapidly as the day warms up.

Mulch

You know the yupneck loves his mulch.  In addition to reducing evaporation and keeping the soil cool, mulch suppresses those pesky weeds that compete for your plants water.  One thing to remember, mulch not only helps keep water in, it can keep it out too.  A deep layer of mulch can trap alot water if it is applied from above.

Mulch and soaker hoses in the yupneck’s 2010 fall garden

Soaker Hoses and Drip Irrigation

I love soaker hoses.  They are cheap, easy to use and they put the water where it is needed.  If you use soaker hoses, you can water anytime you want since you are not going to be wetting the plants foliage.  Place your soaker hoses under a good layer of mulch and you will be doubling the benefit.  Drip irrigation works the same way.  The only thing I don’t like about drip systems is the cost and maintenance.  That is a personal thing though.  I know lots of folks that swear by their drip systems.

Trees and shrubs

Watering trees is considerably different than watering veggies or flowers.  While most garden plants need one inch of water per week, most trees need gallons of water.  A mid-sized fig tree needs at least five gallons of water per week.  Also, you shouldn’t water a mature tree at the trunk.  Use a sprinkler or drip hoses to saturate the area under the trees drip line.  Water to runoff and quit.  This deep watering should get the tree through about 10 days.  If the ground around a tree stays too wet for too long you can kill young roots.

Newly planted trees and shrubs should be watered differently than mature ones.  While trying to get these plants established it is alright to water right at the trunk.  Water to run off every five days.  Here is a trick I learned from my wife’s very frugal and very Czech grandmother who believed in wasting nothing (especially not water).  Take an empty 5 gallon bucket and drill a hole in the side right above the bottom of the bucket.  After planting the tree, put this bucket beside the tree so that the hole is pointing toward the base of the tree.  Now, simply fill the bucket once a week during the hottest part of the year.  As the bucket drains it will give exactly 5 gallons of water to the new tree.

Florescence 2011

This is what an art car looks like when done by the designers at Florescence

 Every other year, the Museum of Fine Arts Houston (MFAH), in conjunction with the River Oaks Garden Club (“http://www.riveroaksgardenclub.org/Florescence.cfm“) and The Garden Club of Houston,  hosts a truly spectacular floral show.  Florescence is one of the largest competitive flower shows sanctioned by the Garden Club of America. This years theme is “Passages”.

Florescence features floral and horticultural arrangements by garden club experts, renowned designers, memebers of the Asia Society, Houston, Federated Garden Clubs, Texas State Floral Association and Lamar High School Floral Design students. 

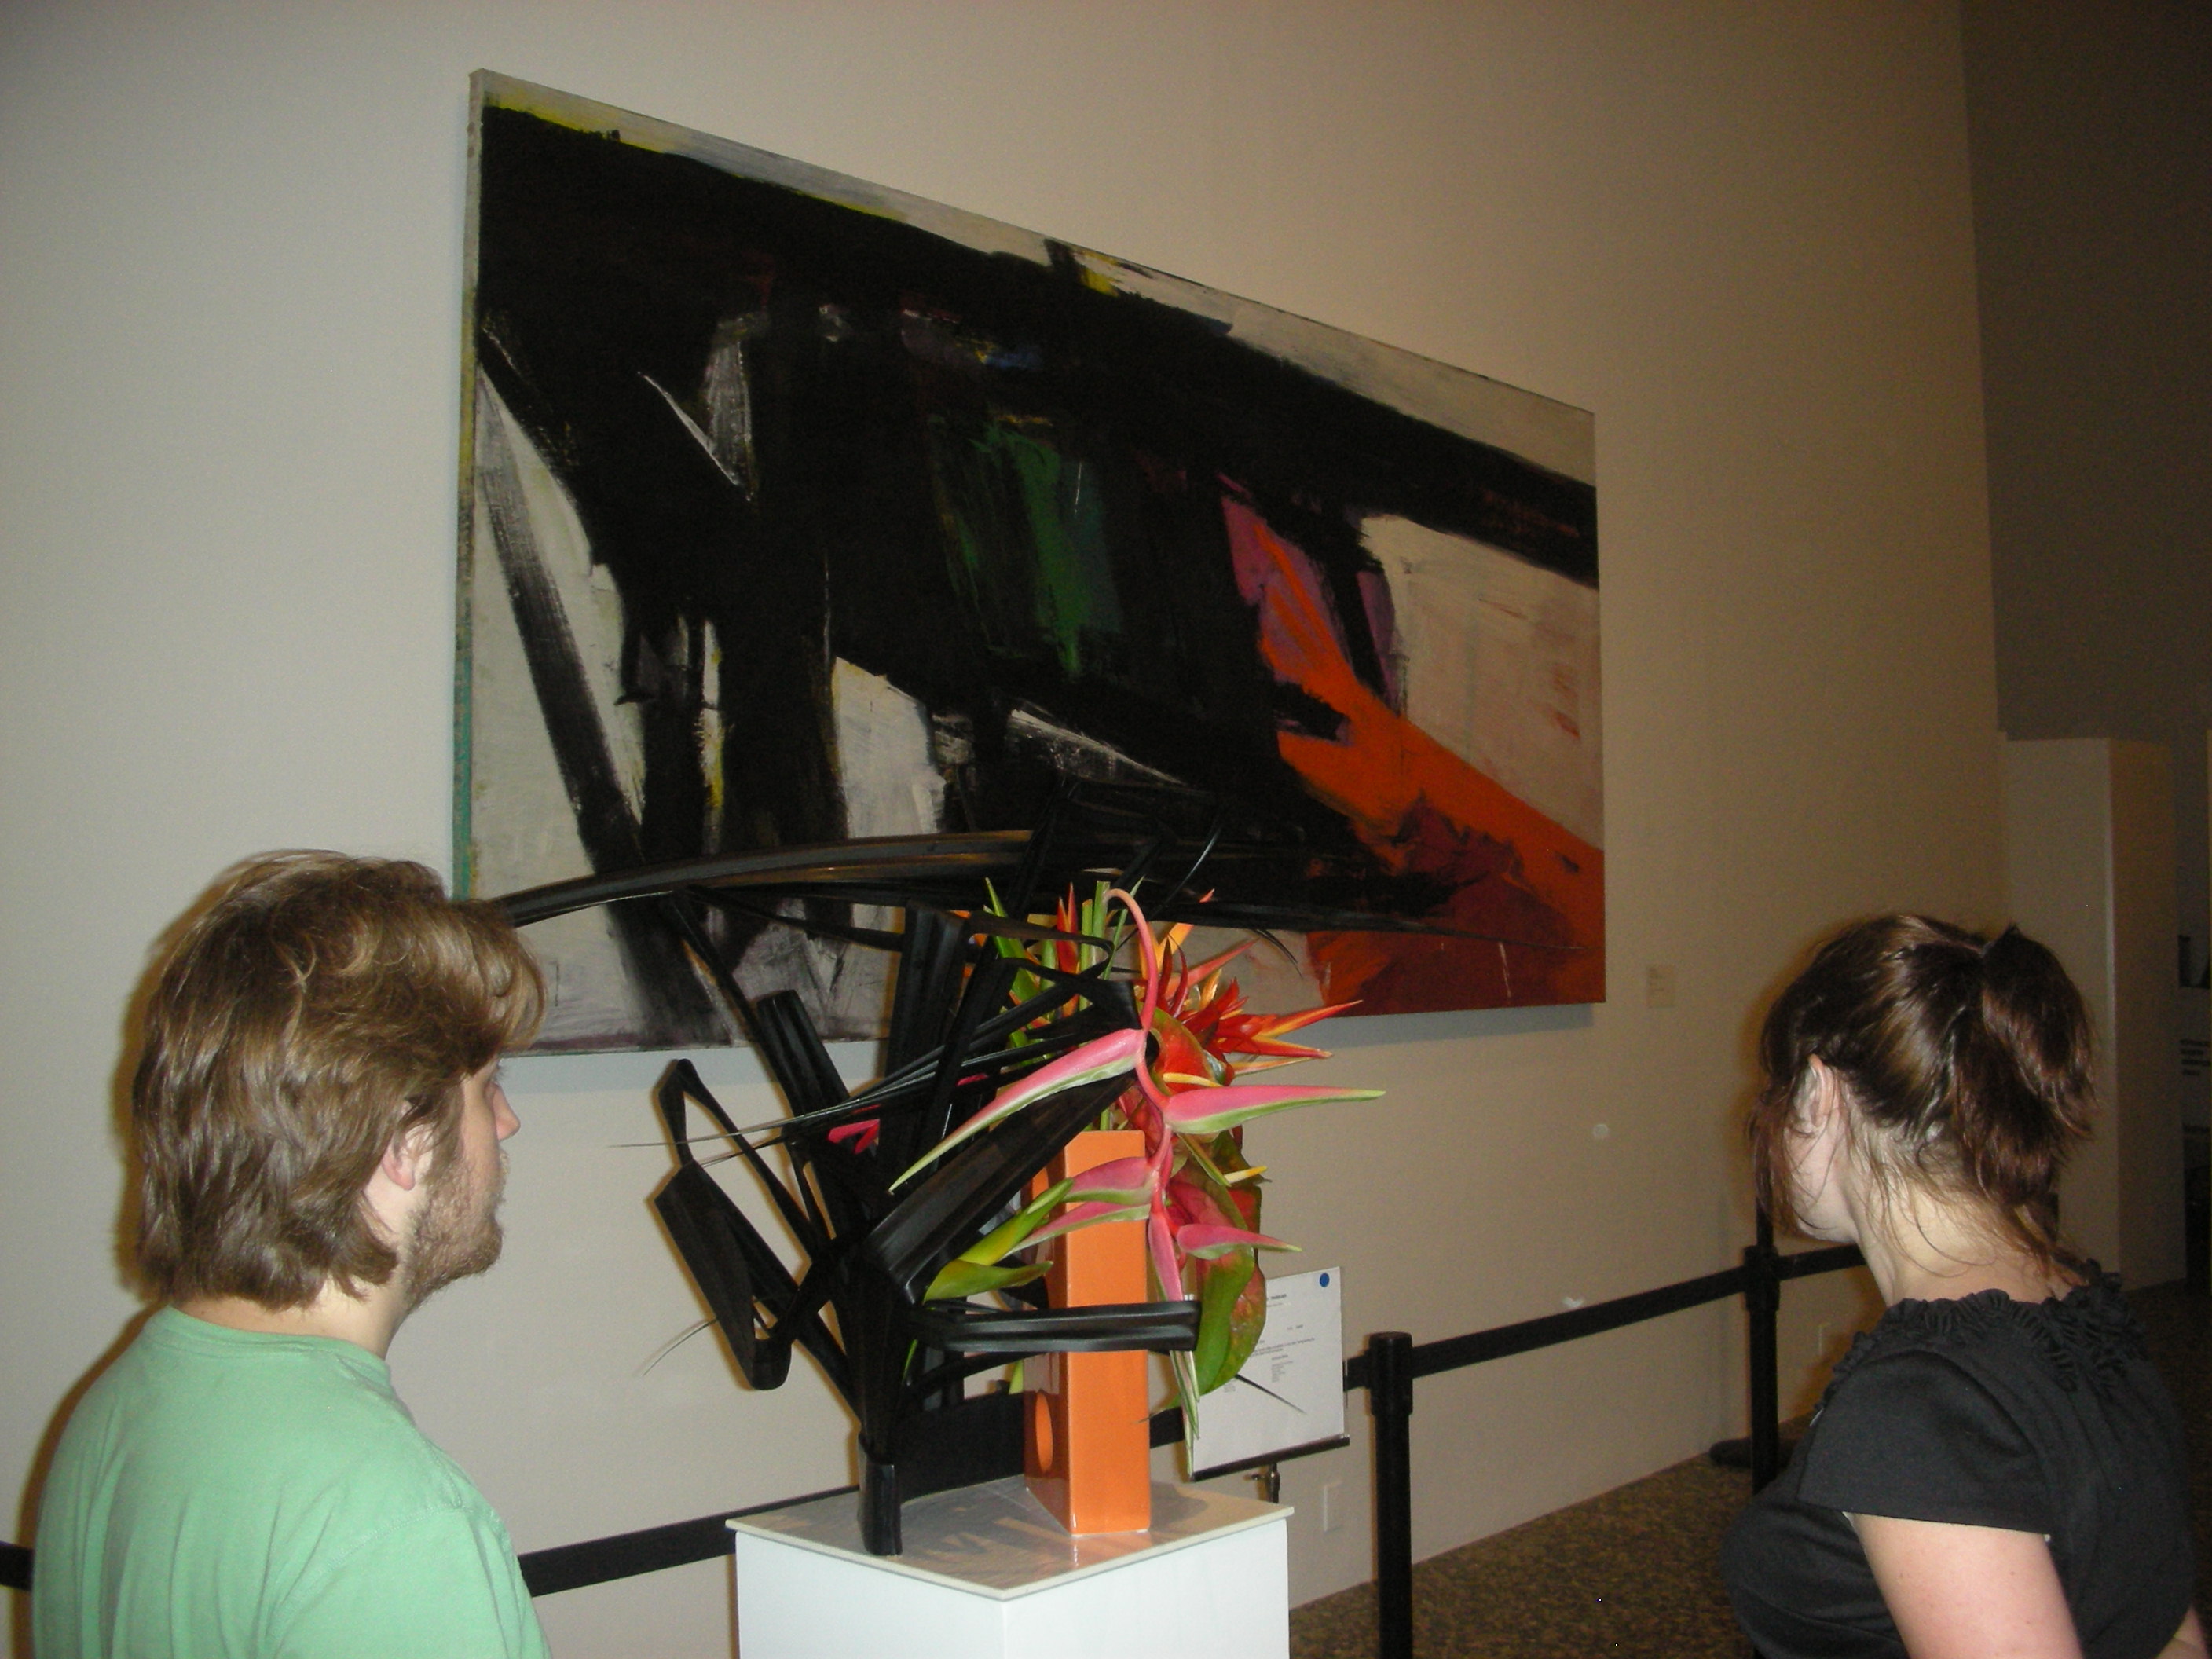
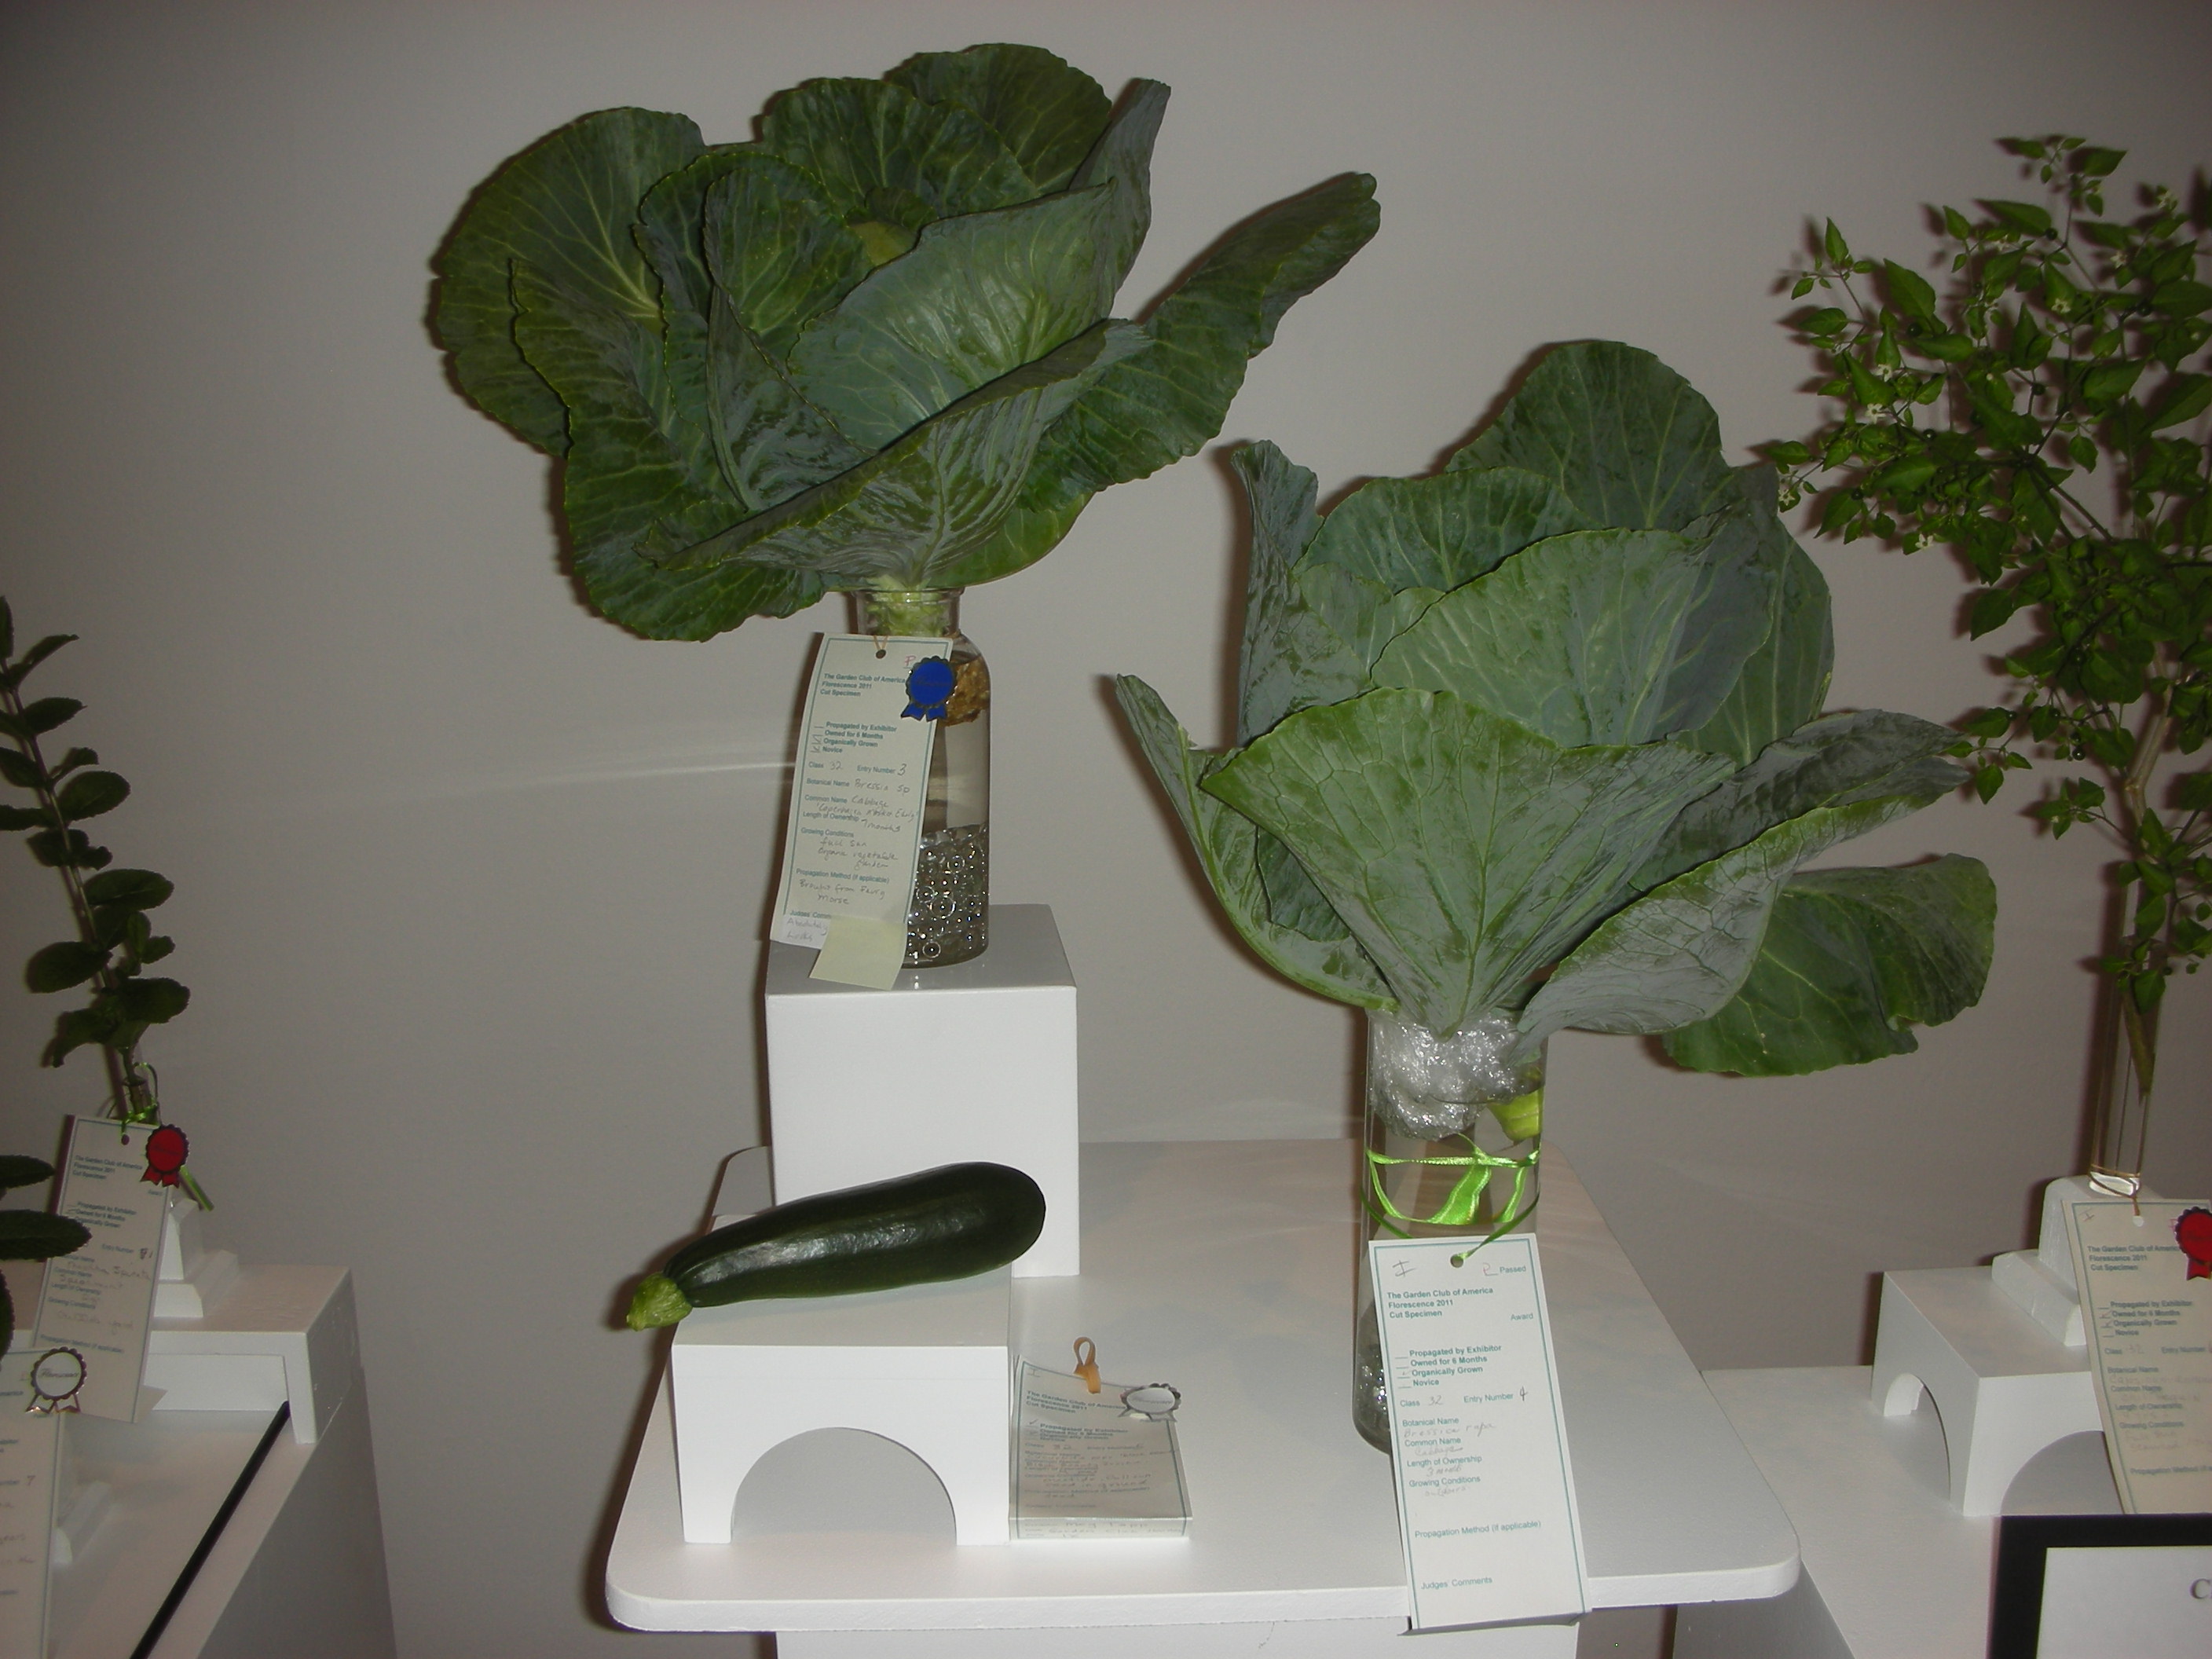
The show was outstanding.  Entries ran the gamut from individual flowers, fruits and vegetables grown by participants to very elaborate arrangements that designers built on site in response to pieces in the MFAH permanent collection.  Scroll down for pictures of some of these exhibits.

A stunning intrerpretation of one of the museum's pieces


My daughter and son in law enjoy another beautiful interpretation

I saw lots of orange in the show.


An all white display can make anything look good.


Stunning! The picture does not do it just. The flash washed out the deep green background, but still you can see how beautiful this was. I think it was my favorite.

Blooms in the Potager

Over the past year I have slowing been shifting the focus of my potager from veggies to herbs and flowers.  Because of this, the potager is now lovelier than it has ever been.  Here are a few pics of some of the things that are blooming (or beginning to) in my little kitchen garden.

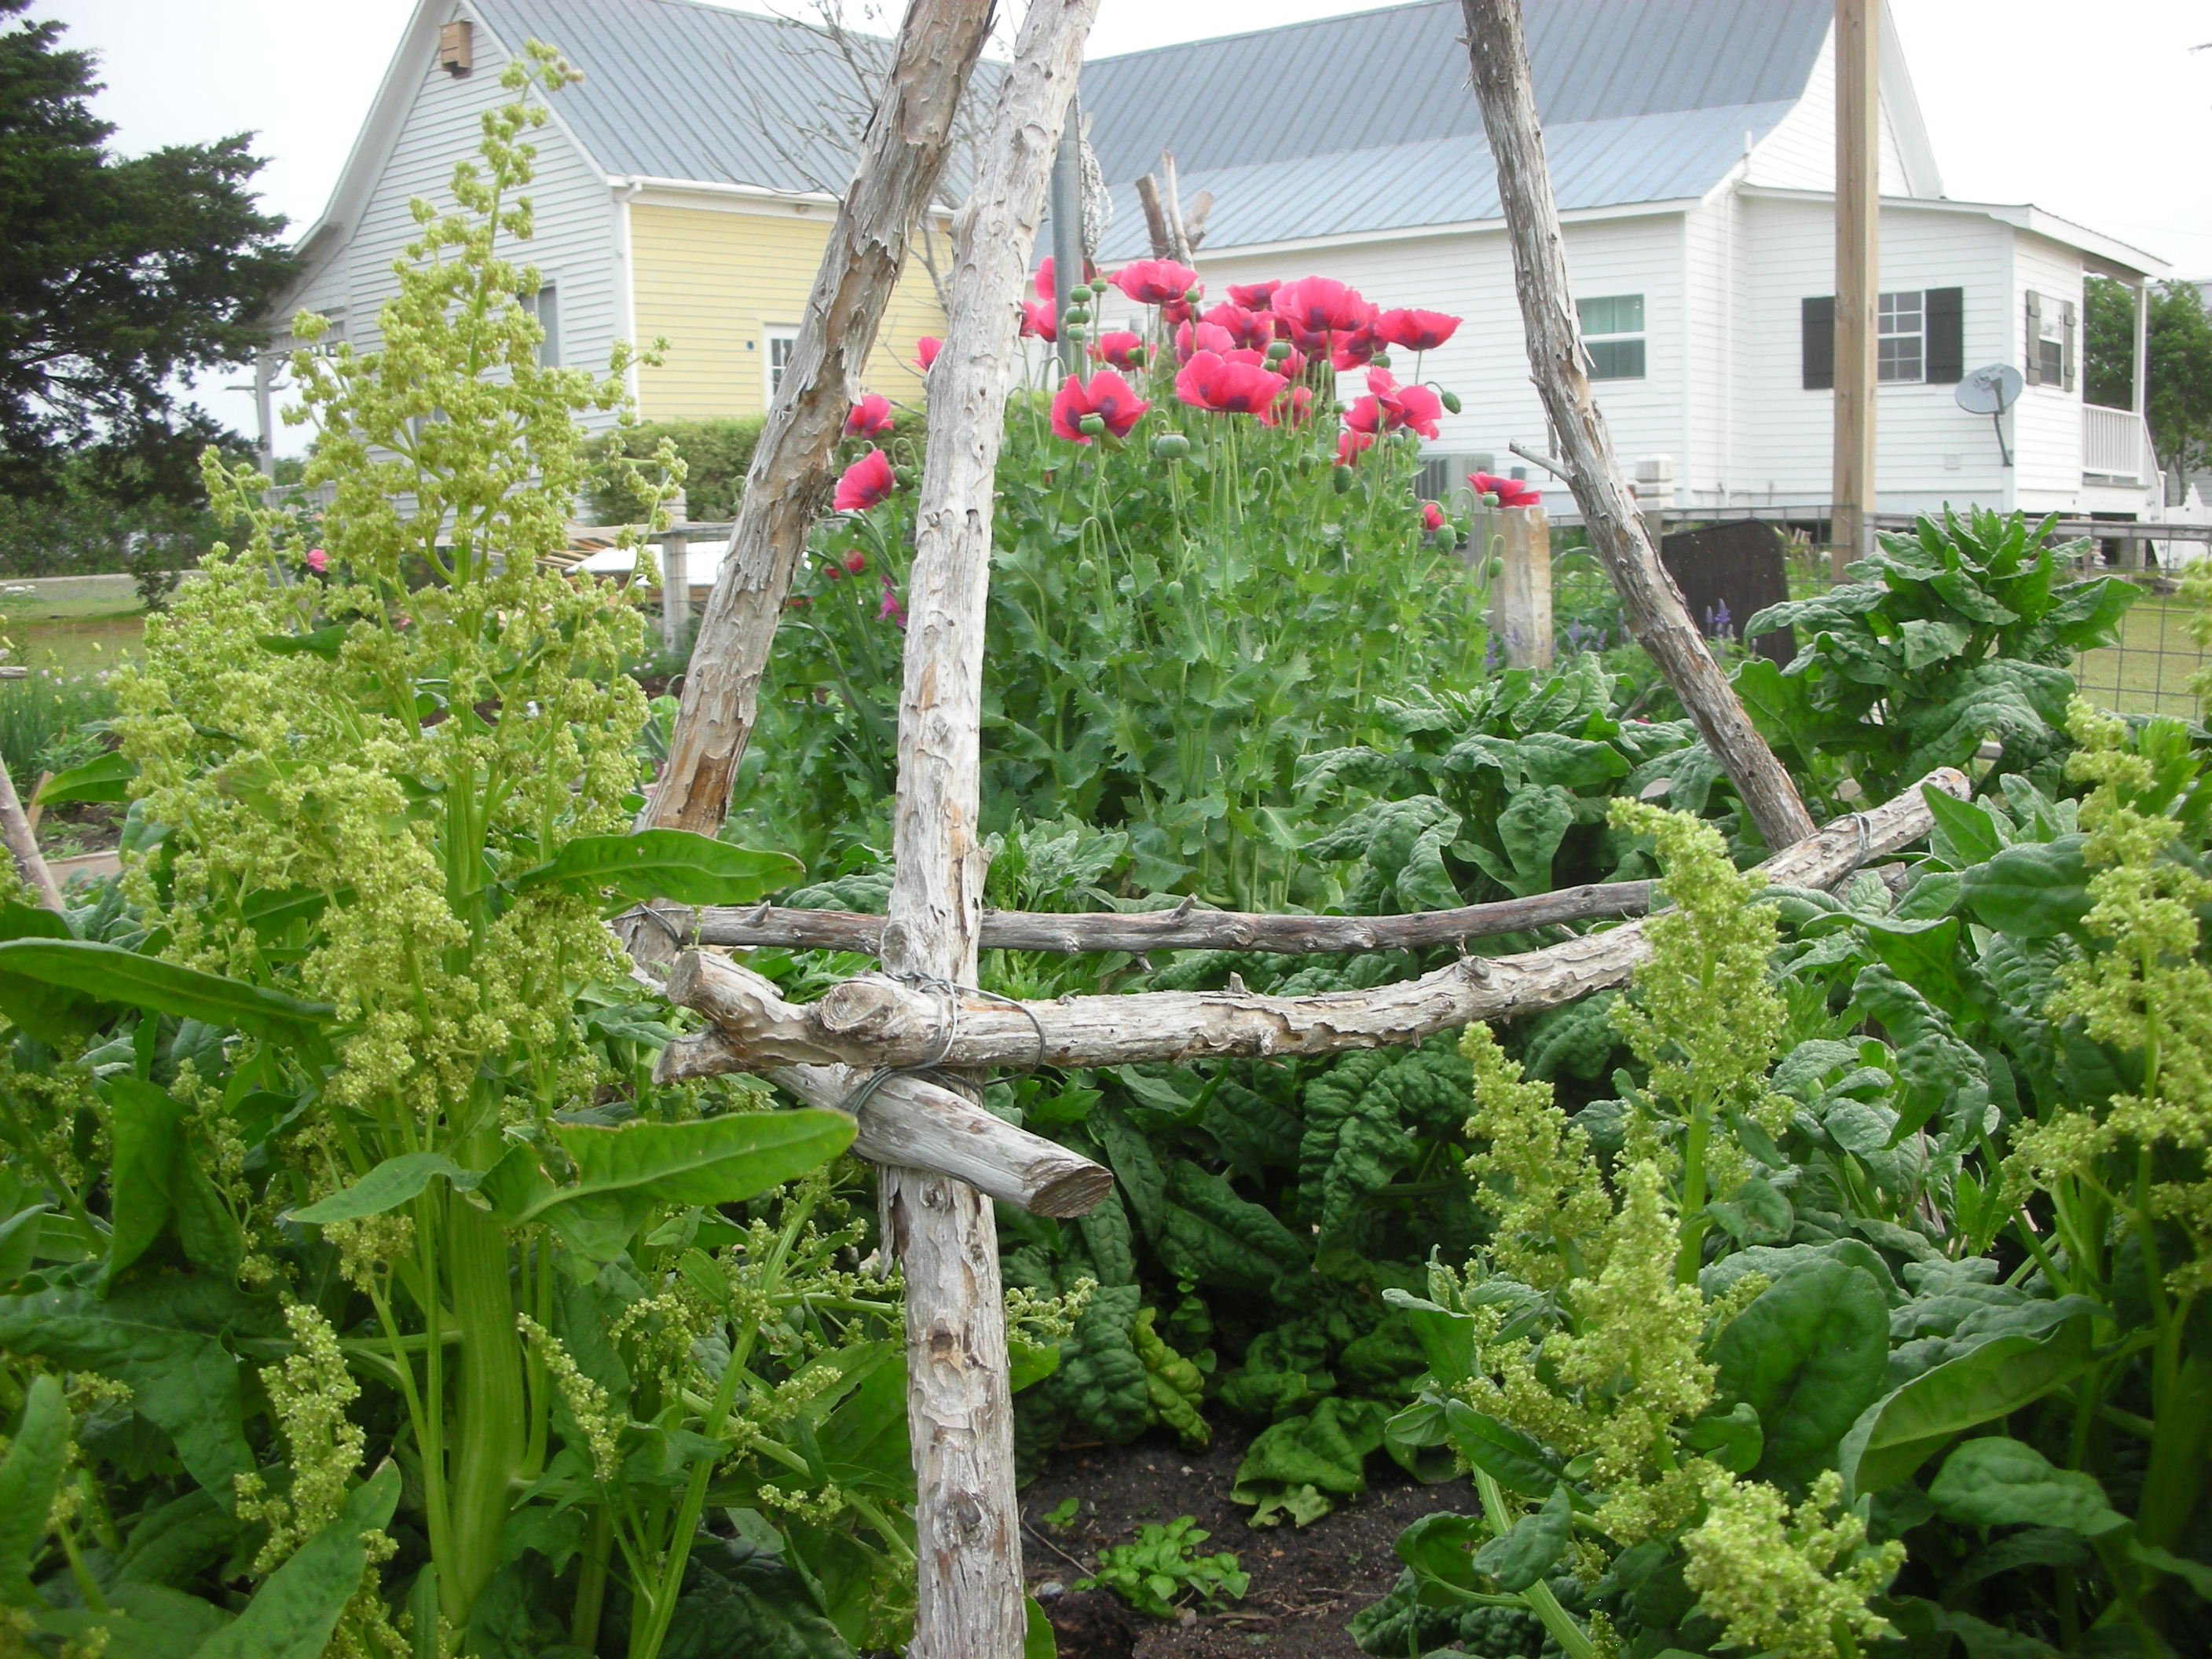
First up are the poppies.  I got the seeds from Carol Ann Sayle at Boggy Creek Farm in Austin.  As you can see, they are beautiful.

Here’s another shot

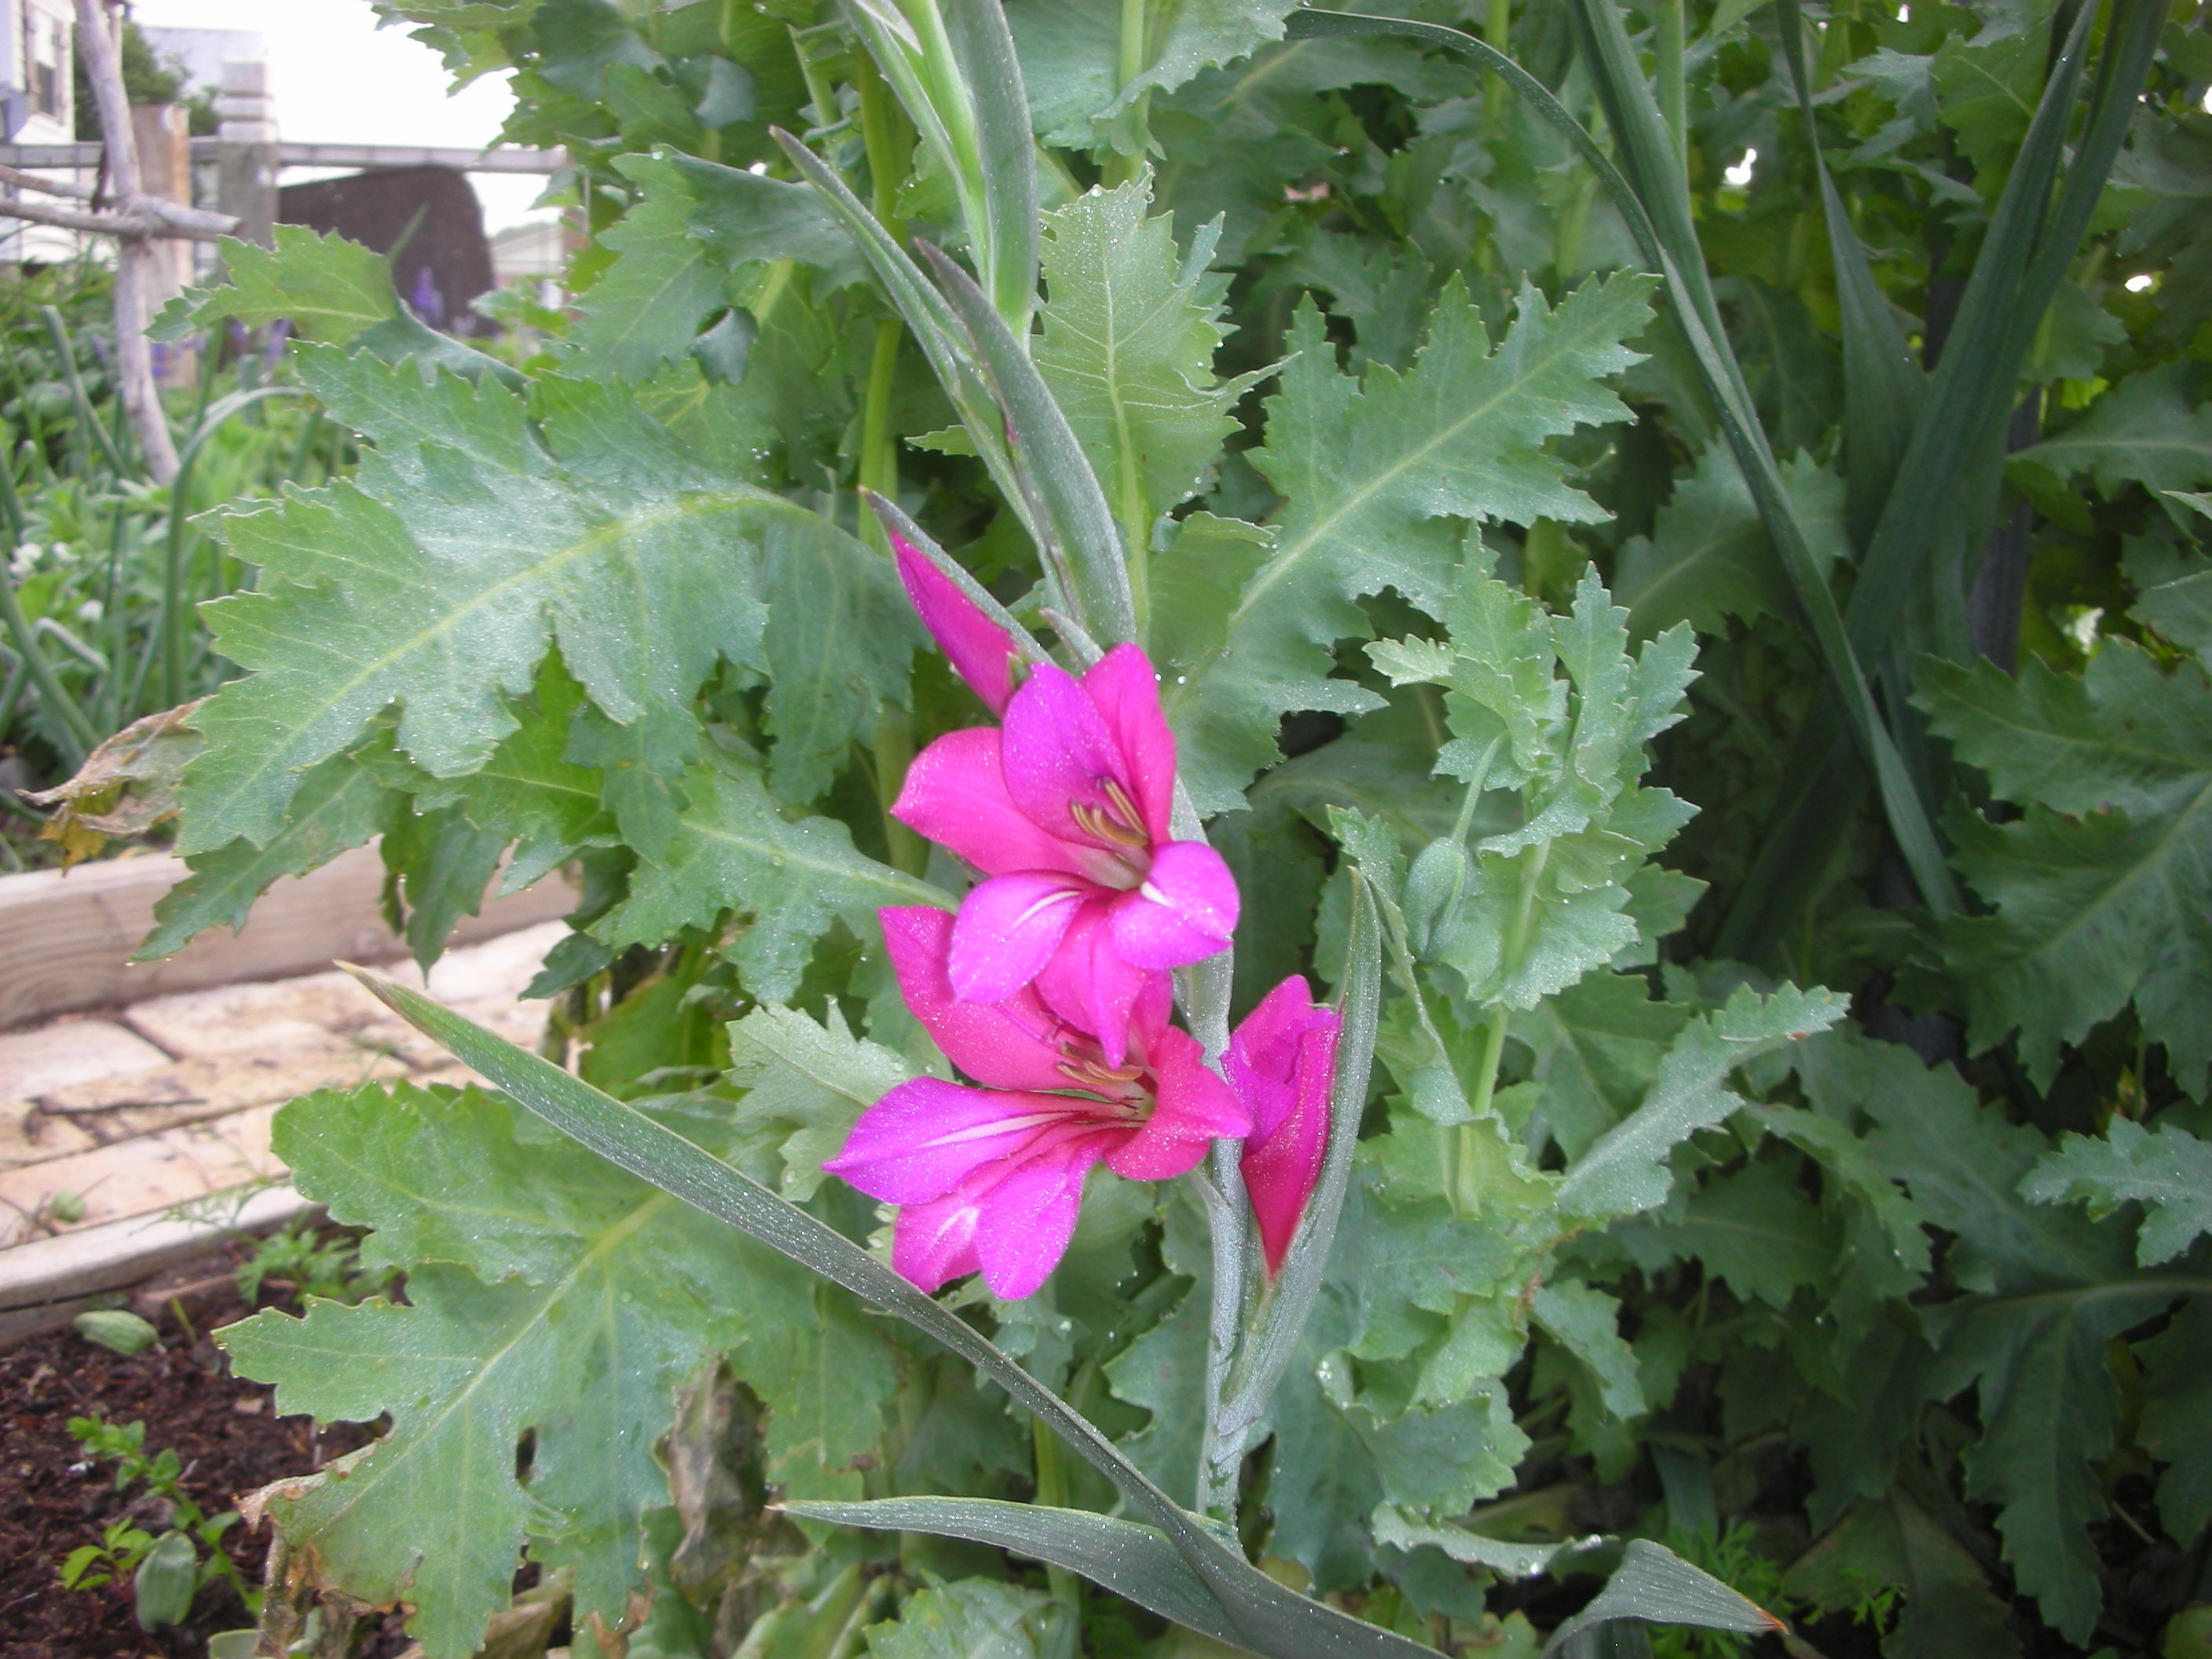
Mixed in with the poppies are some Byzantine gladiolus. 

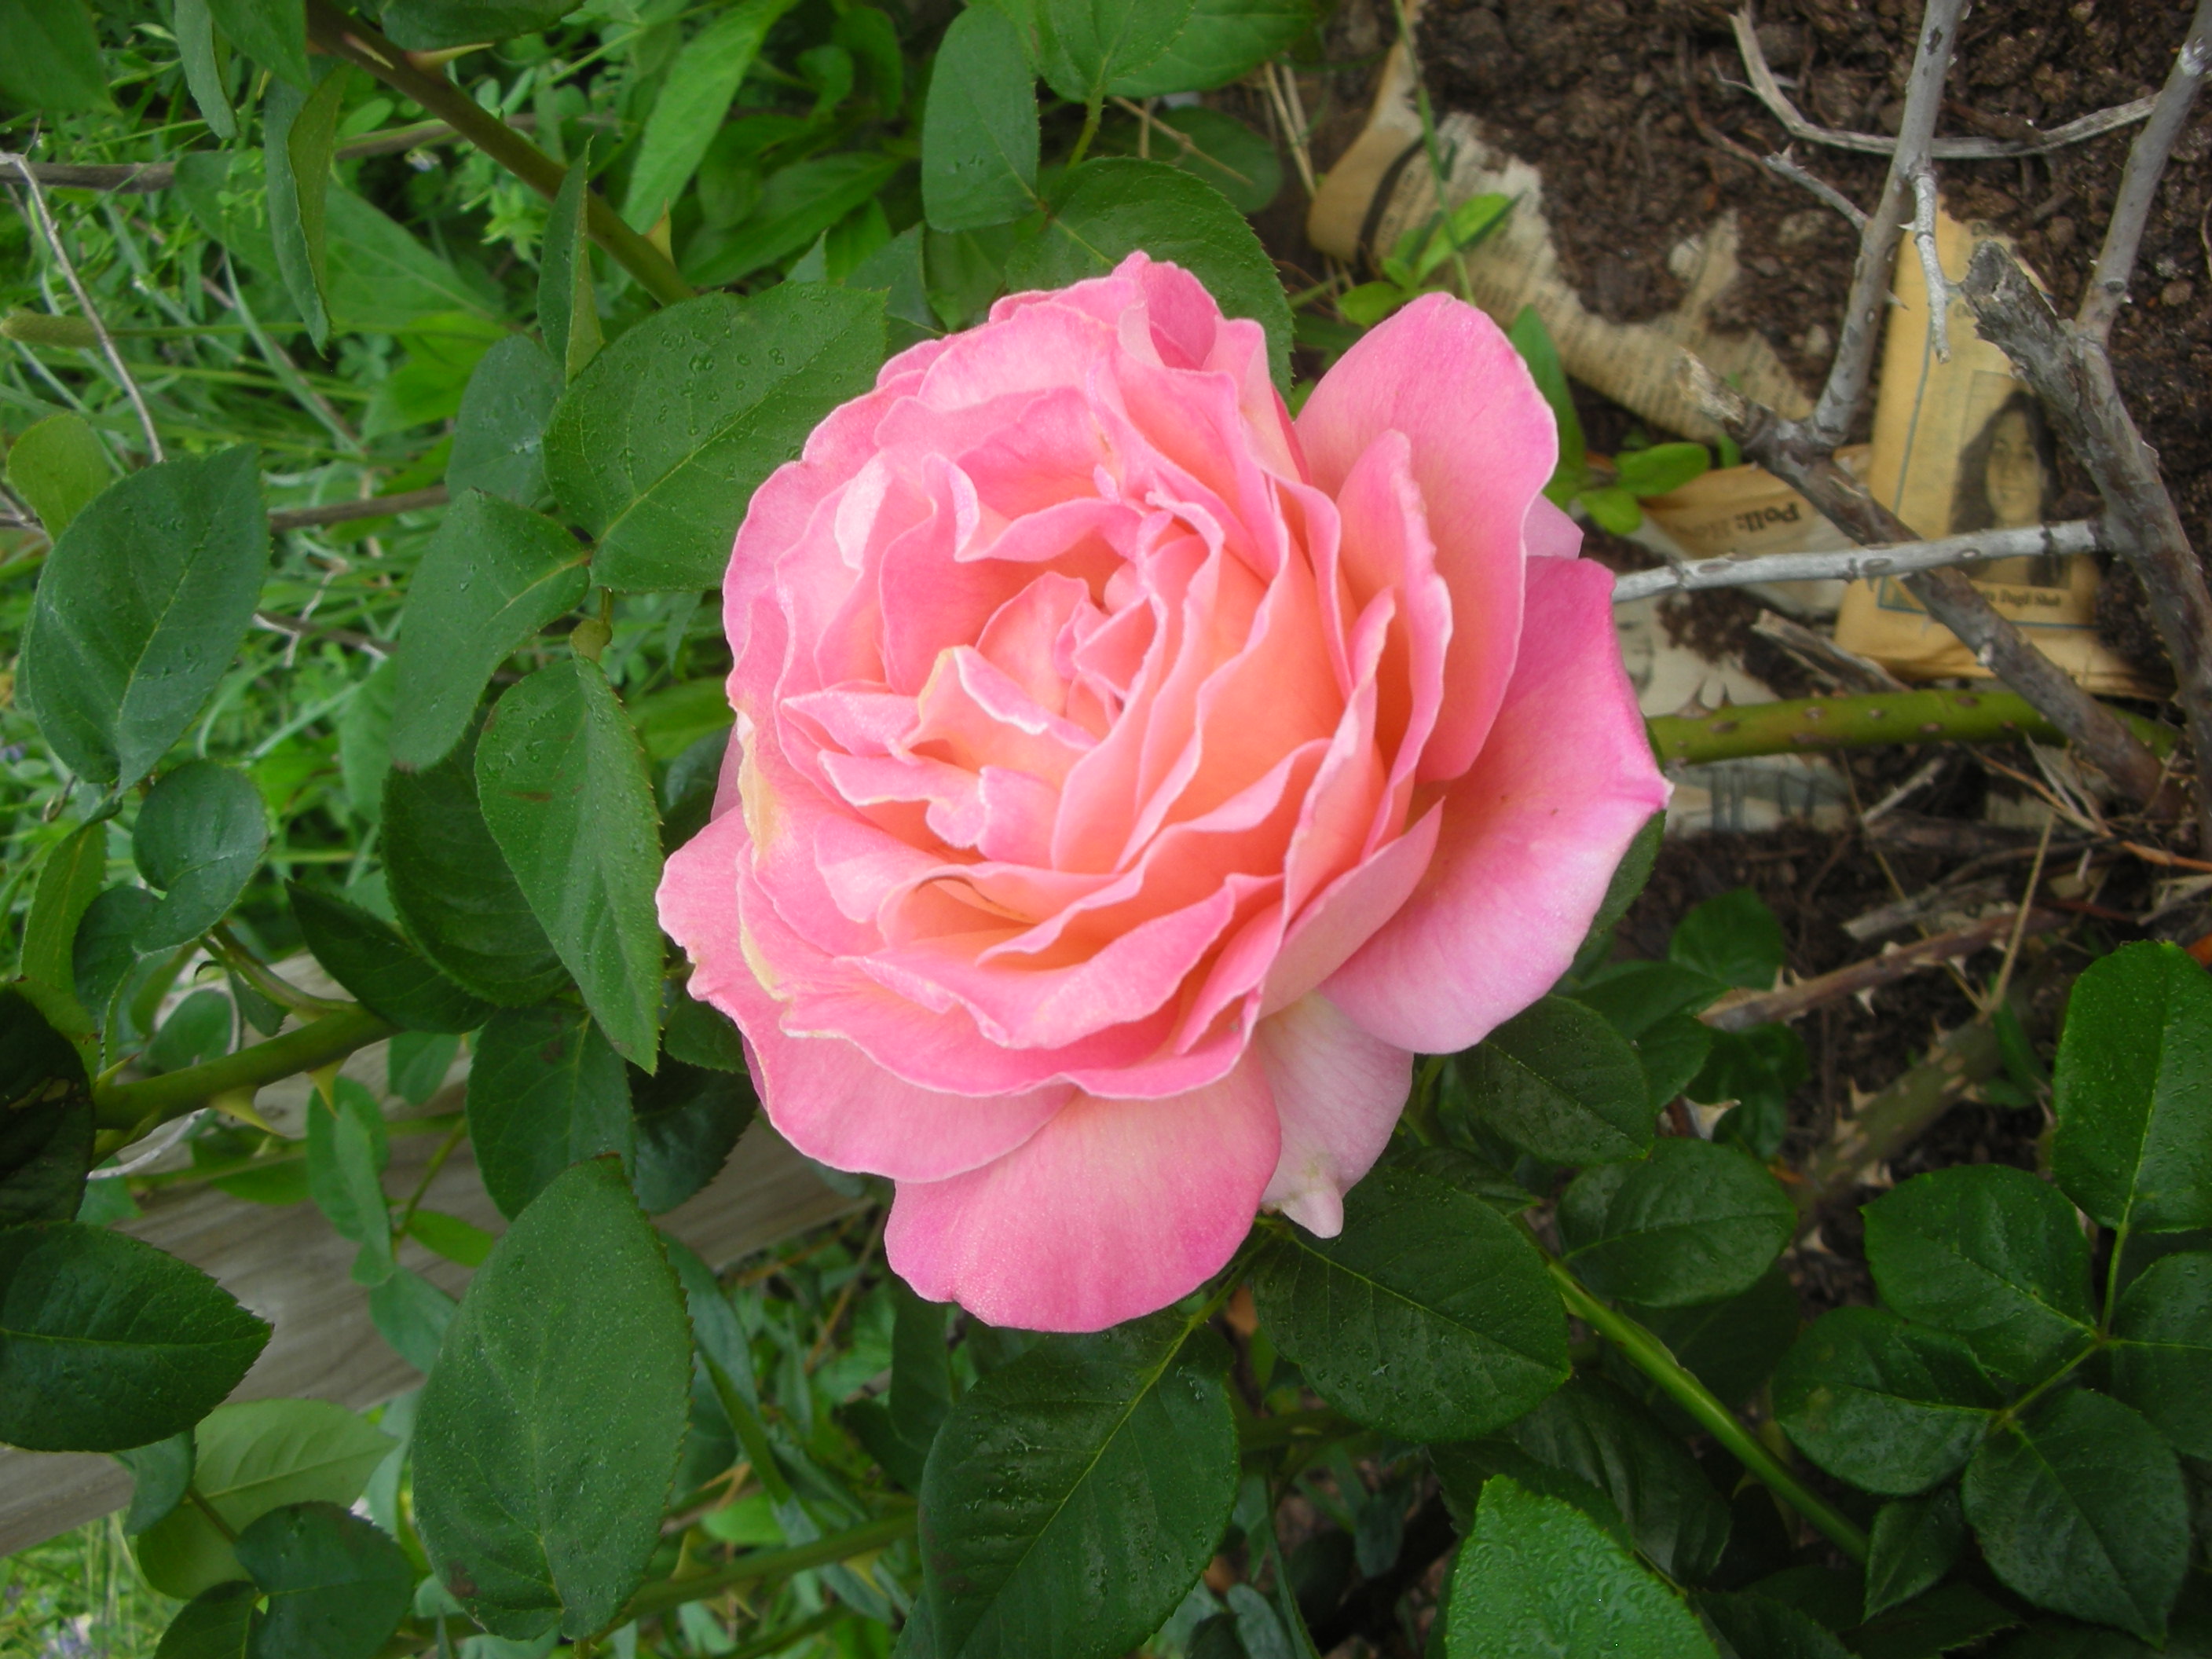
Here is an un-named rose that I got from my sister.  She lost her battle with ALS two year’s ago.  Everytime this rose blooms I think of her and smile.  Since we don’t know what it is, we call in “Ginna’s Rose” in her honor.

My “Victoria” salvia is thriving after the harsh winter.  There is lemon grass in the white pot behind it

I bought these and they were labeled “strawflower”.  They look alot like dianthus to me.  Whatever they are, they are lovely and they last forever as a cut flower.

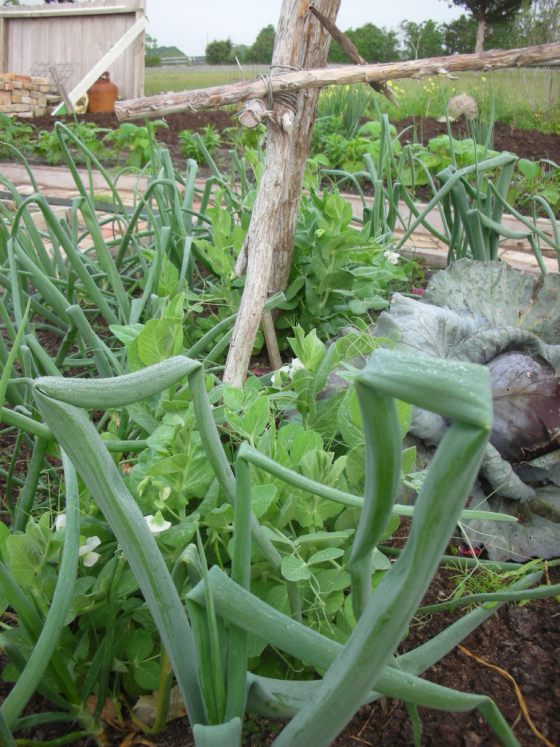
There are still a few veggies in the potager.  Here are some 10/15 onions, purple cabbage and English peas for the trellis

Here is what happens when you let spinach bolt.  I had never let it go this far before but I thought it made an attractive shot. 

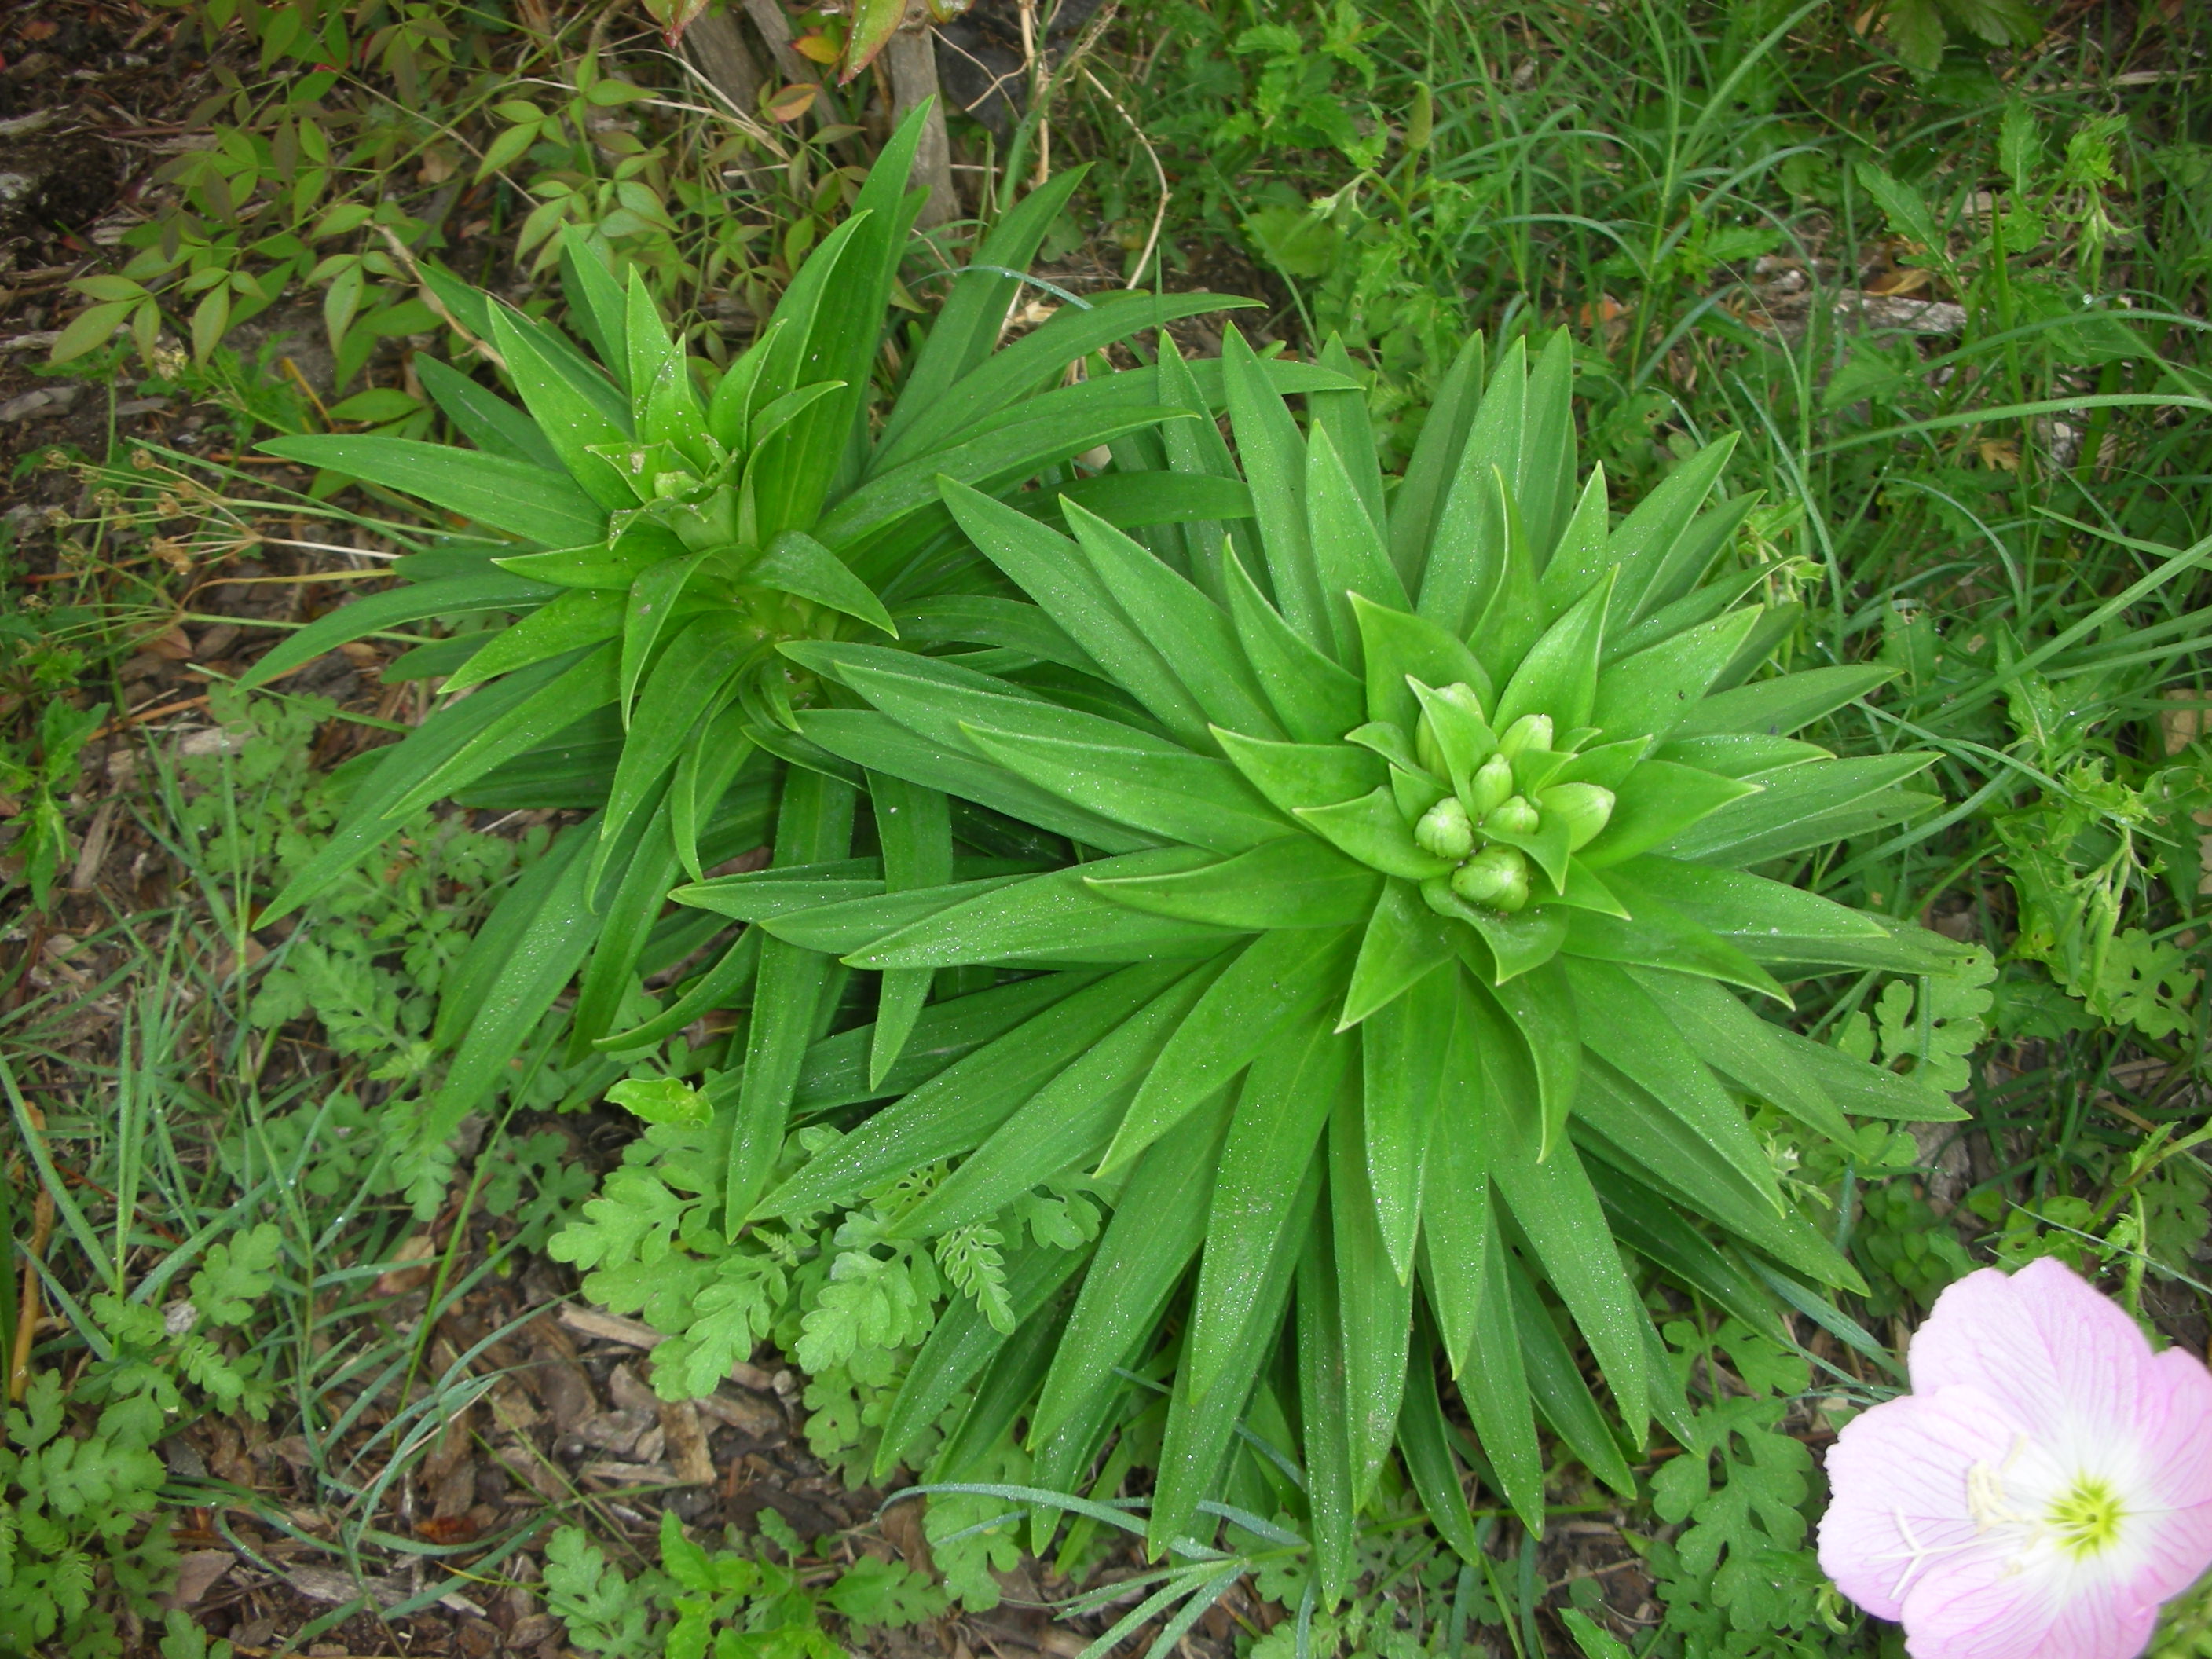
Here are some Easter lilies that may actually bloom by Easter

And finally, a lovely spring bouquet from the potager (if you say that with a french accent it rhymes )

A Garden Shower

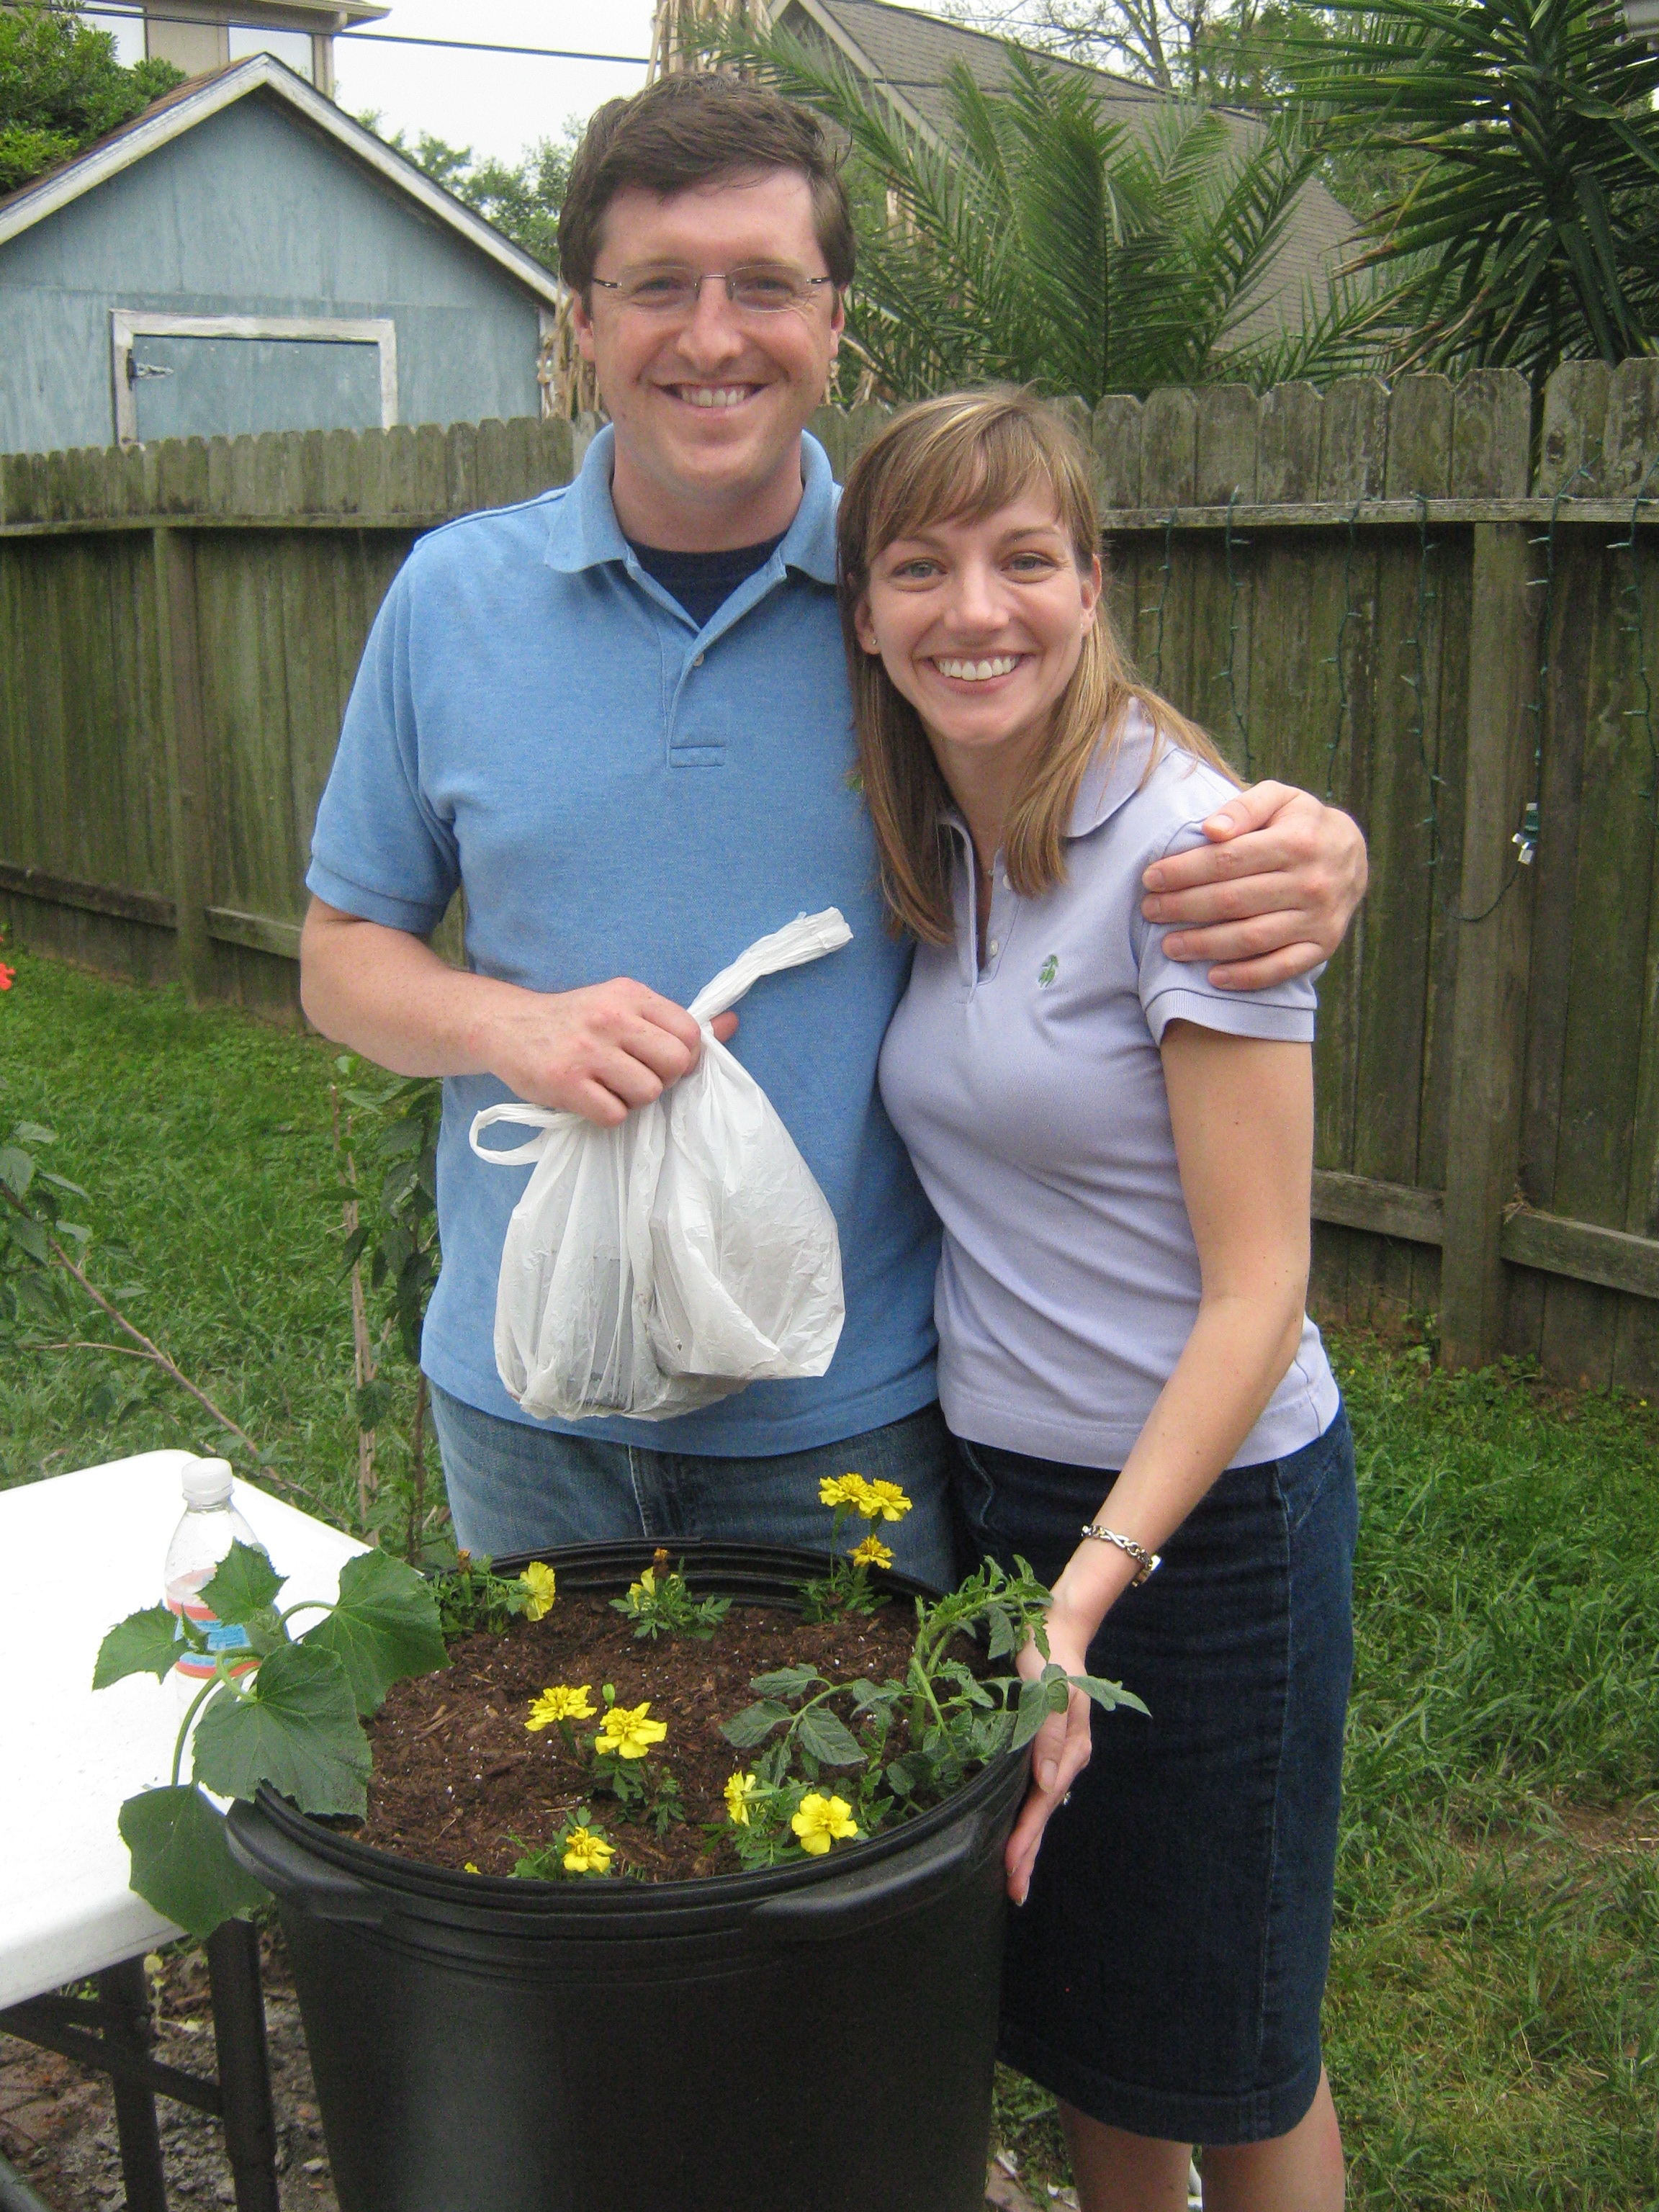
Andrew and Bridget with their new container garden

Bridget O’Brien and Andrew Hoyt are getting married!  Bridget is the Tours Program Manager at the Museum of Fine Arts Houston and her betrothed is an English teacher at the Christo Rey Jesuit College Preparatory School in Houston.  To celebrate their upcoming nuptials, my daughter Heather and her friend Lindsey Smith threw them a “Garden Shower” this past weekend.  Now from what I gathered, a “Garden Shower” is much like any other bridal shower.  Invitations were sent, punch was made, cakes were baked and gifts were presented.  However, where this one differed was in the entertainment.  Now I have to admit, I have never actually been to a bridal shower before.  But, from what I am told, the entertainment usually takes the form of silly party games.  Not this one.  This shower, being garden themed, featured a very engaging, entertaining and educational garden speaker. 

If you haven’t guessed by now, that garden speaker was me.  While I am not really all that famous, I do love talking to others about gardening.   Most of the attendees were young museum professionals that have the desire to garden but are somewhat lacking in the space.  So, we covered several topics related to container gardening.  As one of Andrew and Bridget’s gifts, the group worked together to create a 15 gallon veggie/flower garden that they got to take home.  In that garden, they will be growing and harvesting tomatoes, cucumbers and marigolds. 

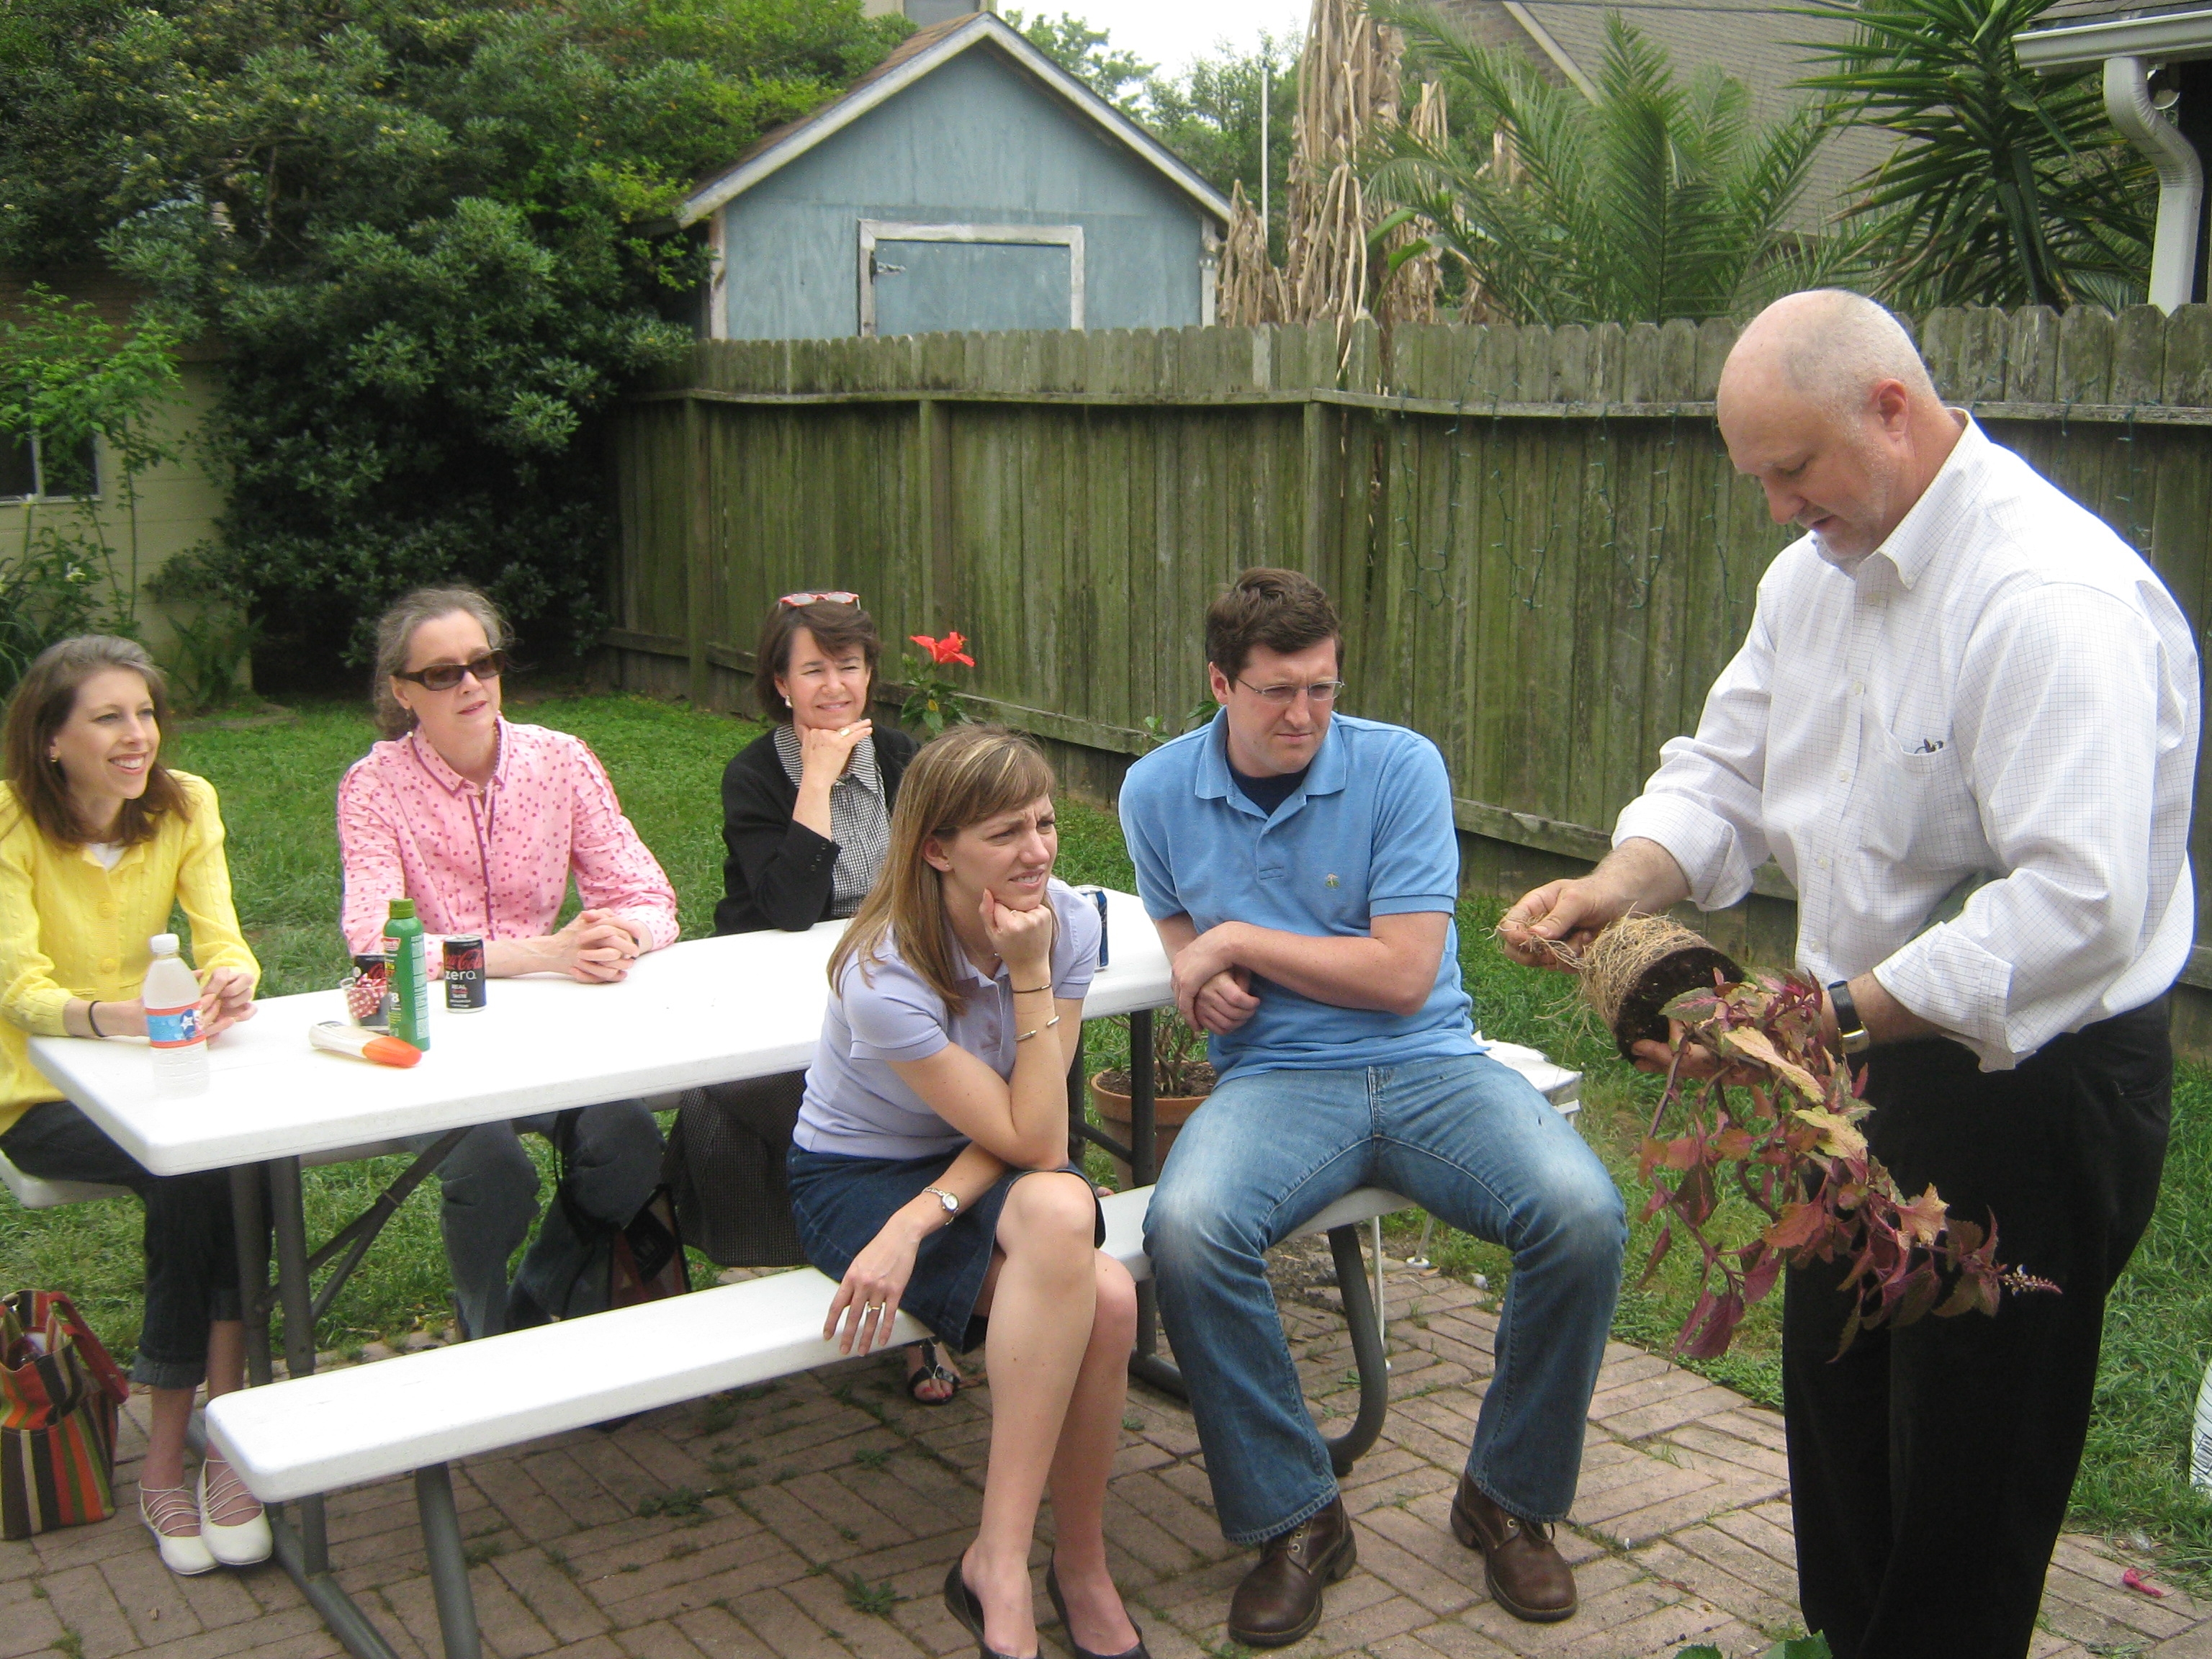
The yupneck explaining the finer points of plant selection

Most of the attendees are recent college graduates that work for non profits (translation-they are still poor), so we also talked quite a bit about plant selection and propagation.  My friends at A&M donated a very large coleus that we proceeded to chop up and turn into about 20 new plants.  Each guest got the opportunity to take cuttings and root them in their own 5” bio-degradable peat pot. 

The betrothed and a large portion of the Education Department of the MFAH. From left to right: Andrew Hoyt, Bridget O'Brien, Lindsey Smith, Sarah Wheeler, Margret Mims and Heather White

All in all, it was a lovely event.  We laughed, we learned and we gardened; a perfect afternoon!  I would like to thank everyone that came and say a special thank you to my daughter for inviting me to participate in this celebration.  Andrew and Bridget, I wish you all the best.  May your life and your garden be bountiful!

Garden Experiments

I love to experiment in my garden.  Every year, I grow something that I have never grown before or I try to grow an old stand-by in a new way.  This year, I am doing both.

My first experiment this year is potato boxes.  I am currently growing white potatoes (Kennebec) and new potatoes (La Soda) in wooden boxes that I “add to” as the potato plants grow.  According to the website that I found (http://www.re-nest.com/re-nest/gardening/how-to-grow-100-pounds-of-potatoes-in-4-square-feet-081760), these 2’ X 2’ boxes can yield about 100 pounds of potatoes each.  While I am a little skeptical of these numbers, I will let you know how accurate that estimate is in a few weeks. 

One of my two potato boxes

The process for this is pretty simple (see the drawing below).  Basically, make four corner posts 33” long ( I used 4X4’s).  Cut two 1X6’s 24” long and two more 25 ½ “ long.  Screw them to the corner posts.  Place your seed potatoes (I used 12 whole potatoes) in the bottom of the box and cover with soil (I used mushroom compost).  As the plants grow, keep covering with soil or compost so that no more than 6” to 12” of plant is showing.  As the planting area gets full of soil, add another row of 1X6’s and continue the process until the box has sides that are 33”.  Once the box is full and plants are coming out of the top, you can remove the bottom layer of 1X6 and harvest as you need. 

 So far, my experiment seems to be working just as it has was described.  The Kennebecs are doing great.  I already have three layers of 1X6 in place and I will probably have to add another this weekend.  The new potatoes had a slow start but they are beginning to take off now.  I can’t wait to finally weigh my harvest and report my results back to you.

 I am also trying an experiment with my tomatoes.  Normally, I plant my tomatoes in my potager.  However, since I have decided to grow mostly herbs and flowers in the potager, I moved my tomatoes to the row garden.  While visiting with my friend Bill Adams, I learned that he grows his tomatoes in pure mushroom compost.  Since Bill is a true Master of Horticulture and the undisputed Tomato King, I decided to follow his lead and do the same thing.   I took my Mantis tiller and dug a furrow about 9” deep.  I then took my tomatoes out of their pots and placed them in the bottom of the furrow.  Next, I back filled with the compost and watered them in.  I am supporting them with a cattle panel and I gave the whole area a thick layer of straw mulch.  So far, everything looks like it is doing great.  I planted the same varieties this year as last so I will have some ability to judge which method did the best.  (Check out Bill’s book “The Texas Tomato Lover’s Handbook –http://www.amazon.com/Handbook-AgriLife-Research-Extension-Service/dp/1603442391). 

In addition to these two “method” experiments, I am  growing three new vegetable varieties this year.  The first are daikon radishes that were given to me by blogging friend “The Gracelss Gaijin”.  Daikon is a staple of Asian cuisine and I can’t wait to try them.  I am also growing “Chinese cucumbers” that were given to me by my friend Emy Chen.  This variety of cucumber is supposed to have a very mild skin that makes it great for slicing.  Can’t wait.  My final “new veggie” for this year is the “Tigger Melon”. 


I got my seeds from Baker Creek Heirloom Seeds (http://rareseeds.com/shop/).  Tigger is a small melon with very sweet, white flesh.  These one pound melons have a great aroma and taste and are perfect for a single serving.  However, the most exciting thing about this melon is it’s orange and yellow stripped skin.  This heirloom has such a cute name and attractive wrapper that my wife had her second graders plant it in their school garden.  Check back in the summer to find out how these experiments went.

Weed Free-Organically

The cover of this month's Texas Gardener magazine. In it you will find my first "published" piece, "Weed Free-Organically".

Well, this is a banner day for the yupneck.  My first published piece came out today in Texas Gardener magazine (http://texasgardener.com/).  My article is entitled “Weed Free-Organically”.  It is a pretty in-depth piece on controlling weeds in your flower beds and vegetable gardens without the use of chemicals.  Of course my wife, kids and mother think it is the best thing they have ever read.  I hope you buy a copy and let me know if you agree with them.  It will be available on news stands by February 28th and also on the web around the same time.

Texas Gardener is the second largest gardening magazine in Texas.  It was started in 1981 by Chris Corby in Waco, Texas.  For thirty years now he has been providing gardening advice to Texas gardeners by Texas gardeners.  Chris has built an impressive stable of very well-respected garden writers.  Their articles provide invaluable tips and tricks for growing things in the wildly variable and difficult Texas climate.  This month, he is doing a special promotion with the garden centers in over two hundred Texas Wal-Marts.  Look for your copy at the check out stand.  You can also find copies wherever magazines are sold.

When I started my master’s degree at A&M, I had no idea what I would do with it.  Thanks to some prodding and encouragement by some very special people, I may have found my niche.  Seeing my work in print is very exciting.  I am humbled to know that some people think that other’s might actually enjoy reading the things I write.  I would like to say a special thanks to my wife.  Without her encouragement, none of this would have happened.   I would also like to thank Cynthia Mueller for asking me to write for HortUpdate (http://aggie-horticulture.tamu.edu/newsletters/hortupdate/).  That first potager piece led to my blog and now this.  Also many thanks to Dr.  Bill Welch and Dr. Doug Welsh for their support and encouragement.  My son-in-law, Ramez Antoun is a very talented photographer.  His photos made this article and my blog come alive.  Thanks Moose!  And finally, thanks to my kids.  You always read what I write.  And even if you think it is boring, you never let it show!  I love you all!

Going Green For God

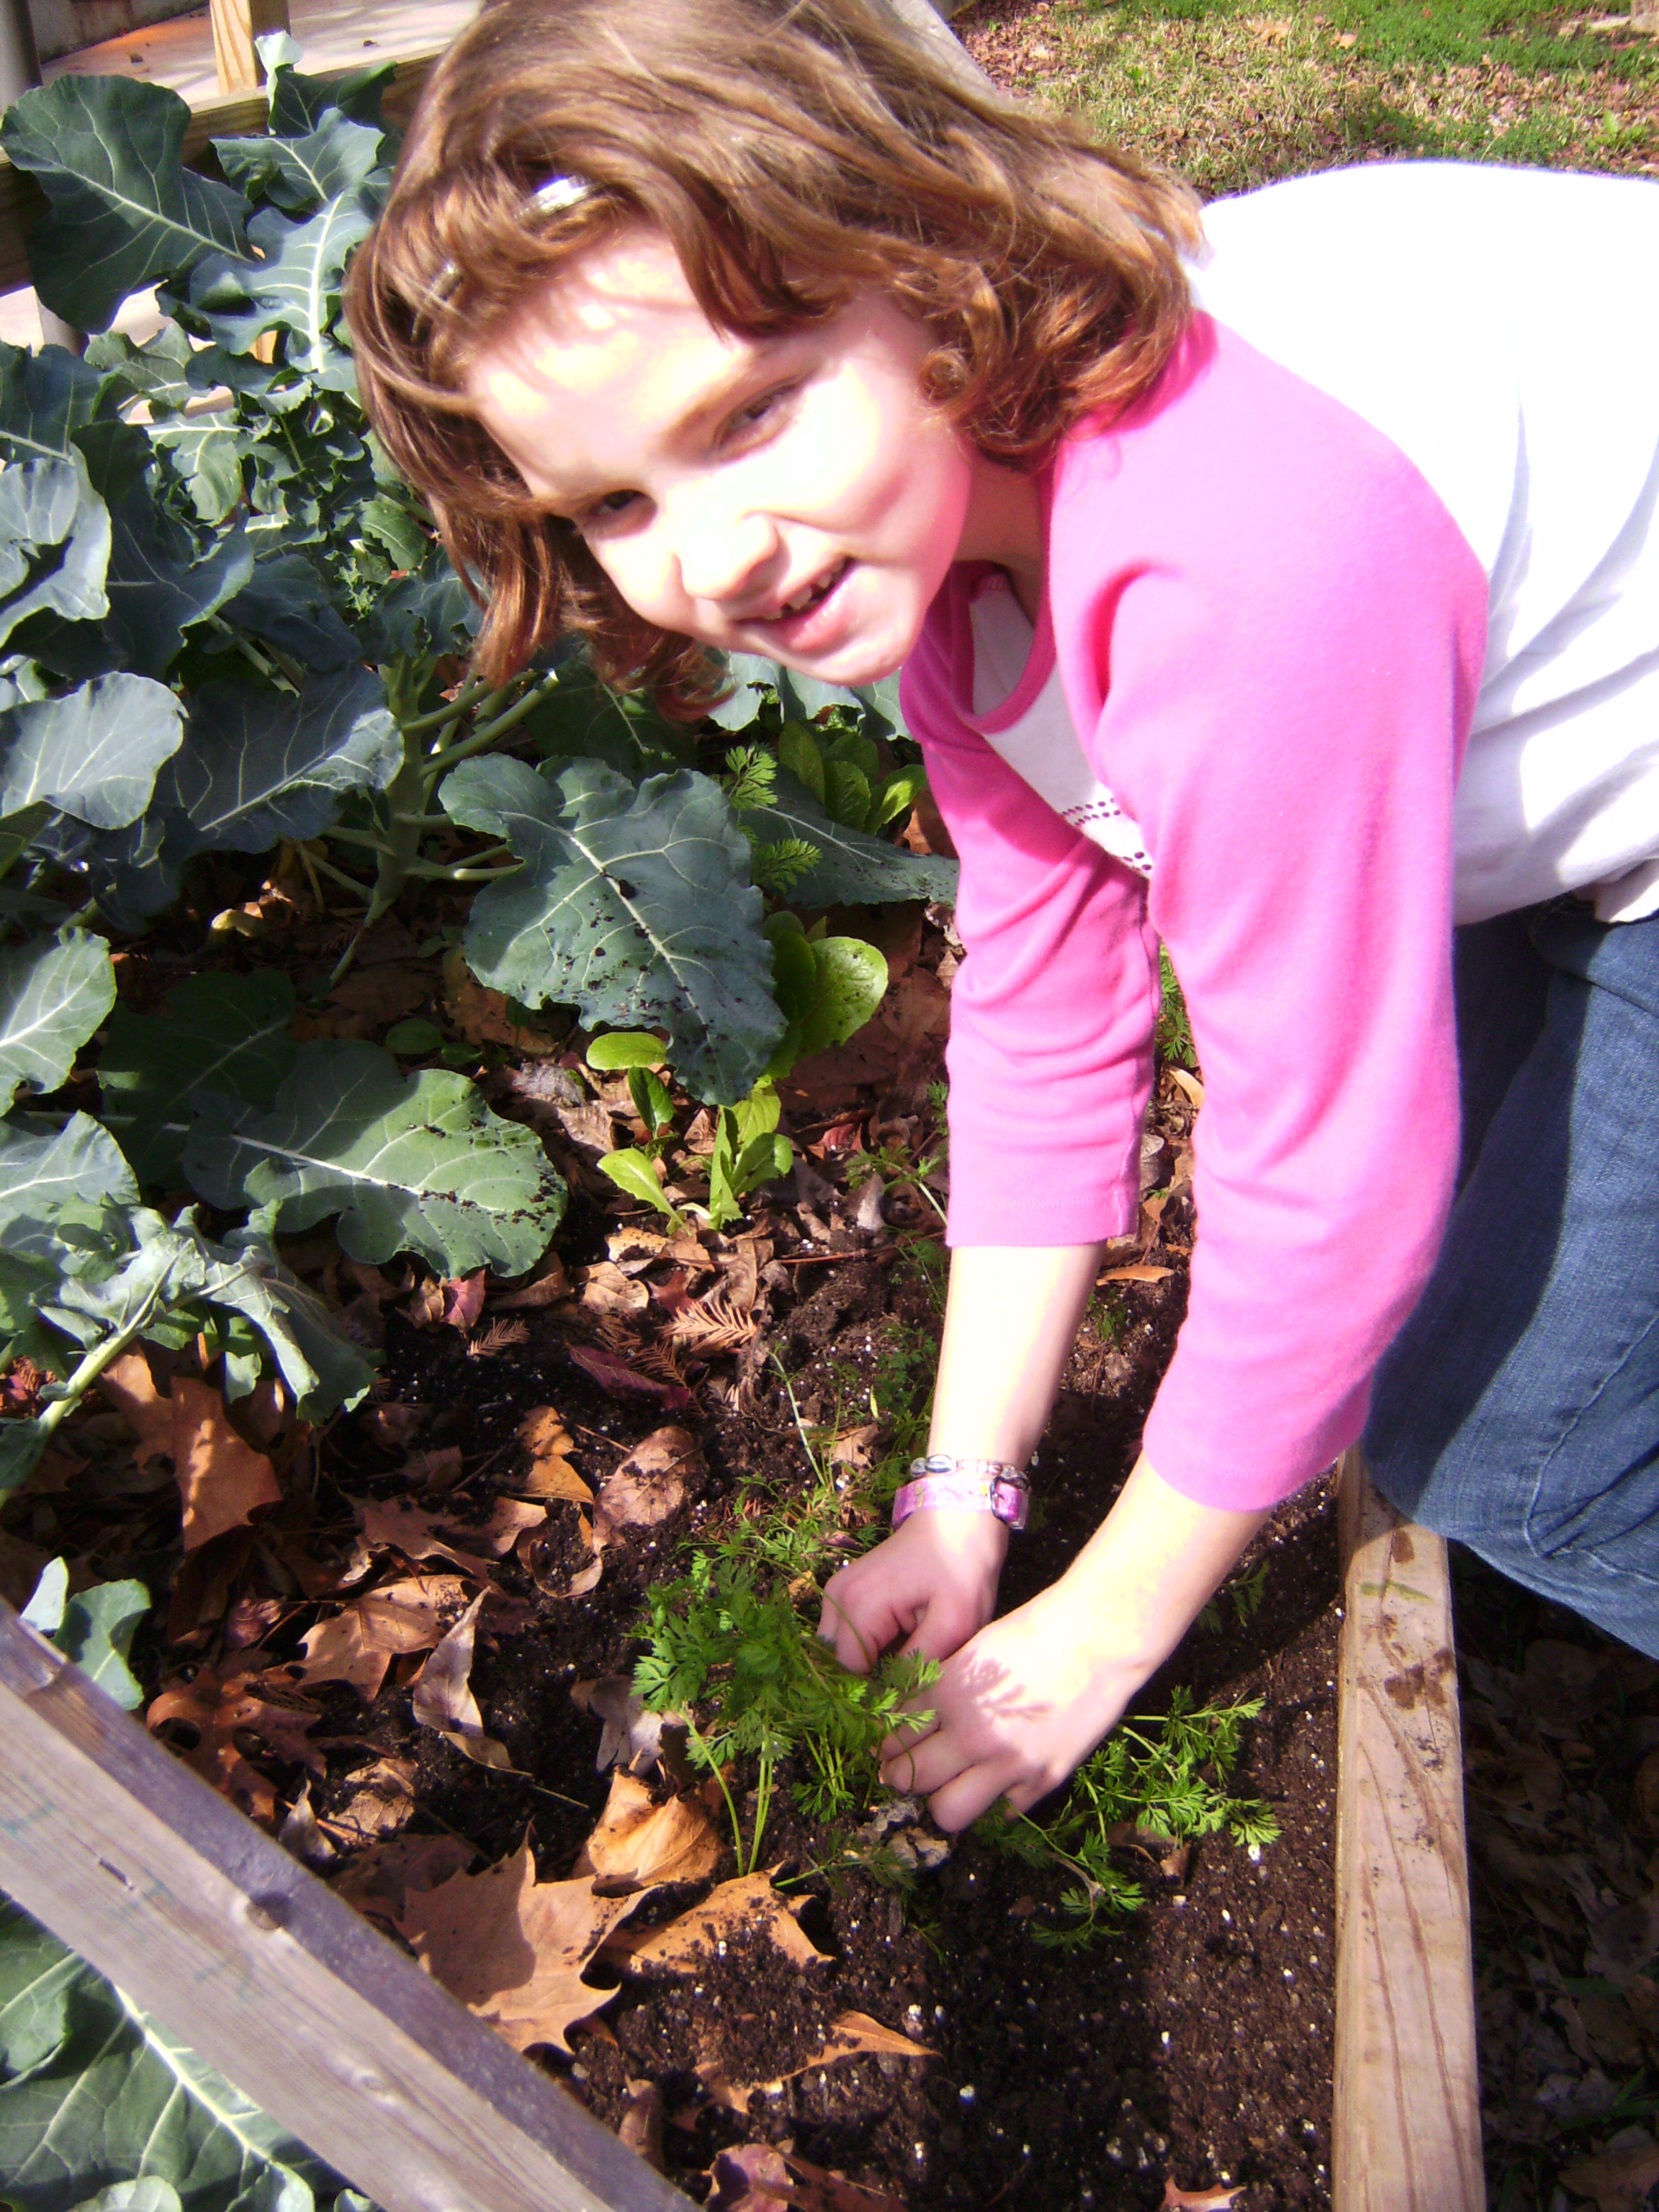
Kate is thinning the carrots in the St. Paul's organic garden

How do you get a bunch of second grade students excited about science?  If you are Sally White, you have them grow an organic vegetable garden.  Sally is the second grade teacher at St. Paul’s Christian Day School in Brenham.  She is also an avid gardener.  Each year, as a part of her science curriculum, she introduces her students to several plant related concepts.  She then uses the hands on experience of the garden to reinforce those concepts.   She calls her program “Going Green for God”.  According to Sally “The kids love getting their hands dirty.  The garden provides a way for me to get their initial interest level up and maintain it through out the year by constant visits to observe and document the changes in the garden.”

Sally built a raised bed garden at the school based on Mel Barthalomew’s square foot gardening methods.  Her garden is an 8’ X 3’ raised bed with a trellis on the back.  Each year her class plants both a fall and a spring garden.  The kids get to plan their garden by selecting the appropriate plants for the appropriate season.  This exercise in planning reinforces lessons learned about seasonality and helps develop their graphing skills.  The kids are responsible for all of the care of the garden.  They water, compost, weed and harvest. This fall, her class has harvested broccoli, cauliflower, carrots and lettuce.  Spring plantings include carrots, lettuces, cucumbers and tomatoes.  This year, she will be adding potatoes to the mix.

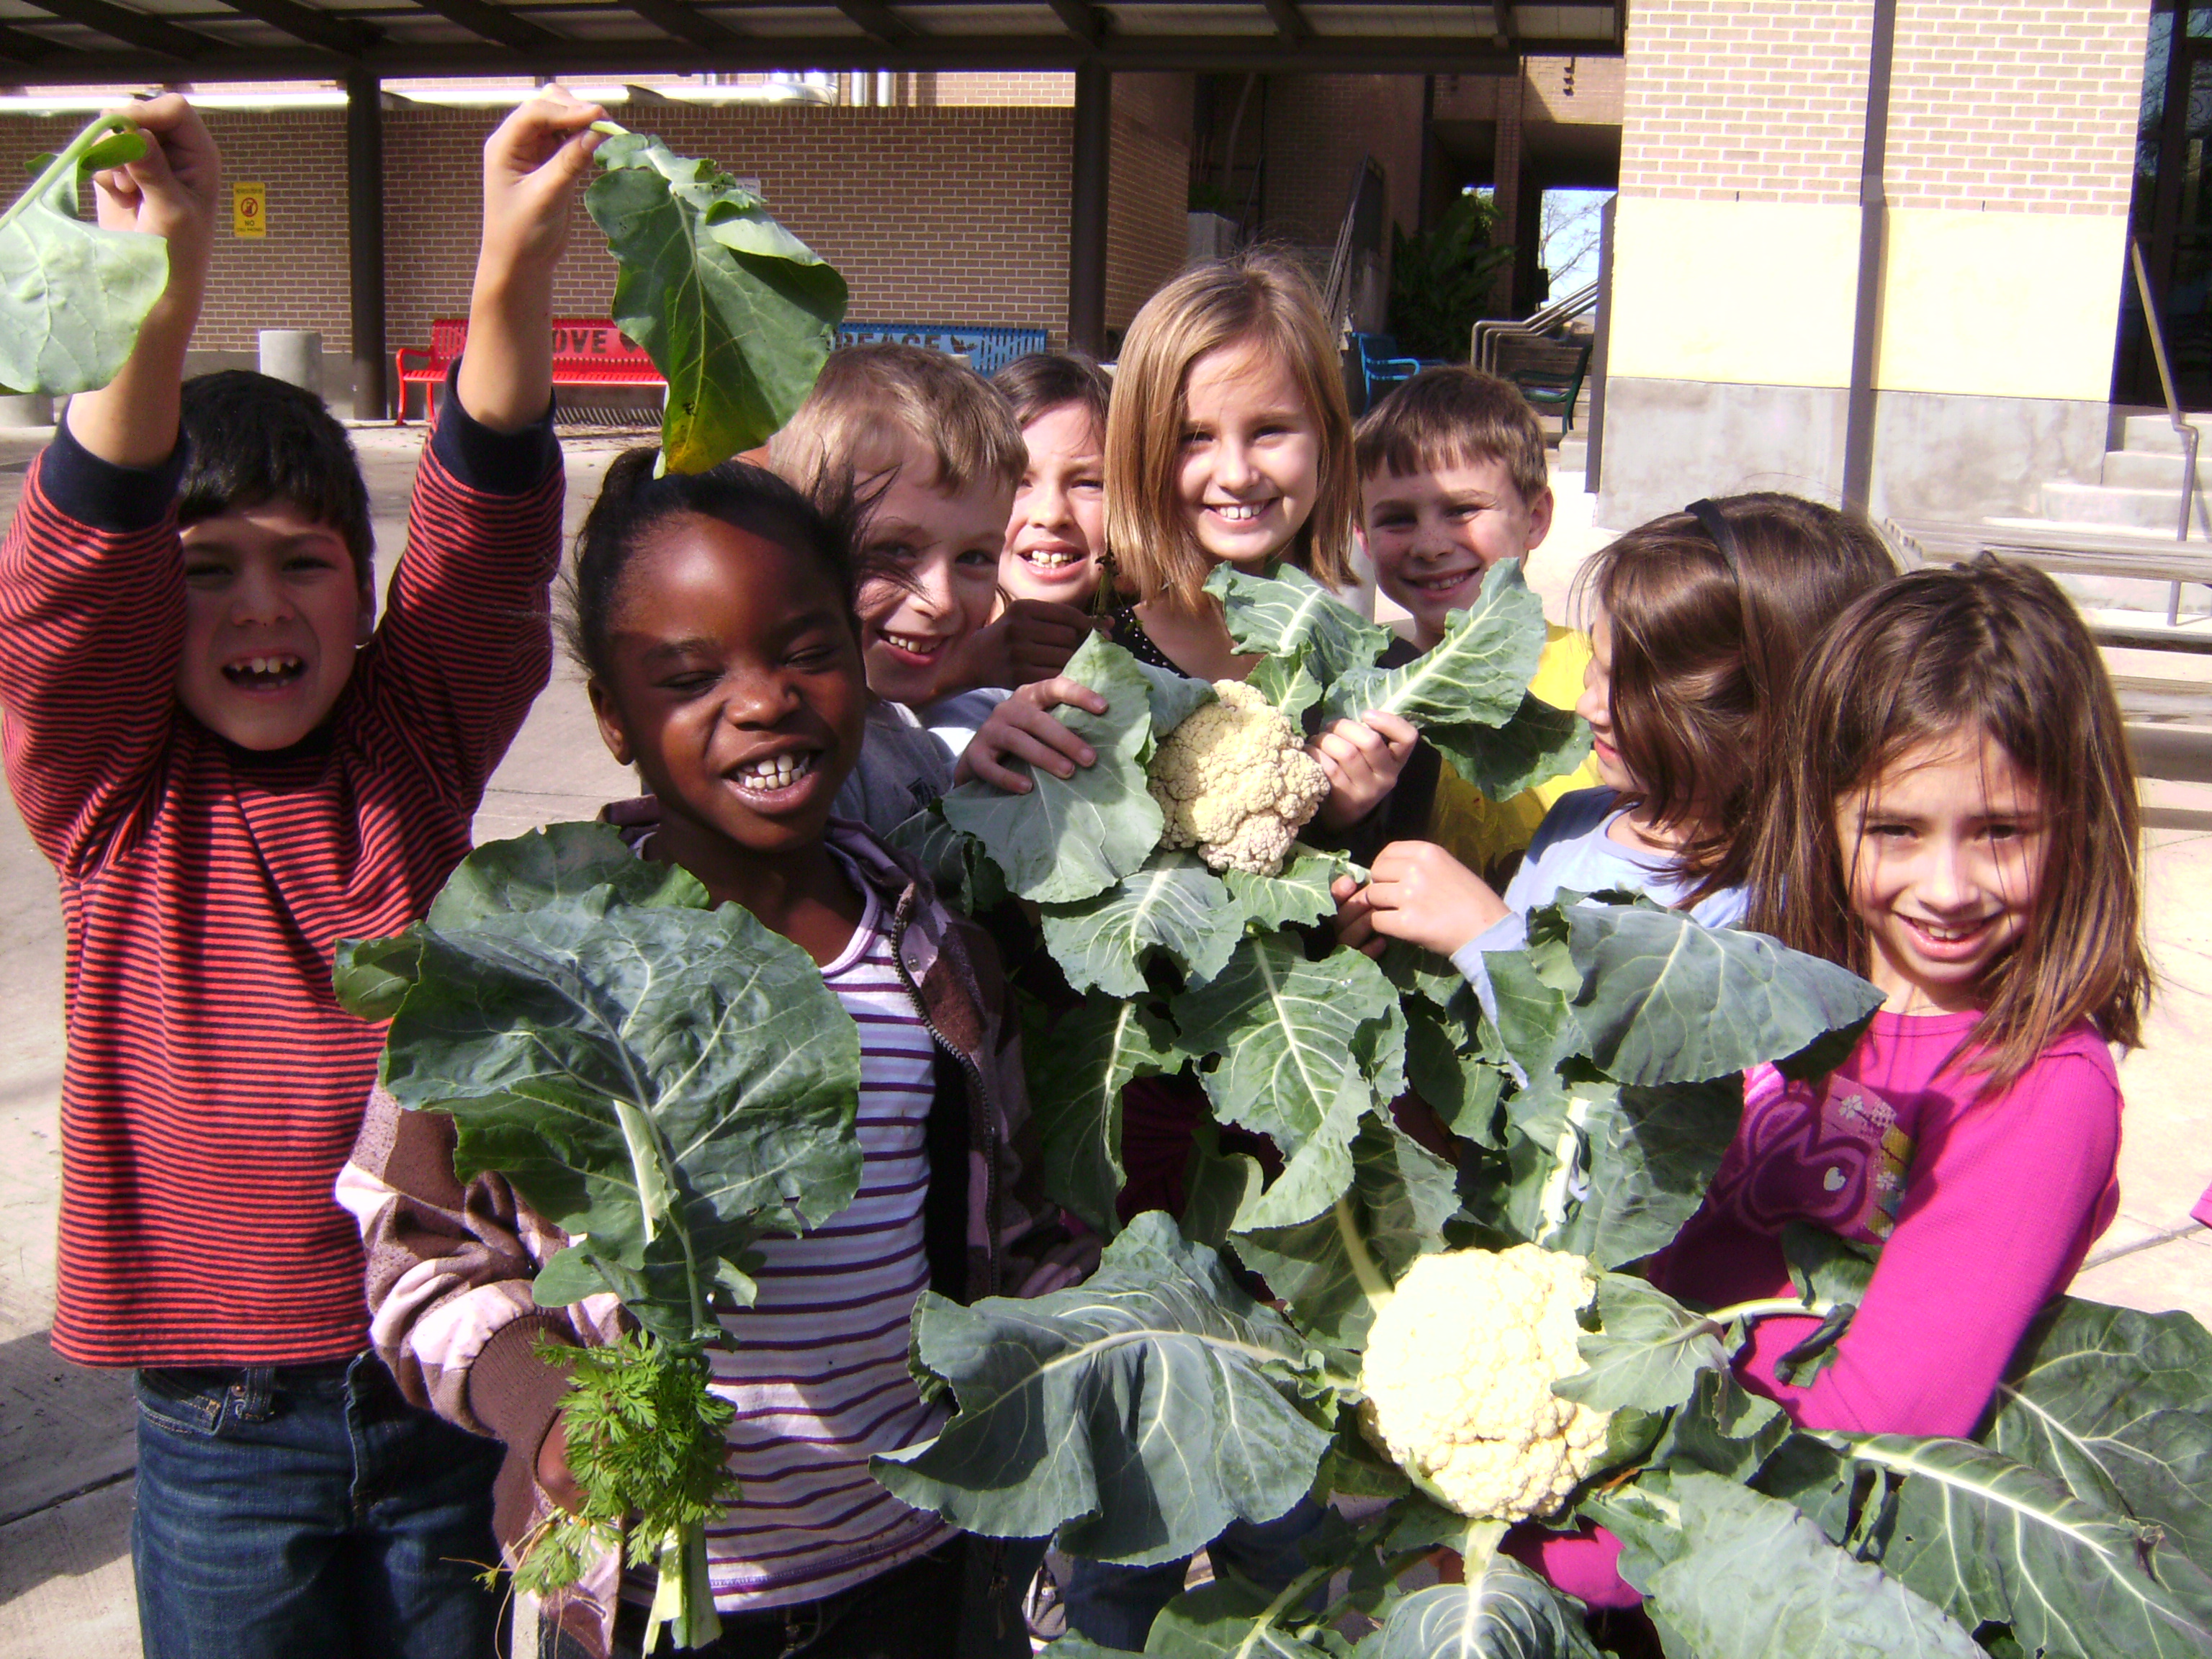
Sally's class harvesting the fall garden

Sally also uses her garden to demonstrate and reinforce the Christian principle of stewardship.  She teaches her students to be good stewards of God’s creation by caring for the garden with organic methods.  Compost is a big part of this.  She teaches kids about the processes involved in making compost and the value that it provides to the soil and ultimately the plants.  Her compost lectures are always a hit.  The kids love the fact that they can make something good out of “cow poo and garbage”!  The compost lesson is reinforced before each planting when the kids add compost to the planting bed to “recharge” their soil.  Good stewardship also means learning to live by the “waste not, want not” motto.  Nothing grown in their garden goes to waste.  The lunch staff often prepares the vegetables for the kids or the kids are allowed to take home the fresh produce.  The greens and foliage go into her compost pile.

Our world is going through a lot of changes right now.  Things like climate change and overpopulation are serious threats to the future of our planet.  Kids across our world are going to grow up in a world that has much fewer certainties than the world their parents grew up in.  By teaching her kids to be concerned, self reliant, good stewards of the earth, she hopes that she is “growing” a huge crop of great kids that will be a positive force on our future.

Fig Facts

My newly planted Alma Fig

The sad little twig that you see on the left will soon grow up to be an Alma fig tree.  A friend of mine propagated it and several other varieties and then handed them out to his friends.  Thanks Tim.  I love receiving “pass along” plants.

Botanically speaking, figs are members of the ficus family.  Some research shows that they have been in cultivation in the Mediterranean area for over 4000 years.  The first figs grown in the U.S. were brought to Florida by the Spanish around 1575.  Franciscan missionaries took the fig to California where the first orchards were developed in present day San Diego.  Those early orchards were comprised of “Mission” figs.  Mission is still one of the most popular varieties in cultivation today.

Figs have been grown in the South for as long as there has been a South.  When I was a kid, everyone’s grand mother had at least one growing in their yard.  One of my favorite childhood memories is sitting at the chrome and formica kitchen table in Streetman, Texas sipping hot tea out of a saucer while eating toast and fig preserves with my Pa and MaMomma.  To this day, I think of them every time I see a fig or a jar of preserves.

My wife's alma fig preserves

Figs are very easy to grow.  They grow as well in clay as they do in sand and they can tolerate that scorching Texas heat.  Plus, they are relatively easy to care for.  They don’t need to be sprayed and they don’t need commercial fertilization.  Feed your fig by constant mulching or with a top dressing of prepared compost.  Too much nitrogen will make figs split on the tree and will cause the fruit to have a watered down taste.  Figs can take some drought but they do like frequent water.  A large fig bush should be given about 10 gallons of water per week during the really hot months.

Alma is a relatively new variety that was created by the Texas Agricultural Experiment Station in 1974.  It is a very tasty fig in a rather unattractive wrapper.  The figs tend to develop dark spots on their skins as they ripen that some say resembles a bacterial infection.  Regardless, the lovely amber colored flesh is very tasty.  It is great raw and it is well suited for canning.

Alma figs ready for canning. Note the dark brown blotches on the skin

Alma has a vigorous growth habit and it is an early producer.  It is not uncommon to get a nice crop from your first year’s growth.  Alma is not a closed eye fig.  However, it does develop a thick resin covering that keeps the dried fruit beetle at bay.  This greatly reduces the threat of on the tree souring.  Alma is a little frost sensitive and should not be planted more than 200 miles from the Gulf of Mexico.

Figs are relatively easy to propagate from cuttings.  Simply take stem cuttings from one year old growth during the dormant season.  Some people recommend treating with a rooting hormone and letting the cutting scab over before planting.  However, lots of old timers say you can just cut them and then plant them and they will be fine.  Figs can send up suckers from the ground level and these can be used as cuttings.  However, remember that figs are very susceptible to nematodes and cutting suckers is a good way to spread this problem.  Just a little FYI on nematodes.  They don’t like black clay.  So, if you are in area of clay soils, then nematodes will not be as big a concern. 

Figs can be pruned to grow like a tree.  However, this makes them a little more susceptible to freezing.  Unless you live on the coast, grow your fig into a bush.  The bushing habit will protect it from freezes.  If it does suffer some damage from a hard freeze, cut out the damaged wood in late winter or early spring.  Also, if you have a mature fig and it seems to be producing less and less each year, take your shears and open it up.  This will encourage both growth and fruit production.

Winter Chores in the Potager

The potager in January

The weather has been so nice this holiday season that my wife and I decided to do some much needed maintenance in potager.  The Cypress vine that brought us so much joy in the summer had to come down.  The same plant that had covered our fence and trellis in beautiful red flowers and drawn so many hummingbirds and butterflies into our lives was now just an eyesore.  So, with pruners in hand, my wife and I cut, chopped and pulled down all remnants of the vine.  It came down very easy, but it covered us in tons of tiny black seeds.  You know what that means.  More Cypress vine than I will know what to do with in this spring!  

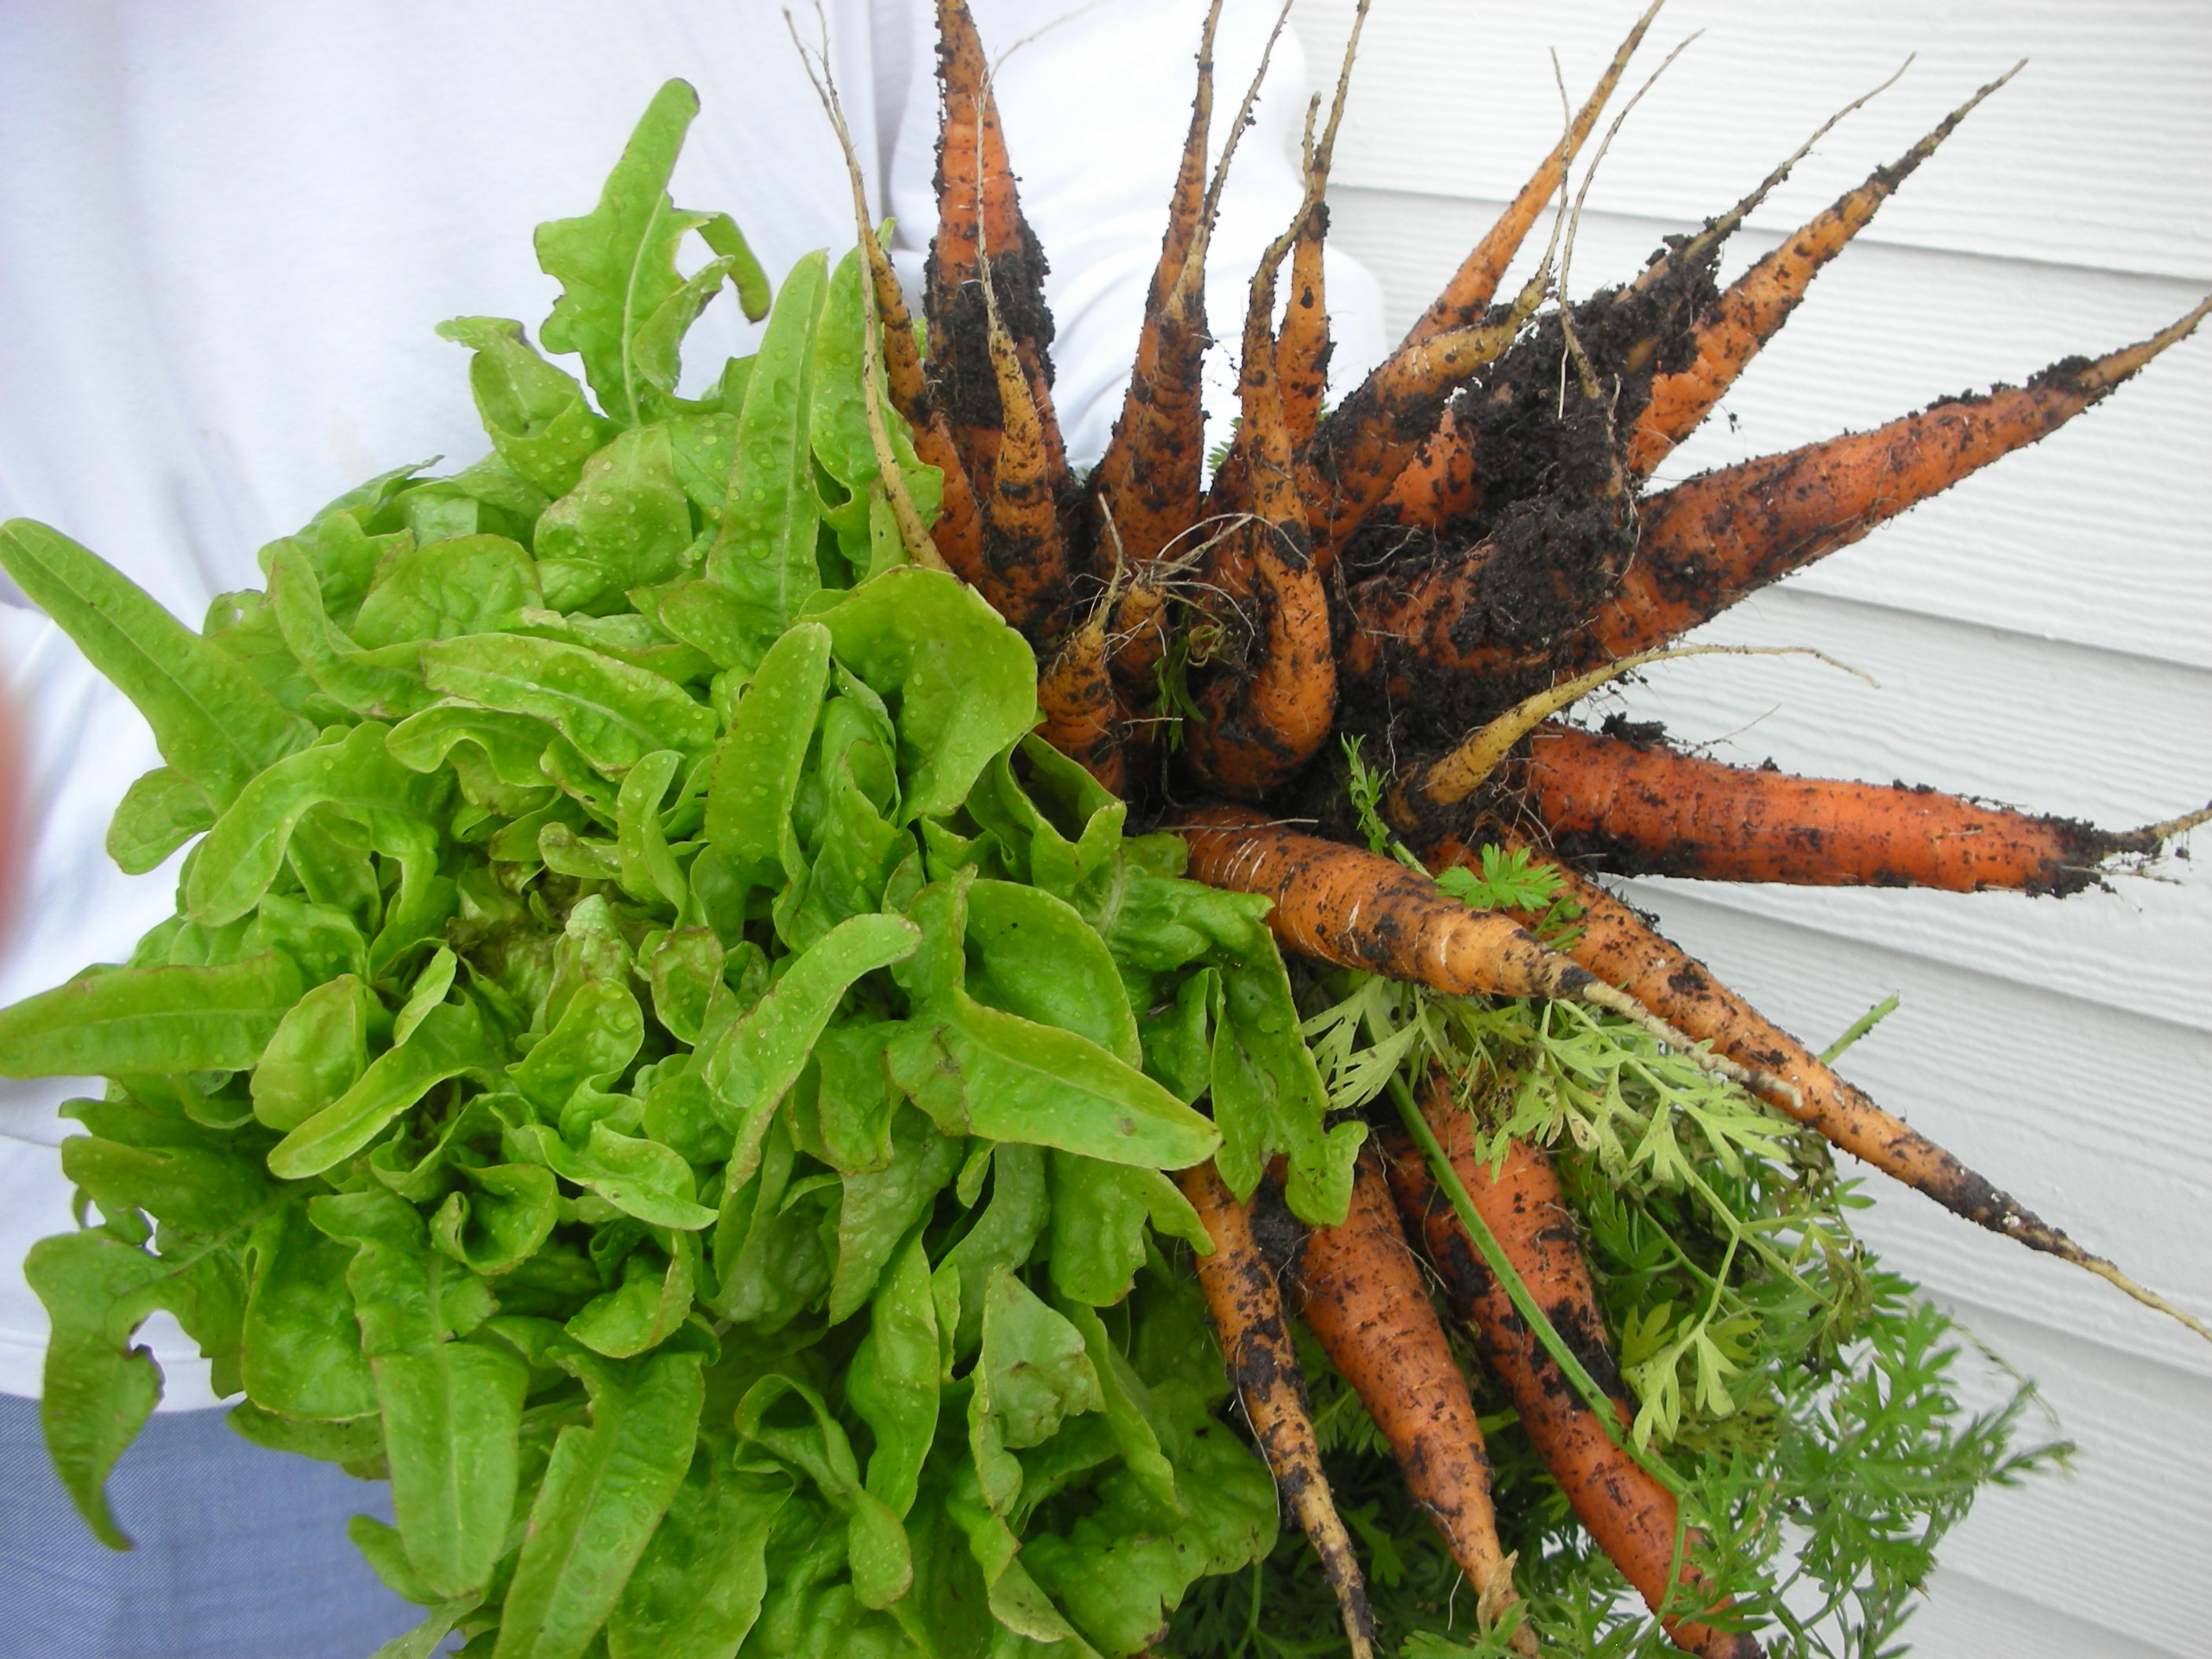
Carrots and lettuce from the potager

Once the fence and trellis were clear it was time to move inside the potager.  First, we harvested.  We pulled carrots, turnips, spinach and butter crunch lettuce. In addition to the lettuce, spinach, carrots and turnips, I have Egyptian Walking Onions, shallots, 10/15 onions, collards, chard, lemon grass, rosemary and purple cabbage.  Man do I love winter in the South!  Where else can you have so many vegetables thriving in the garden in January.
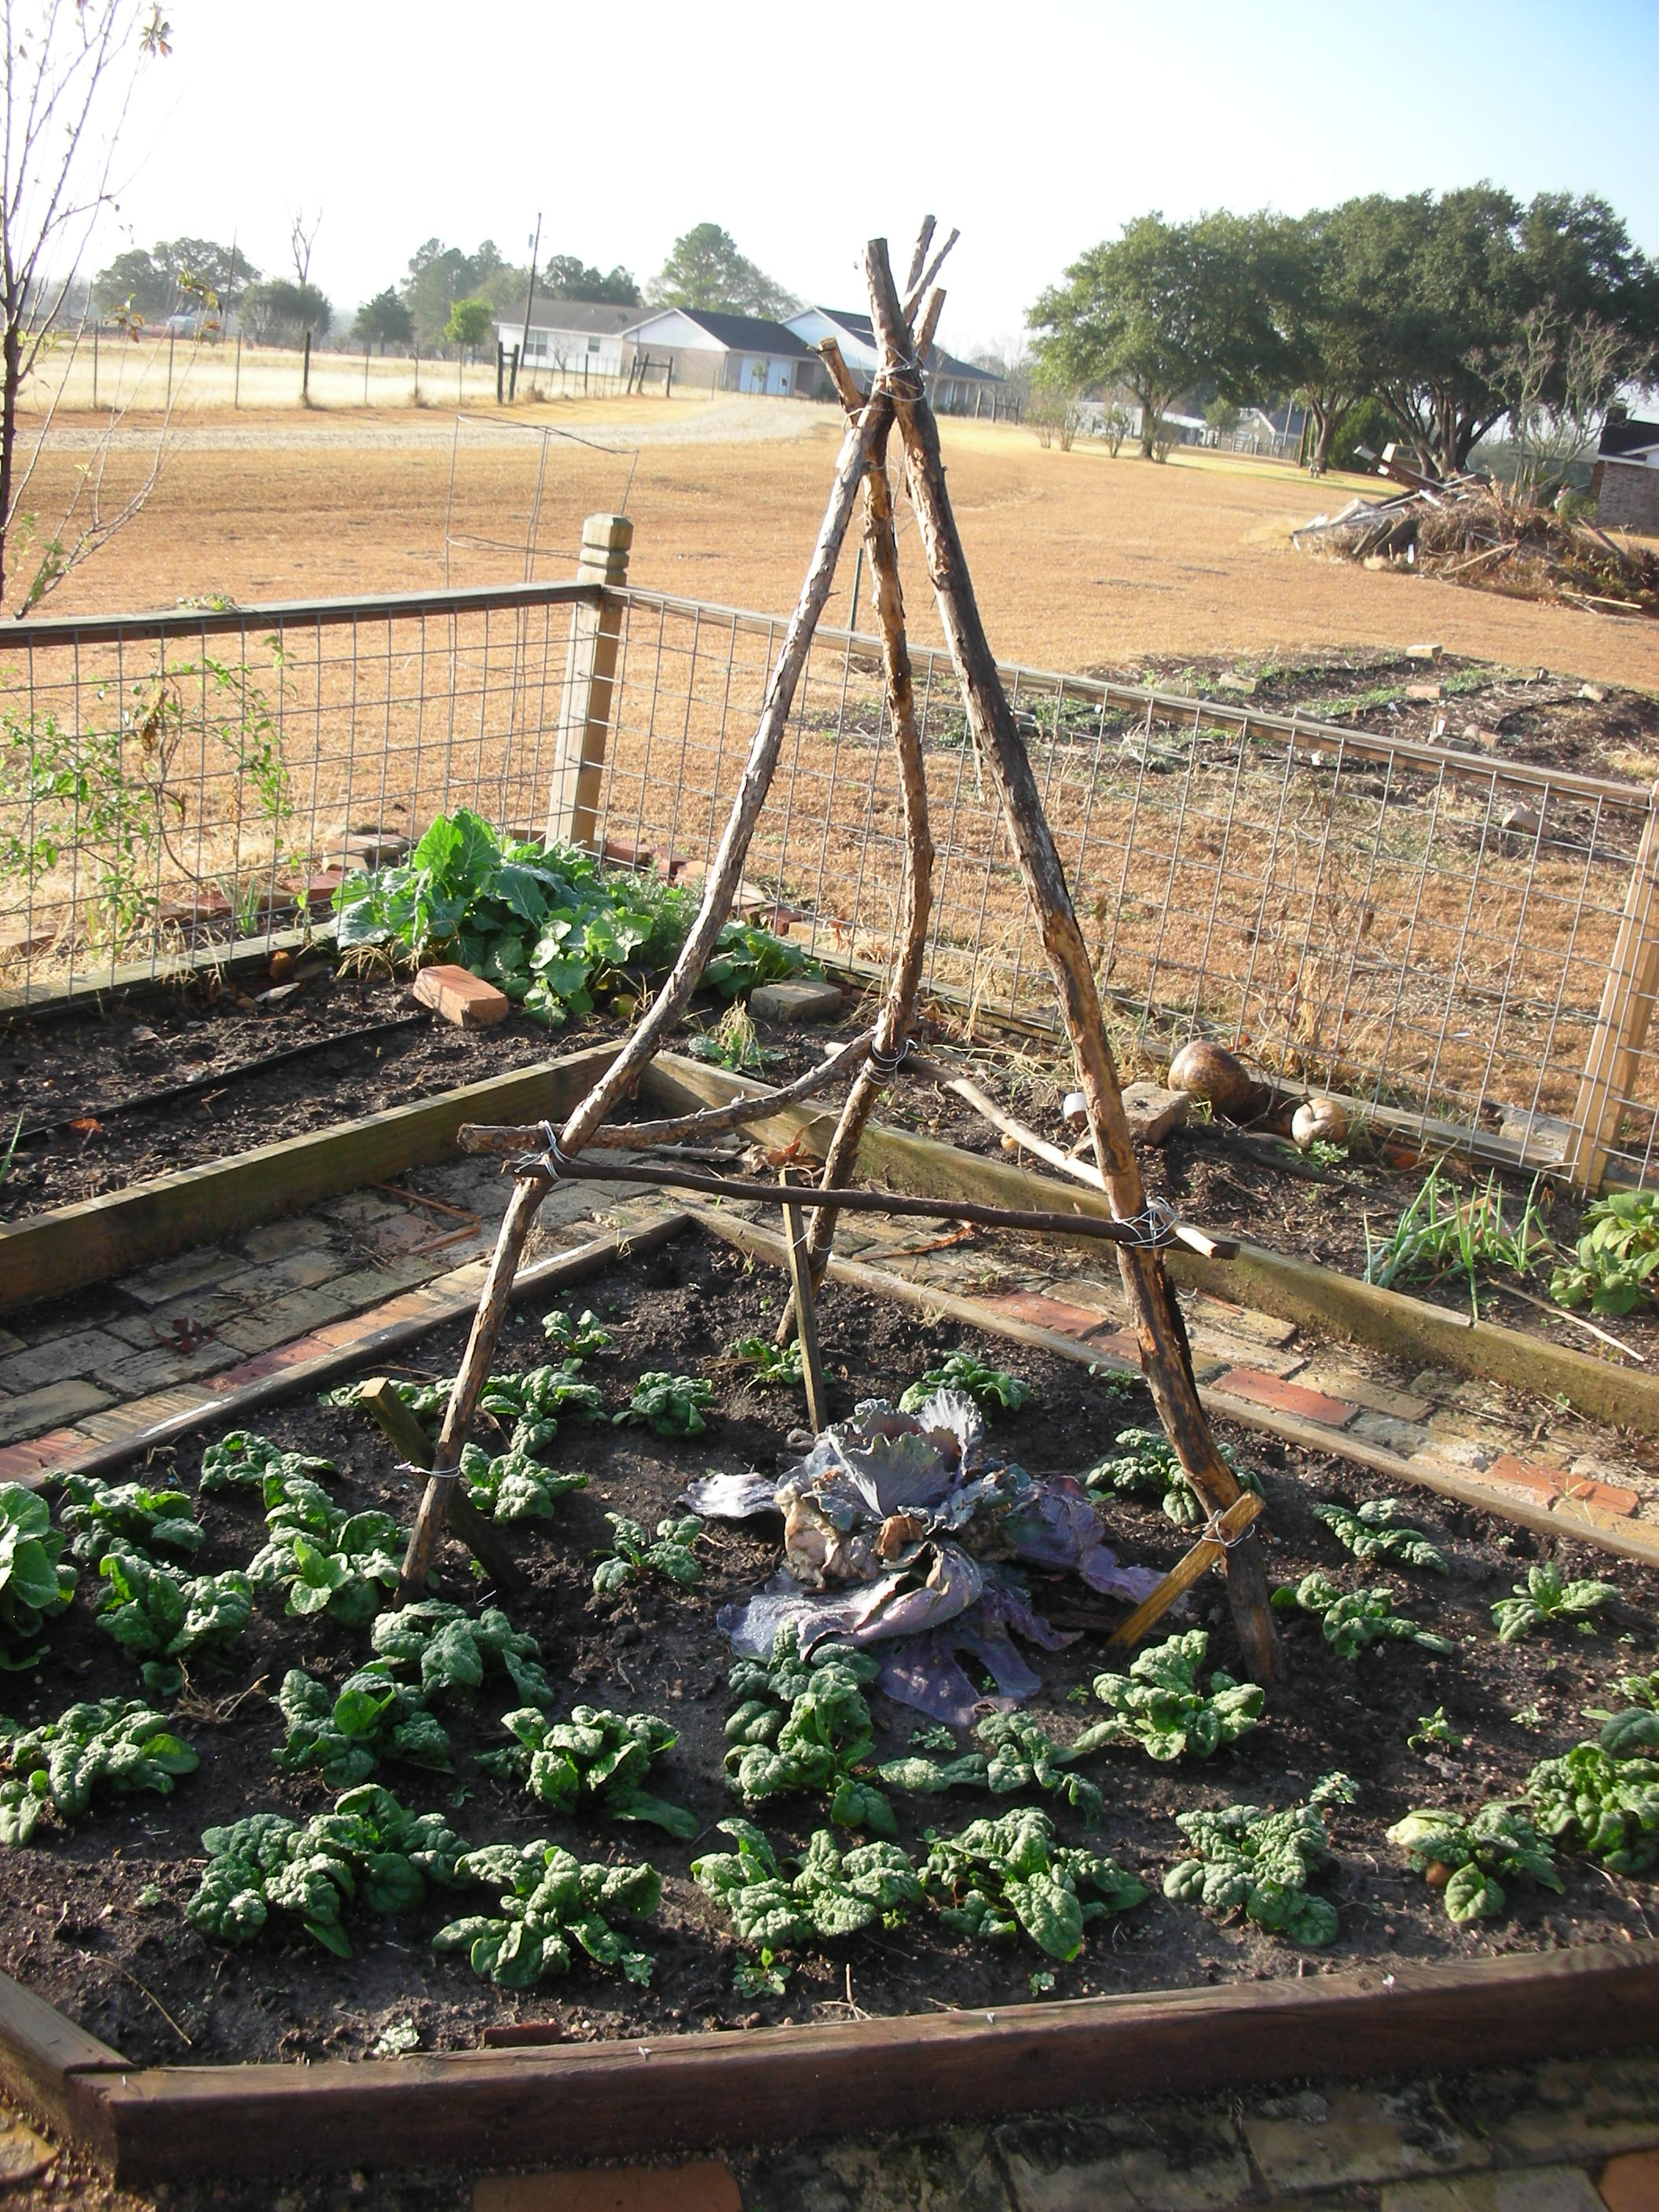
One of the trellises that we built to support the peas

After the harvest we got back to work.  We took the pruners to our lemon grass, uchuva and salvia.  Then we built four, three-legged trellises out of cedar limbs.  We anchored these in the middle of the four odd-shaped beds in the center of the potager.  After they were secured, we planted Little Marvel Peas at their base.  According to my Aunt Sara, peas are best planted either the last week of the year or the first.  We will see.  I have tried to grow them before and they just didn’t pan out for me.  I really hope they do well this year.  I have worked really hard at improving my soil this past year and my wife and I worked very hard on the little trellises. I can just see them covered in pea vines in early March.  Once the peas were planted, we finished up by planting some French breakfast radishes and some Chioggia beets that I got from rareseeds.com

The central bed in the potager. It is full of carrots, poppies and byzantine gladiolus.

While we are talking about the potager, let’s not forget all of the flowers that I have planted in it.  Right now, my red poppies are up and my Byzantine Glads are beginning to make a show.  The foxgloves and Hollyhocks look terrific.  A mermaid rose that I found while riding my bike two years ago has finally taken hold and is beginning to send out canes all along the south fence.  I am going to plant a row of red sweet peas along this fence in hopes that the mixture of red flowers with the white  roses will be stunning.  I also have lots of strawflower, statice and salvias that seem to be thriving.  Check back in the spring to see what will hopefully be my best pictures ever!