Three Easy Dinners from Dad’s Garden by Heather White

While my husband and I were away on vacation our little doggies stayed a la maison de l’Yupneck (this is what I call my Dad’s house).

When we returned we visited Brenham to collect our petit chiens. We enjoyed a fabulous lunch as well as a tour of the gardens. We were sent home to Houston with our sweet pups and a bag full of tomatoes, green beans, garlic, onion, and kale from my dad’s garden. As I made our meal plan and grocery list for the following week, I incorporated dad’s organic veggies and thus barely had to buy anything at the store. Here are the three easy and delicious recipes we enjoyed.

Whole-Grain Spaghetti With Garlicky Kale and Tomatoes

From the Garden:

  • 1 medium red onion, thinly sliced
  • garlic
  • 1 bunch kale, stems removed and leaves torn into bite-size pieces
  • 2 tomatoes, sliced into one inch cubes

From the Cupboard:

  •  6 ounces whole-grain spaghetti
  •  2 tablespoons olive oil
  •  1/3 cup chopped roasted almonds
  •  1/4 cup freshly grated parmesan, plus more for serving

Sautee the onion and garlic with the olive oil, then add the kale and tomatoes and cook until tender. Toss with the cooked pasta, almonds, and 1/3 cup parmesan. Serve with more freshly grated parmesan.

 Ravioli With Sauteed Zucchini

From the Garden:

  • 3 zucchini, sliced into thin half-moons
  • garlic

From the Cupboard:

  • 1 pound cheese ravioli
  • 2 tablespoons olive oil
  • salt and pepper
  • 1/2 cup freshly grated parmesan

Sautee the garlic with the olive oil, salt, and pepper, then add the zucchini and cook until tender. Toss with the cooked ravioli and parmesan.

Chinese Green Beans with Rice and Miso & Dumpling Soup

  From the Garden:

  • 1 pound fresh green beans, trimmed
  • 6  cloves garlic, thinly sliced
  • 1 red onion, thinly sliced


From the Cupboard:

  • 2 tablespoons sesame oil
  • 1 tablespoon sugar
  • 2 teaspoons soy sauce
  • Miso soup, we like the carton available at Whole Foods
  • Frozen Dumplings

Beans:

Sautee garlic with 1 tablespoon of sesame oil then add the green beans and cook until soft. Stir in sugar and soy sauce and continue cooking until beans reach desired tenderness. I usually remove a bean occasionally and bite into it, not the most sophisticated way to determine when they are ready, but this method always ensures perfectly cooked beans.

Soup:

Sautee the garlic and onion with remaining sesame oil. Add miso soup and bring to a boil, add frozen dumplings and simmer until cooked throughout.

 Pour the sauce from the bottom of the bean pan over cooked white rice and serve.   

 These delicious meals were easy on our time and our wallet. Thanks dad for adding locally grown, organic produce to our diet. It was a wonderful week of home cooked and home grown goodness.

Planting the 2012 Spring Potager

March 15 is the ultimate go date in the Zone 9 garden.  At this point there is an almost 0% chance of a freeze.  Because of this you can now plant just about everything.  I have to admit, I am a little behind the curve this year.  The rain, while much needed and much appreciated, has seemed to come at times that have interfered with my time off.  Who would believe that after last’s year’s drought, I would be delayed in my planting by rain?

A "found" Cherokee rose that I propogated from cuttings now spills over the fence of my potager

As soon as it dries up a little, I am going to plant the potager.  I love selecting and designing with the plants that are going to go into the potager.  Each year I replant it gets a little easier.  I learn which plants do well and I also figure out their size and scale when mature.

A lot of my outside beds are now filled with perennials.  I have lots of salvia, roses and dianthus.  I also have lots of herbs like rosemary and Mexican Mint Marigold (Tagetes lucida).  There are also Egyptian Walking Onions, larkspur and hollyhocks.  The only thing that will need to be pulled this spring is the garlic.  In the open spaces in these outside beds I am going to plant several herbs.  On a recent visit to Texas Specialty Cut Flowers, my wife bought several varieties of peppers.  I have also grown some pimento peppers and Napoleon Sweet Bell peppers from seed.  These will go toward the back of the beds with a few varieties of basil that we have saved from seed.  Along the front, we will be planting parsley, oregano, lavender and thyme.

Salvia and daiseys in last years potager

The center beds are going to be all for vegetables.  The look of the triangular beds will not change dramatically.  As a “spiller”, I will replace the spinach and lettuce with Contender Bush beans.  Beans are a pretty quick crop so when they fade around June 1, I will pull them up and replant with purple hulled black-eyed peas. For my “filler” I will divide the shallots that are there now and leave a few behind the beans so they can divide for replanting in the fall.  Finally, I will plant Black From Tula heirloom tomatoes that I have grown from seed as my “thriller” on the trellises in the center of the beds.

The last bed in the potager is the center diamond shaped bed.  Right now it is full of byzantine gladiolus.  Once these bloom and fade I will plant a lovely red okra.  The okra needs to be planted in June anyway so this work out well for me.  I selected okra for this bed because it grows a pretty, nice, tall and structural plant.  Okra is in the hibiscus family.  Because of this, it produces very large and lovely flowers that look just like hibiscus.

The hibiscus like flowers of okra

Right now is a great time to be outside.  The martins have returned, the bluebonnets are in full bloom and the fruit trees are in bud.  Why not get outside this week and plant your garden?  Below is a list of some of the veggies that you can plant now.

The Fall and Winter Potager

Lately, several people have been visiting my site from Pininterest.com and “pinning” shots of my garden on their pinboards.  I am very flattered when this happens.  If you are not yet familiar with Pintrest you should check it out.  It is a collaborative site where you create “pin boards” of your favorite topics and then post images that you find on the web in them.  Then, everyone on the internet can come to your site and see the things that you have found.  It is really cool and you can quickly burn several hours if you are not careful. 

Right now, my little garden has never been prettier.  The folks from the Central Texas Gardener television program came to film it back in December.  It was pretty then, but it is a lot prettier now.  The veggies are doing great, but the flowers have really matured and look beautiful.  Eventhough the potager is mostly about the vegetables, it is the flowers that make it interesting.  So, for all of you Pinterest users that are fans of small, raised bed kitchen gardens, and my regular readers, here are a few pics of what is currently blooming in my little potager.

Panseys are always a great choice for Texans in the fall.  I planted these around the first of Decemeber.  If you look closely you will notice carrot foliage in the back.  I do companion plantings in all of my beds.  I have a mix of pink and purple panseys that share the center bed with a mix of carrots and vilolas (Johnny Jump Ups).  They are all thriving and look very good mixed together.

My purple panseys.

Violas are one of my favorite winter flowers.  The work great in pots where their pretty little flowers grow rapidly and spill over the side.

Calendula is often called pot marigolds.  Not only is it pretty and a prolific bloomer, the petals are edible.

I love dianthus.  They bloom well into the summer.  Their common name is “pinks”.  People think this is because they are mostly pink, but it is really because their petals look like they were cut with pinking shears.  They come in all colors and all sizes now but I still prefer this old fashioned variety.

This year’s winner in the vegetable department is Comet Broccoli.  This variety is incredible at putting on side shoots.  I have two dozen of these scattered throughout the potager.  Last Sunday, my wife and I harvested 8 produce bags full of side shoots.

Here is a picture of me with a lettuce harvest.  Our lettuce has been outstanding this year. 

One of my favorite things in the potager is not a plant at all.  It is our bottle tree.  While not technically in the potager (it is in the outside border), I still think of it as one of the main things that adds interest and charm to my little garden.

In addition to the flowers pictured above,  I have byzantine gladiolous, crinums, daylilies, two varities of roses, lots of salvia, red poppies, holley hocks, crysanthimums, zinnias and larkspur.  This ever changing pallette of colors and textures is what keeps me excited and watchful throughout the year.

Succession Planting of Fava (Broad Beans) in the Potager

The only way to get your small garden to continuosly produce is to practice succession planting.  Succession planting is nothing more than putting something in the ground as soon as something else comes out.  Since my potager is so small, and I love a steady supply of fresh veggies, I have to be fairly deligent in the way I manage my plantings. 

This past weekend, I harvested all but one of my cauliflower plants.  This freed up the middle of my four triangular beds for something else.  I decided to replace the cauliflower with fava beans (or Broad Beans for my English readers).  I also took this opportunity to plant a few more radishes, some round Paris Market carrots and Green Arrow English Peas.

I have never eaten or grown fava beans before.  However, the seeds were a gift from my dear friend and gardening mentor, Cythia Mueller.  So, in honor of my friend, and in keeping with my tradition of trying new things, I decided to plant them where my cauliflower had been. 

Fava beans (Vicia Fava) are a cool season crop that have been grown for millenia.    While native to North Africa and Southwest Asia, they are widely cultivated around the world.  It is believed that along with lentils, peas and chickpeas, fava has been in production for over 6000 years.  It is also interesting to note that they are not true beans.  Fava beens are legumes; but they are more closely related to vetch than they are to green or lima beans.

Fava beans are a great choice for the fall Texas garden.  They love a nice loamy soil, but will grow well in less perfect soils.  They will also tolerate soils with high salinity so that makes them a great choice for the Bryan-College Station area.  Fava are a true cold weather crop and they can take just about anything our winter can throw at them.  They will survive freezes into the the twenties.  Even though I planted mine on December 31, most people in our area plant them around Thanksgiving.  They grow best at temperatures between 40 and 70 degrees F and they will not set beans once the night time temps go above 75 degrees.

Here you can see how I use the end of my hand rake to make holes for large sized seeds

Fava beans produce a thick, square stalk and can grow to heights of three feet or more.  The leaves of these tall plants can be harvested and used like spinach.  Their white flowers are streaked with black.  Since black is a very unusual color in the plant world I can’t wiat for these plants to bloom so I can see it for myself.   Also, those lovely white and black flowers are edible.

Here you can see me placing the beans in their holes. And yes, that is a Baylor hat on my head. I did my undergraduate in Waco so I can wear that hat with as much pride as I have when I wear my maroon hats. BTW, did you see the Alamo Bowl? Awesome! Sic 'em Bears!

Fava beans should be planted about an inch deep.  You can plant them every four inches or so but they need to be thinned to about 8″ apart.  I used the end of a hand rake to make holes in my soil about 1″ deep and about 9″ apart.  Next, I placed the beans in the hole, covered them with soil and watered them in.   Now, if eveything goes right, I should be picking my favas by mid-March.  What do you think the odds are that the temps will stay below 75 until then?


The Fall Potager

Even though it is the middle of December, my little potager has never looked better.  This is one of the reasons I love living in Texas.  Because of the mild winters, I can literally garden year round.  Everyone loves to complain about our hot summers.  However, in my opinion, our winters more than make up for it.  I heard last night that Houston averages 16 days per year below freezing.  We are about 90 miles north of Houston but I am willing to bet we only have 20 to 24 days that are that cold.  Due to this, with proper crop selection, some rotational planting and the willingness to occasionally cover things up, your fall garden can last right up to the spring planting.  Below are several pics of the things that are currently growing in my potager:

I have three different varieties of broccoli growing in my garden.

I have 12 cauliflower growing.  I planted the cauliflower in blocks of three two weeks apart.  This way I don’t have to worry about eating 12 cauliflower in one week!

My wife and I love spinach.  Because of this, two of our triangular beds are lined with it.  In classic gardening form, one bed had a bout a 100% germination rate.  In the other bed, the germination was very spotty.  These little set backs are the things that keep me interested.  I will spend hours trying to figure out why one bed performed perfectly and the other, identical bed, was somewhat of a disappointment.

I always grow lettuce in the fall.  We eat a ton of it and it is so easy.  I only grow leaf lettuce.  Nothing against head lettuce, but once you harvest a head you have to replant and wait.  With leaf lettuce you can continuously clip the leaves through out the season.

I love shallots.  Their form is lovely in many applications in the potager.  I grow these things year round.  I never harvest them all.  Many people call them dividing onions and there is a good reason.  I recently left a clump in the ground for a year and there were almost 50 off shots on it.  I have about a dozen heads of cabbage scattered around the potager.  We are going to try our hand at homemade sauerkraut when the harvest comes in.

I don’t just have veggies growing in the potager.  I have tons of flowers.  These are baby larkspur.  I also have lots of Victoria Salvia, poppies, calendula, mums, two different roses and hollyhocks.  There are also a few byzantine glads and dianthus scattered around as well.

Pansey’s, vi0las (Johhny Jump Ups), carrots and shallots in the center bed.

A very dedicated little bee is gathering nectar on a 40 degree day.

Calendula are often called pot marigolds.  Their petals are edible and they will bloom until it gets about 90 degrees.

MOH on Central Texas Gardener

Yesterday was a banner day for MOH.  About 10:00 a.m. yesterday morning, Linda Lehmusvirta and a film crew from Central Texas Gardener showed up to film my little potager.  This was very exciting for me and I enjoyed it thoroughly.  The only downside is it will take a while before my little garden makes its television debut.  Turns out television programs take an awful lot of prep and it will take a bit of work to get the final product edited and ready to view.

Linda and I doing the interview

 Over the past three months I have worked tirelessly growing the plants and improving the potager so that it will look awesome on TV.  Because of this, things have never looked better at my house.  There really is nothing like a big dead line to motivate you to get all of those honey do’s finished that have been put off for too long. 

My wife and I with Linda Lehmusvirta from Central Texas Gardener

The focus of the interview was growing the Texas fall garden.  I was asked to describe what I most commonly grew and how I grew it.  Since I grow organically in raised beds we spent quite a bit of time talking about soil and bed prep.  We also discussed the benefits of the paved walk paths.  I am not sure how long the interview lasted but I think I babbled on for about 30 minutes.  The interview will mostly likely be edited to about 3 or 4 minutes of dialog so it will be interesting to see what I actually said!

A pic of the lettuce, shallots and cauliflower that is growing in the triangular beds of the potager.

 I would like to say a special thanks to Linda Lehmusvirta of CTG for taking time to do this.  She was great and the film crew was awesome!  The whole experience was so much fun and Sally and I greatly enjoyed making new friends.

Growing Broccoli (Brassica oleracea) and Other Cole Crops

Broccoli flower head beginning to form. These heads are actually hundreds of little flowers. Harvest the head as soon as you see any yellow tint begining to form.

Right now, I am eating so much broccoli that my skin has a greenish tint! Back in September I planted 36 plants of three different varieties and now I am being rewarded with tons of big, full heads of broccoli every night. Now there is absolutely no way that my wife and I can eat this much broccoli. However, that is never really a problem. To me, one of the greatest joys that I receive from my garden is the ability to share my harvests. People are always so happy to receive fresh, all organic produce directly from the garden.

The first four heads that I harvested this year. the large head in the back was 8" in diameter.

You might wonder why on earth I planted so many broccoli plants. I normally grow broccoli in the fall, just not this much. However, this year I was offered an opportunity that I just could not pass up. The largest gardening program in Texas, Central Texas Gardener, offered to come and film my little potager. I was thrilled. However, there was a catch; they wanted to film in December! So, I had a challenge. What could I grow that would make the potager look great in the middle of the incredibly unpredictable Texas winter?  So, that’s how I wound up with so much broccoli. I needed something fool proof to make sure my garden looked good for the cameras of CTG and broccoli fit the bill.

Now my garden does not have just broccoli in it. It also has a lot of cauliflower and cabbage (plus flowers and lots of other root crops). They made the cut for the same reason as the broccoli, they are fool proof.

Notice the slight yellow starting to show. this head is ready for harvest.

Broccoli belongs to the plant family Brassicaceae. The genus is brassica and plants that belong to it are often called simply brassicas or cole crops. Cole comes from the Latin word caulis which means stem or cabbage. The genus Brassicas contains some of the most important agricultural crops in the world. This family has been a favorite food of humans for so long that there are species that have been improved to allow us to eat literally every part of the plant. Rutabagas and turnips are brassicas that are grown for their roots. Kholrabi is grown for its stems. Cabbage, kale, brussel sprouts and mustard are grown for their leaves. Broccoli and cabbage are grown for their large, edible flower heads. All brassicas are very good for you. They contain vitamin C, lots of soluble fiber and various cancer fighting compounds as well.

Growing Cole Crops – Almost all cole crops are great choices for the garden. In fact, because of the mild winters that we have in Zones 7 thru 9, we can usually grow them in both the spring and the fall garden. Brassicas like cooler weather and they can easily survive temperatures in the middle twenties. It grows best when the daily temperature is in the mid seventies and nights are 20 degrees cooler. Because of this, it is best to plant your brassicas in early spring (February) or late fall (September). Most varieties in this genus mature in 90 to 120 days so plant according to when temperatures will be best suited for them. Do not plant too late in the season as they strongly dislike high heat.

I love the large foliage of broccoli.

Brassicas need full sun exposure and respond best to soil that drains well and has been deeply worked with compost. All brassicas are fairly pest free but they can get aphids.  They are also often plagued by cabbage worms and cabbage loppers.  Both of these pests are the larva of moths and they can defoliate a plant if the infestation is severe (more likely to happen in the spring).  You can control these with floating row cover or BT.

The brassica’s biggest enemy in the fall is the grasshopper. Young plants are very susceptible to grasshopper feeding. To help the plant beat the grasshoppers, place one gallon tin cans with the top and bottom cut out over the plants until they are about a foot tall. I am not really sure why this works, but it does. My theory is that either the grasshopper can’t see the plant or they cannot fly in way that allows them land inside of the can.

As far as I know, I have grown every type of brassica and I love them all. However, broccoli has a trait that makes it my favorite of all the cole crops. With most cole crops, you harvest the vegetable and then the plant is done. Not broccoli. Cut the green head and in a few days, additional little florets will start to form around the site of the cut. While these florets will not reach the size of the original flower head, they are just as tasty and each plant will produce several of them.

Little broccoli florets forming around the site of an earlier harvest.

In my mind, cole crops are the absolute best plant family to grow in the fall Texas garden. Give them good soil, plenty of sun and regular water and they will reward you with some of the most flavorful and nutritious things you can take from your garden.

Shallots in the Potager

I love my little potager.  It is truly the best gardening gift that I have ever given to myself.  Not only does it provide my wife and I with all of the veggies, herbs and flowers that we need, it allows me to constantly experiment with plant selection and design concepts.  Even though I want to produce as much food as possible in my small space, it is just as important to me that the beds of my potager are as attractive as they are functional.

Shallots and cauliflower in my triangular beds

Every August and February, I get out my graph paper and sketch out where I want to plant the several varieties of plants that I am going to grow.  I pick plants that are tall and plants that are small.  I will find plants that have interesting textures or colors that will break up all of the “green” in the beds.  Even though I try several different varieties in each design, the one plant that I use in each and every one of my garden designs are shallots.

Shallots are the perfect plant for the potager.  They are highly productive, easy to care for, have very few issues with disease or pests and their upright foliage is the perfect border.  I use shallots in my designs much like most folks use mondo or lariope in their flower beds.  Last year, I used them to line the fronts of my exterior beds.  This year, I am using them as a middle planting in my triangular beds.  The design for my triangular beds is based on the “Thriller, Filler and Spiller” design model.  The beds will be made up of three different types of plants.  I have selected cauliflower for the “thriller” component of the bed.  I love the large scale and course texture of cauliflower and it will contrast nicely with the upright form of the shallots that I am using as my “Filler”.  The outside border will have different varieties of leaf lettuce and spinach acting as the “Spiller”.
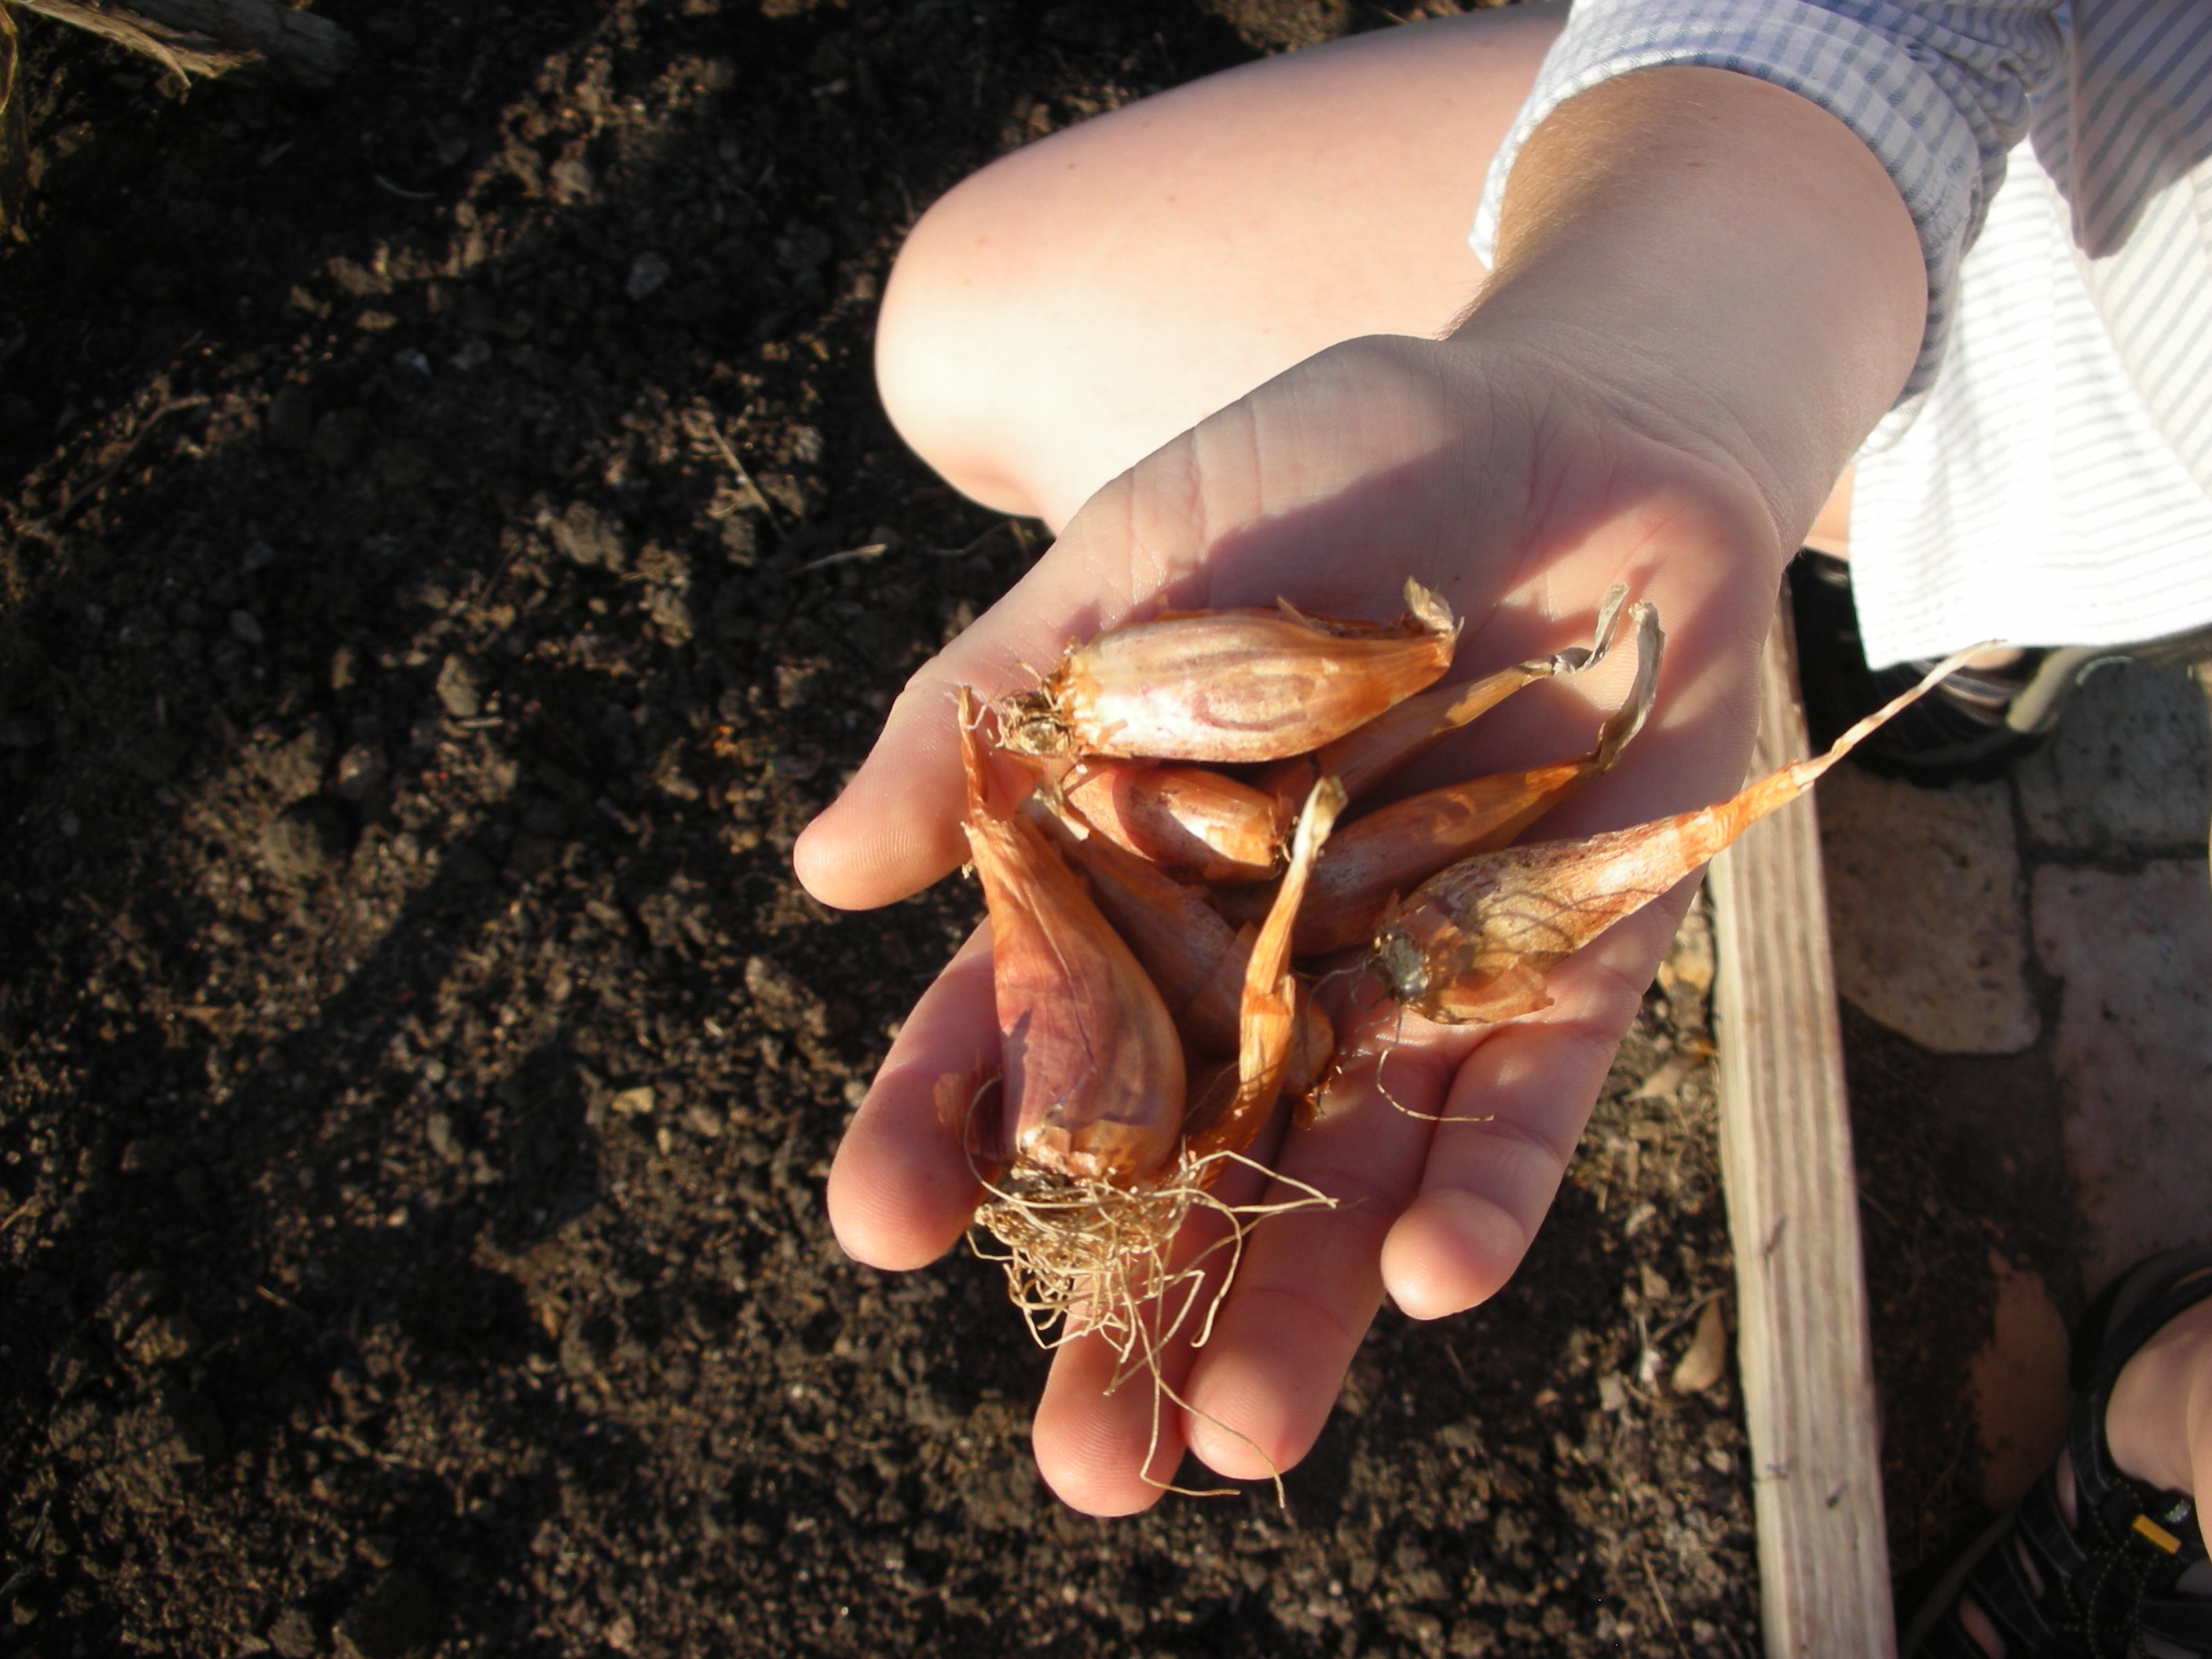
A handful of shallot "offsets". Some folks call the offsets bulbs. Whatever you call them, stick them in the ground just deep enough to cover the neck.

Background – Shallots (Allium cepa var. aggregatum) are often called dividing onions.  They grow in clusters of offsets that make them look somewhat like garlic when harvested.  Technically a perennial, they will continue to “divide” as long as they are left in the ground.  Because of this, I never harvest all of my shallots.  I always leave a few in the ground until I am ready to replant in the fall.  This year I pulled up a single clump that had 43 offsets.  Additionally, shallots are extremely cold hardy.  Last winter was brutally cold by Texas standards.  It got down to 18 at my house and we had several days below 24 degrees.  Still, my shallots thrived.

I got my original shallots from Plants and Things nursery in Brenham.  They are the only folks in the area that carry shallots.  In fact, they grow them in their own garden on the back of the nursery property.  This year, I needed a few more shallots to finish my bed design so I stopped in and visited with Mary Stolz.  She told me that the shallots they sell came from a start she got several years ago at a Master Gardener’s event.  Through the years, those few starts have yielded enough for them to be able to eat all they want and still offer plenty to their customers.  In spite of this year’s drought, they have harvested three wash tubs full of these tangy little onions.  That should tell you a lot about how prolific and reliable these small, bulbing onions are. 
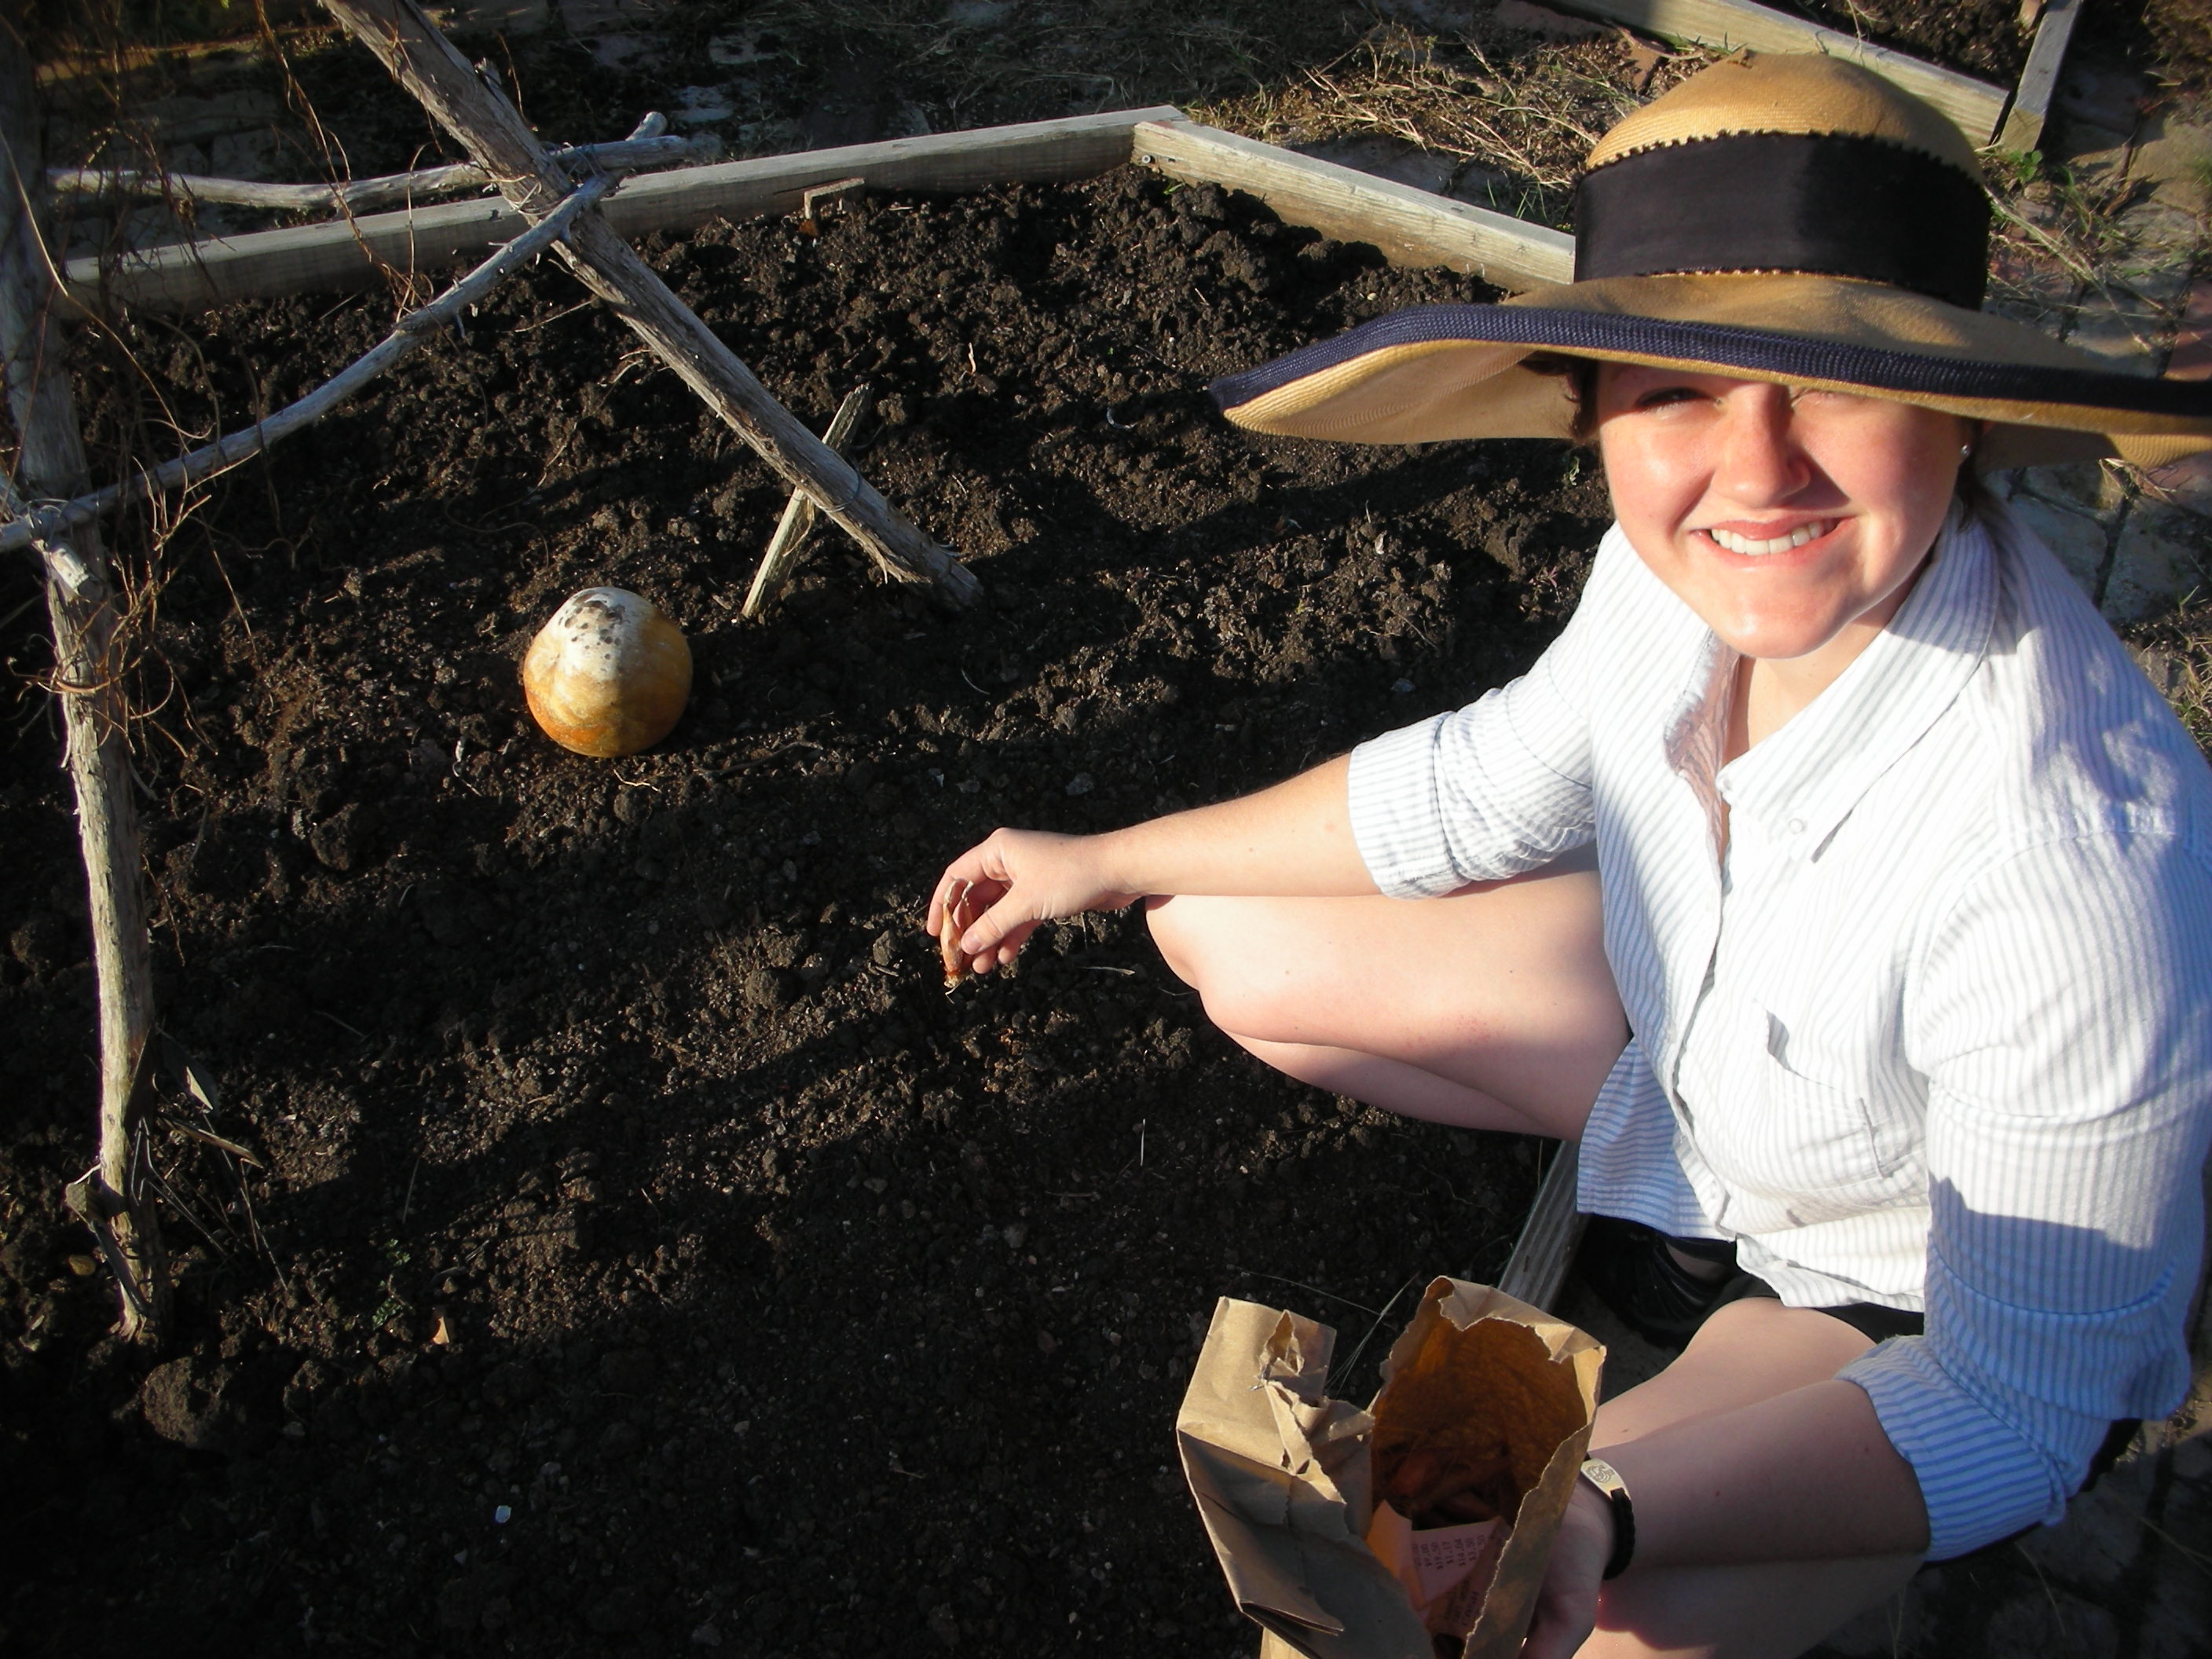
The yupneck's youngest daughter planting shallots in the potager. The round thing in the background is a fully ripe tatume' squash that I am drying for seed.

Planting – Shallots are grown just like regular onions (except you don’t have to worry about any day length issues).  Plant them in the fall for an early summer harvest.  Do not plant them in soil that has been recently manured.  Shallots should be planted with the root scar down and the pointy end up.  Stick them in the ground deep enough to just cover the top of the offset.  Now all you have to do is water and weed.   Some folks suggest pulling the soil back from their base once the roots set, but I have not found this to be necessary.

Harvesting/Curing/Preserving – Just like “regular” onions, the tops of the shallots will “fall over” when they are ready to harvest.  However, you do not have to wait until they are fully mature to enjoy them.  My wife and I use young shallots just like we use “green onions”.  The tops are excellent chopped into a salad and the young offsets have a very strong flavor that I enjoy raw. 

Since shallots are actually onions, they can be “cured” for later use.  Cure your shallots just like you would cure any other onion (click the link to read the details of how to do this).  The only difference in curing them, as opposed to regular onions, is that you need to divide your clumps into individual offsets before you cure them.  Cured shallots can last up to six months if kept in a cool, dark place.

Another advantage that shallots have over regular onions is their ability to withstand your freezer.  My wife and I chop up several small Ziploc baggies full of shallots and then stick them in the freezer.  This makes it very easy for us to use them later in eggs, soups and casseroles.  They do lose a little of their texture when frozen but they maintain that spicy flavor very well.

Store bought shallots are very expensive.  If you eat a lot of shallots, then they are one of the few vegetables that you can grow and truly save money in the process.  Because they are so productive, carefree, tasty and ornamental, shallots have earned the title of the only vegetable that has a guaranteed spot in my fall garden.  Why don’t you stop by Plants and Things today and give them a try in your own garden?

Tree Gators, Aggies and Wildfires

Well, Mother Nature finally sent a little relief to all of us that have been suffering under the heat of the HOTTEST AUGUST ON RECORD.  This cool front was much appreciated by all of the fall gardeners who really needed to get their seeds and seedlings in the ground.  The milder weather encouraged me to tear up and haul off an old brick side walk.  I was also able to get the beds of the potager ready for a slightly late Fall planting.

I also got to install my latest “garden gadget”.  Because of the drought, all of our neighbors are watering much more than normal.  This leaves us almost 0 water pressure at our house.  Due to the low water pressure, our sprinklers are just not covering the same amount of area that they used to.  It has made it somewhat difficult to get enough water on our trees.  So, to help ensure that my trees make it, I bought five “Tree Gators” If you are not familiar with Tree Gators, they are basically a big ziplock baggie that wraps around the base of your tree.  You fill it with 20 gallons of water and then tiny holes in the bottom of the bags drain the 20 gallons over a five hour period.  I was very impressed with this little invention.  It has an incredibly simple design, is ridiculously easy to use, and entirely effective.  What more could you ask of a gadget?  You can check out the entire line of Tree Gator products at http://www.gardenhomedirect.com/Treegator-Original-Slow-Release-Watering-Bag-by-Spectrum-Products_p_3.html.

Over 80,000 Aggies showed up for Sunday’s game. It was the fourth largest crowd ever at Kyle Field.

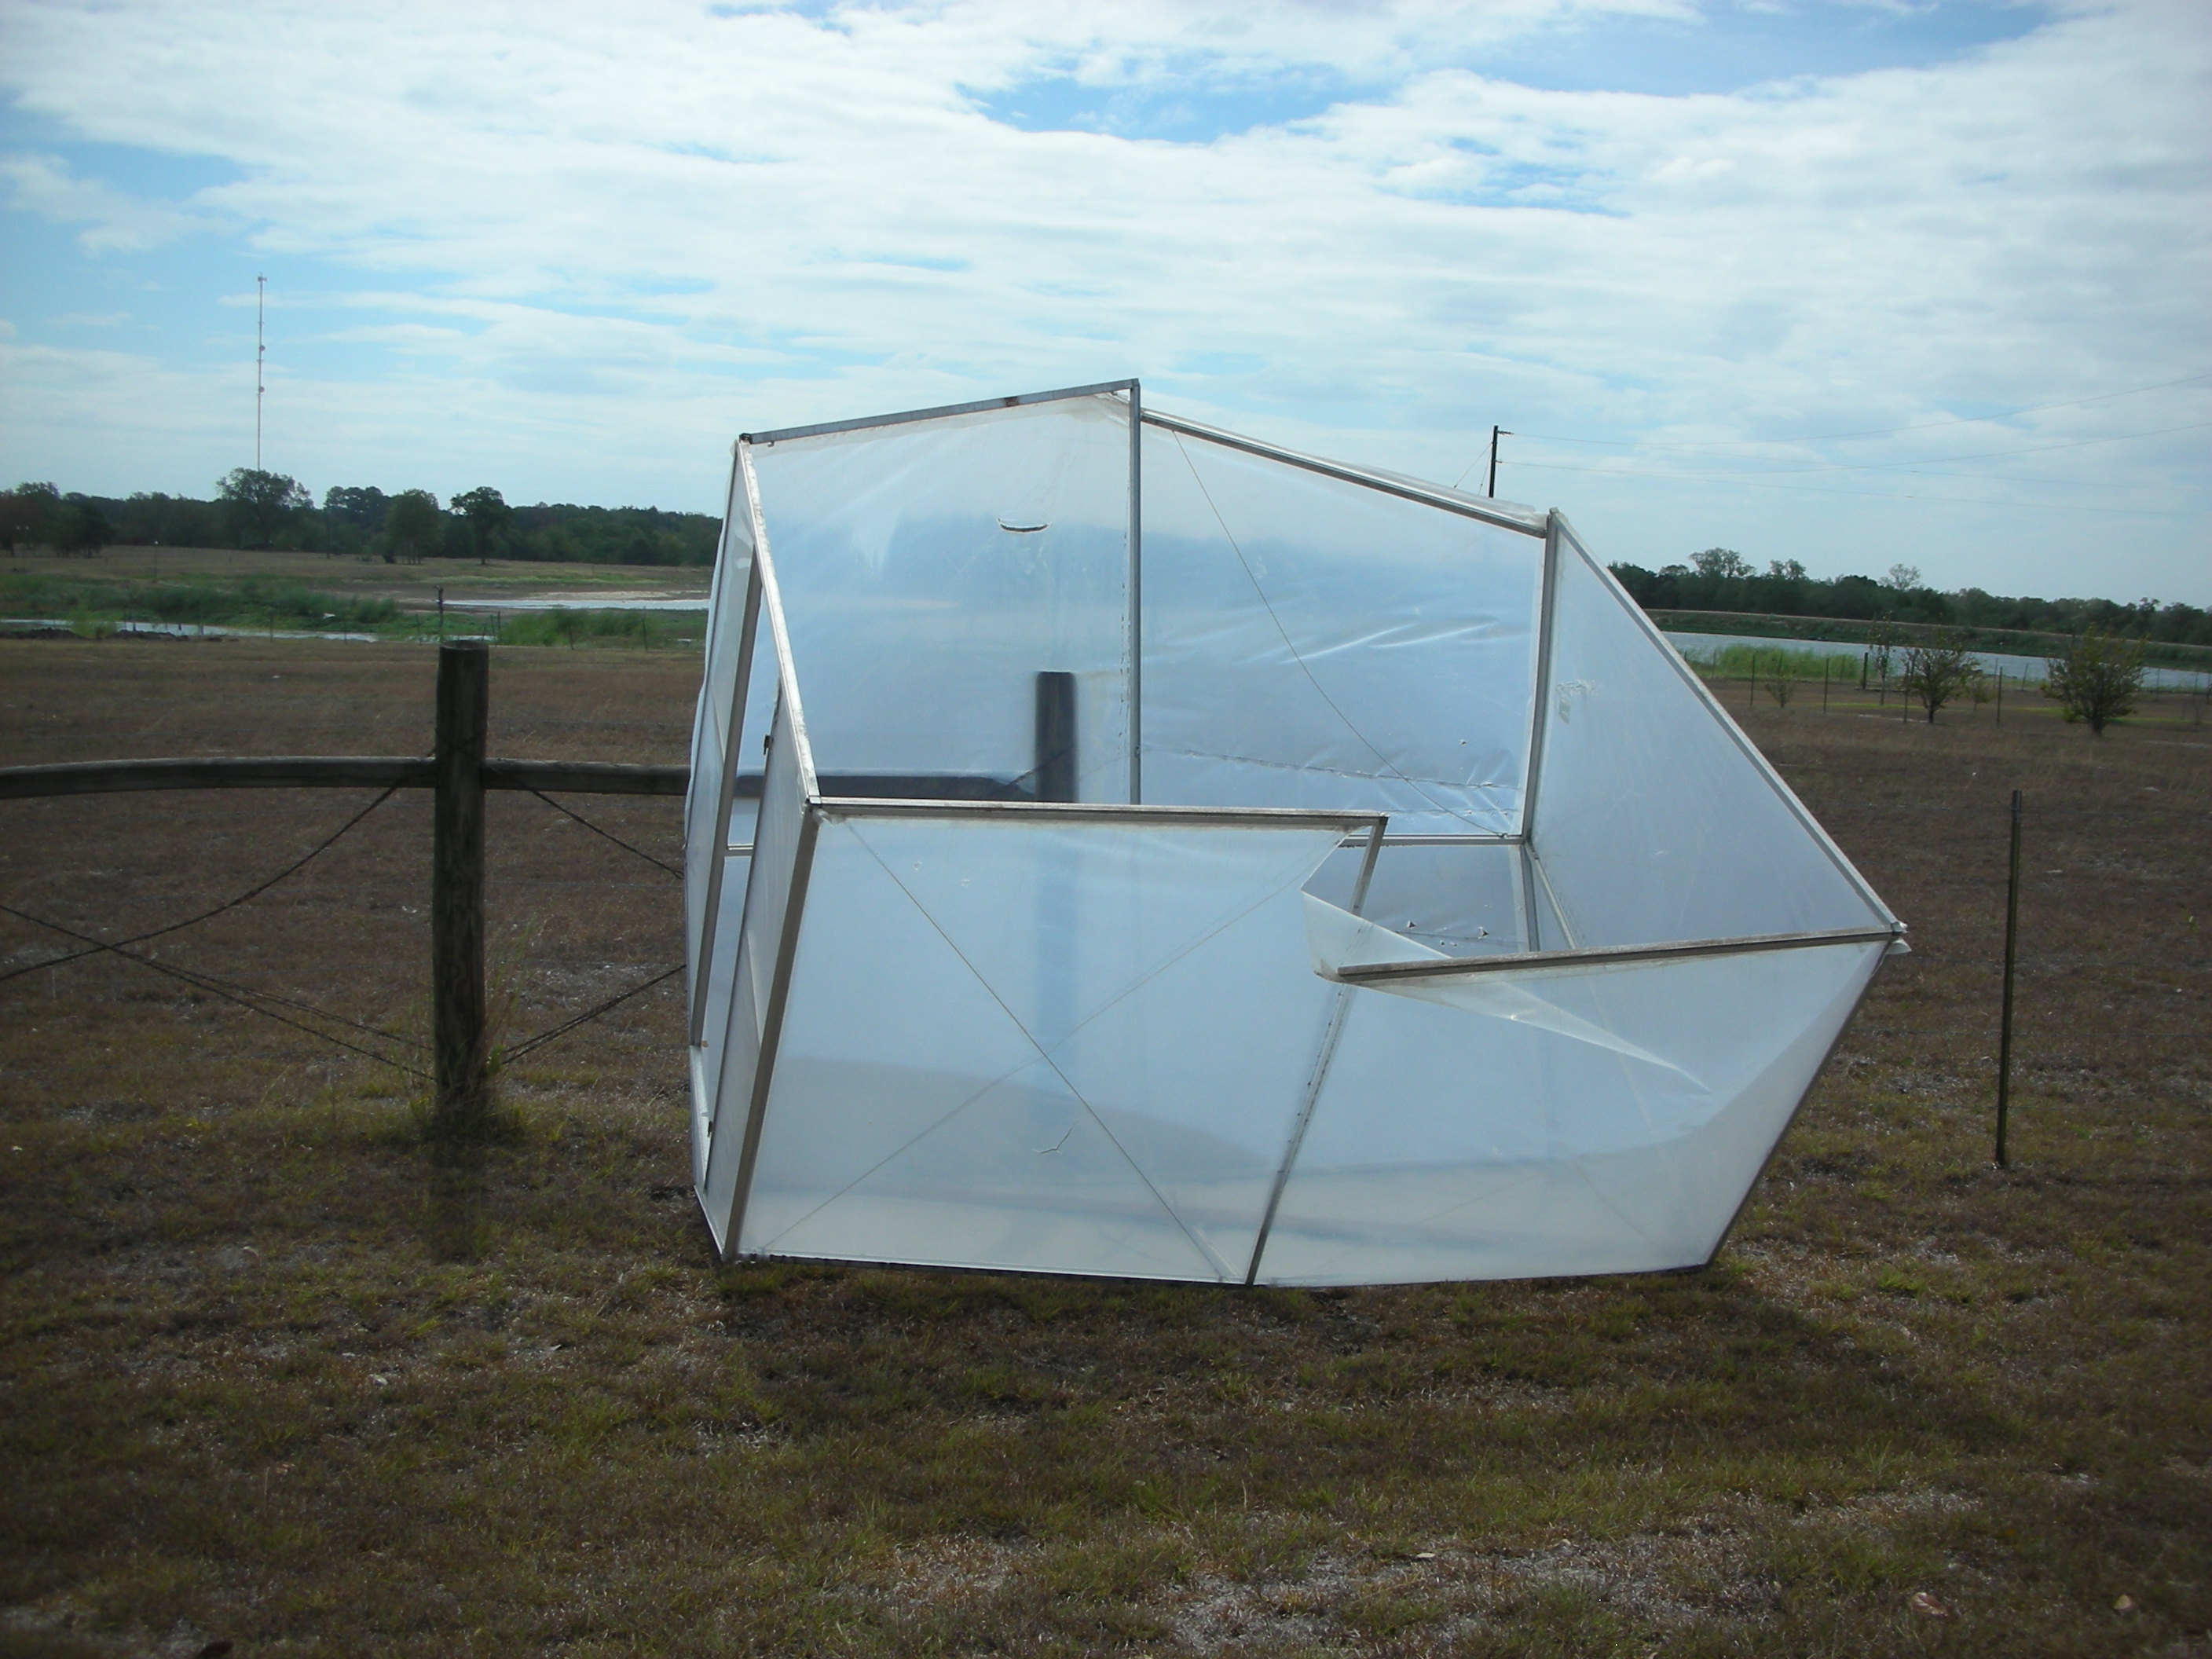
Despite getting to watch A&M beat up on SMU, the weekend was not perfect.  The tropical depression that brought a ton of much needed rain to Louisiana, brought us extremely high winds for most of Saturday and Sunday.  These winds caused a small personal tragedy for me.  I lost my greenhouse to the winds.  I know that this is in no way comparable to losing one’s home.  However, to me it was pretty heart breaking.  I just bought my little greenhouse a month ago.  It was very disappointing to drive up my road on Sunday morning and see all of those dreams of fall and winter propagation wrapped around a barbed wire fence.

My little greenhouse fell victim to the high winds on Saturday

The Texas Wildfires

I would also like to take a minute and talk a little about the fires that seem to be consuming most of Texas.  Right now, there are 64 wildfires burning in Texas.  Things are so bad that on Saturday, I heard something I have never heard in all of my 49 years.  The Brenham radio stations were making public appeals for all volunteer firemen, regardless of where they lived, to grab their gear and head to Bastrop.  The fire in Bastrop is awful.  I heard this morning that Bastrop State Park is gone!  How can that be?  Bastrop State Park was a huge stand of ancient pines covering acres and acres of beautiful rolling hills.  I have spent many painful hours pedaling up and down those hills on my bicycle.  While my thighs hated the hills, the place was so beautiful that I gladly accepted the burning in my thighs as the small sacrifice that my body paid so my mind and soul could be invigorated by the scenery.  I will miss this place dearly.

While Brenham is still fairly safe, all of the counties around us are burning.  Two of my nephews that live close to Bastrop were forced to evacuate on Sunday.  I cannot imagine leaving your home and all of your possessions knowing there is a very good chance they will not be there when you return.  According to the news wires, between 600 and 1000 Texans have lost their homes to wildfires this summer.  Please keep these people in your thoughts and in your prayers.  Also pray for the men and women that are battling these fires.

If you would like to see where these wildfires are currently burning, the Texas A&M  Agrilife Extension site hosts a Google map with data provided by the Texas Forest Service.  Here is the link: http://ticc.tamu.edu/Response/FireActivity/.

Preparing the Zone 9 Fall Garden

Even though it was 106 yesterday, it is time to get your zone 9 gardens ready for fall planting. I have to admit, with all of the talk of water restrictions, I am debating how much of a garden I am going to have this fall. I really cannot imagine not planting a garden, but I do think that I am going to scale back. No row garden for me this fall. Instead, I will be doing all of my planting in my potager (if you are a reader of Texas Gardener magazine, check out this month’s article that details how I built my potager).

Carrots and lettuce love the cooler weather of fall.

Preparation – Before you plant, you need to get the garden ready. For me, this is a fairly simple process. I practice no till gardening in my potager. So, to get my beds ready I do the following things. Note: these steps work well for flower beds as well. Since most beds have a mix of annuals and perennial, they are typically no till as well.

1. Remove all plant material that is left over from the spring garden. If you have not pulled up those cucumber or pole bean vines, then now is the time to do it. Also, if there is plant litter on the ground, remove it and destroy it (burn if you can, haul off if there is a burn ban). Old plant litter can hold a lot of pests that can “bug” you in the fall and then again in the spring. Squash Bugs over winter in plant litter so DO NOT move this debris to the compost pile. The squash bugs will actually thrive in the warm compost environment and be ready for another invasion in the spring.

2. Remove weeds. Thank goodness, weeds are not as aggressive in the fall. A good weeding now will reduce the number of times you will have to weed in the fall and winter. If there are no seed heads on the weeds that you pull, go ahead and put them on the compost heap.

3. Fertilize. Since I grow organically, I fertilize with various forms of compost. I use primarily mushroom compost but I will occasionally add in composted cow manure, rabbit manure, cotton bur compost and an alfalfa and humate blend. All of these are good sources of nitrogen. However, for good flower production (and ultimately vegetable production) you also need phosphorus. I use rock phosphate. Also, don’t forget about the potassium. Potassium (or potash) helps plants use water. Clay soils generally have enough of this in our area. However, since we are in a drought, I am going to add a little supplemental potassium this year. The best source of potassium for the organic garden is greensand. You can also add wood ash but it is high in lime so it can lower your pH.

Cabbage, and all brassicas, thrive here in the fall

Planting – In my humble opinion, fall is the best time of the year to garden in Texas. The temperatures are falling to a bearable level, the rains generally pick up and weeds are not nearly as much of a problem. Also, my favorite vegetables are the brassicas that thrive in the Texas fall. Patty Leander creates the planting guide for the Travis County Agrilife Extension office.  Click the link below to see here updated planting guide for our area.

Texas A&M AgriLife’s Vegetable Planting Guide by Patty Leander


Turnips are a two for one deal in the fall garden. Both the turnip and the greens are delicious and nutritious.