Lavender Fest at the Living Kitchen CSA

The view from the porch of the Living Kitchen CSA

I love the CSA movement.  If you are not familiar with the CSA concept here is a brief run down.  CSA stands for Community Supported Agriculture.  Basically, the CSA is an arrangement between a farmer and their customers.  The members of the CSA agree to pay a weekly fee to the farmer in exchange for an equal share of their harvest.  This arrangement ensures that the farmer has the resources needed to keep the farm going and the members get a steady supply of fresh, healthy (generally organic), locally grown vegetables for their families.  I really love this movement because it allows a lot of people to make a living farming on a relatively small scale.  I am a firm believer that what we put in our mouths really matters.  The people that operate CSAs feel this way as well.  That’s why this arrangement works.  Good people who love agriculture and taking care of the earth provide great food to people that care enough about what they feed their families that they are willing to support the producers.  Everyone wins!

Linda Ford hard at work distributing shares to her members at the Tulsa Farmer's Market

Two weeks ago my wife and I visited The Living Kitchen Farm and Dairy (http://livingkitchen.homestead.com/) in Bristow Oklahoma.  This CSA is run by two of the hardest working entrepreneurs I have ever met.  Linda Ford and Lisa Becklund run a thriving business that combines vegetable production, a goat dairy, mutton production, egg production, artisanal cheese making, farmer’s market and fine dining experiences.  WHEW!  I am exhausted just telling you about all they do!  Their CSA model is a little different than most.  In addition to fresh vegetables, they also provide fresh eggs to their members .  They also intend to add mutton to the mix in the near future.  It is their ultimate goal to provide 75% of their member’s food needs.

Our Chef and hostess, Lisa Becklund, with Mrs. Yupneck

Running an operation this diverse does require some help.  The girls employ seasonal labor and are assisted by several volunteers.  This summer, they also have two college interns that are helping them with the just about everything.  Kathleen Airola (B.S. in Horticulture, University of Arkansas) and Josey Hoelscher (B.S. Animal Science, Purdue) are providing assistance in all aspects of the farm’s operations.  Young people like this are the future of Agriculture in our country.  I am excited to see such talented young people excited about a future in the agricultural world.  Both of these girls were extremely knowledgeable and personable and I enjoyed visiting with them immensely. 

The Living Farm interns: Kathleen Airola and Josey Hoelscher. Also pictured is Living Farm volunteer Cara Johnson. Special thanks to Cara as it was her and her mom that rescued the yupneck and his party when we became lost on our way to the farm!

Even though I am incredibly interested in all thing horticultural, what brought us to Living Kitchen was the birthday of a dear friend.  My wife was looking for something “different” to give her friend for this birthday.  The Living Kitchen Lavender Festival is what she came up with.  In addition to their agricultural events, Linda and Lisa sponsor monthly dinners (in the non-freezing months) that feature whatever is in season on the farm.  We were lucky enough to be there for the “Lavendar Festival”.  Every dish and drink had culinary lavender used in its preparation.  Lisa is a trained chef and her skills were apparent.  Everything that entered out mouths was outstanding. 

Flat bread made in the farm's "cob oven". The bread was perfect with the homemade chevre made right on the farm.

Atmosphere always plays a huge part in the fine dining experience.  Lisa and Linda have a log cabin on their property that they use to host their dinners.  This cabin looks like it is straight off the pages of a magazine.  We enjoyed our Lavendar Feast on the screened in porch of this rustic home with 29 other lovers of good food.  We ate, laughed and made new friends.  All in all, it was a perfect day.  My hat is off to these two outstanding young women.  Together they have built a business that feeds both the stomachs and souls of their guests.

Linnaeus Teaching Garden

A statue of Carl Linneaus, the father of botany and the namesake of the Linneaus Teaching Garden

The Linneaus Teaching Garden in Tulsa is an incredibly beautiful place that was a gift to the citizens of Tulsa by the citizens of Tulsa.  The garden is the vision of a true Master of Horticulture named Barry Fugatt.   Mr. Fugatt is the resident horticulturist at the Tulsa Garden Center.  In 2005 he approached the director with a plan to create a garden that would educate the people of Tulsa on the horticultural possibilities for their own yards and gardens. 

A lovely bed as you approach the teaching center

Over the rest of 2005 and 2006, 3000 people contributed the $800,000 needed to get this project off the ground.  With funding secured, the city authorized the use of 1.5 acres in Woodward Park to be used as the home of what was to become the Linneaus Teaching Garden.  Industry sponsors donated the material and labor to build the structures and hardscapes.  This trend of giving has continued and the garden has now thrived for five years without the need to take any public money.

Summer phlox and a bumble bee

The center is staffed by a cadre of trained volunteers.  To work here, you must complete a 12 week course that covers everything from plant taxonomy to landscape design.  Once the course is complete, the volunteers agree to provide at least 40 hours of their time to the garden each calendar year.

In the yupneck’s humble opinion, this type of garden is needed in every city in America.  The gardens are beautiful and they are filled with plants that grow well in Tulsa.  There is no sales pitch.  If you want to beautify your yard or start a vegetable garden, then all you have to do is stroll around this 1.5 acre oasis.  Every planting is clearly marked and selected soley because it does well in the Tulsa area.  If you want to know more about the plants or the methods that have caught your eye, then you can ask any of the very friendly and well trained staff for the additional info.

Lovely water feature

The Linneas is not just about ornamentals.  The vegetable garden was just as lovely as the beds.  I loved the extensive use of containers.  As more and more urban dwellers catch the gardening bug, container gardening is going to become a much more common way of growing veggies.  Containers are easy to get started and easy to maintain.  In fact, a container filled with the appropriate media (soil) will generally have fewer weeds, require no chemical fertilization and use much less water than a traditional, in the ground, row garden.  One complaint I have often heard people make about container gardens is that they cannot grow big vegetables like corn.  The Linneaus has obviously disproved this urban legend.

I have never seen corn grown in a container. Very interesting. I also liked seeing the whiskey barrels reused as very attractive container gardens.

With the feel of a public garden and a mission of education, this garden is an incredibly rare and valuable resource for the gardeners of Tulsa.  The fact that it is completely funded by private donations and staffed by people that are as passionate about horticulture as I am makes me love it even more.  I wish I had something like this in my neck of the woods.

Pansies in the middle of June! I don't think were in Zone 9 any more!

Save Money On Perennials Now!

Lovely vitex that I got for $17 at Wal-Mart's summer close out. This tree was marked $69.99. It was very root bound so I did a lot of root spreading and trimming. Also trimmed back the top. You can see, it was well worth the $17 and the extra effort.

This may sound funny, but I hate buying plants.  You see, I am cheap and plants are expensive.  Even though I love getting new plants for the garden, I just cannot bring myself to pay what most nurseries want for their plants.  Don’t get me wrong.  I know a lot about the horticultural world and I know very well how much it costs to grow, market and ship a plant.  The horticultural world has done a great job at keeping the prices for their products down.  In fact, when you adjust for inflation, there has been no real growth in the price of bedding plants in the last ten years.  However, I still hate paying full price.  So, I don’t.  I am constantly on the look-out for ways to increase my garden without depleting my checking account. 

A $5 ornamental plum. My wife got two of these at Wal-mart during their end of season.

In the last month, I have purchased a lovely 7’ foot tall, three trunked Vitex (Vitex agnus-castus), two 7’ ornamental plum trees (Prunus cerasifera), two huge Southern wax myrtles (Myrica cerifera), three one gallon pots of variegated New Zealand flax (Phormium “Rainbow Queen”), three one gallon Purple Fountain grass (Pennisetum setaceum “Rubrum”) and a one gallon Broom plant (Genista racemosa).  While the list may or may not be impressive to you, what I paid for it should be.  I got all of these plants from the big boxes and I paid just $56!  That is not a typo.  I got five large trees and several large bedding plants for just $56.  That averages out to just $5.10 per plant.  How can that be?

I wish I could say that I was a master negotiator and I talked the owners of Wal-Mart and Lowe’s into selling me these fabulous plants for this ridiculously low price.  However, that would be a lie.  What really happened is this: Lowe’s and Wal-Mart are closing out their overstock from their spring buying.  I just happened to be in the stores when this was happening.

Plants I bought this weekend at the Lowe's summer close out. Total cost of plants shown: $10.34

Post season close outs happen twice a year at every nursery in America.  If you want to get the good deals, then you need to pay attention to when the stores receive their new stock — and then buy at another time.  In most of Texas, spring stock usually arrives around late February or early March and the fall shipments start coming by late August.  Armed with this knowledge, you can save a lot of money by purchasing your plants off peak. 

If you buy off-season, you need to keep a few things in mind.  First, you can realistically only buy perennials off-season.  Annuals (which usually mean Spring and Fall color) are only good for a short season.  It will not do you any good to buy pansies in July or mums in January.  However, if you want a good deal on loropetalum or New Zealand flax, then you can buy and plant them anytime of the year.  With a little care, you can plant perennials after their off-peak selling season and they will become beautiful, well established plantings in next year’s garden.

Look at the size of that Southern Wax Myrtle. I got two of these for $10 each.

If you buy off-season, you will have limited availability.  If there is a particular plant that you want and it absolutely has to be that plant, then you probably shouldn’t gamble that it will still be there at the end of the season.  Go ahead and buy it.  I have done it and there is no shame in paying retail.  However, if you garden more by form and color than by specific plant, there is a good chance you will find many things left in the nursery at the end of the season that will work somewhere in your garden.

One of my beds has wound up with a lot of purples in it: fall asters, liatrus and castor bean.  So I needed some yellow to compliment and break up all of that purple.  That is why I bought the variegated New Zealand flax.  The light green and yellow foliage and the upright, grass like form will be a great contrast to the mounding asters and the spiky liatrus.  This flax was $7.99 in March.  I got it $2 in June.

Another problem with off-season plants is the fact that they have been in the pot for so long.  When you remove these plants from their pot, many will be completely root bound.  That is no problem to the experienced gardener.  If you buy a root bound plant, simply unwind what you can and trim off the rest.  The plant will actually thank you for this.  Also remember that the top of the plant should be in balance with the bottom.  If you cut many of the roots you will need to prune the top as well.

Finally, if you buy off-season you are going to have to give these plants a little extra TLC once they are planted.  Once they are in the ground, make sure they receive enough water to keep them from going into stress.  If you give them a little extra care, they will grow and thrive just like the plants that your neighbors bought in season and paid full retail for.

There are many, many beautiful things to buy in the nursery.  I wish I could afford them all.  Since I can’t, I buy what I can off-season.  If you are willing to wait, are flexible in your design and willing to give your off-season purchases a little extra TLC then you can have a very full and beautiful garden that didn’t drain your bank account!

Daikon

The other day I was at lunch in BCS (that is Bryan-College Station for all you non-Aggies out there) with several Masters of Horticulture.  We were talking about our gardens and I mentioned that my daikon were doing really well.  To my surprise, not a single one of these PhD Horticulturists knew what a daikon was.  I found this somewhat amusing but I guess if you do not eat a lot of Asian food, then you would have no reason to know about daikon. 

Sydney Pickle, Hannah Michna and Lindsey Pickle pull the first daikon of the year from the yupneck's garden

If you are not familiar with daikon, here is a little background.  They are a root crop much like carrots or parsnips.  In fact, the Japanese translation of their name means “large root”.  Daikon is a radish and it is a staple of Japanese food.  They cook it, pickle it, stir fry it, stew it and eat it raw.  The Chinese, Koreans and Indians also eat a lot of this spicy root.  The greens are also edible.  One reason it is so popular in the Far East is it’s storage capabilities.  Unbruised daikon can stay fresh for three months in a root cellar.  When dried, they can last much longer.  This allows the Japanese to have a ready supply of a vitamin C throughout the long winters.  There are more acres of daikon in production in Japan than any other vegetable.

There are two varieties of daikon.  One looks like a big turnip and can grow to 100 pounds.  However, the one that I grow is much more common.  Raphanus sativus var. longipinnatus is a long white root that resembles a carrot.  It has white flesh and skin.  It can grow to lengths of 36” but is most often harvested when it is between 12” to 18” long and the diameter is between “1” and 2”.  Summer diakon have a sharper and spicier flavor than fall diakon.  Also, the taste of the daikon changes as you progress up the stalk.  The hottest (and most radish-ey tasting) part is near the tip.  The flavor becomes milder as you move up the root toward the greens. 

Daikon, Chinese cucmbers and volunteer zinnias in the potager

Daikon are very easy to grow.  They like rich, loose soil and full sun.  Plant at the same time as you plant other root crops.  They actually work best as a fall vegetable but do quite well in the spring.  Since they produce roots that weigh over a pound, a small amount of space will provide you with lots of radish. 

I work with several Indian and Chinese ex-pats so I grow enough to share.  This year, one of my friends took some home and had his wife make me pickles.  They are AWESOME!!!!  I have enjoyed these pickles so much that I am including the recipe here.  It is a simple and delicious recipe that will make a perfect side for all of your outdoor summer grilling.  Hope you enjoy!

Debbie Kwan’s Daikon Pickles

Slice the daikon and sprinkle with about 1 tsp of salt. Use your hands to knead the vegetables for about 3 minutes.  Place in fridge and wait about 15-30min until water has been expelled.  Drain in a colander and rinse under cold running water, then press gently to expel extra water.

 Combine 1/2 cup sugar, 1/2 cup rice vinegar and 1/2 cup of water in a pot on low heat until the sugar has dissolved. Let cool then pour over the daikon. The brine should cover the daikon. Add peppers of your choice to make it spicy.  Let it marinate in the brine for at least 1 day before eating. They will keep in the refrigerator for up to 3-4 weeks.

Daylilies-A Month of Blooms

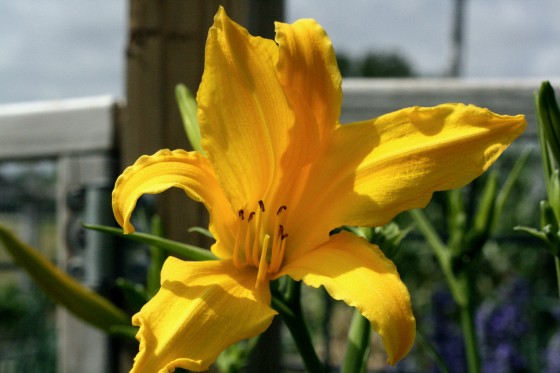
One of the daylilies that was passed along to me from my wife's grandmother

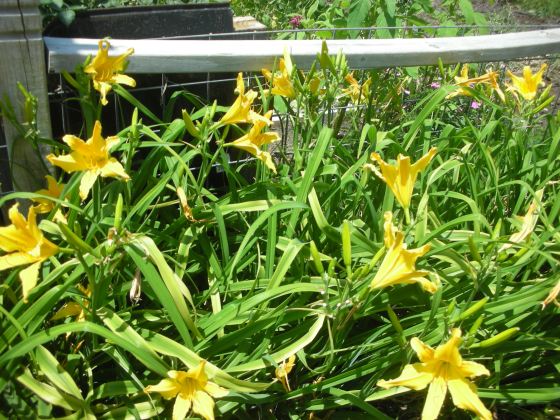
Very few plants in my garden give me as much enjoyment as my daylilies.  Early in April, I start watching them.  I am looking for that first sign of stalks. When I see these I know that soon, the green border around my potager will be covered in bright yellow flowers.

A masss of Nana's daylilies border my potager

My daylilies were passed to me by my wife’s grandmother.  Not directly, though.  A few years after she passed, we dug them up from her home place in the sandy loam of East Texas and moved them to the black clay of Washington County.  This sentence should tell you a lot about daylilies.  First, they lived at Nana’s for several years with absolutely no care.  So, daylilies are tough.  They also survived being dug out of a beautiful loamy soil and moved to a not so wonderful black clay.  So, daylilies are adaptable.  Throw in the fact that they are absolutely reliable, pest free and beautiful and you begin to understand why so many people love them.

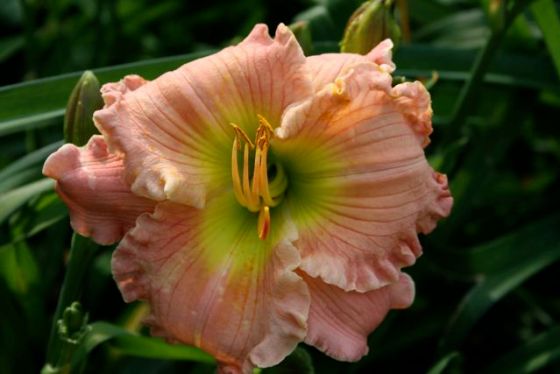
A lovely daylily bred by Chris von Kohn. You can buy this and others from him. All of his contact info is at the bottom of the post.

History – Daylilies originated in China, Korea and Japan.  They found their way to the Americas by the 1700s.  The Tawny Daylily was one of the first.  It quickly escaped cultivation and is now so common on the east coast that many think it is a native wildflower.  This flower was often planted close to outhouses and so it derived the very unfortunate common name of “Outhouse Lily”.  Daylilies began to lose their popularity in the US in the 1800s.  In 1920, the “Hyperion” daylily was introduced.  This began the resurrection of the flower as a major bedding plant in American gardens.

Despite their name, they are not true lilies.  Daylilies belong to the genus Hemerocallis and there are over 60,000 registered cultivars.  Their name is derived from Greek and literally means “beautiful day”.  Since the 1950s, the US has been the world leader in daylily hybridization.  I have a young friend at A&M named Chris von Kohn.  He has already created over 1000 daylily hybrids.  He hasn’t gotten one named yet, but he is only 22!  Chris is an up and coming Master of Horticulture and I am betting that we are going to be hearing a lot more about him in the years to come.  Thanks to the efforts of people like Chris, you can now own daylilies in every color except blue.  Some have  a strong fragrance and others have none.  There are daylilies with ruffled petals and multi-colored petals.  Some have “eyes” and still other sparkle with “diamond dust”. 

Another lovely daylily bred by Chris von Kohn. He is about to start grad school so he will greatly appreciate every order. All of his contact info is at the bottom of the post.

Planting – Daylilies are incredibly easy to grow.  Plant them in direct sun (or dappled shade) in well worked soil.  Dig a hole about 8” deep and make a small mound in the center of the base.  Spread the roots of the plant over this mound and backfill to a point where there is no more than 1” of soil over the crown.  If the roots of the plant are too big for the hole, trim them.  Water them in and then apply mulch (but not around the crown).  Water regularly for the first year.  After that, the daylily should be able to survive with minimal amounts of supplemental water.

Dividing – Daylilies reproduce rapidly.  If their clumps become too dense, they will begin to flower less and less.  Because of this, you need to divide them every two or three years.  This is best done in late summer or early fall.  Also, it is a good idea to give your plants a good watering the day before you do your dividing and transplanting. 

There are two ways to divide your plants.  The easiest is to just stick your shovel in the middle of the clump and remove half of the plant.  Since they have an extensive root system you may need to push your shovel all the way into the soil.  Use the shovel to work around the new clump and remove.  Replant in a prepared hole at the same depth as the original plant and water.  Place them about two feet apart.

Another creation of Chris von Kohn. You can buy this and others from him. All of his contact info is at the bottom of the post.

If you want to get individual plants, you can use a sharp knife to divide your clump into fourths.  Once this done, you can begin to remove individual fans.  Replant these fans like previously described.

Very few beautiful plants are as hardy or as easy to grow as Daylilies.  There are varieties that are hardy from zones 1 to 11.  Once established, they have a low water requirement and they are relatively pest free.  On top of all of that, they are incredibly diverse in color and form.  With so much to offer there is no reason for you not to grow daylilies in your own garden.

Buy Your Daylilies Here – Chris von Kohn will be selling some of his creations this fall.  They are incredible!  He is currently taking orders.  They are in bloom now so if you live in the Arlington/DFW area you can go by and pick your favorite.  He will mark it and save it for you and you can pick it up in the fall.  You can reach Chris at cvk007@earthlink.net or you can give him a call at either 817-269-7474 or 817-483-5146.   If you don’t live in the DFW area, just drop him an e-mail and he will be happy to send you pictures and then ship your plants when they are ready.

The yupneck with Chris von Kohn. He has just been awarded the outstanding senior agriculture student for horticulture by Gamma Sigma Delta, The Honor Society of Agriculture.

Snake Bit (kind of) !!!

Yesterday evening was perfect.  A storm was rolling in so the weather was cool and the sunset was the most beautiful shades of pink, orange and red.  My wife and I strolled hand in hand through the yard and noticed all of the things that were blooming or emerging (castor beans).  We went into to the potager and watched the cotton tail that has taken up residence in our “vine garden” (watermelons and sweet potatoes).  While there, my wife noted that the yellow pear tomato was covered so we walked over.  She stood behind me as I gently pulled and handed her handful after handful of these sweet, succulent delights.  As I reached in for the third handful, BAM!!!!  Something hit me in the foot!  It felt like I had been kicked by a small child.  Confused, I looked down and there I saw this:

Turns out that little kick was no kick at all.  I had been struck by a very large and  aggressive Texas Rat Snake.  Now I am no herptologist, so if my i.d. of this snake is wrong please feel free to tell me. 

According to Houston Herpetological Supply this snake is good to have around as it eats primarily rats and mice.  However, it will also eat birds and bird eggs and it can climb trees to accomplish that feat.  Because it is often found around chicken coops, it is often called a chicken snake.  However, it doesn’t eat chickens and rarely eats their eggs (too big).  This snake can be aggressive when encountered in the wild.  It will coil up and strike.  It will also wiggle its tail in leaves so it sounds like a rattlesnake.  Also, it is the largest snake in Harris (and evidently Washington) county and it can reach lengths of over six feet.  This one must have been a teenager as I am guessing it was only four to five feet long.

I am growing my tomatoes on a cattle panel. They are heavily mulched with straw and have drip irrigation. This pic is from about a month ago. They have now formed a very thick and wide hedge that appears to be ideal for snakes to lay under.

Well, that explains it.  An aggresive Texas Rat Snake just did not appreciate me bothering his tomatoes.  Glad I am not afraid of snakes.  If this would have happened to my dad it would have probably killed him.  I was surprised at how determined this guy was to stay in my tomato bushes.  After striking me, he just laid there and looked at me.  He wasn’t moving.  So, I had a choice.  Catch it, kill it or just run it off.  I am not a snake hater so I just chased him off.  My wife was a little dismayed by the fact that he decided to run in the direction of the house. I ran in front of him and he turned and went under a woodpile. 

So, what have I learned from this?

1. Always take a hoe with you into the garden whether you are weeding or not

2.  Always wear shoes (or boots) when you are in the garden

3.  Look before you stick your hands into places you can’t see very well

4.  Snakes like tomatoes

5.  If you have rats in the house or attic, put a rat snake in there (learned this from the website).  They will eat them and then leave.

Love-Lies-Bleeding

For me, growing new things is a big part of the fun in gardening.  Each year, I like to try at least one new vegetable and one new flower.  Sometimes the new things work out and sometimes they don’t.  This year, one of my flower experiments has yielded a keeper: Love-Lies-Bleeding (Amaranthus caudatus).

Love-Lies-Bleeding flower heads just beginning to form

Love-Lies-Bleeding (and all amaranths for that matter) is easy to grow, tolerant of poor soils and incredible to look at.  In less than three months, mine have gone from seed to eye catching three foot tall plants covered in long red inflorescence that cascade almost down to the ground.  These plants have been grown for ornamental purposes for a very long time.  A. caudatus was included in a plant survey found in Colonial Williamsburg and it was very popular in Victorian English gardens.

Love-Lies-Bleeding is member of the amaranth family.  Amaranths are a diverse species with plants whose foliage and inflorescence range from yellow to red to deep purple.  In addition to producing very showy inflorescence, amaranths are edible.  Both the leaves and the seeds are harvested as food all over the world.  The leaves are used much like spinach and the seeds are used as grains.  However, since amaranths are not in the grass family, their seeds are gluten free.  Amaranth was a very important crop for both the Aztecs and the Inca.  To this day, the seeds are still “popped” like popcorn, mixed with honey, molasses or chocolate and sold as snacks on the streets of Mexico.

Up close on the developing flower head

The botanical name of Love-Lies-Bleeding derives from Greek and means “unfading flower”.  This is an accurate description as the flowers are very long lasting cut flowers and they can be easily dried  to extend the amount of time that you get to enjoy them.  For fresh flower arrangements, cut amaranths when ¾ of the flowers are open on the stem.  They will last 7-10 days in a vase.  If you want to dry them, harvest when the seed begin to set and the flowers are firm to the touch.  Cut and hang upside down for at least 10 days.  This is great for Texas as high heat during the drying process allows the flowers to better retain their color.

Love-Lies-Bleeding is easy to grow and extremely well suited for our hot Texas climate.  Plant seeds when the soil is around 70 degrees.  It is tolerant of both drought and poor soils.  In fact, too much nitrogen and the flowers will not be as bright.  Give it too much water and the plants may break.  Water deeply but infrequently.  It does not like wet feet.  Once it sprouts, thin to about 18” since it is not uncommon for these plants to reach five feet in height and spread to over two feet.

This is what the flower head looks like two weeks after the first picture was taken. Notice how the flower color has begun to fade. The soil in my potager has too much nitrogen for this plant that loves marginal soils.

Like all things that are easy to grow, Love-Lies-Bleeding does have its problems.  Since each plant can produce over 100,000 seeds, it can be a bit invasive (it is in the same family as pigweed).  However, when young, the plants have a shallow root system and are very easy to pull.  And, since I know I am going to have to pull weeds anyway, I might as well pull something that will grow into a beautiful plant if I miss it!

Heirloom Gardening in the South – Yesterday’s Plants for Today’s Gardens

Bill Welch and Greg Grant are the premier “Masters of Horticulture” in the country.  Both of them have ample credentials to back up my claim.  However, what really sets them apart is their deep knowledge and sincere love of the plants and gardening traditions of the South.  They have worked for years to document, preserve and re-introduce “time tested plants” that have helped to color the fabric of the southern landscape tradition.  These true southern gentlemen share a common, and almost evangelical zeal to share that knowledge (which is another southern tradition). 

Heirlooms, a whirligig and a tire planter in a Louisiana garden. You can learn all about the origins of these southern garden accesories in this book.

Their latest book, “Heirloom Gardening in the South – Yesterday’s Plants for Today’s Gardens” is a masterful compilation of their many years of saving, growing and educating others on the value of heirloom plants.  Combining equal parts history, plant catalogue and how to information, this book is the perfect resource for all of us that garden in the South. 

The book is easy to read and full of eye catching photographs that document everything from stunning gardens to geranium cuttings.  The book is divided into five sections that tell you the history of the southern garden tradition, how to find and propagate these living antiques, where to plant them, and how to use them.  It also includes an exhaustive inventory of the heirloom plants that grow here.  Each plant in the inventory includes an in depth discussion of its history and habits.  This section alone would be worth far more than the cover price.

Byzantine gladiolus and a bottle tree in an East Texas garden

As an avid reader of gardening books, I have come to realize that most of them fall into two distinct categories: picture books and books that tell you how to grow things.  Rare is this book that combines these two elements.  “Heirloom Gardening in the South – Yesterday’s Plants for Today’s Gardens” is just such a book.  If you are serious about growing heirlooms in the south, then this book has to find its way to your bookshelf!

Where Do Mother's Day Flowers Come From?

Photo from www.mommafindings.com

Have you ever wondered where the cut flowers that you are about to buy for Mother’s Day come from?  If you are like approximately 75% of the people that buy packaged cut flowers in San Antonio, your Mother’s Day flowers will come from HEB.  However, HEB doesn’t grow those flowers.  HEB buys most of their cut flowers from growers in Columbia.  In fact, most of the cut flowers sold in the US are now imported.  In 1971, the US produced about 1.2 billion blooms of the major cut flower crops (roses, carnations and chrysanthemums) and imported 100 million.  Fast forward 30 years and that trend have been completely reversed.  In 2003, the US imported 200 billion stems and produced just 200 million.  A whopping 70% of those imported stems now come from Columbia. 

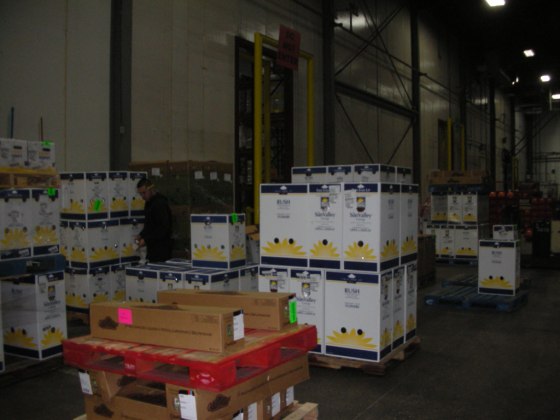
A load of fresh flowers await shipment from the HEB Floral Distribution Center

I am currently enrolled in “International Marketing of Floriculture Crops”.  This course is taught by two true masters of horticulture, Dr. Charlie Hall and Dr. Terri Starman.  For the past four months they have taught us how cut flowers are produced, imported and marketed.  To enforce some of the concepts that we have been learning, they put together a field trip to the HEB Floral Distribution Center in San Antonio.  What an interesting and enjoyable trip this was. 

The yupneck in front of one of HEB's refrigerated trucks that are going to keep mom's flowers between 34 and 42 degrees. Note that I am wearing a coat. The floral facility kept me between 34 and 42 degrees as well.

In order to keep costs as low as possible, HEB contracts directly with growers in Columbia.  HEB works very closely with these growers to ensure that they are producing the high quality products that HEB demands.  These growers cut, package and ship their flowers to a distribution center in Miami.  HEB then contracts with trucking companies to have those flowers delivered to their San Antonio warehouse.  Once at the warehouse, HEB quality control inspects the shipment.  If the flowers pass inspection they are then sorted and shipped to one of their 335 stores. 

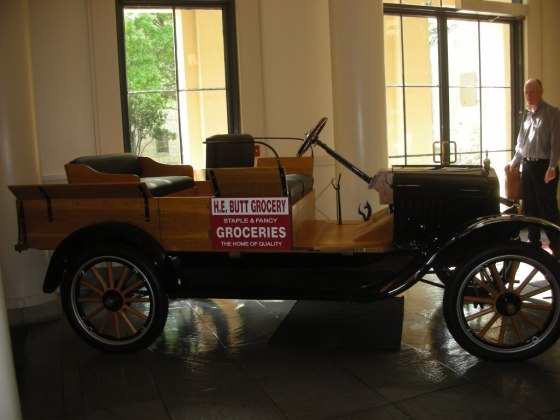
The first truck that HEB used to deliver flowers. Not really, but it is the first truck that they used to deliver groceries

Now that is a lot of moving around for a very perishable product.  In fact, most cut flowers have been “cut” for 12 to 15 days before they reach the store.  Add to that, the fact that HEB offers a freshness guarantee (they are the only grocery store chain to do this) and you begin to see how truly amazing your bunch of Mother’s Day flowers is. 

How can HEB (and other retailers of cut flowers) do this?  The answer lies in a thing called “the cold chain”.  Temperature is the single biggest factor affecting the “life” of fresh cut flowers.  The growers have developed methods that chill the crop as soon as it is cut.  From the time it receives that initial chilling until it is placed on a retailer’s shelf, your mom’s bunch of flowers was stored and transported at between 34 to 42 degrees.  These cold temperatures reduce all of the factors that contribute to the ultimate “death” of the flowers and ensure that they will look good for mom for at least a week or two.

Providing cut fresh flowers to the US public is a very complex system.  It is truly amazing to me that HEB is able to manage all of these processes and still sell you a very high quality product at a very reasonable price.  My hat is off to HEB!

Garden Experiments

I love to experiment in my garden.  Every year, I grow something that I have never grown before or I try to grow an old stand-by in a new way.  This year, I am doing both.

My first experiment this year is potato boxes.  I am currently growing white potatoes (Kennebec) and new potatoes (La Soda) in wooden boxes that I “add to” as the potato plants grow.  According to the website that I found (http://www.re-nest.com/re-nest/gardening/how-to-grow-100-pounds-of-potatoes-in-4-square-feet-081760), these 2’ X 2’ boxes can yield about 100 pounds of potatoes each.  While I am a little skeptical of these numbers, I will let you know how accurate that estimate is in a few weeks. 

One of my two potato boxes

The process for this is pretty simple (see the drawing below).  Basically, make four corner posts 33” long ( I used 4X4’s).  Cut two 1X6’s 24” long and two more 25 ½ “ long.  Screw them to the corner posts.  Place your seed potatoes (I used 12 whole potatoes) in the bottom of the box and cover with soil (I used mushroom compost).  As the plants grow, keep covering with soil or compost so that no more than 6” to 12” of plant is showing.  As the planting area gets full of soil, add another row of 1X6’s and continue the process until the box has sides that are 33”.  Once the box is full and plants are coming out of the top, you can remove the bottom layer of 1X6 and harvest as you need. 

 So far, my experiment seems to be working just as it has was described.  The Kennebecs are doing great.  I already have three layers of 1X6 in place and I will probably have to add another this weekend.  The new potatoes had a slow start but they are beginning to take off now.  I can’t wait to finally weigh my harvest and report my results back to you.

 I am also trying an experiment with my tomatoes.  Normally, I plant my tomatoes in my potager.  However, since I have decided to grow mostly herbs and flowers in the potager, I moved my tomatoes to the row garden.  While visiting with my friend Bill Adams, I learned that he grows his tomatoes in pure mushroom compost.  Since Bill is a true Master of Horticulture and the undisputed Tomato King, I decided to follow his lead and do the same thing.   I took my Mantis tiller and dug a furrow about 9” deep.  I then took my tomatoes out of their pots and placed them in the bottom of the furrow.  Next, I back filled with the compost and watered them in.  I am supporting them with a cattle panel and I gave the whole area a thick layer of straw mulch.  So far, everything looks like it is doing great.  I planted the same varieties this year as last so I will have some ability to judge which method did the best.  (Check out Bill’s book “The Texas Tomato Lover’s Handbook –http://www.amazon.com/Handbook-AgriLife-Research-Extension-Service/dp/1603442391). 

In addition to these two “method” experiments, I am  growing three new vegetable varieties this year.  The first are daikon radishes that were given to me by blogging friend “The Gracelss Gaijin”.  Daikon is a staple of Asian cuisine and I can’t wait to try them.  I am also growing “Chinese cucumbers” that were given to me by my friend Emy Chen.  This variety of cucumber is supposed to have a very mild skin that makes it great for slicing.  Can’t wait.  My final “new veggie” for this year is the “Tigger Melon”. 


I got my seeds from Baker Creek Heirloom Seeds (http://rareseeds.com/shop/).  Tigger is a small melon with very sweet, white flesh.  These one pound melons have a great aroma and taste and are perfect for a single serving.  However, the most exciting thing about this melon is it’s orange and yellow stripped skin.  This heirloom has such a cute name and attractive wrapper that my wife had her second graders plant it in their school garden.  Check back in the summer to find out how these experiments went.