Four Tips for Growing Outstanding Fall Color

Nothing says fall like flats and flats of pansies. Photo by Morgan McBride

If you haven’t already done so, right now is a great time to plant your fall color. If you have been to a garden center lately you probably knew this. Every garden center that I visit is covered in pansies, snap dragons and kale; and with good reason. These cool season crops grow really well here, they look great in the landscape, they brighten up the gloomy days to come and they can take just about the worst that a Texas winter has to throw at them. In addition, if properly cared for, they will continue to bloom right up until your spring annuals begin to flower and take over.

The secret to success with your fall planted annuals lies in your soil. While these crops will all survive in a wide range of varying soil types, they will thrive in a well prepared bed. Every year I hear different people give tips about what you should add to your soil to properly prepare it for planting these fall annuals. Since I hear the same tips year after year, the advice must be sound. Listed below are the top 4 organic soil amendments that you can add to make sure your fall annual plantings thrive.

Kale and other brassicas are excellent for the fall color bed. Here is a curly purple variety that will compliment the yellow pansies in the prexious picture. Photo by Morgan McBride

Organic Material-Good soil is full of organic material. Organic material, or compost, makes the soil more arable, increases its ability to hold water and nutrients and feeds the microorganisms in the soil that convert the stored nutrients in compost into a form that is usable by the plant. Certain types of compost do have small amounts of NPK that are instantly available to the plant. However, it takes time for nature to convert the majority of the nutrients in the compost into a form that the plant uses. So, truly healthy soil is amended twice a year, every year.

Blood Meal- Blood meal is a by-product of the beef industry. It is basically dried and powdered cow’s blood. Blood meal is one of the highest non-synthetic sources of nitrogen. In fact, it is equivalent to an application of a 13.25% commercial nitrogen fertilizer. It also contains a trace amount of phosphorous and potassium. In addition to being a great source of readily available nitrogen for plants, it also activates many of the microbes that are feeding on the organic material.

Pansies are one of the most planted flowers in America. Photo by Morgan McBride

Bone Meal-Another by-product of the slaughter industry, bone meal is an organic source of phosphorous. Ground bone meal works as a slow release treatment. This is fine since most soils are better at holding phosphorous and potassium than nitrogen. Bone meal contains roughly 12% phosphorous and 4% nitrogen. Calcium is another essential nutrient for plants and bone meal is an excellent source of this.

Peat Moss-Peat, as Peat Moss is often called, is a dried form of moss. It is an excellent soil conditioner and provides nitrogen to the soil as it breaks down. However, the reason most people recommend adding peat to your beds is because of its amazing water holding capabilities. Peat can hold up to 20 times its own weight in water. This is very important to us in the arid southwestern part of the U.S.  By adding peat your will improve your soil and reduce your water bill.

Thornless Prickly Pear-The Perfect Plant?

Thornless prickly pears and maximillian sunflowers at Wildseed Farms in Fredericksberg.

My botanical brother Morgan McBride swears that thornless prickly pear (Opuntia ficus-indica) is the perfect plant. You don’t have to water it, it flowers, you can eat the pads and the buds, and it’s evergreen. Plus, if a piece of it falls off onto the ground, it will grow you another plant. I am not sure if I agree with him completely, but you have to admit, he makes a good point.

While I am not as enamored with thornless prickly pear as Morgan is, I do really like the plant. One of my favorite plant combinations of all time was at the weekend place of Dr. Bill Welch. He paired the sculptural, medium green cactus with a dark burgundy castor bean that he got from my plant mentor, Cynthia Mueller. The dark burgundy was a perfect back drop and the combination was stunning. I also felt it was, for lack of a better word, appropriate. Texas is a big place. Some think of it as a southwestern state while others consider it definitely southern. The pairing of the quintessential southwestern plant (the cactus) with the very southern castor bean made me conclude that this was the perfect plant combination to express the dichotomy of Texas.

Thornless prickly pear fruits ready for harvest

Thornless prickly pear does appear in the wild. However, the plant that most of us grow is a hybrid developed by a California breeder named Luther Burbank. Mr. Burbank was busy developing plants around the turn of the century. His two biggest successes were the Russet potato and the thornless prickly pear. Mr. Burbank was a shameless promoter and rather sloppy plant breeder. Because of his poor record keeping, we have no idea what plants he actually used to create the plant we now call thornless prickly pear. Regardless, he was very proud of his creation and he sought to market it as dry land forage for cattle. While the cactus did not catch on as a forage crop (turns out it will grow all of its thorns back if it is subjected to extreme drought), no one can argue with its success as an ornamental.

The cactus blooms in the spring (and sometimes fall). The flowers are typically yellow but can be found in white and red. The fruits of the cactus are very sweet and some say they taste like a very sweet watermelon. Native Americans loved the fruits of this plant so much that they are often called Indian Fig.

Thornless prickly pear and fall asters

Like any cactus, the thornless variety is incredibly easy to grow. Just stick a pad (or nopal) half way in the ground. Water every once and a while and in no time flat you will have a very large mass of cactus. In fact, this stuff is so hardy that it is difficult to control if it is planted in a well drained site with plenty of water.

I don’t know if thornless prickly pear is the perfect plant or not. However, you have to admit, it does have a lot going for it. It is attractive, durable and makes quite a statement in the landscape. Very few plants evoke as strong a sense of place as do cactus. So, if you are looking for something that is guaranteed to grow, thornless prickly pear may be the plant for you.

Cacti-Lanterns

A very spooky Cacti-Lantern on my buddy's front porch

Here is a quick and simple Halloween tip for you.  This year, instead of heading to the grocery store to buy a pumpkin to carve, head out to the garden and harvest a few cactus pads.  You can quickly turn these unassuming cactus pads into a wide variety of very scary faces that are every bit as fun to make, and just as frightening  as their pumpkin based cousins.  Cacti-Lanterns are a cute, clever, easy and oh so spooky way to spice up your Halloween decorations.

Cacti-Lanterns are jack-o-lanterns made with the pads of the thornless prickly pear cactus.  They are much easier to make than the pumpkin based jack-o-lantern.  Simply pull a nopal (that is the actual Spanish name for the pads on the cactus) from your thornless prickly pear.  Carve your scary face into the nopal and then stick it toward the front of a one gallon pot or planter.  After you have watered it in, stick a candle in the dirt behind the nopal and light it.  That’s it! 

In my opinion, Cacti-Lanterns are superior to the regular pumpkin based type for several reasons.  Number one, they are basically free.  Who doesn’t have a cactus or two in their yard.  Second, there is very little mess associated with cactus carving.  No pumpkin “guts” to scrape out and dispose of. And finally, after you are through with your Cacti-Lantern, keep watering it and it will grow you another cactus.

Unlike pumpkins, your Cacti-Lantern can be used from year to year. Just keep watering it in the pot and it will grow into a healthy, yet "holy" cacti.

I got this idea from my botanical brother Morgan McBride.  Like so many other things, Cacti-Lanterns were born of necessity.  He forgot to bring home pumpkins for the kids to carve.  So, in order to avoid a lot of tears from his kids, he quickly figured out this very clever way to re-use what he had in a way that made him, the wife and the kids all happy. 

If you have access to a thornless prickly pear, why not give this a try.  The Cacti-Lantern is just as much fun to make as a traditional jack-o-lantern and it is just as scary.  Plus, there is no real clean up required and your Cacti-Lantern will eventually turn into another plant.  What do you have to lose?


Lone Star Gourd Festival

One of Judy Richie's stunning art gourds. Photo by the artist

This past weekend, my lovely wife and I headed out for a much need mini-vacation.  For our “romantic get away” we decided to go to the Lone Star Gourd Festival in Fredericksberg, Texas.  We picked the Gourd Festival for several reasons.  First, I love gourds.  The gourd festival is a great place to see some really incredible art being made with gourds.  Second, I just submitted an article to Texas Gardener about gourds and I wanted to meet Judy Richie.  Judy is an incredibly talented gourd artist and her art will be featured in that article. 

A classic example of the finishes and deep front cuts with weavings that Judy has pioneered

Judy has been making gourd art for over ten years.  She is a pioneer in the gourd art world and many of her pieces are featured in several galleries through out the US.  Judy is a talented artist in every skill that can possibly be used to convert an ugly brown dried gourd into something that is truly museum quality art.  She is a master carver, engraver, weaver and finisher.  She was the first to deep cut into the side of a gourd and then adorn those openings with intricate weavings.  She has also developed several of her own finishes that make her art unique and instantly recognizable.

This vibrant piece shows all of things that Judy is famous for: incredible finishes, carving, weaving and inlay. the small piece inlayed in the bear is an ancient Native American pottery shard.

I first discovered Judy’s art at the “The Copper Shade Tree” in Round Top, Texas.  Gerald Tobolo and his wife are the owners of this gallery.  Gerald is a master coppersmith and he started this gallery to highlight his work and the work of other craftsmen working in Texas.  Judy’s art is one of the centerpieces of his collections and one of his better sellers.  According to Gerald, “Judy’s work is so versitile and varied.  Some of her pieces have a distinct Western flair while others resemble art pottery.  In fact, I recently had a customer buy one of her pieces for his craftsman style home.  This customer is a stickler for accuracy in his home.  Even though, no gourd was probably ever featured in a craftsman style home, he loved the fact that the Judy’s piece would “fool” his guests by making them think it was a very fine piece of hand thrown pottery.”

Judy’s business is called “Redcloud Originals”.  Please check it out.  Her website is full of great examples of her work and it also lists the galleries that she exhibits in and her show schedule.

Even though Judy was the main reason I went to the festival, she was not the only artist there.  Once again, I was amazed at the variety and quality of art being created out of gourds.  Scroll down for some pics of things that caught my eye at the 2011 Lone Star Gourd Festival.

The "Traveling Gourd". This is a HUGE gourd that was sent to each chapter in the Texas Gourd Society. There, artists from each chapter added to it to make a gourd that is truly representitive of all of the great things in the Great State of Texas.


I thought this was a cute and original treatment. Great for a child's room.


My favorite creation in the competition room

Doing Rye Grass Right

The drought has really done a number on my yard.  In order to have something more than mud and dry weeds in the yard this fall and winter, I have decided to seed rye grass.  Now I have never put out rye grass before.  So, I decided to consult an expert before I went out and spent a whole lot of money and then wasted it by doing the job wrong.  My buddy, Morgan McBride, has worked in the green industry his entire life.  For over twenty years, he has designed, installed and maintained landscapes all over the DFW Metroplex.  Since he is an expert in turf management (and he would talk to me for free) I decided to ask him the proper way to seed rye grass.

Lovely rye grass sod. Photo from the website of lazyjfarms.com.

The Basics- Rye grass (genus Lolium), is a cool season annual grass commonly used for lawns, livestock food, green cropping and erosion.  There are also perennial species out there but the term “perennial” is a little misleading.  In Texas, the perennial species will only come back in areas of medium to heavy shade.

rye-grass-seed

Morgan recommends using a perennial rye blend. It costs a little more but it will generally give you a more even coverage.  Photo by Morgan McBride

When seeding your lawn you need to be aware of which type of rye you are going to use.  The cheapest rye grass seed are the single variety annual types.  This type of seed is sold in your nursery or big box for around $20 per 50 lb bag.  The annual type works fine but it does not germinate as well as the perennial types.  Because of this you will need to seed at a higher rate.  Also, the varieties most commonly sold in our part of the world are VERY fast growers.  So, if you don’t mind mowing every three or four days, then the single variety annual type will be fine.

Rye-grass-seed-2

Rye grass (genus Lolium), is a cool season annual grass commonly used for lawns, livestock food, green cropping and erosion control. Photo by Morgan McBride

If you want to get the best coverage possible, you will probably be better served by purchasing a perennial blend.  These blends typically contain three varieties of perennial rye.  While the price is usually around $60 per 50 lb bag, you can seed at a lower rate.  Also, with three varieties, you greatly increase your chances of getting an even germination over the entire lawn.  With three verities you will get one that will do well in sun and one that will do well in the shade.

When to apply – When Morgan was doing turf management he always had September 15 circled as the date to start spreading rye.  However, climate change has taken away the certainty of that Sept. 15 date.  For your rye grass to prosper, it needs the days and nights to be at least 20 degrees different in temperature.  This year, it is now almost the middle of October and we are still barely getting that 20 degree spread.  Also, while the rye will germinate when the day/night temperature spread is 20 degrees, it will not really “take off” until that temperature spread is 30 degrees.  Using this knowledge you can select a date that is best in your area to spread your seeds.

spreading-rye-grass

For your rye grass to prosper, it needs the days and nights to be at least 20 degrees different in temperature. Photos by Morgan McBride

Preparation – Before spreading your rye grass you need to do two things.  First, rye needs to come in contact with the soil.  To increase your seeds’ chances of survival you will need to mow your grass very close to the ground.  If you have a thick St Augustine lawn you will need to scalp it.  Also, germinating rye grass cannot tolerate drought of any kind.  To increase your germination rate your soil needs to be thoroughly moist.  Since the drought has been so bad this year, Morgan recommends watering deeply for one to two weeks before spreading your seed.

Application – Once you have purchased your seed, get out your spreader.  If you buy the perennial blend you are going to want to set it to apply about 10 lbs per 1000 sq ‘.  So, your 50 lb bag will cover about 5000 sq’.  For best coverage, Morgan recommends setting the spreader to put out about half the recommended rate and seeding twice in different directions.  The Heritage Ranch Turf News Blog has a great post about this including pictures.  Please check it out as well.

When using the single variety you will need to seed at a higher rate.  Set your spreader to put out about 15 to 20 lbs per 1000 sq’.  This higher rate is used to offset the generally lower germination rates of the single variety types.

rye-grass-coverage

Morgan spread rye grass on this bare spot in his backyard. Two weeks later the rye grass has covered the spot. Photo by Morgan McBride

Getting it established – Once you have spread your seed you will need to be very diligent in your watering routine for a couple of weeks.  Rye grass needs an even moisture level for the most successful germination rates.  If you have a sprinkler system this should be much easier for you.  Set your sprinkler to do a short cycle in the morning, noon and afternoon.  If you do not have a sprinkler system, and you cannot be home during the day, go to your local nursery or big box and buy a battery operated hose timer.  This will be the best $20 you can spend for your rye.

When rye germinates it sends out a small, curved single root spike.  This spike is called a hook.  The hook must remain moist and in contact with the soil if it is going to have any chance of turning into grass.  That is why frequent watering is required for the first two or three weeks.

Fertilization – Rye grass is often used as a cover crop for vegetable gardens because it is so high in nitrogen.  Since rye is such a good sink for nitrogen it is a very good idea to feed your rye regularly with a high nitrogen fertilizer.  While not as easy to find as it used to be, something like a 12-0-0 is a good choice.  If you cannot find a pure nitrogen fertilizer, buy the one that has the highest N value you can find.  Broadcast your fertilizer at the same rate as you applied the seed at least once a month; the more the better.  The more nitrogen you put out the more attractive your grass will be.  Highly fertilized rye will turn a deep blue green that is just as lovely as Kentucky Bluegrass.

rye-grass-two-weeks

Two weeks after planting the rye grass is firmly established. Over the next few the grass will begin to form clumps that will form a soft and solid green carpet. Photo by Morgan McBride

Mowing – If there is drawback to rye, it is the fact that you will have to mow your lawn all winter.  However, if you don’t mind doing this there is a good chance that your winter lawn will look better than your summer lawn.  Set your mower high and mow frequently.  This will turn your lawn into a deep, soft carpet that is joy to both look at and run barefoot through.

Most of Central Texas got some much needed rain this past weekend.  The temperatures are also expected to start dropping.  So, according to Morgan, this week is the perfect time to spread your rye grass in central Texas.  If you want a lush, green lawn this winter (and you are not under watering restrictions) head out to your favorite lawn supplier and get that rye now.

Great Deal on Daylilies

As I mentioned in an earlier post, my friend Chris Von Kohn is a daylily breeder extrodinaire.  This past weekend he sold several of his creations at the Ft. Worth Botanic Gardens Fall Sale.  Chris is selling these beautiful and reliable flowers to finance his Masters of Horticulture degree at Texas A&M.  He has several plants left and he is selling them for the ridiculously low price of $7 per double fan.  If you are planning on adding some daylilies to your beds, why not contact him (his info is below). 

After the weekend rains, this is the perfect time to plant daylilies.  Please give Chris a call.  You will get some unique and beautiful plants that no one else has and he will get to go to grad school.  Everyone wins!

If you are in Arlington you can go by and pick them up.  If you are not in that area, he will be happy to ship them to you.  Chris’s cell is 817-269-7474 and his email address is Cvk007@earthlink.net.

Here are few pictures of some of the daylilies he has breed:

Tree Town USA

Have you ever wondered what $100K worth of trees looked like? These trees are in 670 gallon containers and have been container grown their entire life.

Last week, I got to spend two very enjoyable days at a 1200 acre tree farm south of Houston.  This farm is owned and operated by Tree Town USA.  Tree Town USA is the largest tree farm in the US.  They have several farms and sales offices all over the country.  This one is located just south of Wharton in beautiful Glen Flora, Texas (Click on the link and you can see the farm from the air, pretty amazing).

A shipment of high quality oak trees leaving Tree Town USA

I was the guest of one of their salesmen named Morgan McBride.  Morgan and I have been friends for most of our lives.  He and I share a great sense of humor and a deep love of all things horticultural.  Morgan has worked in the green industry his entire life.  He is a Texas Certified Nursery Professional and a true master of horticulture.  Since I had never visited a tree farm of this magnitude, he thought I might enjoy getting up close and personal with the inner workings.  He was right.

To say I was amazed is an understatement.  Until you see a working 1200 acre tree farm you just cannot grasp the amount and the scale of the work that it encompasses.  To support this much intensive agricultural production, Tree Town USA employs a huge amount of infrastructure.  The watering system was truly an engineering marvel.

The water for all of the trees comes from a 1600' well. The well is that deep so that the water contains no salts or other minerals. The water is pumped into retaining tanks where it settles and then leaves through a 10" main. That main is then tapped by 4" irrigation tubes. Drip systems are then attached to the 4" lines.

Morgan and the other sales people regularly visit the farm to pick the best inventory for their top customers.  On this trip, He needed to pull several small quantities of oaks and then 120 30 gallon yaupons.  Helping him was going to be a very pleasant way to spend a Friday away from the office.  I arrived late Thursday afternoon.  He had just finished a lot of his work so he took me on a tour of the place.  I thoroughly enjoyed learning the ins and outs of the tree business.  This farm employs between 200 and 250 workers.  It takes all of their efforts, seven days a week, to keep an operation of this size moving.

Since it takes so long to grow a tree, tree farms are much different than a traditional nursery.  Their quickest crops typically take three years to develop.  Some of their larger trees have been grown for 3, 5 and even ten years before it is ready for sale.  I cannot even begin to imagine the management required to keep a plant alive for 3 to 10 years in a pot in the wildly variable Texas climate.

45 gallon Nellie R. Stevens hollies before the storm

This past month, Morgan was the top salesman in the company.  While I was happy for him I was a little confused.  I asked how he could sell so many trees in the middle of the worst drought in history.  Many of his biggest customers are landscape architects.  In order to get paid for a large commercial project, everything has to be complete.  That includes the landscape.  So, even though this has been the hottest AND driest year on record, these firms still have to install trees, shrubs, ground cover and turf.  Since there is a lot of building going on in the DFW metroplex, Morgan has been selling a lot of trees and shrubs.  He did tell me that the cities of Austin and San Antonio have been making some concessions to the builders because of the drought.  Trees and shrubs still have to be planted, but they are amending the contracts to allow the firms to come back later and plant the water sucking ground cover and turf.

These crepe myrtles are typical of how the winds affected much of the stock

Another very interesting thing happened on my trip.  Around 6:30 pm on Thursday night, a MASSIVE thunderstorm blew in.  This storm brought some much needed rain.  However, it was accompanied by 60 mph winds.  High winds are not the friend of a tree farm.  These high winds blew over an INCREDIBLE amount of stock.  Even though they were all well anchored, the wind pulled the anchors up.  Friday morning was a very sad day on the tree farm.  All 200 employees had to stop what they were doing and walk the property and stand up and re-anchor the stock.  The blow down was so massive that at the end of the day, 200 people did not finish standing everything back up.

The blow down caused problems for Morgan and I as well.  We still had 120 30 gallon yaupons to find and tag.  What was supposed to be a very enjoyable learning experience for me turned into an awful lot of work.  These yaupons were all six to eight feet tall and had a spread of six to eight feet as well.  Before we could find the best ones, we had to stand up a whole bunch of very heavy shrubs.  I do not know how many 30 gallon yaupons are on a two acre pad, but it is a bunch!

My friend Morgan tagging yaupons for his customer

Despite the hard work, this was truly the most enjoyable “field trip” that I have ever been on.  Thanks a ton to my buddy Morgan and to Tree Town USA for allowing me to visit.  Tree Town USA only sells to the trade.  So, while I wish I could make a product placement plug for them, you can’t buy from them directly.  However, you can request Tree Town USA trees from your local Home Depot or your independently owned nursery.  Since I have had this experience, I can tell you that if you buy Tree Town trees you will be getting a very high quality product that was grown with the best science possible by a whole lot of people who truly love trees!

Very interesting berry arrangement on one the yaupons we tagged

Square Foot Gardening Second Graders


The organic gardens from Mrs. White's second grade class at St. Paul's Christian Day School in Brenham, Texas

This past Wednesday, I got to participate in two of my favorite activities at the same time; gardening and talking about gardening.  As I mentioned in an earlier post, my wife is a second grade teacher at St. Paul’s Christian Day School in Brenham.  Each year she uses the garden as a way to introduce a plant based biology curiculum to her class.  This year, she asked me to come and talk to her class about plants in general and the seasonality of plants in particular.  It was our goal to help these second graders learn that certain plants grow in different seasons and then plant the proper plants to help bring home the message.

I love talking to young children.  They pay very close attention to what you are telling them and they love to participate in the discussion.  My wife’s second graders did not disappoint.  They were such a good audience.  They answered questions, asked questions, and they always put their hands up first.  They were so good!  I truly love giving presentations to young people.  They always reaffirm my strong belief that, no matter what the news media tells us, America is still producing a whole lot of awful good kids.

Showing the kids the proper way to remove the plants from their cells

So, after our very exciting disscussion of which plants do best in Texas in the fall, we went to the garden to put my lecture into practice.  As I mentioned in my earlier post (Going Green For God), my wife gardens in an 8′ X 3′ garden with a trellis on the back.  Her garden is based on the the best selling book “Square Foot Gardening” by Mel Bartholomew.  Since she doesn’t have a lot of space or time, the square foot gardening method is the perfect tool to allow her kids to grow a variety of crops in a small space with out too much effort.  My wife’s garden allows for 24 seperate squares to be planted.  This is good because her classes usually range in size from 20 to 24 kids.

Excellent weeding!

Before we planted, we cleaned out the weeds and left over plants from the spring garden.  Sometimes when I weed, I fail to take notice of the truly amazing things that happen in the soil.  Not these second graders!  While weeding, the kids found a freshly germinated Texas Montain Laurel seed, young pecans trees beginning to sprout (so evidently squirrels are aware of my wife’s garden), crepe myrtle seeds, grubs, worms and milipedes.  Each new find opened up another round of questions.  However, the thing that generated the most interest was the smallest little snake skin shed that I had ever seen.  The kids were VERY interested in that! 

Before planting, we recharged the beds by adding three bags of composted humate.  The kids really loved this part (and I did too).  We sprinkled the compost over the top of the garden and then used our hands to mix it in.  I cannot really describe the method used by these second graders to mix in the new compost, but it resulted in all of us having dirt and compost all over us.  It really was a lot of fun. 

Mixing in the compost

Once the beds were ready for planting, we laid out the strings that divided the garden into it’s 24 squares.  Each child got to plant either a broccoli, cauliflower, cabbage or mustard green plant.  We had twenty plants, so in the four squares that were left over, we planted 64 carrot seeds (16 per square). 

Planting carrots

Over the next few months, these young gardeners will water, weed and OBSERVE.  I hope that my wife’s efforts will instill a life long love of growing things in some of them.  Even though they don’t yet realize it, my wife is teaching a whole lot more than biology in her little garden.  Her garden shows that you can do a whole lot of good things in life if you work together.  It also let’s them watch the miracle of life unfold right before their eyes.  By watchinging that little seed turn into the carrot, she is showing them that the garden is a special place that can feed alot more than just their stomachs.

Great technique

P.S.  Do you remember the first time you watched a seed germinate?  There is a very good chance that your first exposure to gardening was in a second grade classroom.  Teachers work very hard to find ways to get kids excited about learning.  Take time out of your busy day to thank all of the teachers that are doing everything they can to make sure that the kids of tommorrow are as awesome as the kids of yesterday!

Hyacinth Bean (Lablab purpureus)

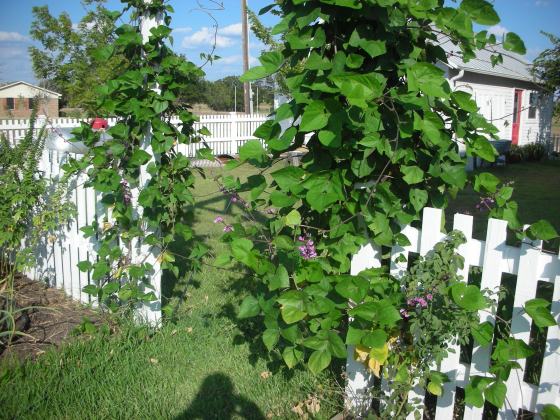
The lovely foliage of the Hyacinth Bean on my trellis

This past spring I was at a garage sale at the home of a truly extraordinary horticulturist named Lorraine.  She and her daughter hold this sale every spring.  In addition to clothes and knick knacks, Lorraine sells plants.  You never know what she is going to have.  Many folks in town know that she can grow anything, so they bring her pots, seeds and cuttings.  She always turns them into beautiful plants that she then sells at ridiculously low prices.  She grows in compost that she makes herself.  She has a green house, the cutest potting shed in town, and a dang fine vegetable garden that she has been tending in the same spot for over 60 years.  She is truly incredible and I hope to someday be just like her.  I really admire her and I never miss her sale.  This year, she had three pots of hyacinth beans that I snatched up and took home.  Those three little four inch pots of hyacinth beans have turned out to be the best $3 I have spent all year!

This year, the first flowers on my hyacinth bean appeared in late July

I planted Lorraine’s starts in May at the base of the trellis that leads to my side yard.  This trellis is over 12’ at the top.  I planted two plants on one side and one on the other.  Since May, those three plants have grown and grown until they almost completely cover this huge trellis.  The foliage is striking and the pinky-purple flower spikes are extraordinary.  The bees, butterflies and wife love them. 

Planting –Plant your seeds outdoors after all danger of frost has passed.  You can also start them inside three or four weeks before the last frost.  Some folks recommend pre-sprouting the seeds in damp paper towels before planting.  However you get them to sprout, be sure and plant them in full sun. Hyacinth bean likes rich, well drained soil.  Water regularly to get them established.  Germination from seed can take about two weeks.  Once the plant starts to grow, provide regular water but do not over water.  They are relatively fast growing and should start producing flowers 45-60 days after germination.

My hyacinth bean bloomed for over a month before it set seeds.  Maybe that was because it was just so hot.  I saw my first flowers in July but I did not see my first seed pods until the first week of September.  The plant is still blooming and it is beginning to get covered in the deep purple, iridescent seeds pods that it is famous for.

The first of the deep purple seed pods appeared last week

Hyacinth beans send out long runners that are perfect for quickly covering a fence, building or trellis. If growing on a fence, they need no support.  To get mine to go up the trellis I tied the tendrils and shoots to the posts of my trellis using a jute-like twine.  Once I had the vines trained over the structure I let them go.  They soon sent out their long inflorescence of magenta flowers that make them so attractive.  The posts of my trellis are 4 ½ feet apart.  The inflorescences of these plants are now so long that you have to push your way through the flowers.

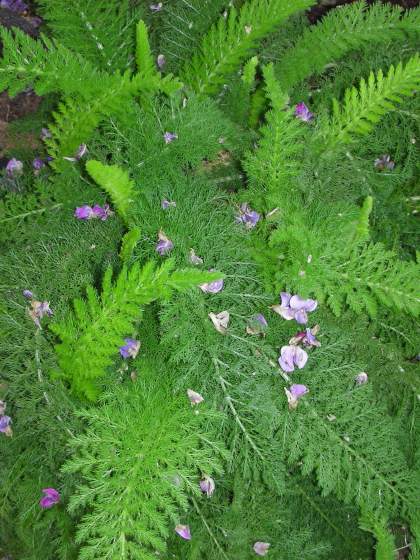
Flower petals from the plant falling onto my yarrow

Harvesting – You can eat hyacinth beans if you harvest them when they are very young.  Many cultures around the world use them extensively in their cooking.  However, if you want to eat them you need to know that are slightly toxic when mature.  So only eat them if you know when to pick them.  In fact, once fully mature, they should not be cooked or ingested at all.

Hyacinth beans are fairly good re-seeders.  Leave them alone and they will come back year after year.  If you want to harvest the seed, wait until the plant has died and then pick the dry, brown seed pods.  Once fully dry, open the seed pod and save the unique black seeds in a cool dry place until next spring.

The 143rd Washington County Fair

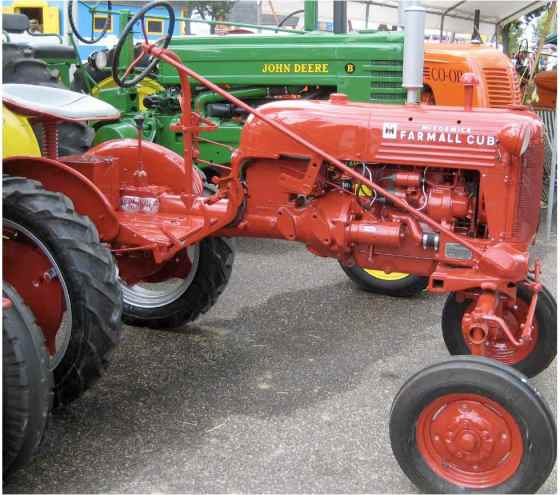
This weekend, I am going to be spending a lot of time at the Washington County Fair.  I absolutely love the fair.  Where else can you see a greased pig contest, eat a deep fried Snickers, watch a rodeo, get your picture made with a queen, sit on about a hundred antique tractors, milk a cow, see tons and tons of livestock, watch people pay tons and tons of money for that livestock, hear great country music, dance to that music and still be home before midnight?   There simply is no other place in all of America that offers this much good, wholesome family fun in a single place as a county fair.

Picture from http://leejsackett.com/projects.html

There are two kinds of fair people in the world; those that go and those that PARTICIPATE.  This last group is the one I throw my hat in with.  I did a lot of my growing up at the McLennan County fair.  Each year in high school, I proudly showed my polled Hereford heifers at the fair grounds in Waco.  The Heart of Texas (HOT) fair was the start of the show season for me.  It was also the culmination of a year’s worth of work that involved animal selection, halter training, fitting and grooming.  By the time the fair arrived, I could not wait to walk around that arena with my calf!  I was also lucky enough to have an outstanding Ag teacher who also loved to participate in the fair.  Each year our Ag (FFA) classes made individual and group projects to enter in the various competitions.  Through the years I got to help build countless pic nic tables, round bale feeders and even a complete cattle trailer completely from scratch.  Thanks to his efforts, I won a blue ribbon for my show box (if you are not familiar with livestock shows this is the box that contains all of grooming articles for your animal) in 1977.  That is the only blue ribbon I have ever won.  My Ag teacher was Donald Jones and I truly loved him (and I still do, he is the only teacher that I ever had that I still keep in contact with).  Mr. Jones taught me to weld, how to use a table saw and how to castrate just about any animal that might need castration.  He also taught me a lot about respect, teamwork, and pride in a job well done. 

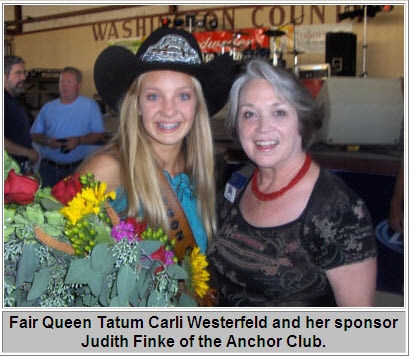
Tatum Westerfield is the 2011 Washington County Fair Queen. This young lady sold over $68000 worth of fair tickets to earn this year's title. Photo from KWHI.com

I have visited many county fairs all across the country and in my humble opinion, this one is the best.  I can’t really put my finger on why, it just is. The Washington County Fair was the first county fair in Texas and still is the oldest running county fair in Texas.  The first one was held in 1868 and it has been held every year since.  After 143 years the people of Washington County have really learned how to throw a party. 

If you are not from a rural area you may not be aware of the significance that county fairs play in rural America.  County fairs are THE social event of the year in rural communities.  They are the culmination of a year’s worth of by parents, children, Ag teachers, county agents and countless other volunteers.  They are a time for friends to gather, and a time celebrate the traditions that make rural America what it is.  And it has been that way for at least 143 years.  I love knowing that my grandfather, my great-grandfather and my great-great grandfather looked forward to going to the fair as much as I do now.  So I guess that is really what makes the fair special: Tradition.  America is a place that honors hard work, self reliance, competition and community.  The fair allows us the opportunity to practice those values and celebrate those that cling to them.   Not too long ago, America was mostly rural and American agriculture and agriculturists gave our nation the resources that we needed to grow into what we are today.  The fair is an annual reminder of this.
Tonight, the weather is going to be great!  The temperature should be in the 70s after the sun goes down.  Perfect fair weather!  So, grab your sweetie, put on your boots, gas up the truck and meet me at the fair!