Fall Asters

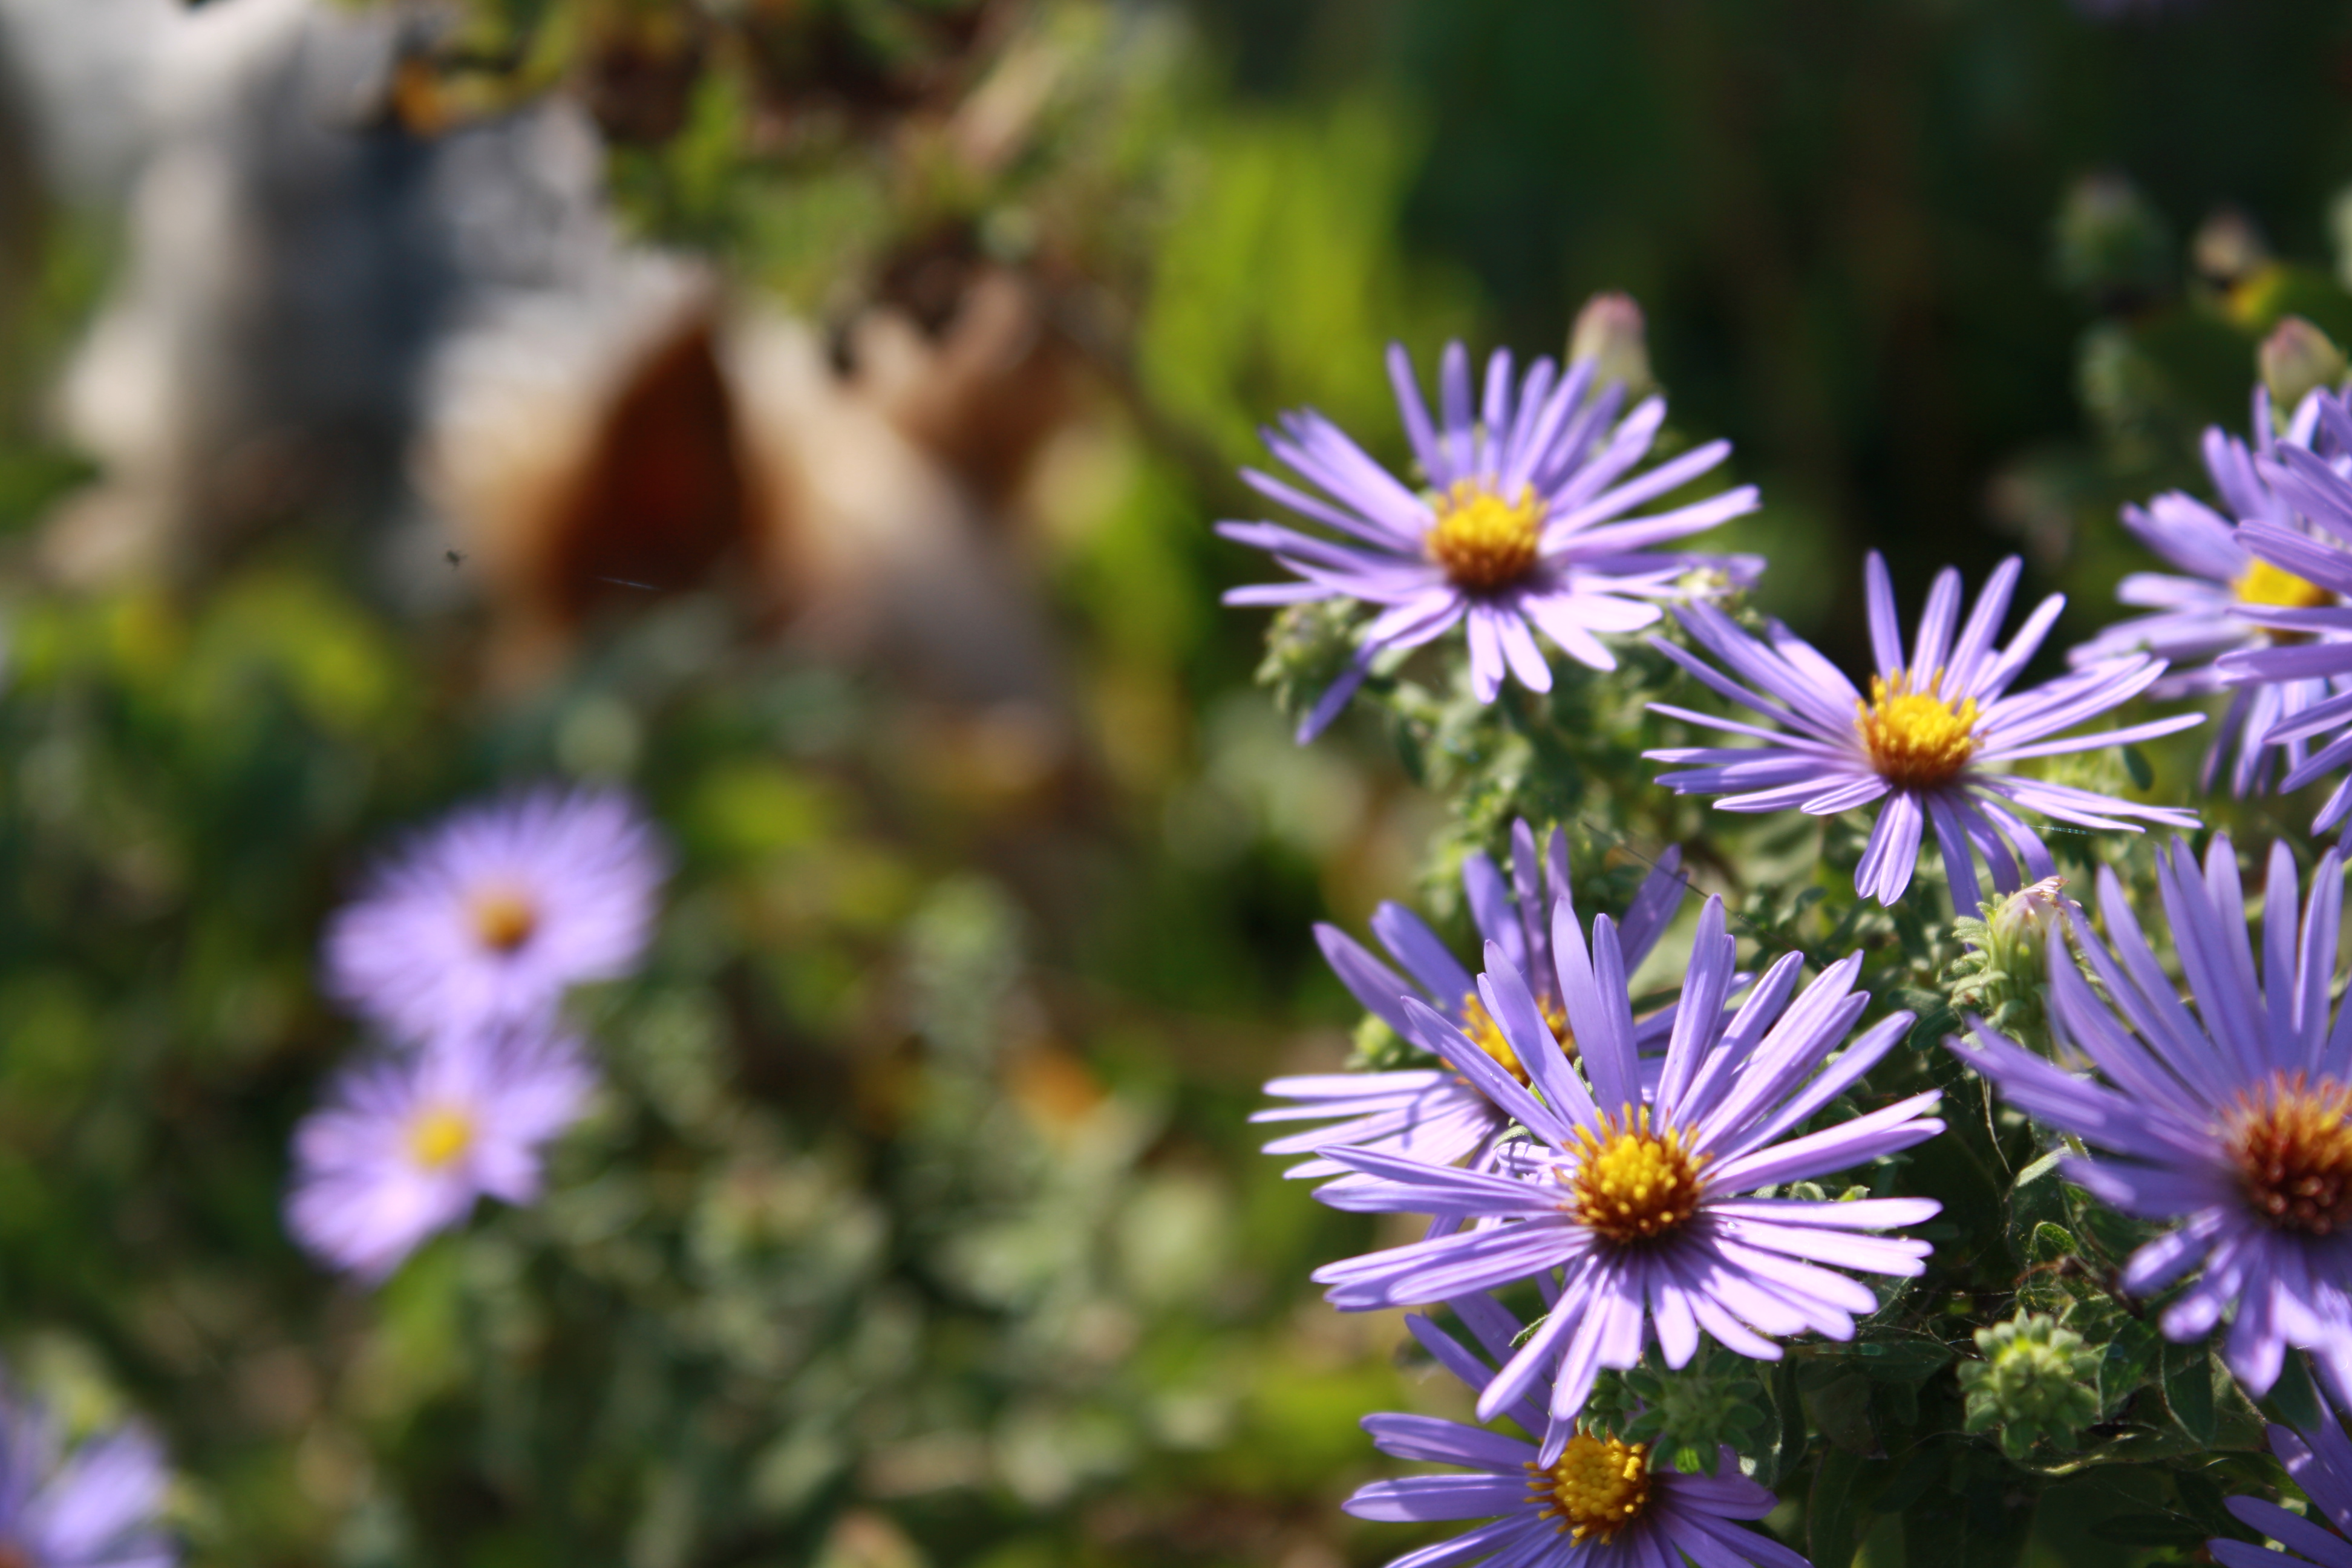
Aster oblongifolius. Photograph by Ramez Antoun

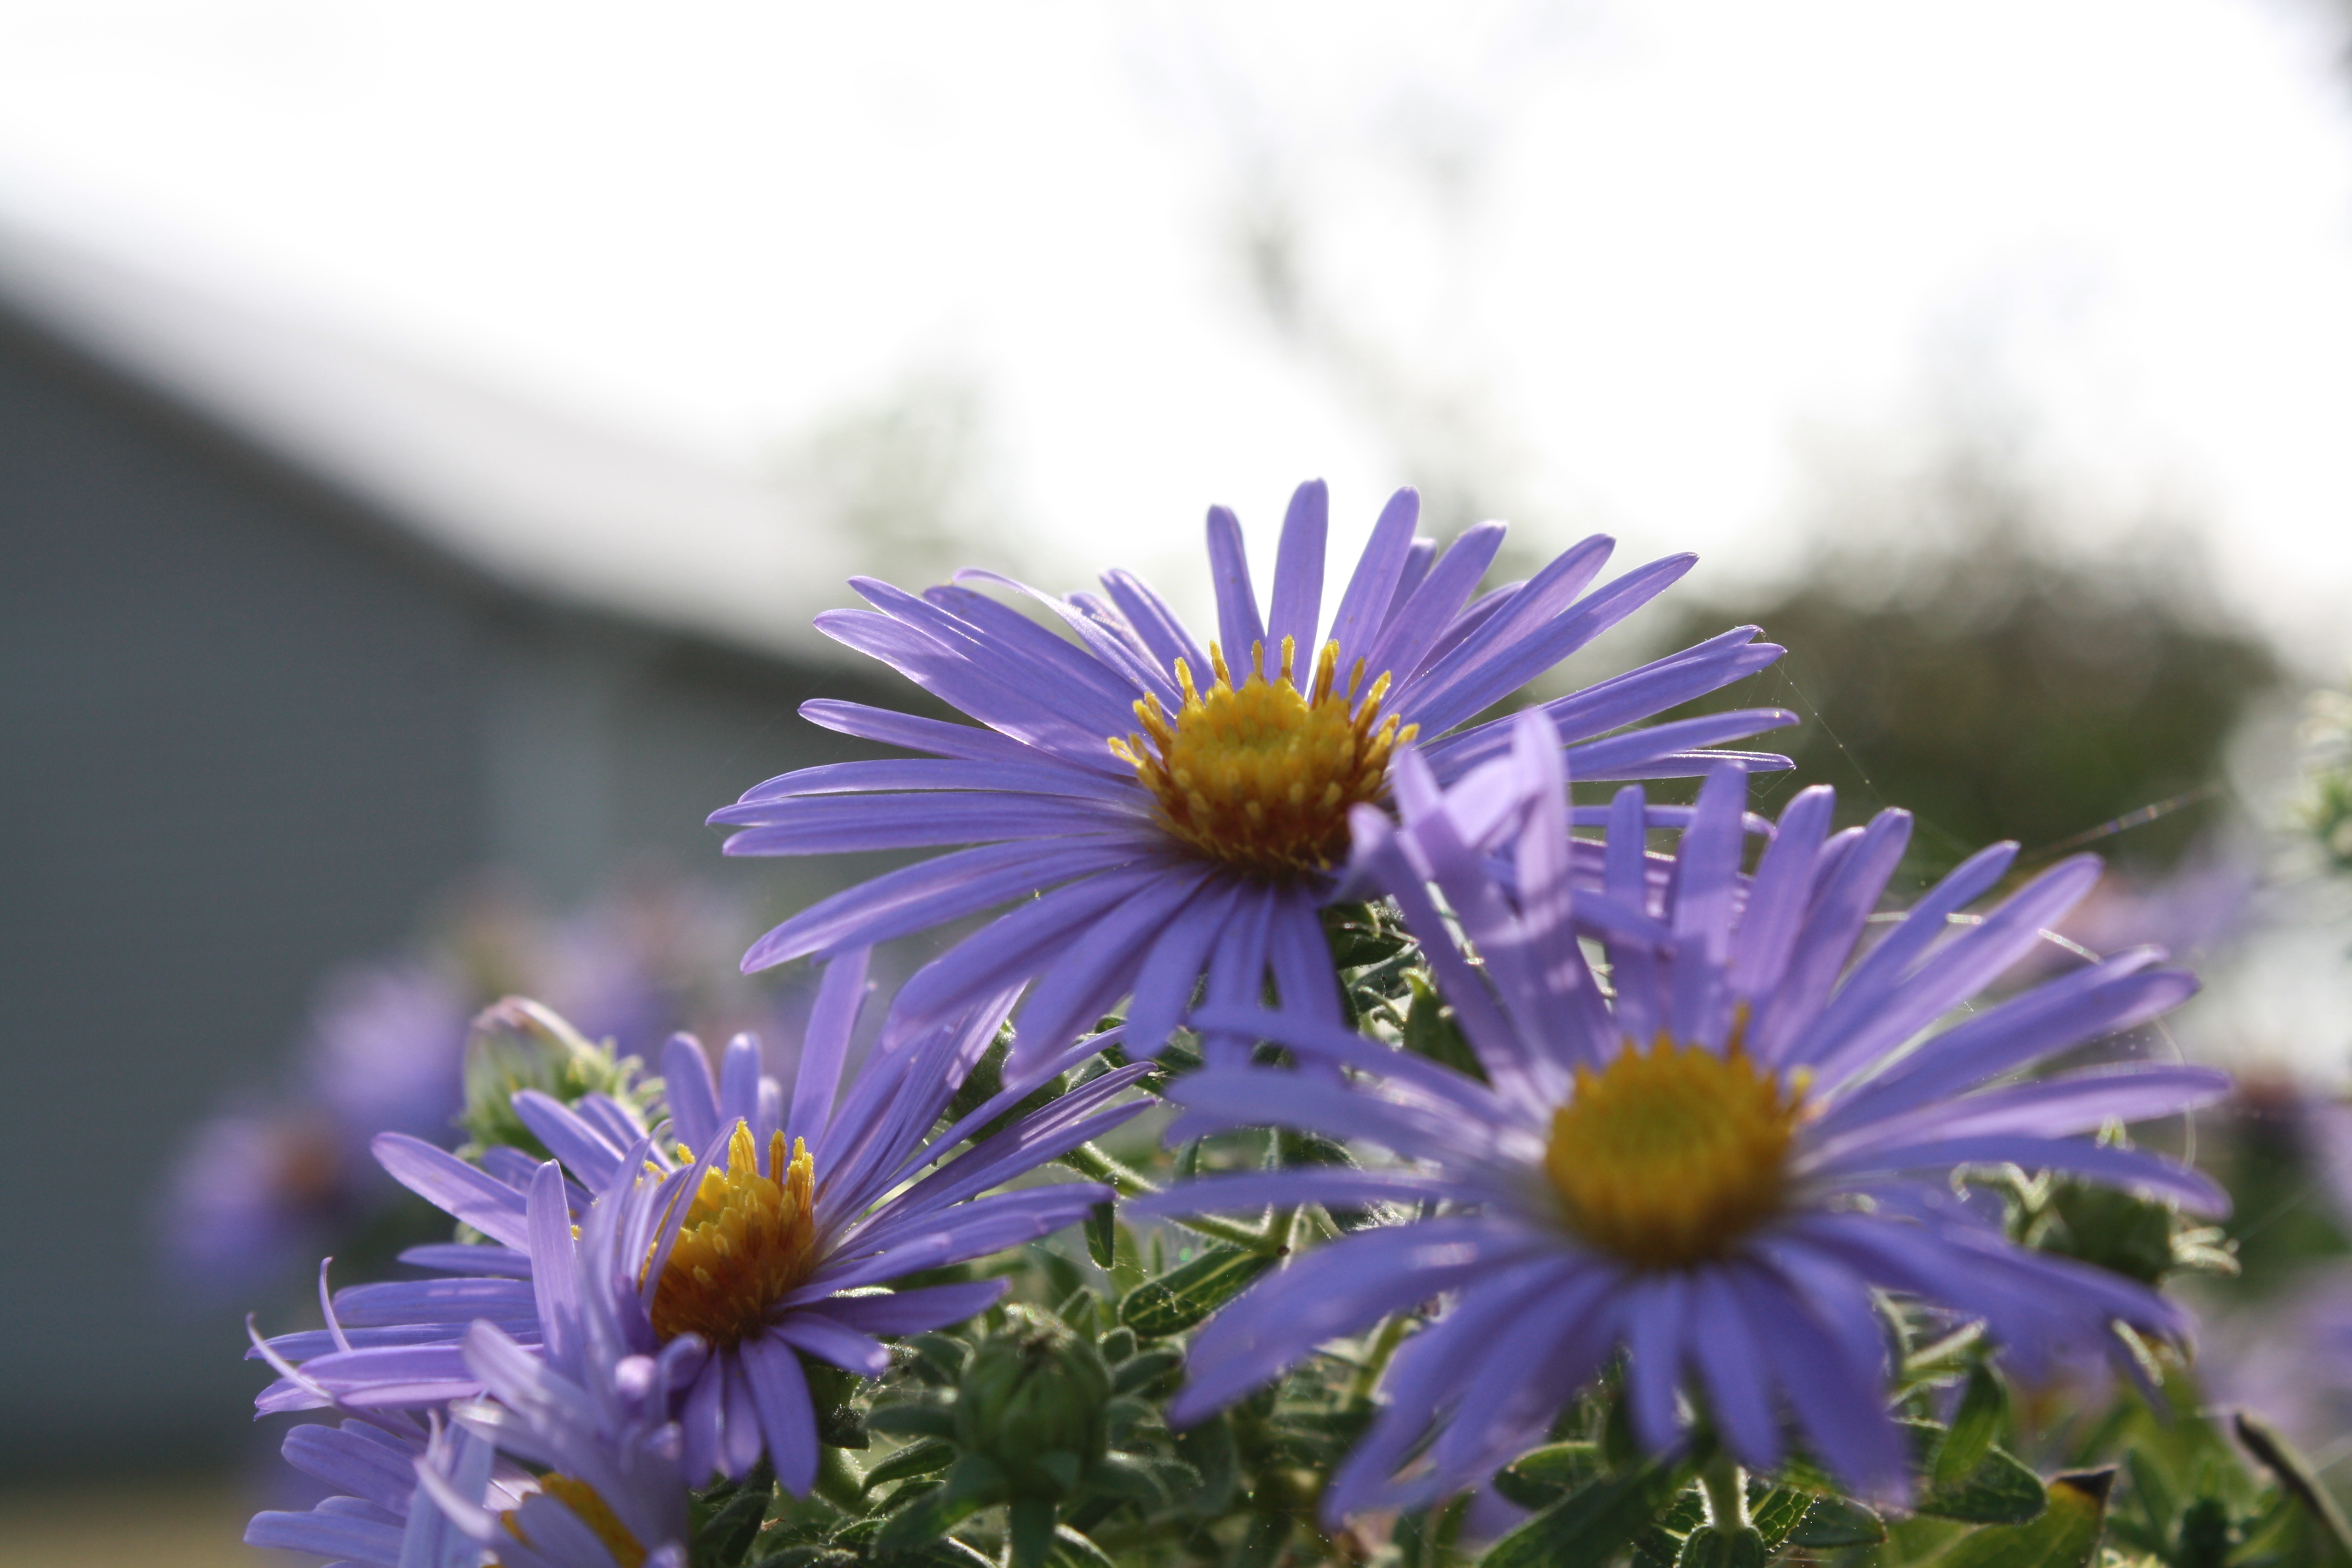
This past weekend, my daughter and son-in-law came to visit.  I love when they come because my son-in-law shares my affinity for growing things.  Each time he comes we spend most of the weekend outside.  Besides being a fine gardener, Ramez is also an excellent photographer.  He has the skill, the eye and the equipment that I don’t.  So each time he comes I ask him to take a few pictures.  This trip, he focused on my fall asters.  As you can see in these pictures, they are beautiful this time of year.

The aster I grow is a Texas native (Aster oblongifolius).  One of its common names is Fall Aster.  It is one of the last plants to bloom in the fall.  Fall aster is a clumping perennial that spreads to about 36” and can reach 24”in height.  It is almost an evergreen plant and often keeps its leaves for 10 or 11 months.  Because of this, it works well in the perennial border.  Even though fall asters are relatively unremarkable most of the year, they really redeem themselves in the fall.  Starting in early October this plant literally explodes with color.  Small star shaped purple flowers with yellow centers literally cover the foliage.  A mass of these plants is stunning.  Even though they are beautiful on their own, you can pair it with several Golden Rod varieties and create a very attractive fall border in a complimentary color scheme.

Fall aster is a very hearty plant and it can be grown in just about any soil the great state of Texas has to offer.  Mine is growing in black clay and it is thriving.  Asters are easy to grow from seed and you can also divide existing clumps to get more plants.  They are relatively disease and pest free.  The only negative that I am aware of with this plant is the fact that the stems seem to loose their lower leaves as they age.  This can be helped by cutting back about a third of the plant in the summer.

More Texas Fall Asters. Photo by Ramez Antoun

Asters have been grown all over the world for a very long time.  The English love them.  Our native version is just as pretty as any of their foreign cousins.  Plant this hearty and beautiful plant now and you will be rewarded with stunning borders for many Octobers to come.

MiMi's flowers

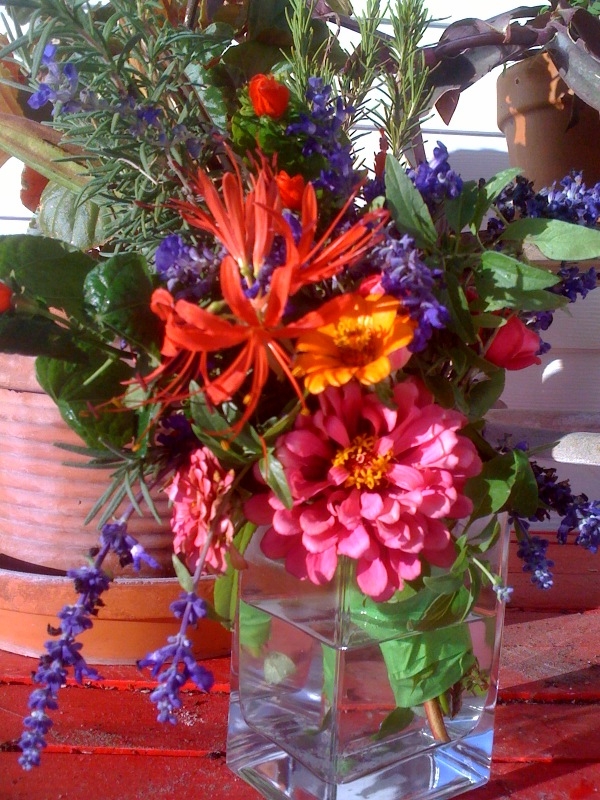
An arrangement from our fall garden

Right now the weather is so nice that I want to be outside all of the time.  So far this fall I have planted the potager and the row garden.  I have divided and moved perennials and I have also divided and moved my spring bulbs.  I have started stem cuttings of my coleus, begonias and geraniums.  I have been so busy preparing things that I almost failed to step back and enjoy what was already there.  This Saturday, my wife asked me to go outside and pick a few roses for her mother.  As I went out to cut the roses I noticed all of the really lovely things that were still growing in our garden.  I decided that MiMi would get more than just a few roses.  The arrangement you see is composed of a spider lilly, salvia, turk’s cap, zinnias, roses, rosemary and okra.  I am so glad that I took the time to look around and enjoy what was right under my nose.  I really enjoyed putting this together and sharing a little of what we love with someone we dearly love.

Cypress Vine – The hummingbird magnet!

Hummingbird migration season is upon us.  Because of this, we have so many ruby throated and black chinned hummers in our yard that my wife is filling our two feeders everyday.  While the hummers seem to appreciate the sugar syrup that she makes for them, they always head first to the only thing that is still really blooming in my garden; cypress vine.


Cypress vine flowers on my potager fence. Photo by Ramez Antoun

Cypress vine (Ipomoea quamoclit) is a member of the morning glory family and as such grows very well in our hot Texas summers.  It is a tropical plant that is native to Mexico and Central America.  It is a lovely vining plant that can grow 20 feet or more in a single season.  Cypress Vine has loose, feathery foliage that is covered with hundreds of tiny, tubular flowers.  The star shaped flowers can range in color from deep red to almost white and they are irresistible to butterflies and hummingbirds.  Other common names for this plant include Hummingbird Flower, Star Glory, and Cardinal Plant.

 Cypress vine is very easy to grow.  Start seeds when the soil has warmed up to around 70 degrees. It prefers full sun but can tolerate light shade.  Cypress Vine likes to be kept in moist, rich, well drained soils but it will grow in just about any type of soil and will tolerate some dry periods.  Cypress Vine is a quick grower and can produce blooms in as little as 45 days.  You can fertilize with a high phosphorus fertilizer right before the first bloom to enhance its flowering.   Cypress vine readily reseeds itself so once established you will be able to enjoy this plant year after year. 

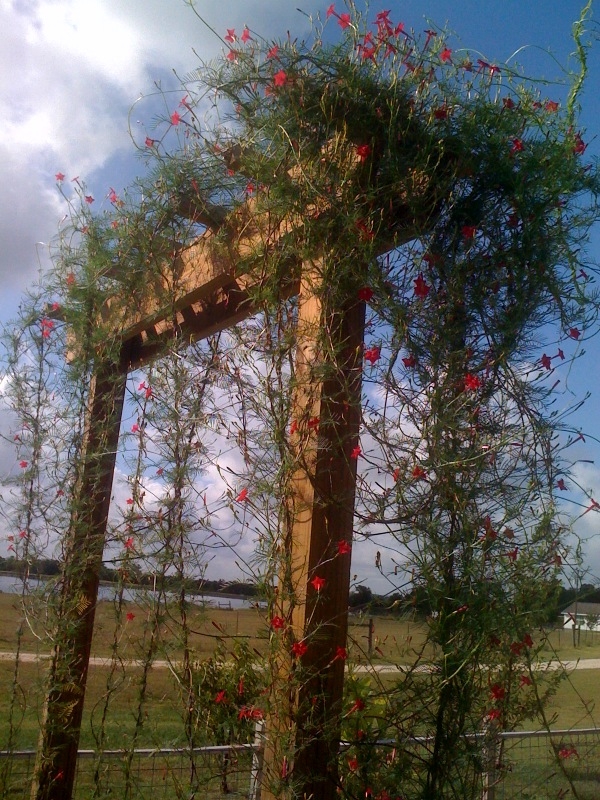
Cypress Vine on the arbor

Because of its vining habit, Cypress Vine needs support.  I planted mine against the western fence of my potager.  This fence has an arbor over the gate and I wanted it to spread over both of these structures.    All of the growth you see in these pictures came from two vines.

Unmanaged, Cypress vine will grow in and over anything that is in its way.  Since mine is on a fence, I trained it to grow up and out toward the arbor.  This kept most of the runners in check.  Some runners did grow down into my daylilies but I simply pulled them off.  The plant did not seem to mind one bit.  Cypress vine is also an aggressive self seeding annual.  All of those lovely flowers produce tons of little black seeds. So, if you plant Cypress Vine, be prepared to have lots of it in years two and three.

All of this from two vines in the first season!

Cypress Vine is a very lovely and very hearty plant that thrives in our climate.  It is easy to grow and looks great on a fence, trellis or arbor.  This self seeding annual is relatively disease and pest free and will provide you with a flush of blooms from May through late fall. If you can tolerate its aggressive growth habit it will reward you with a beautiful late summer garden full of butterflies and hummingbirds.

*This article was published in the September issue of “Hort Update” (http://aggie-horticulture.tamu.edu/newsletters/hortupdate/2010/sep/)

Internship at Bayou Bend

As part of my degree, I recently performed an internship at Bayou Bend.  If you are not familiar with Houston’s hidden gem, then read on!  Bayou Bend is a treat for all lovers of history and gardens.  And … since it is an all organic garden, it should be of interest to those of us who are interested in more than just growing.  Hope you enjoy it!

History – The Bayou Bend Collection and Gardens is the home to the Museum of Fine Arts Houston’s collection of decorative antiques.  The home houses one of the best collection of American antiques in the world.  The grounds consist of 14 landscaped acres that contain eight separate gardens. 
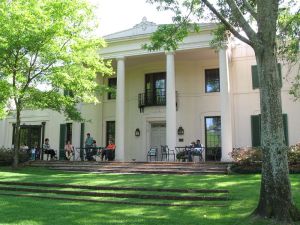
The back terrace of Bayou Bend


Miss Hogg was the heir of an oil operation that eventually became Texaco.  She used her family fortune for many philanthropic purposes.  In addition to Bayou Bend, her family legacy includes Memorial Park, River Oaks, The Houston Symphony and the Museum of Fine Arts.  She was also instrumental in preserving Texas history and the culture as evidenced by her preservation of many early Texas buildings at Warrenton, Texas.   In addition to these civic pursuits, Miss Hogg was a champion for mental health facilities and equal education opportunities for minorities.

The Hogg mansion was built between 1927 and 1928.  At the time the house was built the property was “nothing but a big thicket”.  Miss Hogg was an avid gardener and nature lover.  Her vision from the beginning was to ensure that the property remain mostly a native lower coastal forest.  Only one tree was removed during the building of the house.  Over the next several years Miss Hogg created eight separate and unique gardens on the property.  Three of the gardens are named for mythological goddesses or muses (Clio, Diana and Euterpe). 

The Clio garden after a spring flood in 2008

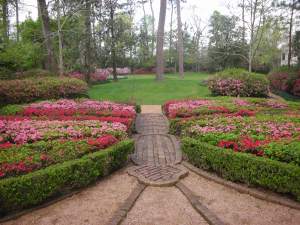
The other gardens are the White, East, Butterfly and Carla.   The final garden is the manicured native woodscape.  Miss Hogg donated her home and gardens to the Museum Of Fine Arts Houston in 1957.  They were opened to the public in 1966.

 The gardens of Bayou Bend are now under the direction of a true Master of Horticulture, Bart Brechter (B.S. Horticulture, Stephen F. Austin State University), Curator of Gardens.  Mr.  Brechter is tasked with maintaining these gardens in accordance with the original plans drawn out by Miss Hogg.  He uses only plant materials that were planted during Miss Hogg’s lifetime.  The main feature of this garden is the azalea collection.  Bayou Bend is home to one of the most complete collections of  Southern Indica azalea’s in America.  He uses 100% natural methods for maintenance, fertilization and pest control.  He is also responsible for a large collection of trees.  The River Oaks Garden club pays for all of the tree maintenance at Bayou Bend.  Mr. Brechter has also been able to establish a dogwood on the property as a new cultivar, Cornus florida, “Bayou Bend”.  He is in the process of propagating cuttings from this tree.  Sale of these cuttings will go toward the up keep of Bayou Bend.
 Plant Propagation – Due to its charter, the Bayou Bend gardens are allowed to only use plant materials that were in the garden during Miss Hogg’s lifetime.  Many of the azaleas and other plants are “antique”.  This means that they are older varieties that have fallen out of favor with the nursery trade.  Because of this, Mr. Brechter acquires much of his plant material through propagation.  To aid in this he manages a greenhouse on site that he shares with the River Oaks Garden club. On my first visit to Bayou Bend, Mr. Brechter had me repot 52 varieties of camellias.  These cutting were in large flats filled with a 100% Perlite mixture.  They had been in the greenhouse since last November. My first step in the propagation process was to create the potting mix.  I used a 1-1-1 mixture of Perlite, commercial potting mix and composted hardwood mulch.  Once the mix was ready I used it to fill quart containers.  I would then gently remove the cuttings from the Perlite tray and evaluate for rooting.  If the cutting showed root development it was repotted in the quart container.  Once a tray was filled with the one gallon pots, the tray was moved outside to the shade cover area in the greenhouse compound and watered. 
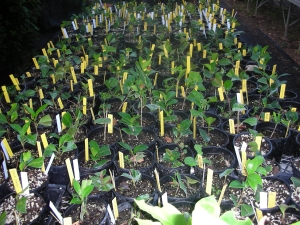
Camellia cuttings that I potted during my intership

On my second visit, Mr. Brechter had returned from a meeting of the Texas Azalea Society in Nacogdoches, Texas.  While on this trip, he took cuttings from 31 varieties of hollies from the SFASU Mast Arboretum.  These cutting were wrapped in wet newspaper stored in zip lock baggies in a refrigerator.  We filled large trays with Perlite and began to disassemble the cuttings.  Before planting, we treated all of the plants for pests by immersing them in a mild solution of water and orange oil.  Once treated, I cut the stems at a 45 degree angle on a node.  I stripped all but three or four leaves from these cuttings and then inserted them into the Perlite. Once a tray was filled and labeled, the tray was placed under the mister.

Grounds Maintenance – Bayou Bend is essentially a 14 acre public garden.  The site contains large swaths of St. Augustine turf and many formal and informal landscape areas.  Much of the grounds are planted in perennials.  The bulk of these plantings are the azaleas for which Bayou Bend is famous.  These azaleas make Bayou Bend spectacular in the spring and it is the anchor of the annual River Oaks Garden Club’s annual Azalea Trail.  There are also many beds that are planted with annual color.  Mr. Brechter buys many of these annuals from specialized growers that provide him access to many of the antique varieties of plants he requires.  In spring, Mr. Brechter uses a purple pansy that is currently only available from one nursery.  Another spectacular example of annual plantings is the beds at the front of the house.  As you approach the house from Lazy Lane Boulevard, the shaded drive opens to a circular driveway.  Where the drive meets the driveway are two large beds that are bordered with mondo.  Each spring, these beds are filled with over 10,000 tulips.  The tulips are then followed with 5000 pink caladium bulbs (Carolynn Wharton) which are removed and stored at the end of the season as well.  All of these plantings are maintained with natural methods. 

Begonnias on the East Terrace

Bayou Bend’s many perennials are planted in beds that have been worked with compost and mulch for years.  This soil provides excellent drainage and nutrients for the plants and aids in water conservation.  The perennials receive minimal pruning.  All plantings receive a deep layer of hardwood mulch every year.  This mulch is allowed to decompose and provide addition organic matter to the soil.  Tender annuals receive a soil and foliar application of Bio Matrix.  All weeding is done by hand.

 Pesticides/Fungicides –  Mr. Brechter only applies pesticides on an as needed basis.  The garden is relatively pest free.  Mr. Brechter attributes this to an abundance of plant materials that are naturally resistant to most of the insects and fungus that are found in gulf south.  Also, the organic methods used attract beneficial insects, animals and birds which in turn help keep down the pest problems.  When an insect outbreak is spotted (this happens most often in the greenhouse area), Mr. Brechter sprays the infested plants with an Orange oil solution.  Orange oil is effective on aphids, mites, lacewing and other common nursery pests.

Earth-Kind – When this directed studies program was approved, I was supposed to help Mr. Brechter start an Earth-Kind certification trial for azaleas.  During my first two visits, we began work on the trial.  Mr. Brechter had worked with Texas A&M Extension to establish the parameters of the test.  It was determined that we would plant three plants of five varieties in a bed of about 1000 sq’.  The azaleas were to be planted in unimproved soil on 6’ centers.  Irrigation was to be supplied by a drip system that connected to a pop up heads in the existing irrigation system.  The plants were to be monitored for three years.  During that time they would be provided with minimal feeding, pruning and pest control.  Over the course of the next three weeks, we picked a site and cleared it.  We manually removed all vegetation from the area with grubbing hoes.    The ground was lightly broken and then raked smooth.  We then laid out the plant spacing.  Once this was done, we selected the azalea varieties to be used.  For this trial we planned to use 1 Encore variety-Autumn Embers, 3 Southern Indica varieties:  Formosa, G.G. Gerbing and George tabor and 1 Kurume variety called Fashion.

 On week three, we were going to install the irrigation and the plants.  However, Mr. Brechter was asked to hold off on this trial.  He was informed that the Earth-Kind program was under going revisions and A&M would prefer he wait.  Because of this we were not able to begin the experiment.

Building a Potager

I have a problem.  Actually, I have two BIG problems; black clay and coastal Bermuda grass. These two things have been a pain in my gardening side since the first time I tried to till a portion of an old coastal field and turn it into a vegetable garden. I live on a patch of blackland praire in Washington county Texas between Brenham and Burton.  Over the years I have tried everything to tame the grass and improve the clay. All of my efforts have fallen woefully short. The clay is still either sticky or hard as a rock, and the grass always returns.

Two years ago, I began experimenting with raised beds. I tilled up the clay and added about four inches of mushroom compost. This improved things somewhat but I still could not keep the grass out of the rows, and ultimately the beds. At this point I should point out that I try to be an organic grower. I am not yet 100% weaned off of my traditional ways, but I am now using about 90% organic methods to try and control my weeds and bugs.

My first raised beds

Last year, the additional organic material really started to pay off. The vegetables were great. I simply planted and applied a heavy layer of hardwood mulch. Then I declared war on the weeds and that sticky mud that invariably happens when you water around black clay. I laid down weed paper in the rows and covered this with bricks. I also tilled in beds around my garden fence. I filled those beds with daylilies and petunias and large planters. I also added the weed paper and hardwood mulch to these outside beds. The bricks worked great for controlling the mud. But the Bermuda came back with a passion. Evidently Bermuda and many other weeds, enjoy a little organic matter as much as the tomatoes.

I was now thoroughly frustrated with my grass problem. However, I did note my two big successes. The additional organic material was definitely paying off and the bricks had solved the sticky mud issues. Now I was determined to figure out how to get the weeds under control.

I started reading and I came upon two concepts that I hoped my help me solve both of my problems: square foot gardening (the Mel Bartholomew method) and potagers. Mel Bartholomew and his method of creating super rich soil and close quarter plantings seemed to hold some promise. As I read more about both topics, I began to feel that combining Mel’s ideas about soil and close quarter plantings with the French concept of a kitchen garden might finally give me dominion over the weeds and the mud.

A real French potager

The term potager comes from the French term jardin potager. The potager is designed to provide all of the vegetables, herbs and flowers for a household. The potager is not just functional; it is expected to be beautiful as well. Because of this, annual and perennial flowers are grown right along with the vegetables. Plants in the potager are often selected as much for their form and texture as they are for their nutritional value.

Another thing that I have learned about gardening (or any other endeavor for that matter) is that it helps to have a plan. Since the creation of my potager would require an investment of time, talents and money, my wife insisted I have a detailed plan. I was lucky on this one. I am currently taking a Landscape Design class with Casey Krueger at Texas A&M. With his help, I created a very respectable and doable design for my potager.

Day 1 – Armed with my plan and an army of future son-in-laws (I have four daughters so I really do have a small army of future son–in-laws), we literally dug-in and started to build. First, we built the forms for my raised beds. This required a few carpentry skills, a few basic math skills, and a lot of manual labor.
Day 2 – Since the beds were now in place, we began to dig out about five inches of soil from the bottom of all of the walk paths. After this was done, we covered the walk paths with approximately 8 layers of newspaper and five inches of decomposed granite (take that weeds!). We then laid the bricks. Once the bricks were in place, we added a thin layer of decomposed granite to the top and used a broom to work the granite dust into the gaps between the bricks. After a good watering, the unplanted potager was ready to go.
Day 3 – This was the day for soil preparation and planting. To prepare the beds I used a modified version of Mel Batholomew’s formula. Since my clay has no problem holding water, I left out the suggested vermiculite and peat moss. What I did add was compost peat, cotton bur compost, farm style composted cow manure, mushroom compost, and an alfalfa and humate mix. I bought all of these items from the Plants N Things nursery in Brenham, Texas. We mixed all of these ingredients together on a couple of big tarps. Once it was mixed we wheel barrowed it into the raised beds. Finally, we used my Mantis tiller to mix it all into my existing soil. Now it was time to stick things in the ground. I planted tomatoes, squash, watermelon, and bronze fennel that I had purchased from the Texas A&M Horticulture Club’s Annual Plant sale. I also planted Contender bush beans, Swiss chard, sunflowers, apple and egg gourds, Chinese long beans, and Hyacinth beans for the trellis. One bed stayed intact throughout the build. In it I have onions, shallots, radishes and lettuces. Once all of the seeds are up I will again put down about six inches of hardwood mulch.

My unplanted potager

I am very excited about the promise my new garden. I am hopeful that the granite base and the bricks will keep the weeds and the mud at bay. I also believe that if a few weeds do pop up in the raised beds they will be easy to pull. Remember how I said I was about 90% organic? Well I hope to keep that percentage. However, after all of the time and effort that went into this potager, I have decided that organic or not, at the first sign of a weed invasion I am buying weed killer!

A version of this article was published in the May 2010 issue of “Hort Update” (http://aggie-horticulture.tamu.edu/newsletters/hortupdate/2010/may/)