A Garden Shower

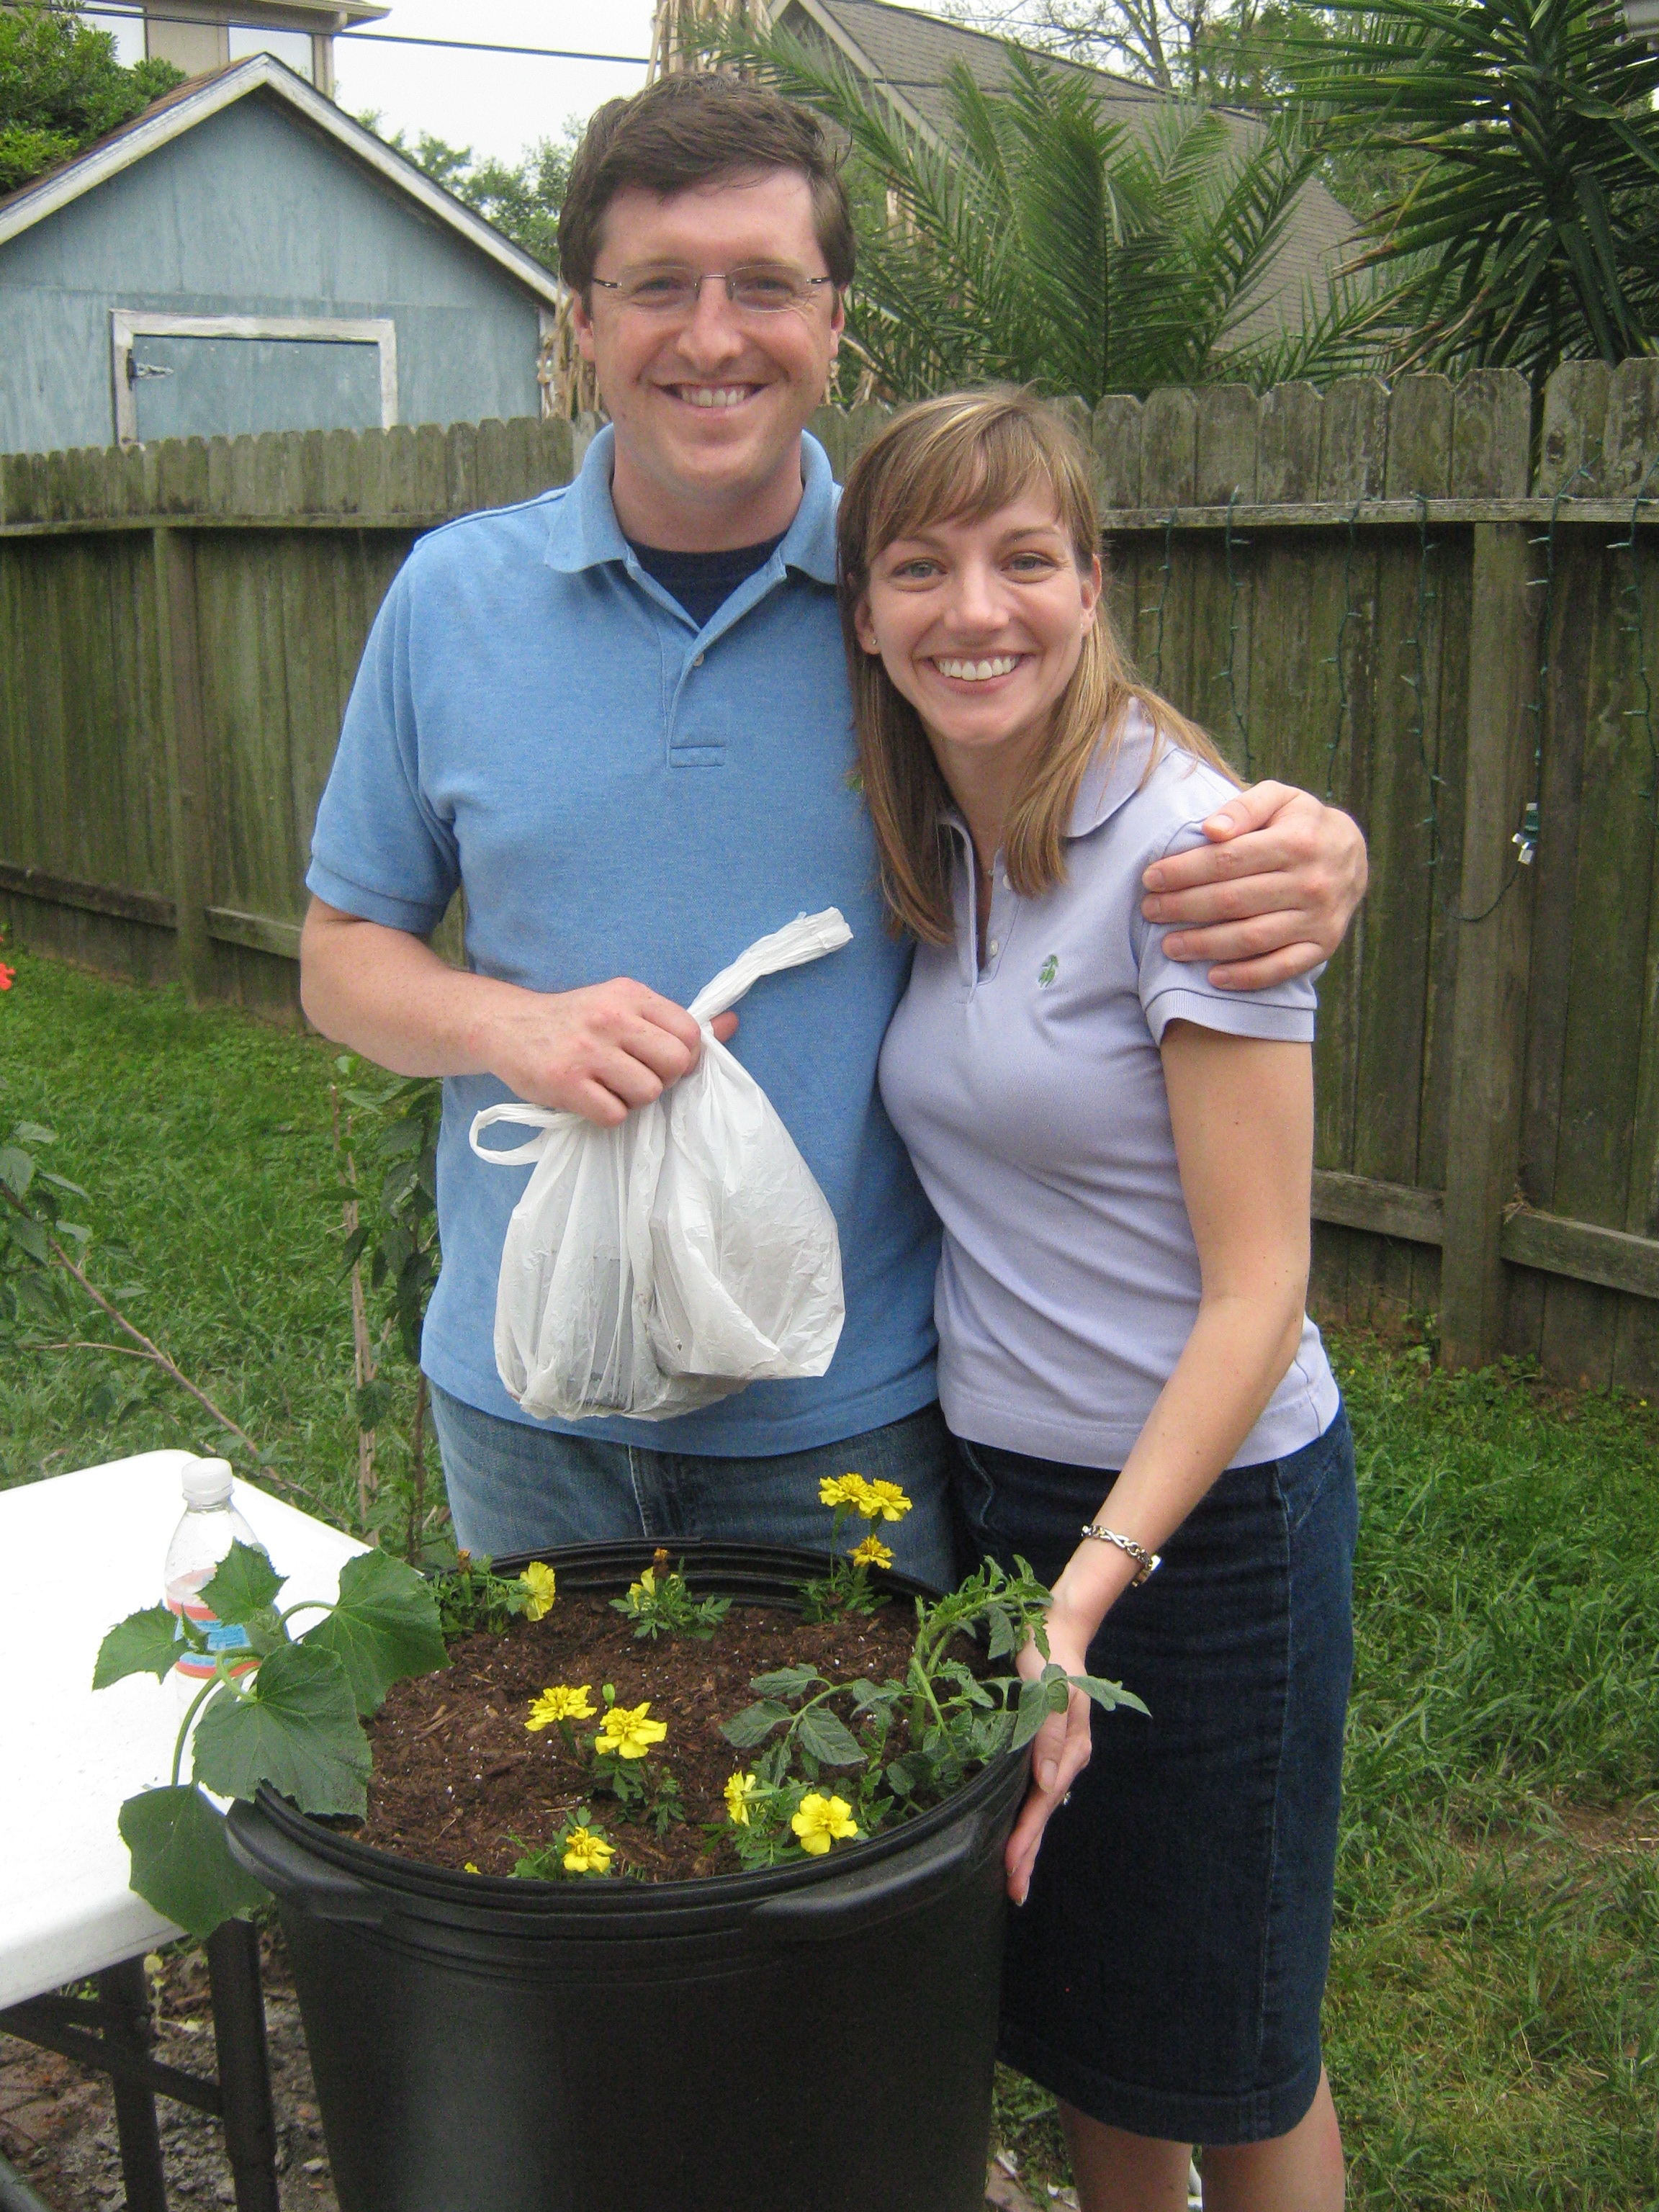
Andrew and Bridget with their new container garden

Bridget O’Brien and Andrew Hoyt are getting married!  Bridget is the Tours Program Manager at the Museum of Fine Arts Houston and her betrothed is an English teacher at the Christo Rey Jesuit College Preparatory School in Houston.  To celebrate their upcoming nuptials, my daughter Heather and her friend Lindsey Smith threw them a “Garden Shower” this past weekend.  Now from what I gathered, a “Garden Shower” is much like any other bridal shower.  Invitations were sent, punch was made, cakes were baked and gifts were presented.  However, where this one differed was in the entertainment.  Now I have to admit, I have never actually been to a bridal shower before.  But, from what I am told, the entertainment usually takes the form of silly party games.  Not this one.  This shower, being garden themed, featured a very engaging, entertaining and educational garden speaker. 

If you haven’t guessed by now, that garden speaker was me.  While I am not really all that famous, I do love talking to others about gardening.   Most of the attendees were young museum professionals that have the desire to garden but are somewhat lacking in the space.  So, we covered several topics related to container gardening.  As one of Andrew and Bridget’s gifts, the group worked together to create a 15 gallon veggie/flower garden that they got to take home.  In that garden, they will be growing and harvesting tomatoes, cucumbers and marigolds. 

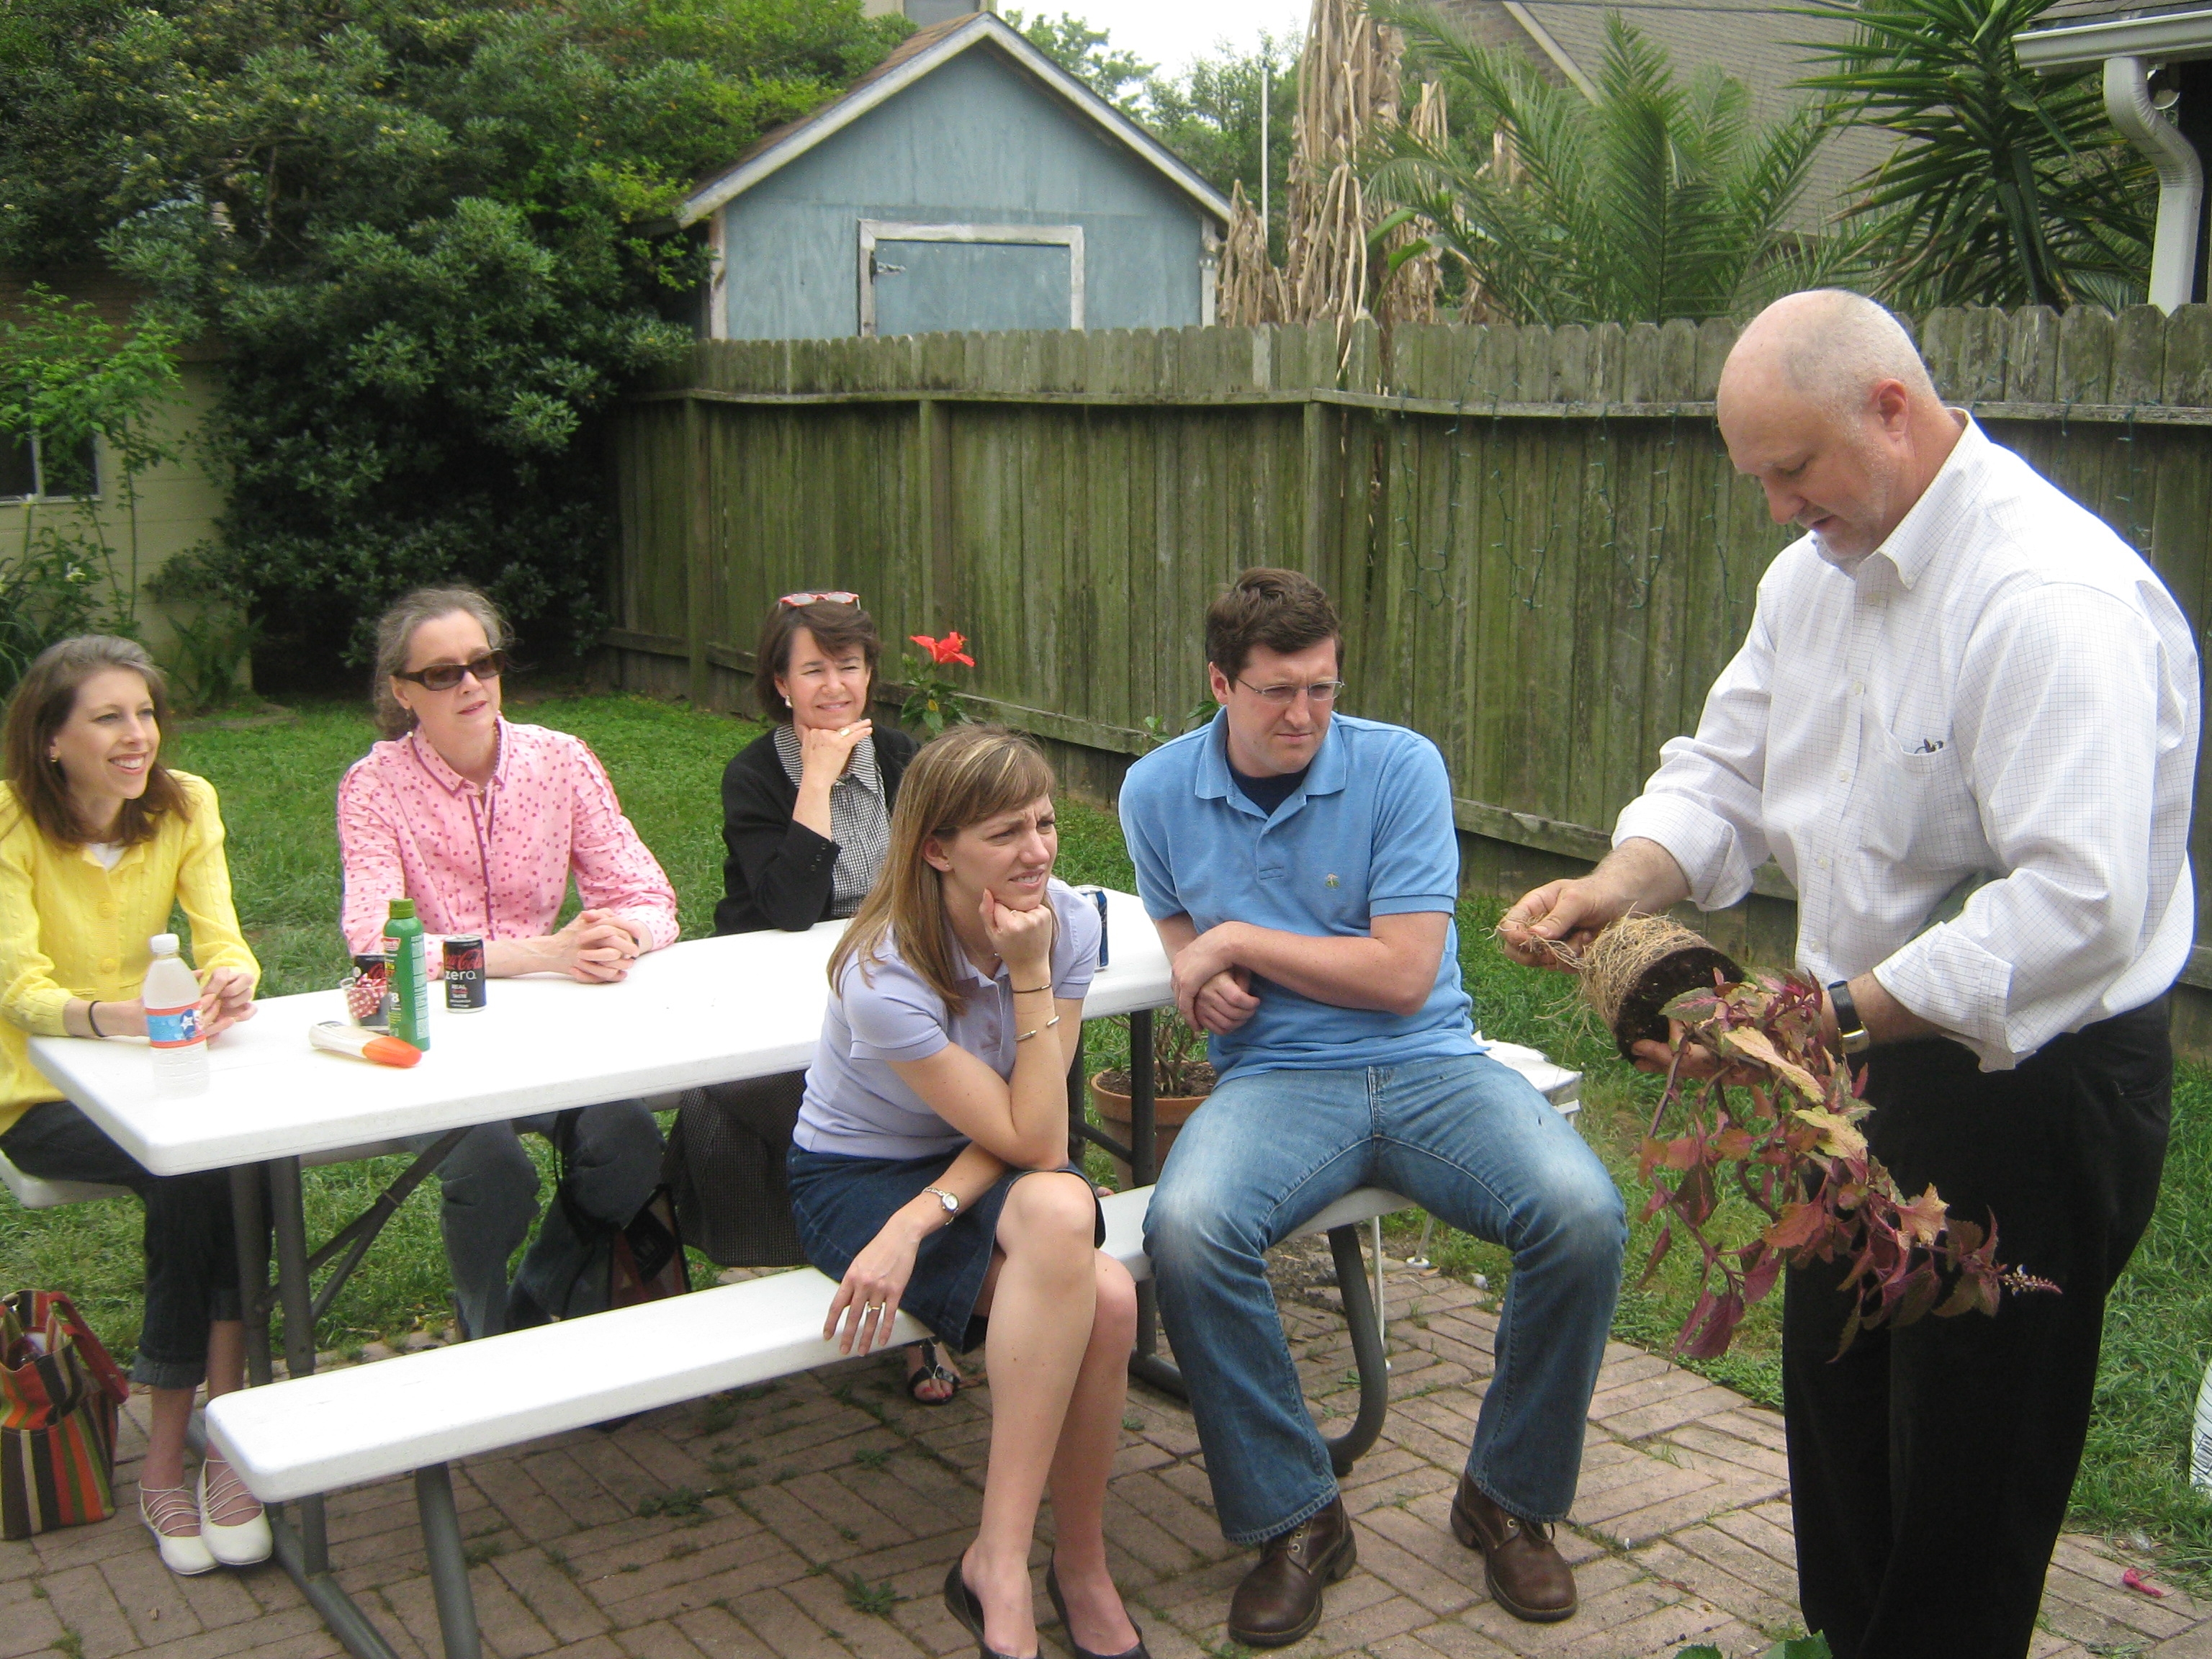
The yupneck explaining the finer points of plant selection

Most of the attendees are recent college graduates that work for non profits (translation-they are still poor), so we also talked quite a bit about plant selection and propagation.  My friends at A&M donated a very large coleus that we proceeded to chop up and turn into about 20 new plants.  Each guest got the opportunity to take cuttings and root them in their own 5” bio-degradable peat pot. 

The betrothed and a large portion of the Education Department of the MFAH. From left to right: Andrew Hoyt, Bridget O'Brien, Lindsey Smith, Sarah Wheeler, Margret Mims and Heather White

All in all, it was a lovely event.  We laughed, we learned and we gardened; a perfect afternoon!  I would like to thank everyone that came and say a special thank you to my daughter for inviting me to participate in this celebration.  Andrew and Bridget, I wish you all the best.  May your life and your garden be bountiful!

Propagating Antique Roses

A sprawling Cherokee Rose at Peckerwood Gardens. Photo by Dr. Bill Welch

Two years ago, I was training for the MS 150 outside of Cat Springs, Texas.  As I turned a corner and started down a long straight path, I saw something very unusual up ahead of me; a cedar tree covered in big white flowers.  Well, I knew that couldn’t be right so I pedal closer.  When I got close enough to be able to tell what I was seeing, I was shocked to discover that the white flowers on the cedar tree were coming from an incredibly large rose-bush.  I am not kidding, this rose-bush had sent out runners that were 30 to 40 feet long.  They were so long that they went all the way up the back of the tree and hung over the front almost down to the ground.  I was excited. 

I wasn’t sure but I thought this lovely, five petaled white rose with the bright yellow stamens was an antique rose called “Cherokee”.  The Cherokee Rose is truly an antique rose.  It has been here so long that some think it originated here.  In fact, the people of Georgia were so certain it was native that they made it their state flower.  I quickly pulled out my pocket knife and took a dozen cuttings.  This is why I love “antique roses”.  You can be on a bike ride in the country, find one, take cuttings with a pocket knife, stick them in your back pack, leave them there for over two hours and still be pretty certain that they are going to root. 

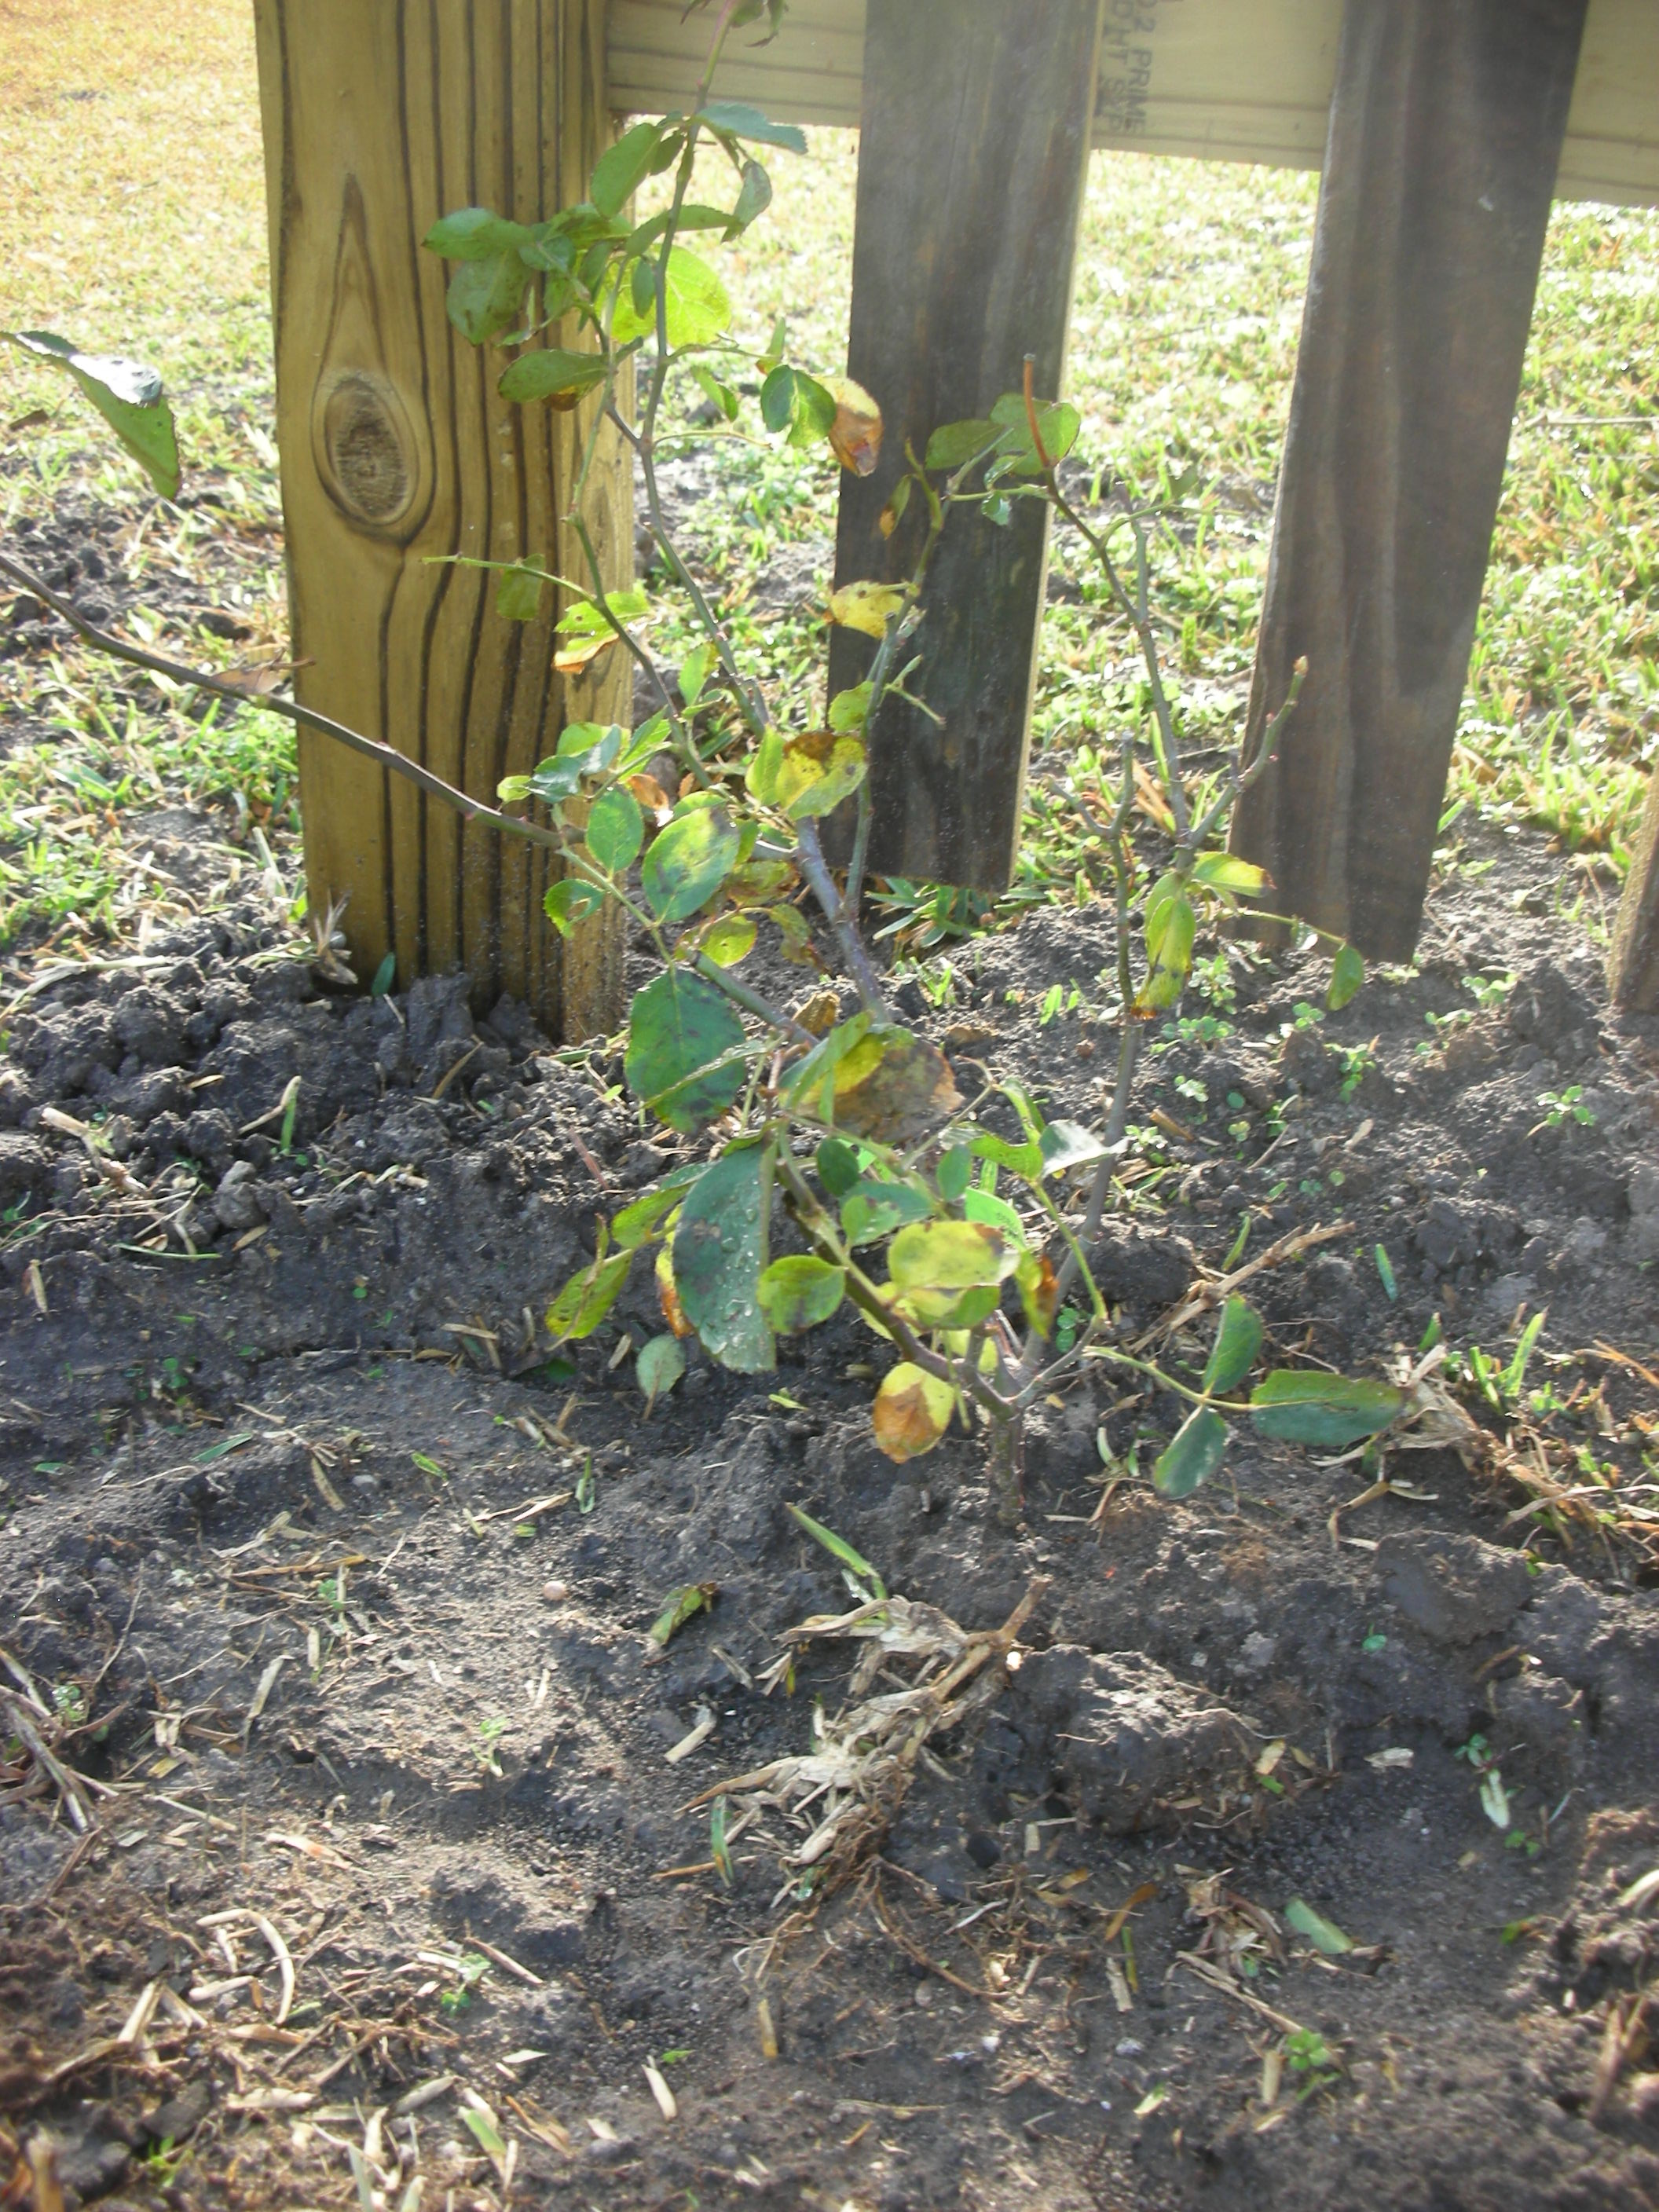
Propagating antique roses from cuttings is a fairly easy process. 

  1.  As a general rule, you should cut new wood that has just finished blooming.  This is usually in the spring but can be in the fall.  The rose is not particular as to where you cut it.  I use sharp shears to make 45 degree cuts to create stems that are about 6″ to 8’’ long.  Leave a few leaves on the stem.
  2. Next, I fill four-inch pots with a good quality garden mix and wet it.  Some people root in pure perlite, but you will need to add a little fertilizer if you go this route.   Most cuttings need two things to be successful: moisture and root aeration.  The perlite provides excellent aeration to the roots.
  3. Stick the cutting in the pot.  Many people like to dip the cuttings in a rooting hormone.  This is your choice.  It can increase your chances of getting the cuttings to take.  However, I am not certain they are necessary.  Roses naturally produce auxins at the cut.  Auxins are hormones that stimulate root production.  I have used both methods and have had success both ways.  Also, some people like to “wound” the cutting at the base.  This involves making little cuts at the base of the stem.  Roots will grow from the wound sites.
  4. Place the well watered pot in a produce bag and seal with a tie wrap.  This will keep the humidity high as the plant roots.  Open the bag every few days and make sure the soil stays moist (not wet). 
  5. Roses love the sun so find a place that is sunny but gives some shade during the hottest part of the day.  Since they are in the bag, it is very easy for them to get over heated.

Propagating plants is undoubtedly my favorite task in the garden.  Roses (especially old varieties) are very tough and very easy to grow from cuttings.  Don’t get too bogged down in the details.  Just go for it!  Remember, many of these antique roses came here in a box of dirt on the back of a covered wagon with mason jars stuck over them.  If they survived that, surely they can survive anything we do to them!

"Use of The Water Feature When Ill With Diarrhea is Prohibited"

Would they write this if there weren't a problem?

Last week, I attended the 2011 National Floriculture Forum.  It was hosted by Texas A&M (Whoop!) at the Dallas Arboretum.  We got a private tour of the gardens by Jimmy Turner.  If you are not familiar with Mr. Turner he is the research director for the Dallas Arboretum and a true “Master of Horticulture”.  Jimmy is an entertaining, engaging and incredibly knowledgeable speaker and we were very lucky to spend the morning with him in his garden.  In fact, he is the one that pointed out the sign that lead to this post.  The Forum was awesome!  I learned so much and met so many talented horticulturists from around the country.  And, what a place to hold it.  The Arboretum was spectacular!  According to Jimmy, they plant half a million bulbs each year for their spring show.  As the following pictures will illustrate, the time, effort and expense of this monumental effort is well worth it.  Hope you enjoy the pics.

Tulips and daffodils at the Dallas Arboretum

One of the four frogs that make up the water feature that you can’t use if you have an upset tummy.  The crape myrtle allee is in the background.

Stunning container plantings featuring pansies (Viloa tricolor) and dusty miller (Senecio cineraria)

The sunken garden

A river of pansies

Yellow tulips and violas.  Notice the pecan hull mulch

Lovely setting in the tulips

More tulips

We ended the evening with a catered meal on the back terrace of the Alex Camp House which is on the grounds of the Dallas Arboretum.  The house was designed by John Staub who also designed Bayou Bend (the Ima Hogg house) in Houston.

Bluebonnet season is here!!!


Bluebonnets and Indian Paintbrushes in the Yupneck's yard. Photo by Ramez Antoun

“The bluebonnet is to Texas what the shamrock is to Ireland, the cherry blossom to Japan, the lily to France, the rose to England and the tulip to Holland.”

That quote from Jack Maguire comes closer to describing the way we Texans feel about our state flower than anything else I have ever read.  The bluebonnet is as much a symbol of Texas as is the Alamo or the Texas flag.   The bluebonnet was selected as our state flower in large part because it is uniquely Texan.  The two most common varieties (Lupinis texensis and Lupinis subcarnosus) grow natively here and nowhere else.  This plant is so well loved that each year, millions of Texans load up their cars with kids and camera equipment and head out into the country.  I truly believe that no one in Texas has ever avoided being photographed in a field of bluebonnets.  

A yupneck family picture in our bluebonnets

I am fortunate enough to live in one of the best bluebonnet counties in Texas.  I live on two long, skinny, Washington county acres.  Because of the shape of my property I have about 600’ of road frontage.  My wife has worked very hard to ensure that every inch of that 600’ is covered in bluebonnets.  I am pleased to say, she has succeeded!  In fact, she has been so successful that we have actually come home and found complete strangers in our yard taking pictures.

The Farmall Cub that I bought to mow the dead bluebonnet foliage

While bluebonnets are definitely the most fabulous native flower ever created, they do have their problems.  Unless you have ever grown bluebonnets you may not be aware of what happens after the blooms fade.  Bluebonnet foliage can grow to about 2’ in height.  After they set seed the foliage and the seed pods begin to dry out and die.  This creates a very unattractive, “weedy” look in the yard.  However, no matter how bad it looks, you cannot mow them until the seed pods “shatter” and release their seeds.  Mow too soon and you will not have bluebonnets next year.  This “weedy” appearance in the yard requires very patient and very understanding neighbors.  Luckily for us, the people of Washington County are serious about their bluebonnets and no one would ever complain about our “seeding” bluebonnets (at least not to our faces).  One the bright side, the dry bluebonnet clumps are so thick and hard they almost ruined our John Deere riding mower.  So, in order to save the John Deere from the bluebonnets, my wife let me buy a 1946 Farmall cub with a shredder to handle this once a year job.

A slightly blurry but very cute picture of my wife in our bluebonnets

If you want some bluebonnets of your own, they are very easy to grow.  Just throw some seeds out in your yard in October or November.  Timing is everything.  They must go out at this time if you want them in the spring.  Bluebonnets have a relatively low germination rate.  So, to increase your success rate, mow your grass very close to the ground before sowing.  Once you have spread the seed, walk around on them and try and ensure that they have good contact with the soil.  Water them in.  After watering, you can forget about them until spring.  Only apply supplemental water if you do not receive average fall and winter rainfall.  Bluebonnets are very drought tolerant (they are a Texas native after all).  Over watering will kill them quicker than anything.

This weekend, my wife and I found the first bluebonnet flower in our yard.  Because of this, I am pleased to announce that Bluebonnet season is here again.  It is time to enjoy some of the best weather and scenery that Texas has to offer.   So, load up your kids, drive out in the country and make your kids endure the same spring rituals that your parents made you endure.  They will thank you later. 

P.S.  Don’t  go onto other people’s property without asking.  If you do, you may get to experience another Texas tradition – shooting trespassers!  Happy Spring Y’all!!!!

Weed Free-Organically

The cover of this month's Texas Gardener magazine. In it you will find my first "published" piece, "Weed Free-Organically".

Well, this is a banner day for the yupneck.  My first published piece came out today in Texas Gardener magazine (http://texasgardener.com/).  My article is entitled “Weed Free-Organically”.  It is a pretty in-depth piece on controlling weeds in your flower beds and vegetable gardens without the use of chemicals.  Of course my wife, kids and mother think it is the best thing they have ever read.  I hope you buy a copy and let me know if you agree with them.  It will be available on news stands by February 28th and also on the web around the same time.

Texas Gardener is the second largest gardening magazine in Texas.  It was started in 1981 by Chris Corby in Waco, Texas.  For thirty years now he has been providing gardening advice to Texas gardeners by Texas gardeners.  Chris has built an impressive stable of very well-respected garden writers.  Their articles provide invaluable tips and tricks for growing things in the wildly variable and difficult Texas climate.  This month, he is doing a special promotion with the garden centers in over two hundred Texas Wal-Marts.  Look for your copy at the check out stand.  You can also find copies wherever magazines are sold.

When I started my master’s degree at A&M, I had no idea what I would do with it.  Thanks to some prodding and encouragement by some very special people, I may have found my niche.  Seeing my work in print is very exciting.  I am humbled to know that some people think that other’s might actually enjoy reading the things I write.  I would like to say a special thanks to my wife.  Without her encouragement, none of this would have happened.   I would also like to thank Cynthia Mueller for asking me to write for HortUpdate (http://aggie-horticulture.tamu.edu/newsletters/hortupdate/).  That first potager piece led to my blog and now this.  Also many thanks to Dr.  Bill Welch and Dr. Doug Welsh for their support and encouragement.  My son-in-law, Ramez Antoun is a very talented photographer.  His photos made this article and my blog come alive.  Thanks Moose!  And finally, thanks to my kids.  You always read what I write.  And even if you think it is boring, you never let it show!  I love you all!

Bulb Hunting

This past Wednesday, I got a signed copy of Chris Wiesinger’s new book “Heirloom Bulbs for Today” from my friend Dr. Bill Welch.  Chris is the owner of the Southern Bulb Company and a true “Master of Horticulture”.  Since graduating from A&M he has quickly established himself as the leading expert on Southern heirloom bulbs.  His book is packed full of useful information about many of the heirloom bulbs that do really well in Texas and the Gulf South.  This lovely book is as entertaining as it is useful.  It is full of wonderful anecdotes about his bulb hunting expeditions. The photographs and illustrations are both beautiful and a great source for identifying the things you may dig up from time to time.  The text also gives you all of the information you need to harvest, plant and care for these living heirlooms.  If you are interested, you can find it on Amazon.  Here is the link: http://www.amazon.com/Heirloom-Bulbs-Chris-Wiesinger/dp/193397995X

Grand Primos and Crinums at the Hueske Homestead

The timing of this book was very apropos.  Two days after receiving it, the weather was a balmy 74 degrees and I had the day off.  So, I decided to do a little bulb hunting of my own.  My wife and I are friends with a wonderful and generous woman that is the owner of an abandoned homestead. This place was the home of two sisters for almost 100 years.  Both were born in the house that still stands on the site.  The sisters were avid gardeners who loved and nurtured this piece of property for almost 80 years.  Their love of growing things is evidenced by the thousands of bulbs and corms that still bloom year round at the abandoned site.  Thanks to the generosity of my friend, I am able to go to the home site periodically and harvest bulbs.

Crinums around an old bird bath

I really cannot convey in words how many bulbs there are at this house.  Each time I visit I swear there are more bulbs there than when I last visited.  The choice is never what to harvest, it is always how much to harvest.  Today I made it easy on myself.  I brought a wheelbarrow and told myself that when it was full I would quit.

Upon my arrival, I stepped inside the gate and started digging.  The soil here is the most beautiful soil that I have ever found.  80 years of care can truly do wonders.  My shovel easily slid into this beautiful loam.  As I dug, I actually felt sorry for the bulbs that were going to have to leave this wonderful place for the hard black clay of my house.  Each turn of the shovel revealed clumps and clumps of bulbs.   After about an hour, I had harvested about 100 Grand Primo narcissus (Narcissus tazette ‘Grand Primo’) and an equal number of Oxblood Lilies (Rhodophiala bifida).  I also harvested about 50 crinums of an unknown variety. 

Time to go home

It is not really the optimal time to be gathering any of these bulbs. However, I have to harvest when my busy schedule allows.  The good thing about most of these old fashioned varieties is their hardiness.  Even though there are “better times” of the year to harvest them, you can realistically gather bulbs any time of the year.  The worst thing that usually happens if you harvest out of season is they do not bloom the first season they are transplanted.  That is a price I am willing to pay for the access to these living heirlooms. 

Harvesting

Like I mentioned before, there is definitely a right time to harvest bulbs.  For best results, you want to harvest (or divide) bulbs after their foliage has all died back.  This happens at different time for different bulbs. Grand Primo will bloom in late January and early February in our part of the world.  However, the foliage will stay bushy and green until June in some cases.  Bulbs need this foliage to stay in place as long as possible.  The foliage does the photosynthesis for the plant which the bulb then stores to produce next year’s blooms.  Spider Lilies (Lycoris  radiata) and  Oxblood Lilies (Rhodophiala bifida) are fall blooming bulbs that produce foliage that stays green for up to six months.  Because of this, it is a good idea to mark these bulbs so you will remember what you are digging when the time comes.

Dividing

Oxbloods and Grand Primos divided and ready to plant

When you dig up your bulbs, you want to be careful and not cut them.  For that reason, dig at least six inches away from the dead clump.  I stick the entire blade of my shovel into the soil on an angle toward the bulbs.  I do this all the way around the clump.  This creates a bowl shaped hole.  Next, turn over the bowl shaped mound of dirt and start removing the soil.  You will find the bulbs in clumps.  Carefully separate the bulbs with your hands.  Try to preserve as many root as you can and discard any bulbs that are soft or damaged.

At this point you have a choice.  You can replant them immediately or you can dry and store them.  I always replant immediately.  However, if you want to save them then spread them out in the sun for a few days.  After they are dry, store them in any permeable bag.  You will want to keep them in a cool, dark, dry place until you are ready to replant or share them.

Planting
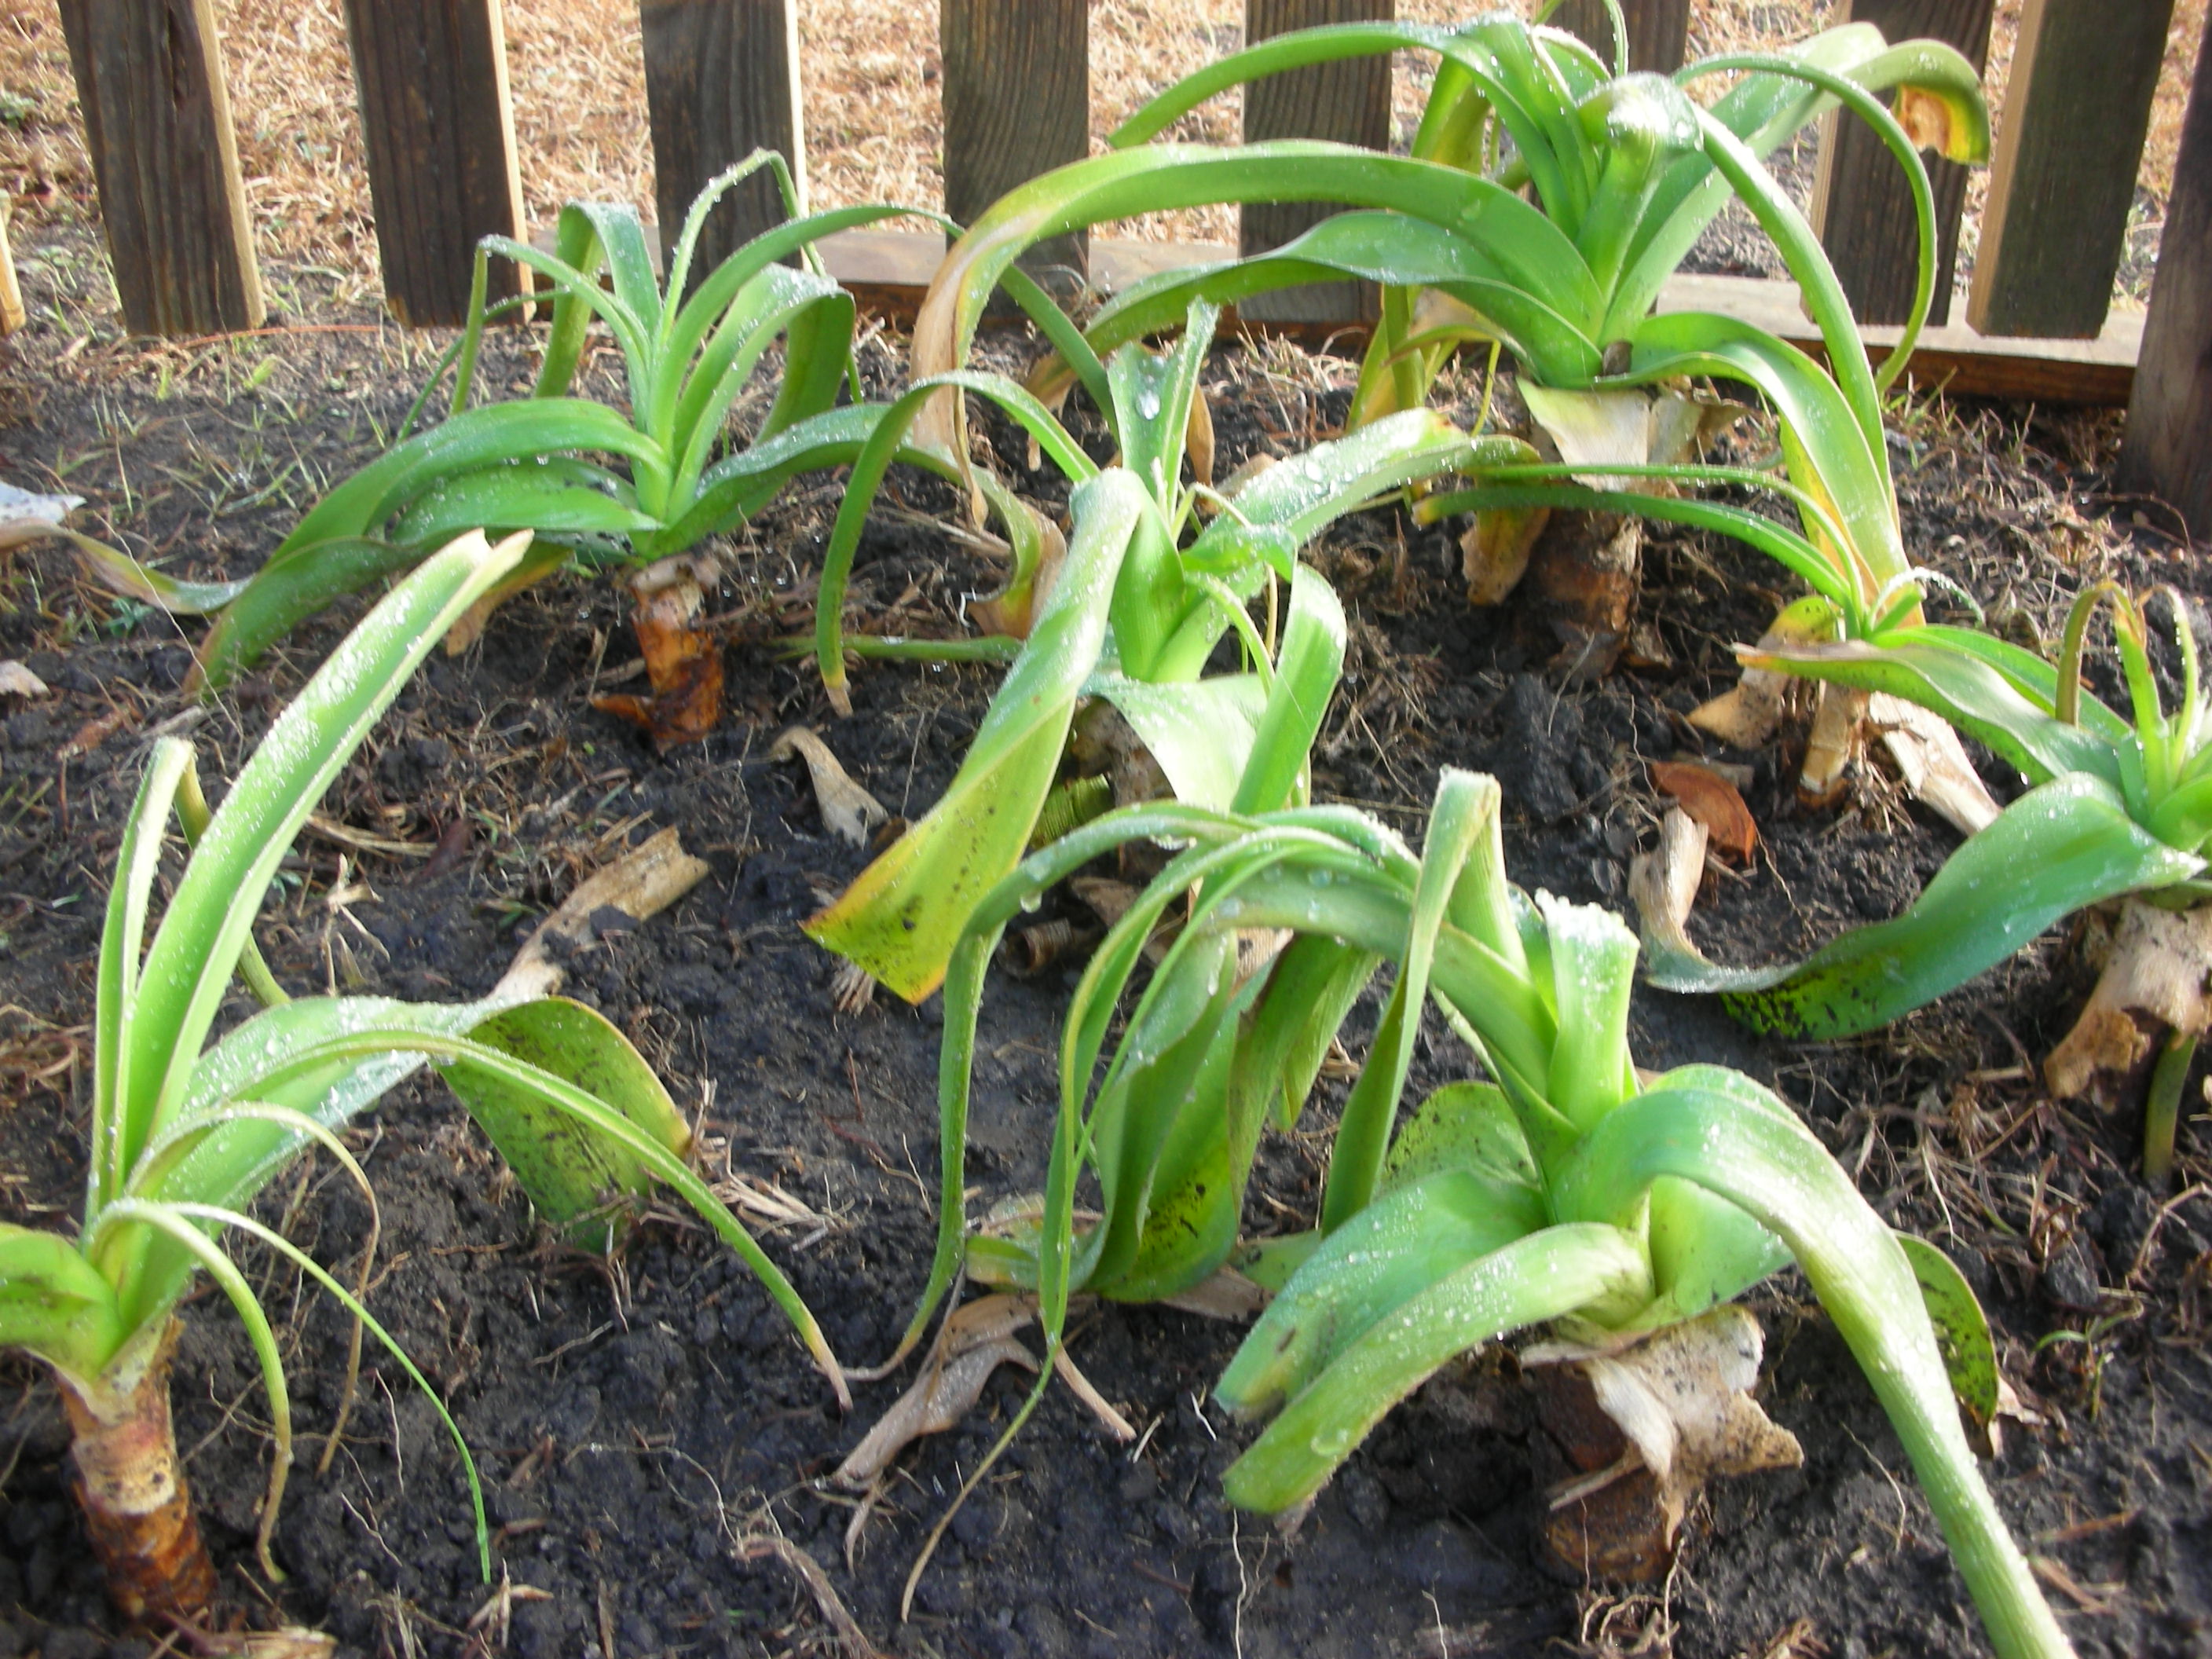
Crinums from the Hueske Homestead replanted in one of my beds

Heirloom bulbs are not too particular about how they are planted.  Basically, just get them in the ground deep enough to cover them.  One rule of thumb says that they should not be planted deeper than three bulb heights.  Corms (like iris and gladiolas) should not be planted as deep.  In fact, a lot of irises like to have the tops of their corms left exposed.  Also, some bulbs like byzantine gladiolas can be difficult to determine which end is up.  If that is the case, simply plant it sideways.

Nothing is more rewarding to me in the garden than growing things that have been shared with me.  My grand parents were all gone before I was old enough to take things from their gardens to remind me of them in mine.  However, thanks to the generosity of people I can still grow things from past gardeners who loved their plants as much as I love mine.  I am so happy to be the care taker of these heirloom bulbs that have now been passed down from two gardeners of another time to me.  I will think of these charming ladies each spring, summer and fall when the bulbs they enjoyed so long ago burst forth and brighten the time that I have left on this wonderful planet.

A Monday Holiday

Surprise Easter Lilies

We have been so busy with the holidays and the remodel that our beds have suffered.  All of them need weeding and trimming.  This past Monday was so lovely that my wife and I decided to do some of that much need yard work. We started the morning by cutting back the Lantana that grows by our back deck.  While we were pruning I got one of those little surprises that I just love in the garden.  Tucked under the leaves and the bare branches of last year’s lantana was this year’s Easter Lilies!  Truth be told, I had forgotten they were there.  I won a single stem at our church picnic last summer and I just stuck it in the ground.  Well, that was a good decision.  That one plant has now divided and given me five new plants for the price of one.  I have never grown Easter Lilies before so I am not sure if this much division is common, but I am excited about it.

The Milk and Wine Crinums that I moved

After we cleaned up our mess I decided to do my absolute favorite garden chore – move things!  Fall is the best time for this, but, with a little care, you can move plants anytime of the year.  My friend and garden mentor Cynthia Mueller says that if you move a plant correctly, it won’t even know its been moved.  I have fully embraced her advice.  The first thing that I moved was a bunch of milk and wine crinums (Crinum x herbertii).  I got my crinums from a friend.  I think that is how most people get them.  I had several small clumps scattered around the yard so I decided to dig them up and make two masses on either side of my propane tank.  I am hoping that their lush spring and summer foliage will help camouflage my ugly propane tank.  Next, I moved a few clumps of daffodils and narcissus that were left by the previous homeowner.  He had planted them willy nilly all over the place.  I am slowly trying to sort them out and plant them in masses.

The "Don Juan" climbing rose that I hope is about to swallow my arbor

Once I ran out of things to move, I did a little planting.  Since I have recently finished the arbor in the picket fence, I planted a Don Juan climbing red rose at the base of it.  Don Juan is a fairly aggressive climbing rose that can grow to 15’.  It has very beautiful deep red velvety double petals and it smells terrific.  I have high hopes that it will be stunning on my white arbor. 

Next, I got to plant some Primrose Jasmine (Jasminum mesnyi) that I have been nursing for the past nine month.  I planted these on the east side of my house.  My house is on a slope and it sits up on blocks, so I have a lot of space between the ground and the bottom of the windows.  Since primrose jasmine makes mounds up to 10’ feet high, I figure this is the perfect plant.  Primrose jasmine is an old-fashioned plant that is often called “Fountains of Gold”.  You can see them growing at old home sites all over Texas.  These plants make a huge mound of arching branches that are covered in double yellow flowers in the spring.  I got mine by pulling up shoots from an existing plant and then potting them.  I have kept them alive now since last spring and I am very glad to finally have them in the ground.

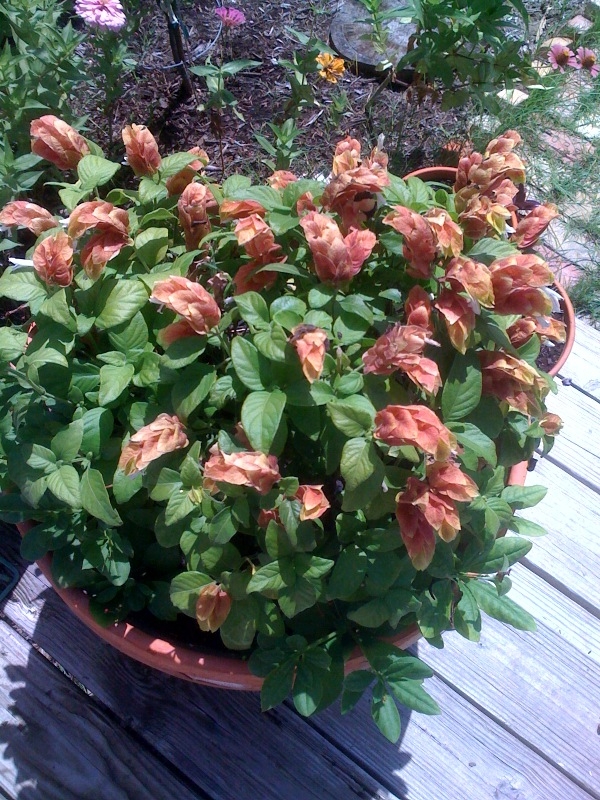
The shrimp plant that I divided and planted in the flower bed

To finish things up, I divided some shrimp plant that I had in a pot.  This one pot made four lovely clumps that I put by the steps to my deck.  I also planted some Society Garlic and day lilies that I had in pots.  I also planted a whole flat of dwarf mondo around the “stump” stepping stones that lead to my faucet.  All in all it was another relaxing and rewarding holiday at the nest.
Winter Chores in the Potager

The potager in January

The weather has been so nice this holiday season that my wife and I decided to do some much needed maintenance in potager.  The Cypress vine that brought us so much joy in the summer had to come down.  The same plant that had covered our fence and trellis in beautiful red flowers and drawn so many hummingbirds and butterflies into our lives was now just an eyesore.  So, with pruners in hand, my wife and I cut, chopped and pulled down all remnants of the vine.  It came down very easy, but it covered us in tons of tiny black seeds.  You know what that means.  More Cypress vine than I will know what to do with in this spring!  
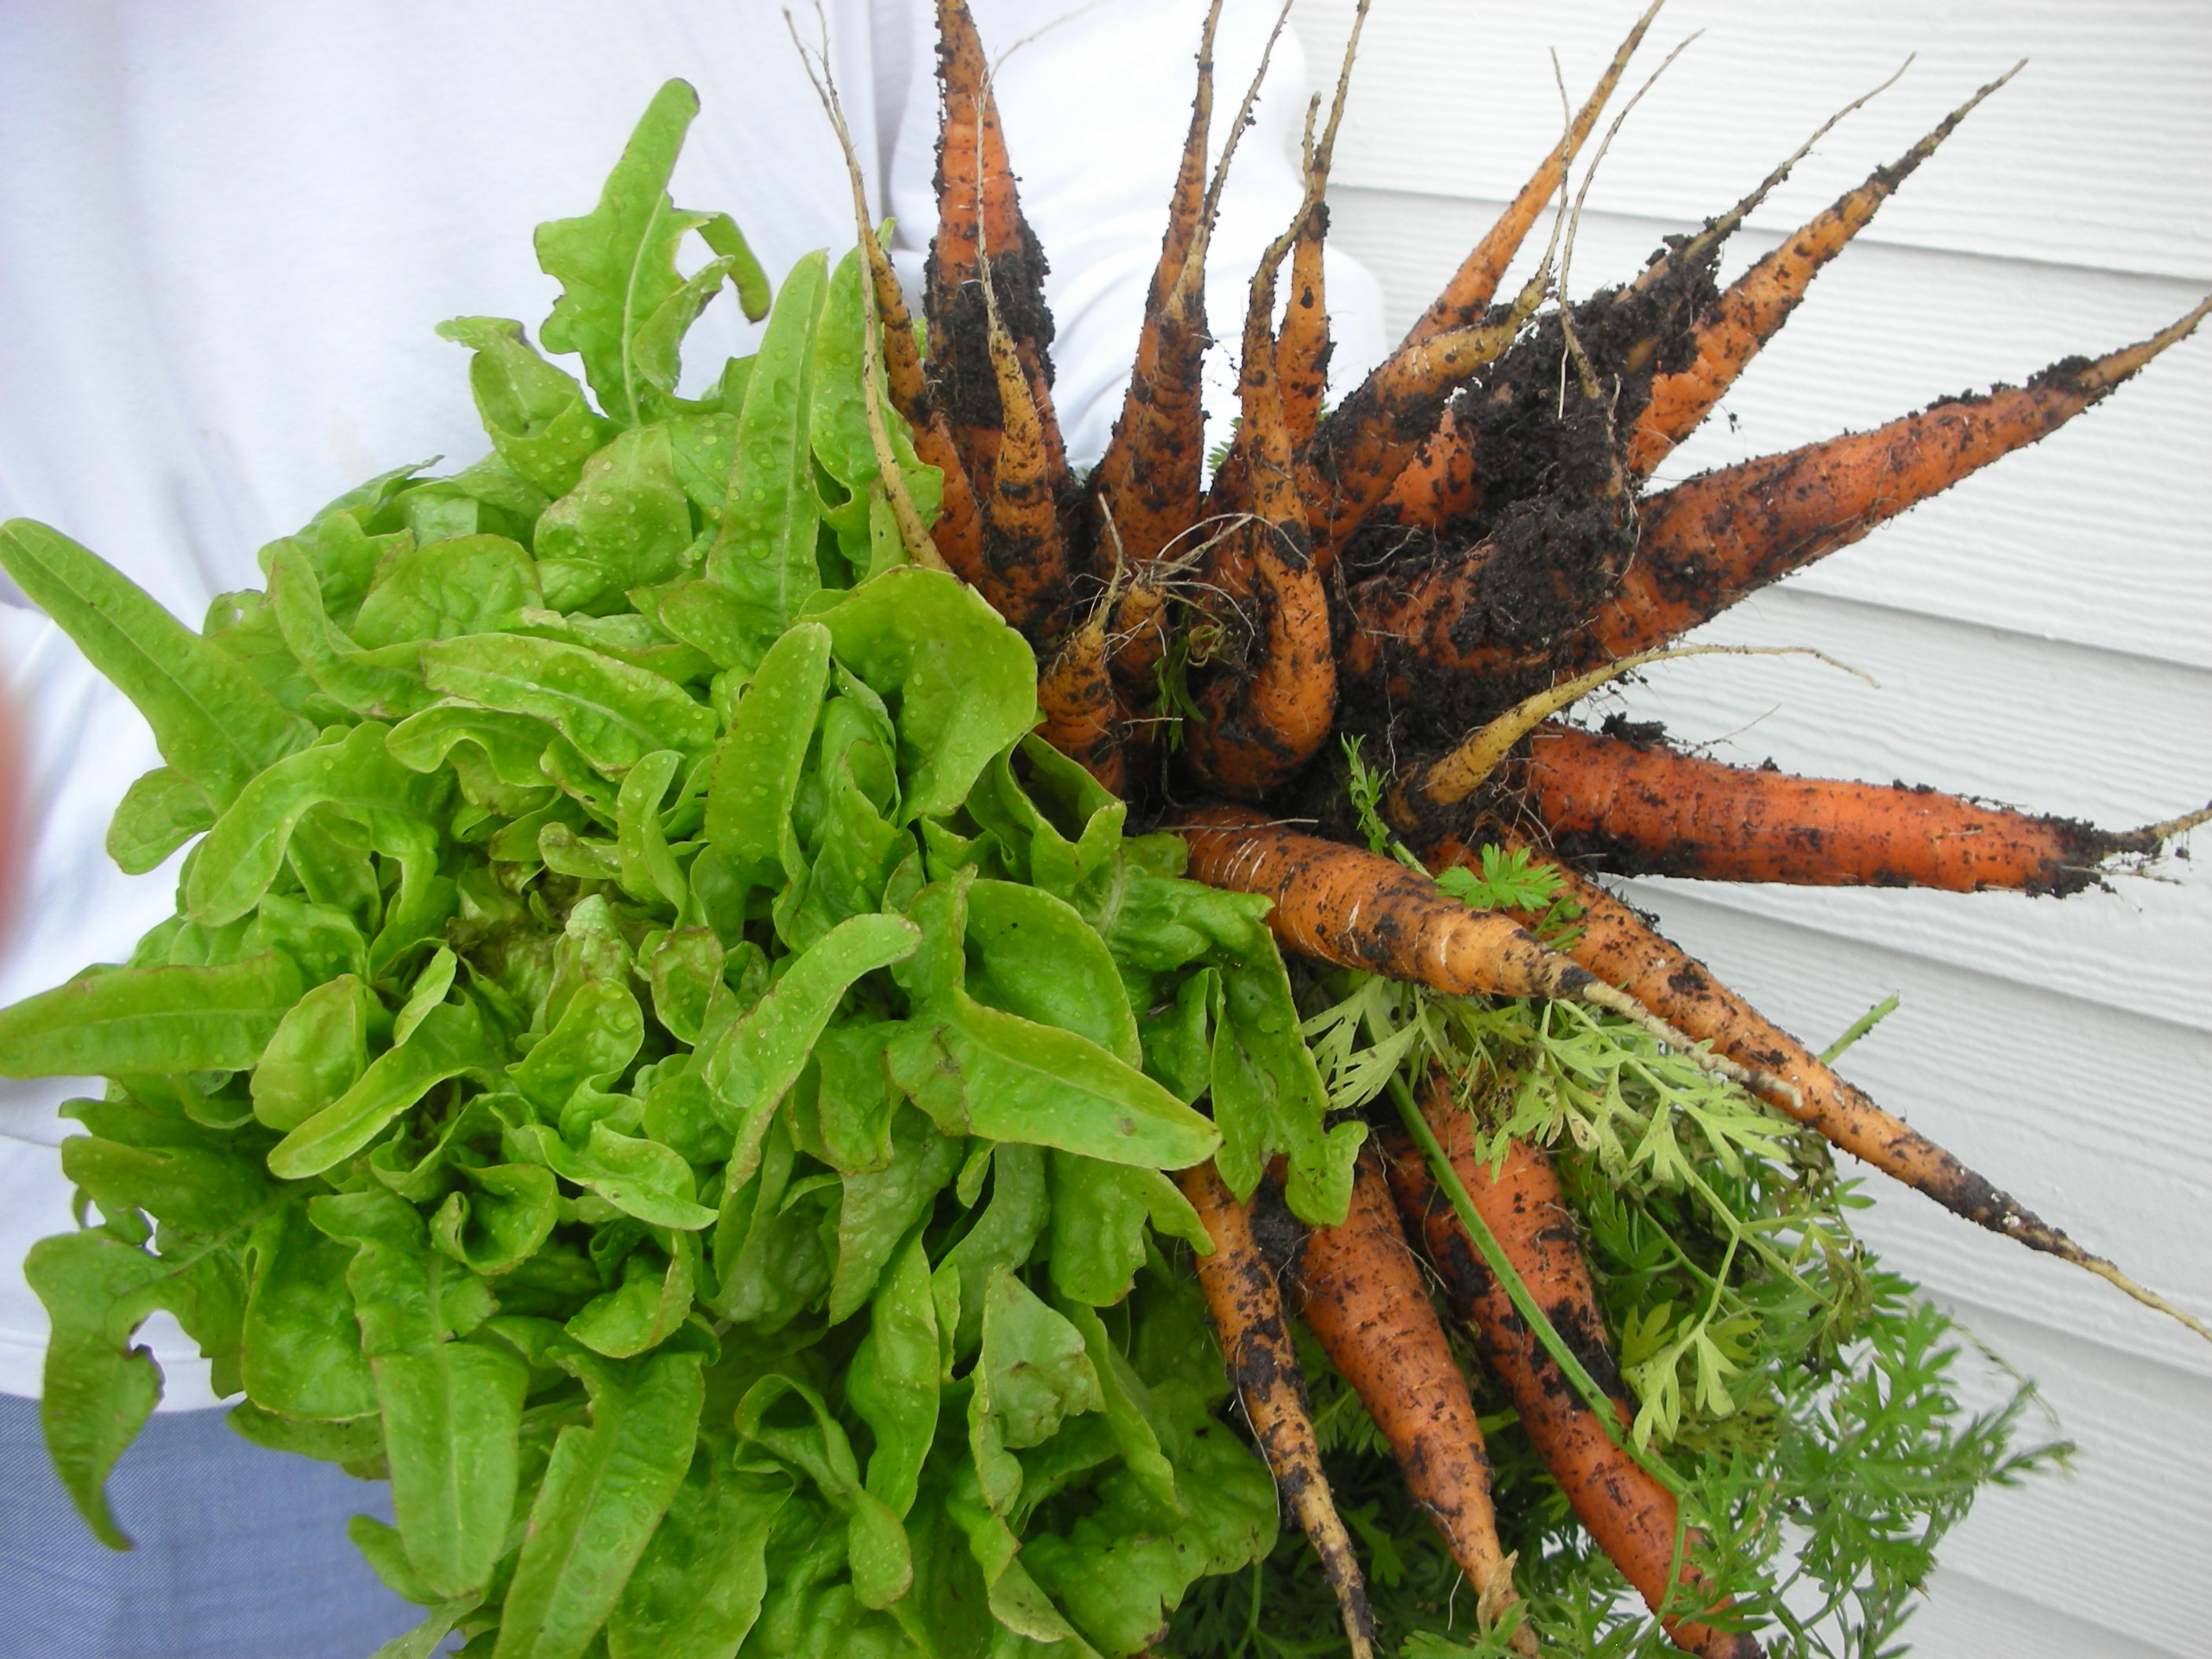
Carrots and lettuce from the potager

Once the fence and trellis were clear it was time to move inside the potager.  First, we harvested.  We pulled carrots, turnips, spinach and butter crunch lettuce. In addition to the lettuce, spinach, carrots and turnips, I have Egyptian Walking Onions, shallots, 10/15 onions, collards, chard, lemon grass, rosemary and purple cabbage.  Man do I love winter in the South!  Where else can you have so many vegetables thriving in the garden in January.

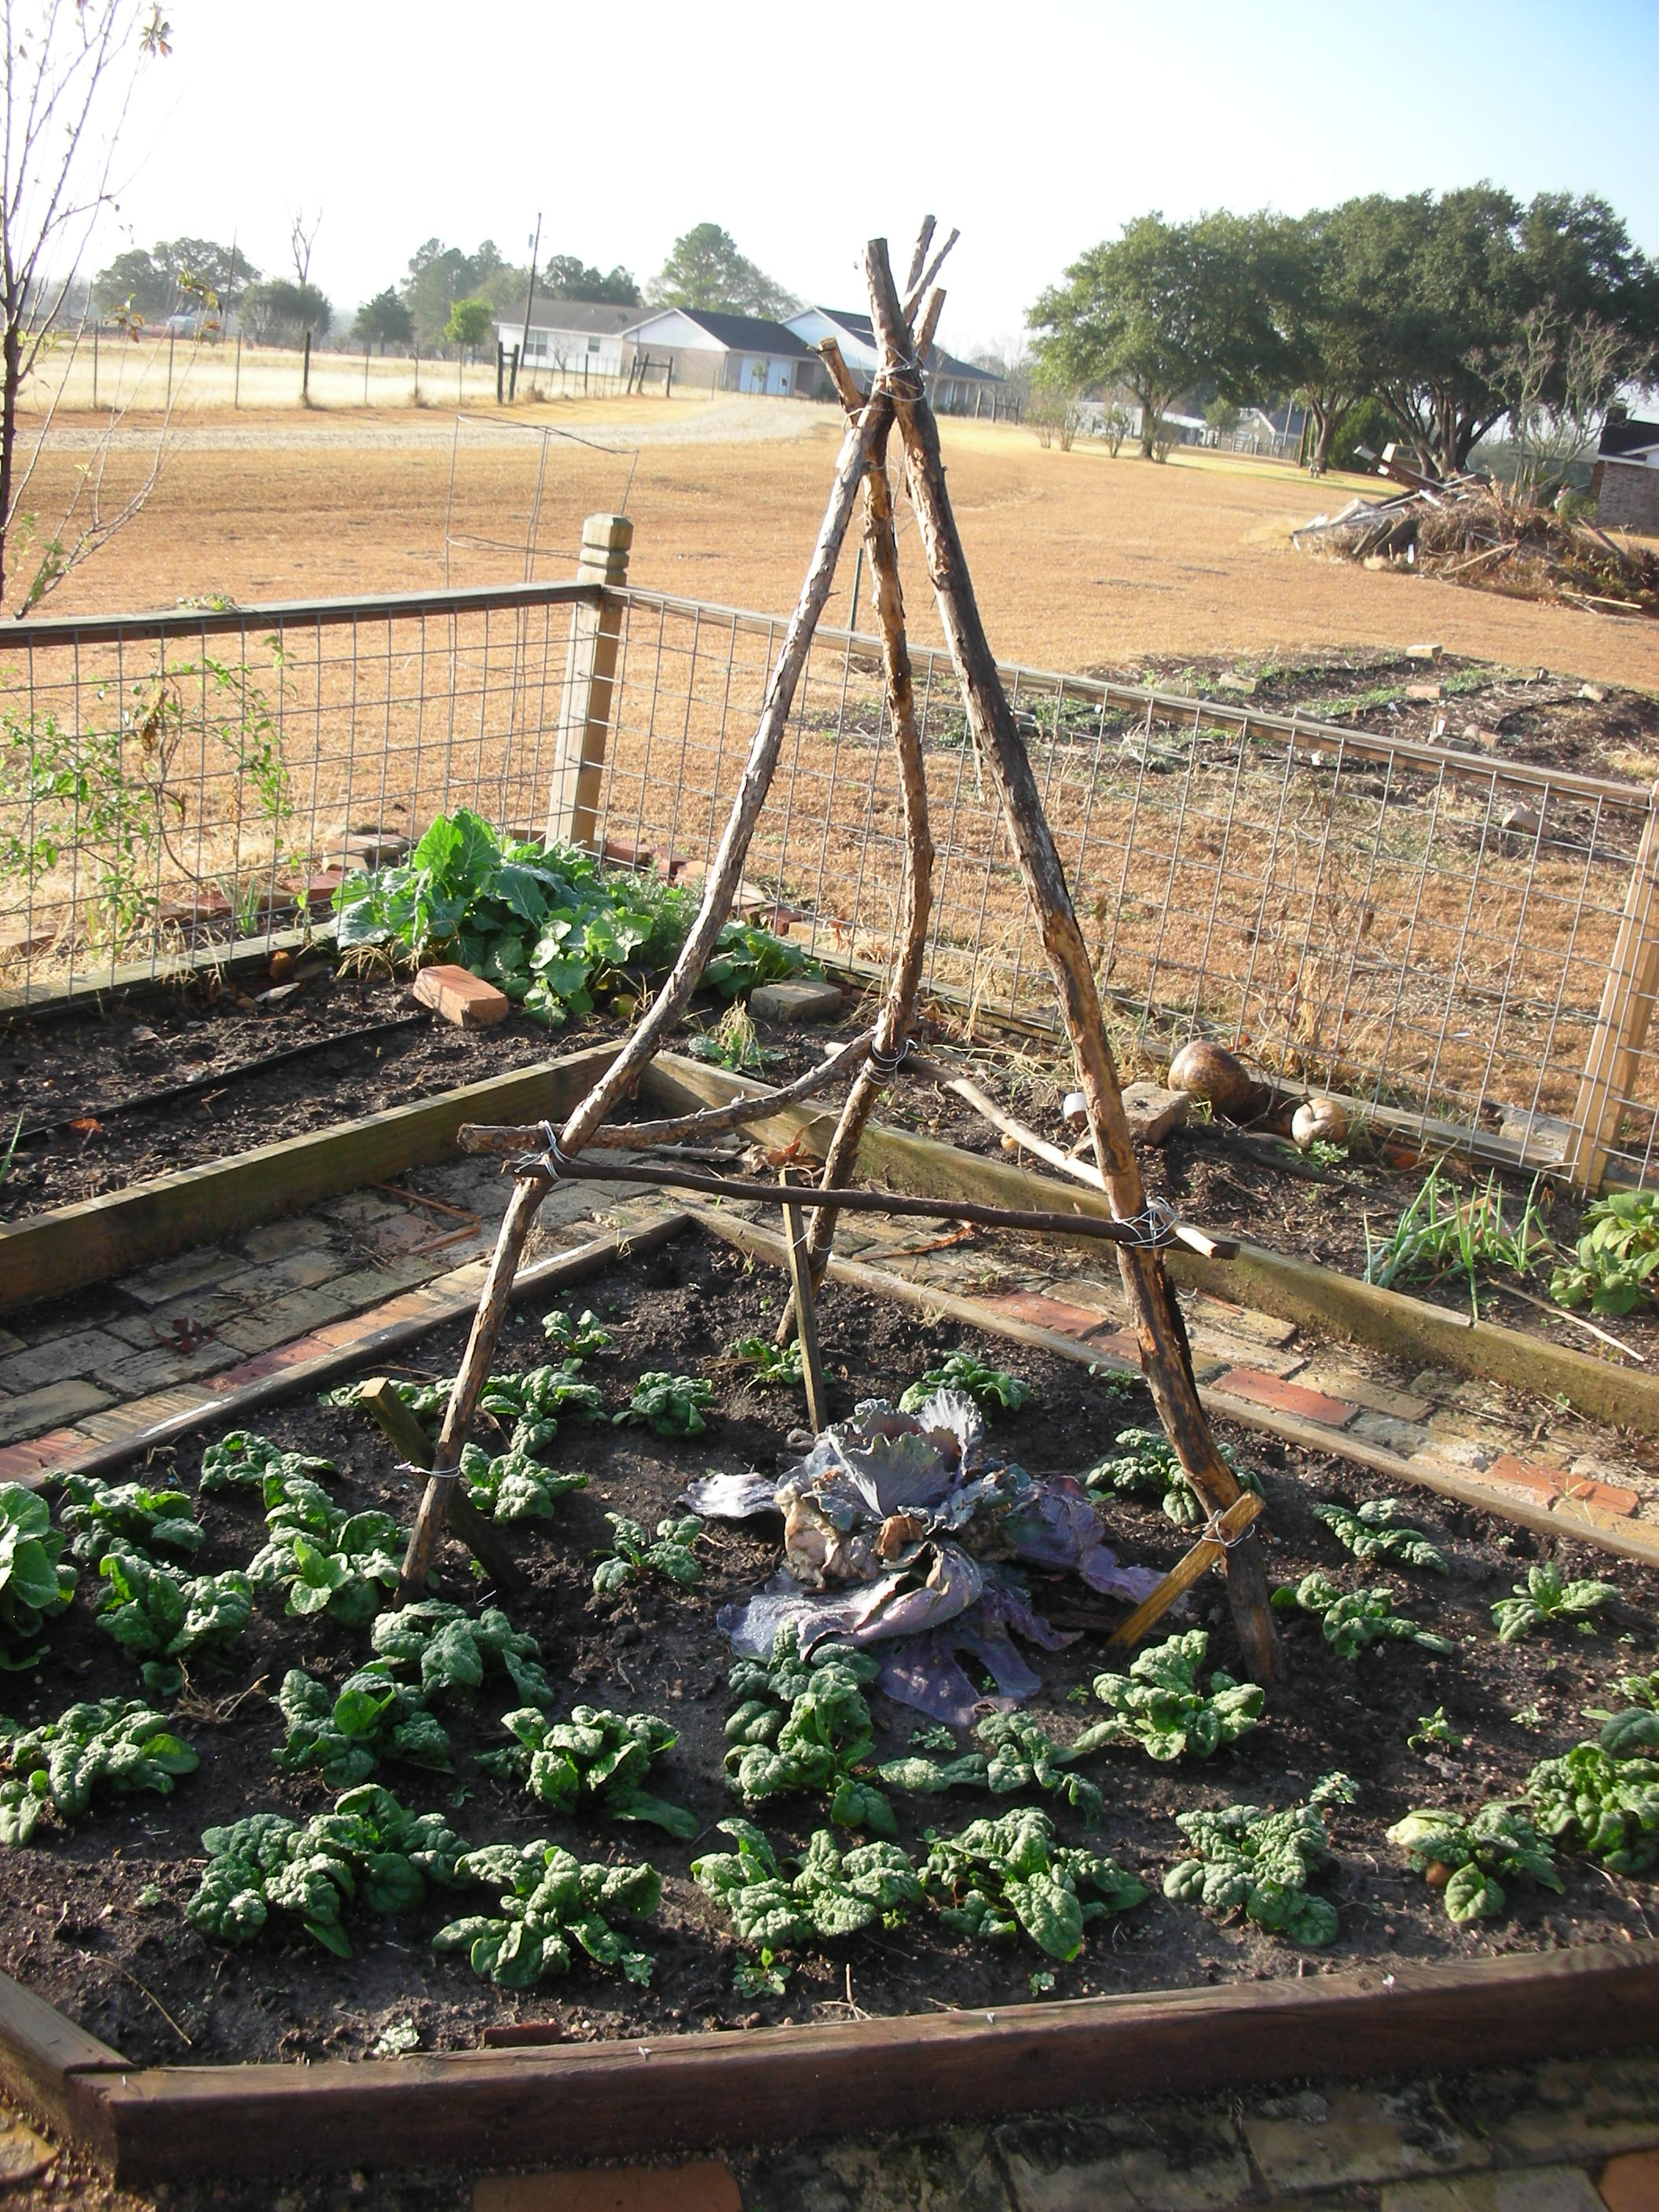
One of the trellises that we built to support the peas

After the harvest we got back to work.  We took the pruners to our lemon grass, uchuva and salvia.  Then we built four, three-legged trellises out of cedar limbs.  We anchored these in the middle of the four odd-shaped beds in the center of the potager.  After they were secured, we planted Little Marvel Peas at their base.  According to my Aunt Sara, peas are best planted either the last week of the year or the first.  We will see.  I have tried to grow them before and they just didn’t pan out for me.  I really hope they do well this year.  I have worked really hard at improving my soil this past year and my wife and I worked very hard on the little trellises. I can just see them covered in pea vines in early March.  Once the peas were planted, we finished up by planting some French breakfast radishes and some Chioggia beets that I got from rareseeds.com

The central bed in the potager. It is full of carrots, poppies and byzantine gladiolus.

While we are talking about the potager, let’s not forget all of the flowers that I have planted in it.  Right now, my red poppies are up and my Byzantine Glads are beginning to make a show.  The foxgloves and Hollyhocks look terrific.  A mermaid rose that I found while riding my bike two years ago has finally taken hold and is beginning to send out canes all along the south fence.  I am going to plant a row of red sweet peas along this fence in hopes that the mixture of red flowers with the white  roses will be stunning.  I also have lots of strawflower, statice and salvias that seem to be thriving.  Check back in the spring to see what will hopefully be my best pictures ever!

Green Strawberries (or fun with ethylene)

Have you ever purchased a green strawberry? We buy green bananas all the time.  Sometimes we even buy green tomatoes.  But why haven’t you ever bought a green strawberry?

All fruits (and many vegetables and nuts) fall into two categories based on their ripening characteristics: climacteric or non-climacteric.  Climacteric fruits will continue to ripen after the fruit has left the plant.  Non-climacteric fruits stop the ripening process the minute they leave the plant.  That is why you have never bought a green strawberry.  A green strawberry will always be a green strawberry.  It will never turn red, it will never get juicy and it will never taste good.  Strawberries are the quintessential non-climacteric fruit.

Bananas, on the other hand are the quintessential climacteric fruit.  Bananas are the most consumed fruit in America.  According to a 2006 report by the USDA, each American eats a whooping 25.14 pounds of bananas per year.  This is amazing when you think about how perishable bananas are and the distances they have to travel to get here (the top producer and exporter of bananas is India).  An understanding of the science behind this climacteric/non-climacteric thing is what allows us Americans to eat so many things that come from so far away.

Ripening is controlled by several variables.  One of these is ethylene.  When fruits start to ripen they produce ethylene.  Knowing this, we can hasten ripening by exposing the fruit to ethylene or we can slow down the ripening process by chilling the fruit (which suppresses ethylene production and is how they keep bananas fresh for so long).

The last of the yupneck’s 2010 tomatoes

O.K. I know you are thinking “This is a pretty cool horticultural fact and all, but what can I do with it?”  Well, it can help you save your fall tomato crop, that’s what.  Tonight, it is supposed to get down to 28 degrees at my house.  I am fairly certain this is going to finish off my fall tomatoes.  I have nursed them through two light freezes already.  Each time a little more of the foliage got burned and I had to cut it back.  Not much protecion left for the tomatoes that are still on the vine. So, tonight I am going home and picking what is left of my green tomatoes.  I will then take them in the house and put them in a brown paper bag with two or three ripe bananas.  I will fold the bag shut and leave it for three or four days.  When I open it up this weekend, I should have a bag full of red tomatoes!  The ethylene that is being released by the bananas will save my fall tomato crop!

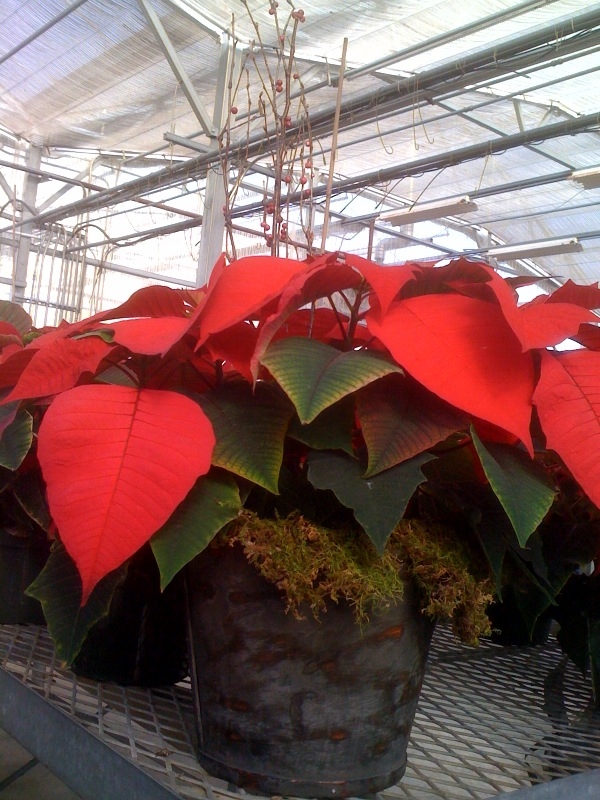
Poinsettia grown by me in my Greenhouse Management course taught by a real Master of Horticulture, Dr. Terri Starman. Our poinsettia’s were wrapped in brown paper sleeves for shipment.

Here is another useful ethylene tip.  If you bring home flowers or potted plants this holiday season that are wrapped in plastic or paper  (this is common with poinsettias), un-wrap them ASAP.  You see, those plants are producing ethylene as well.  The wrappings will trap the ethylene and your flowers/plants will drop their leaves/petals pretty quickly if you do not get them out of their protective coverings.

Now that you have the facts about ethylene you can use the handy chart below to determine which fruits you can buy while they are still “green” and which fruits will never get ripe for you once they leave the plant.

Climacteric Non-Climacteric
Apples Bell Pepper
Apricots Blackberries
Avocados Blue Berries
Bananas Lemons
Cantaloupes Limes
Figs Oranges
Nectarines Grapefruits
Peaches Raspberries
Pears Summer Squash
Persimmons Egg Plant
Plums Pumpkin
Tomatoes Strawberries
Watermelon  Grapes

Spider Lilies in Heaven

Spider lilies outside the home of the Graceless Gaijin in Totsukawa this past October

A young friend of ours is currently doing one of the coolest things that I can imagine a tall, blonde, 22-year-old American ever doing after graduating from college.  She is teaching English to Japanese elementary students in remote, rural Japanese village named Totsukawa.  While she is away, she is keeping a blog so all of us who are stuck in our mundane, state side lives can live vicariously through her.  She is an excellent writer.  When I was reading her latest post, I came upon a little gem that really caught my eye: “Spider lilies are called “higanbana” in Japanese.  According to Buddhist beliefs there is a river that separates the world of the living and the world of the dead, and higanbana grow on the opposite bank to guide the spirits across the river.”   Now how cool is that?  Spider lilies leading the way to Buddhist heaven.  This pleases me greatly since spider lilies are probably my favorite bulb.  I don’t know if I will go to Buddhist heaven (or Christian heaven for that matter), but if I do get to go I really like the thought of spider lilies leading the way!

My spider lilies (Lycoris radiata) were a gift from the previous homeowner.  The first fall that we were there, we noticed these odd, single stems beginning to shot up in our front yard.  We had no idea what they were but we decided to mow around them and see what they would become.  Well we were pleasantly surprised when the flowers burst open!  I instantly fell in love with these bright red, exotic looking beauties.  When I found out that one of their common names is “Naked Ladies”, I decided I loved them even more!

Until I read her post, I did not realize that spider lilies are native to Japan.  These rather unique looking bulbs rise up out of the ground on a single stalk and produce a single, red flower.  They usually bloom here in late September or early October.  Thanks to the graceless gaijin, I now know that they bloom at the same time in their native Japan. 

The spider lilies that surprised me again this October

Spider lilies have a relatively short bloom time, generally two weeks or less.  When they are in bloom you can extend their life by providing adequate water.  Once the flower dies, the foliage appears a couple of weeks later.  The foliage is a dark green clump that is reminiscent of lariope.  This clump will last until spring.

Luckily for us, these bulbs naturalize very readily in Texas.  If you buy bulbs (The Southern Bulb Co. is a great place to look: http://www.southernbulbs.com/catalog/index.php), you can plant them in full sun or partial shade.  The bulbs should be buried to a depth of three or four inches in good soil that has been amended with lots of organic material.  Provide normal water through the spring and summer and then wait for the fall show.  Since they naturalize so readily, you can also divide the bulbs you already have.  It is best to do this in the spring after foliage has died back.

Since the blooms and the foliage of the spider lilies eventually all die and disappear, I always seem to forget they are there.  Each fall, the appearance of those single “naked” stalks always lifts my spirits and informs me that once again, it is time to slow down and pay attention to what nature is about to share with me.  I don’t know if Spider lilies will line the path to my heaven, but I certainly hope they do!