The Gardens of the Philbrook

Mrs. Yupneck entering Villa Philbrook. If you think the front is impressive, wait until you see the backyard!

This past weekend, the yupneck and his lovely wife took a much-needed break.   We headed to Tulsa, Oklahoma for a little R&R.  If you have never been to Tulsa, you should make a goal to go.  I have been several times now and each time I discover something more amazing than I did the time before.  This city is truly a gem.  With a population of approximately 250K, it is the perfect size to provide you with all of the big city amenities while maintaining the feel of a small town.

Tulsa used to be the oil/energy capital of America long before Houston took the title from them.  Because of this, there is still a very large oil and gas presence (and money) in the area.  All of that oil money has blessed Tulsa with an incredible collection of Art Deco buildings and a thriving arts culture.  However, I did not come to see buildings or art.  I came to see plants.  And boy am I glad I did.  Horticulturally, Tulsa is a beautiful city.  It is dotted with lovely parks, beautiful public gardens and absolutely fabulous neighborhoods.  Those folks in Tulsa evidently love their plants as much as the yupneck.  I saw so much beautiful stuff that I cannot include it all in a single post.  So, here is the first installment of the Great Tulsa Escape Weekend.

The "backyard" of Villa Philbrook

Our first stop was the Philbrook Museum of Art.  This Italian Renaissance Mansion was a gift to the city of Tulsa from Waite Phillips.  The mansion is spectacular and the art amazing.  However, it was the 23 landscaped acres surrounding the property that really got me going. 

After passing through the central gallery, you quickly come to the center of the museum.  It is from here that you get your first view of “the backyard”.  To say it is impressive is a huge understatement.  The Italianate Garden was designed and installed with the house in the 1920s. 

One thing I have begun to notice as I have toured gardens and landscapes this summer is how simple the plantings are.  Mass and repetition are two of the founding concepts of landscape design; and they have been used exquisitively in this garden.  Above, notice that the majority of the picture is made up of just three plants: boxwood, grass, and jasmine.  These three elements are strikingly combined in the parterre.

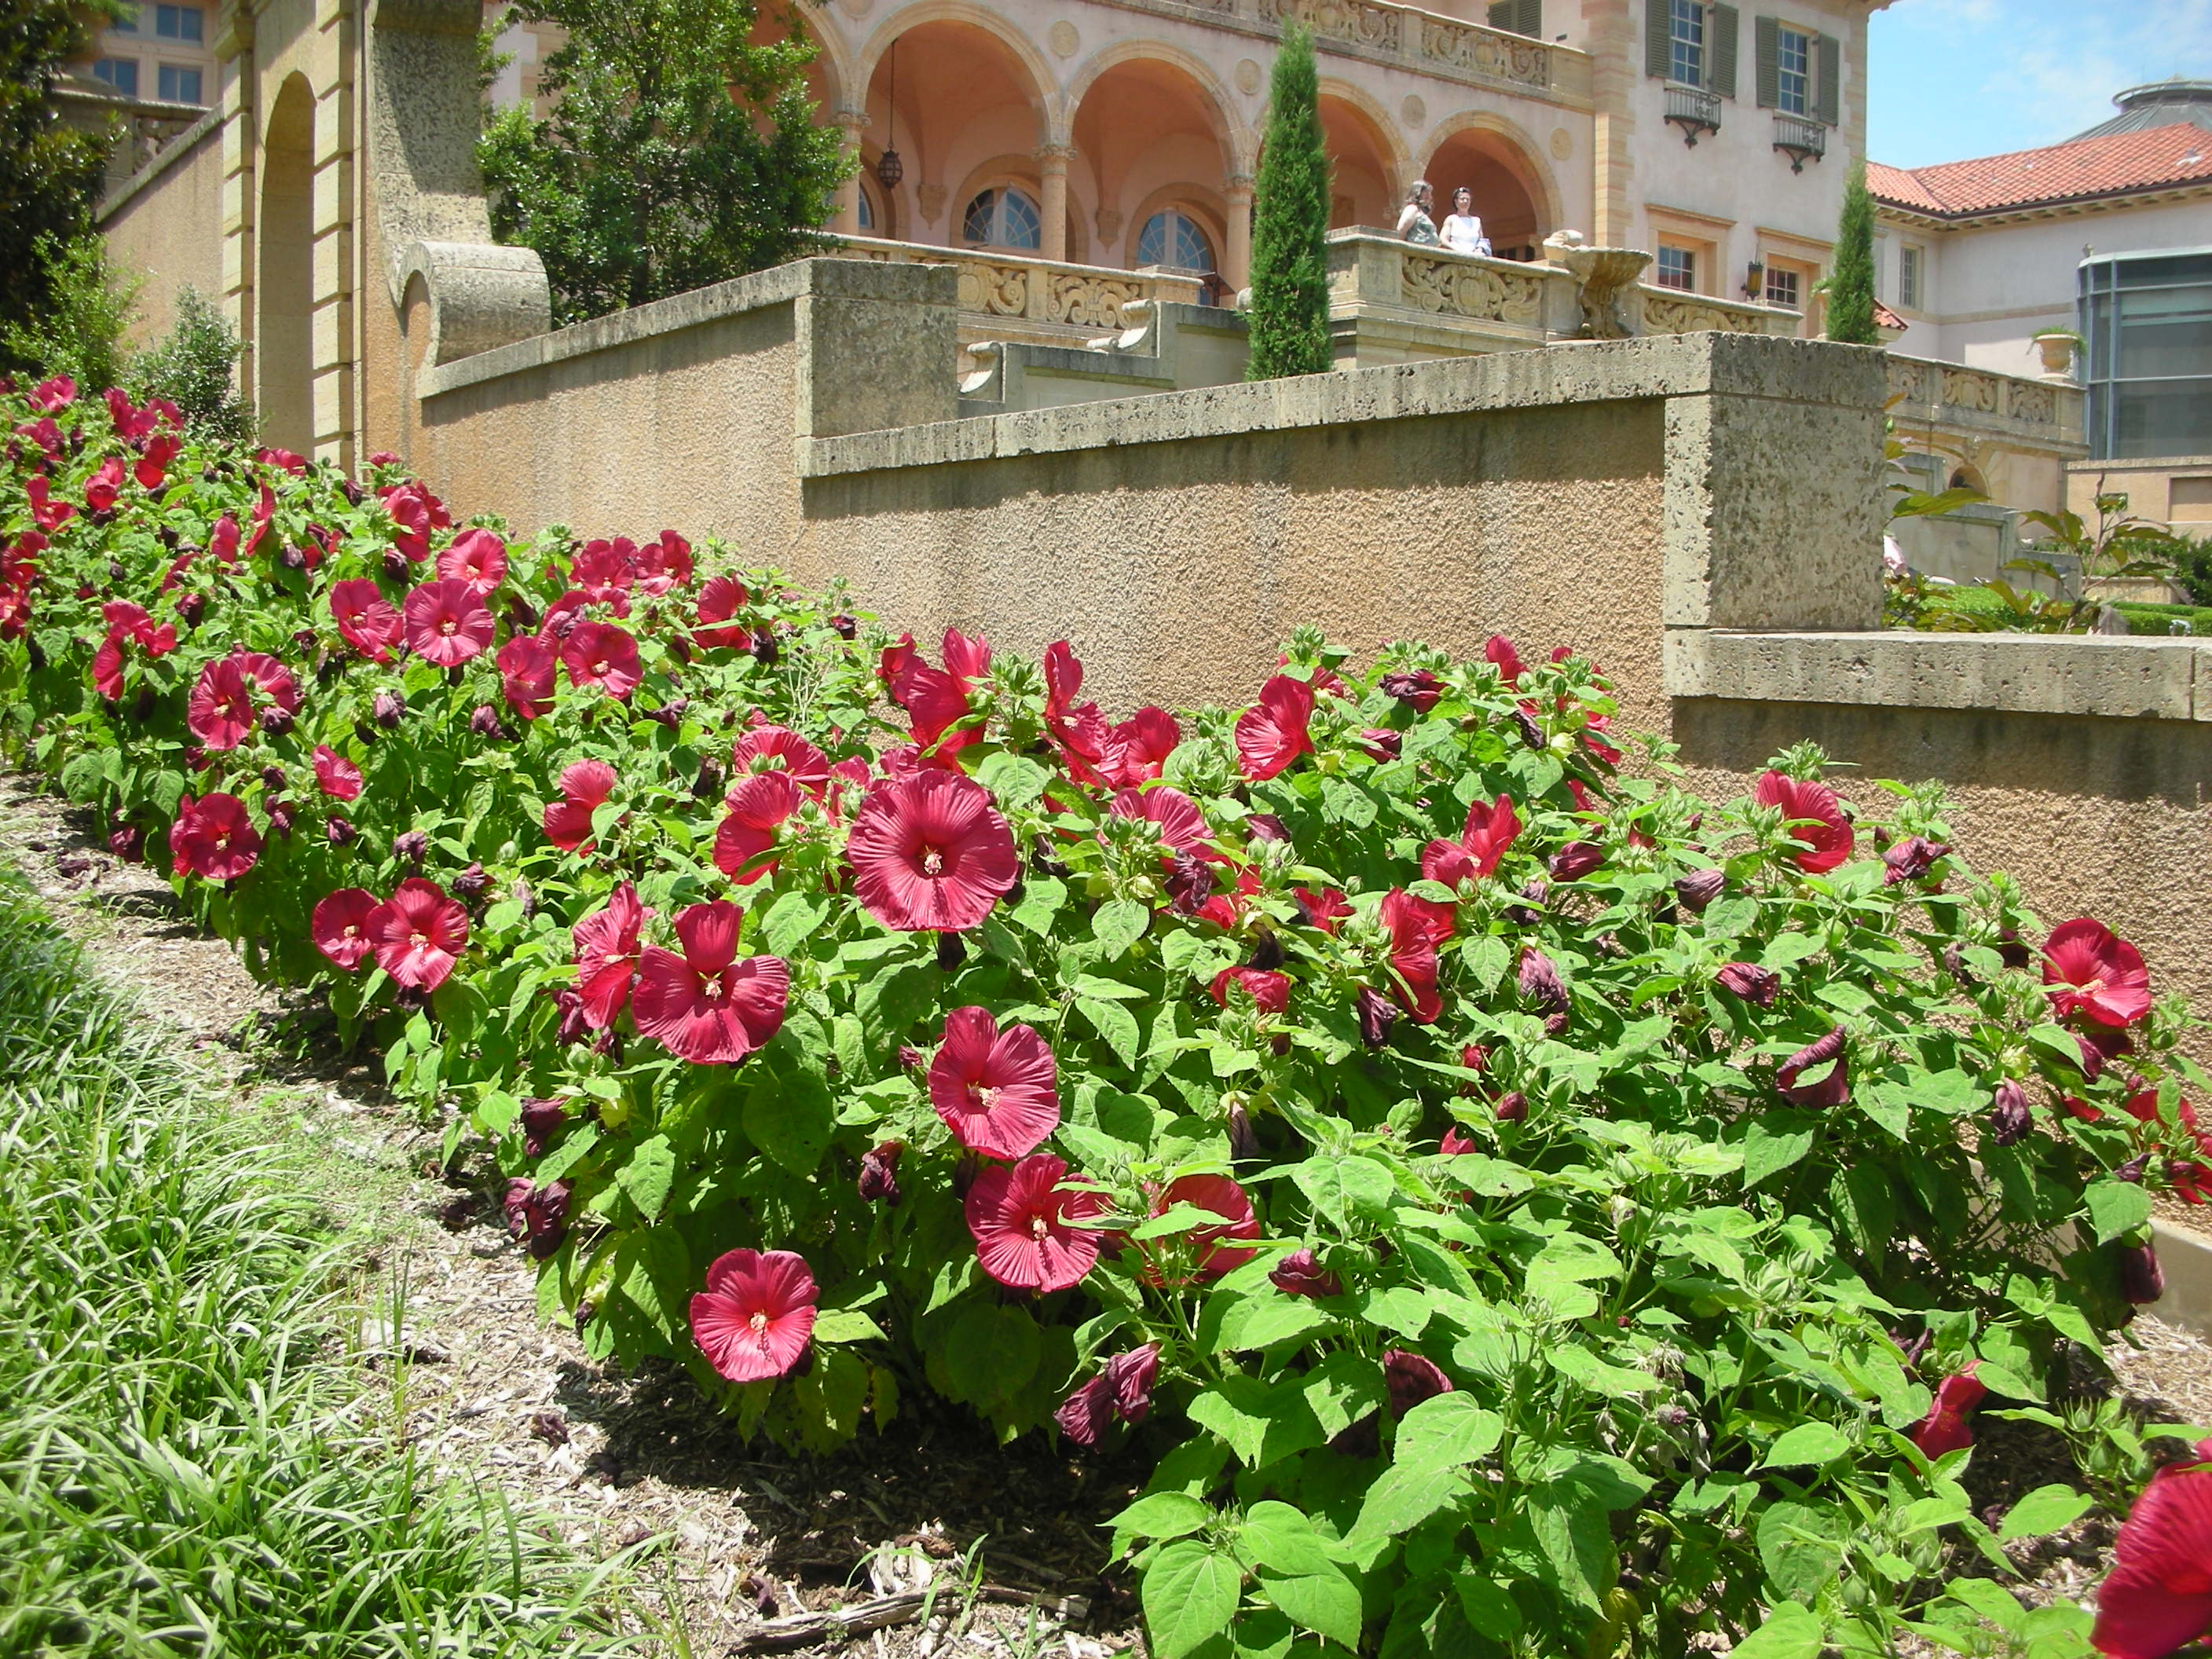
A mass planting of hardy hibiscus makes a lovely hedge at the Philbrook

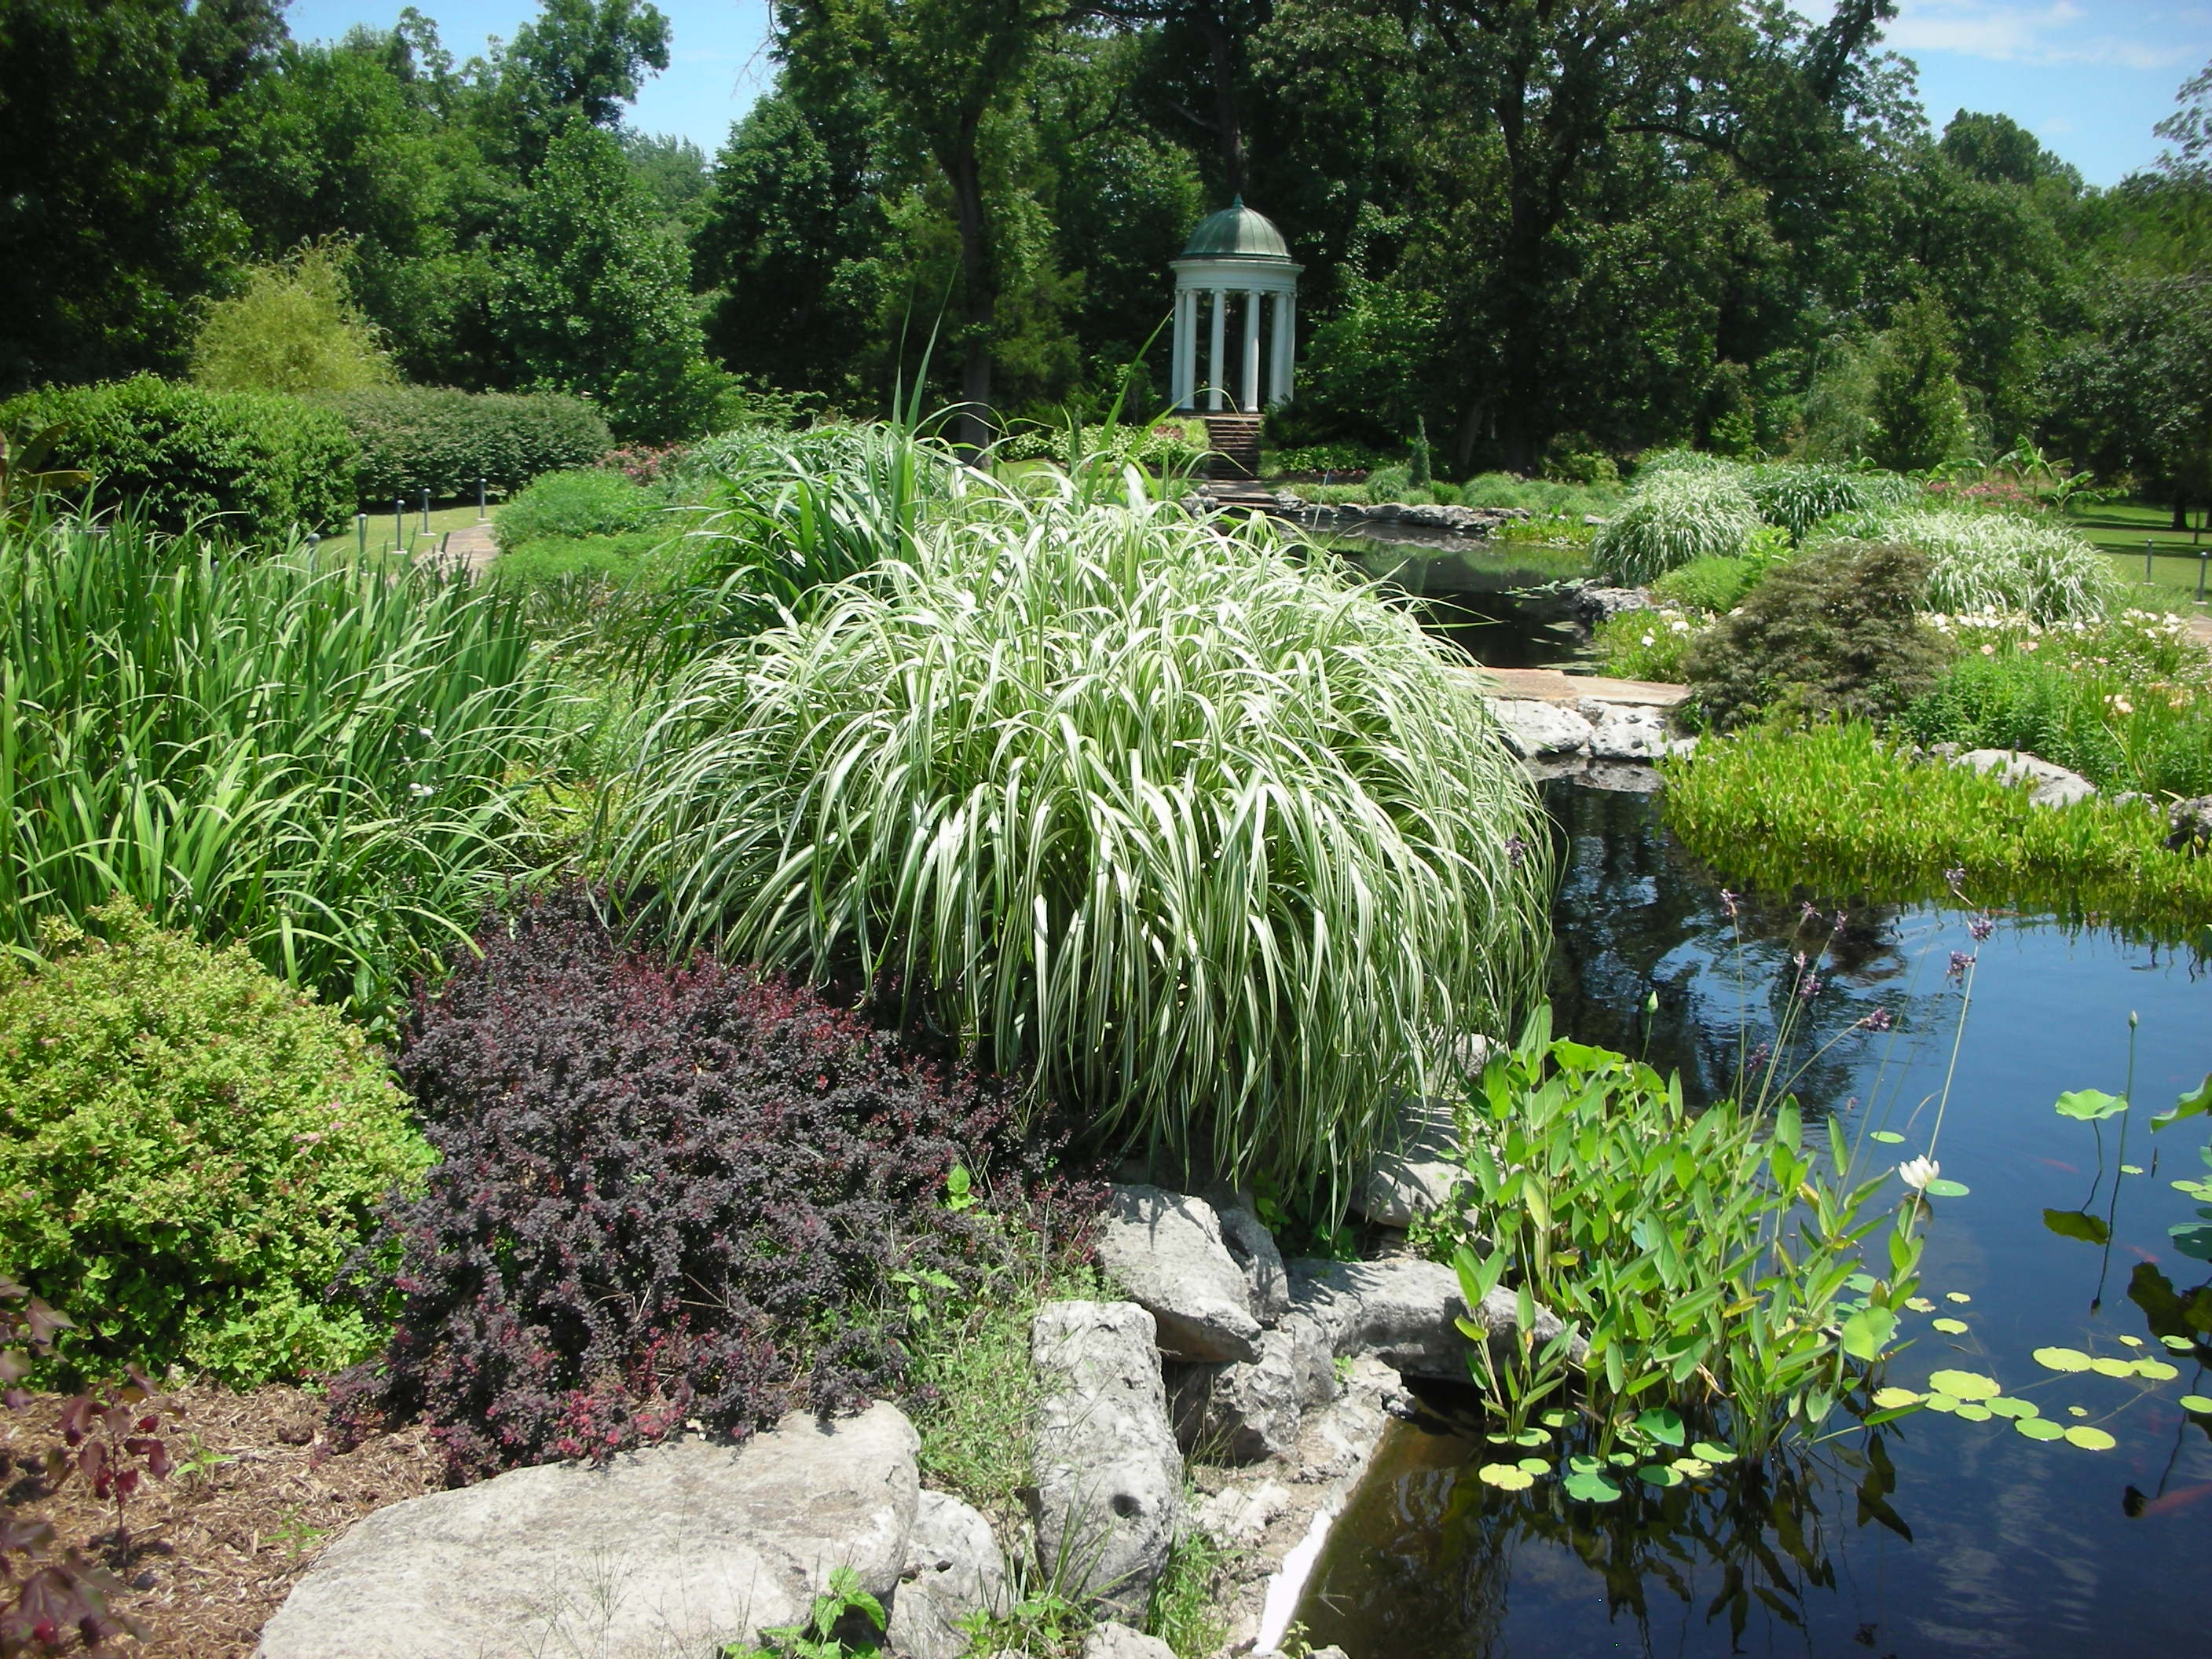
As you walk down the hill, you leave a formal parterre and enter the water garden.  While water is a constant theme of the entire garden, the pond in the lower garden is the focus.  Here plantings were selected to give a more “wild” or natural appearance.

Lovely combination of variegated miscanthus and barberry

 The lower garden is flanked by a very lovely structure called “The Lover’s Chapel”

The Lover's Chapel

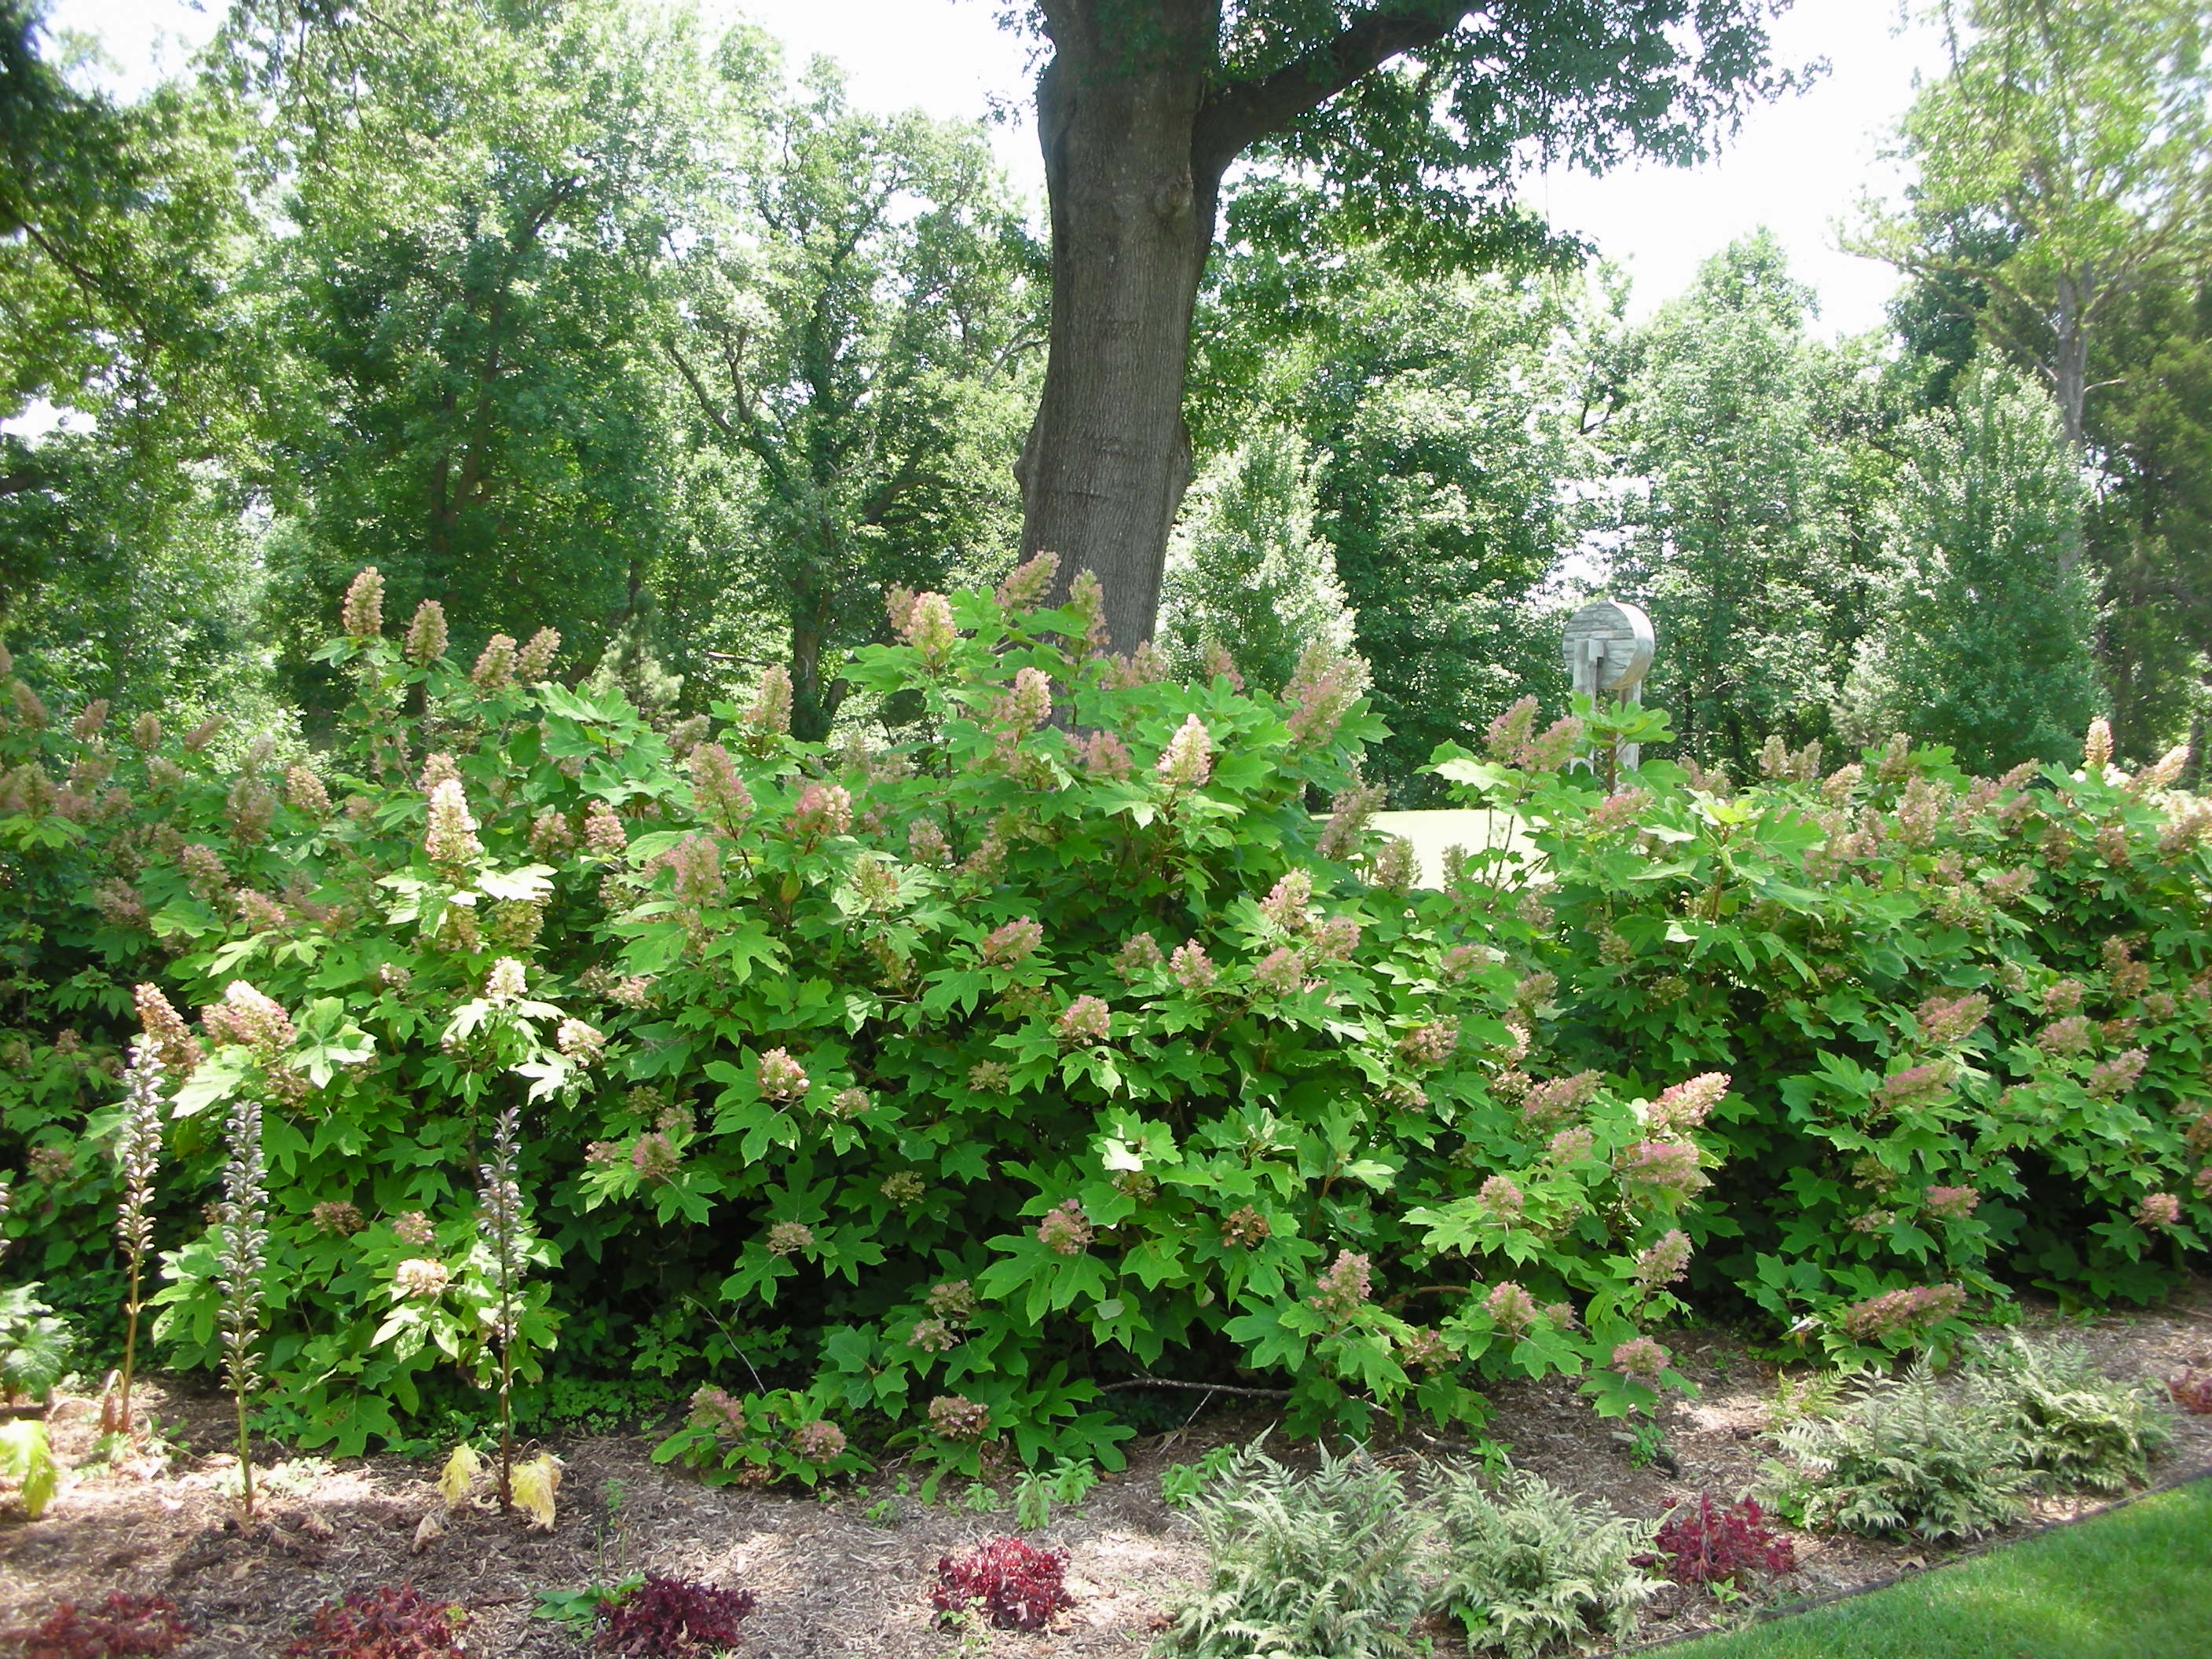
I was amazed by all of the plants that they can grow in Tulsa that i just have had very little to no luck with.  Lots of hydrangea.  Here is a very beautiful mas of oak leaf hydrangea

Oak Leaf Hydrangea and Bears Britches

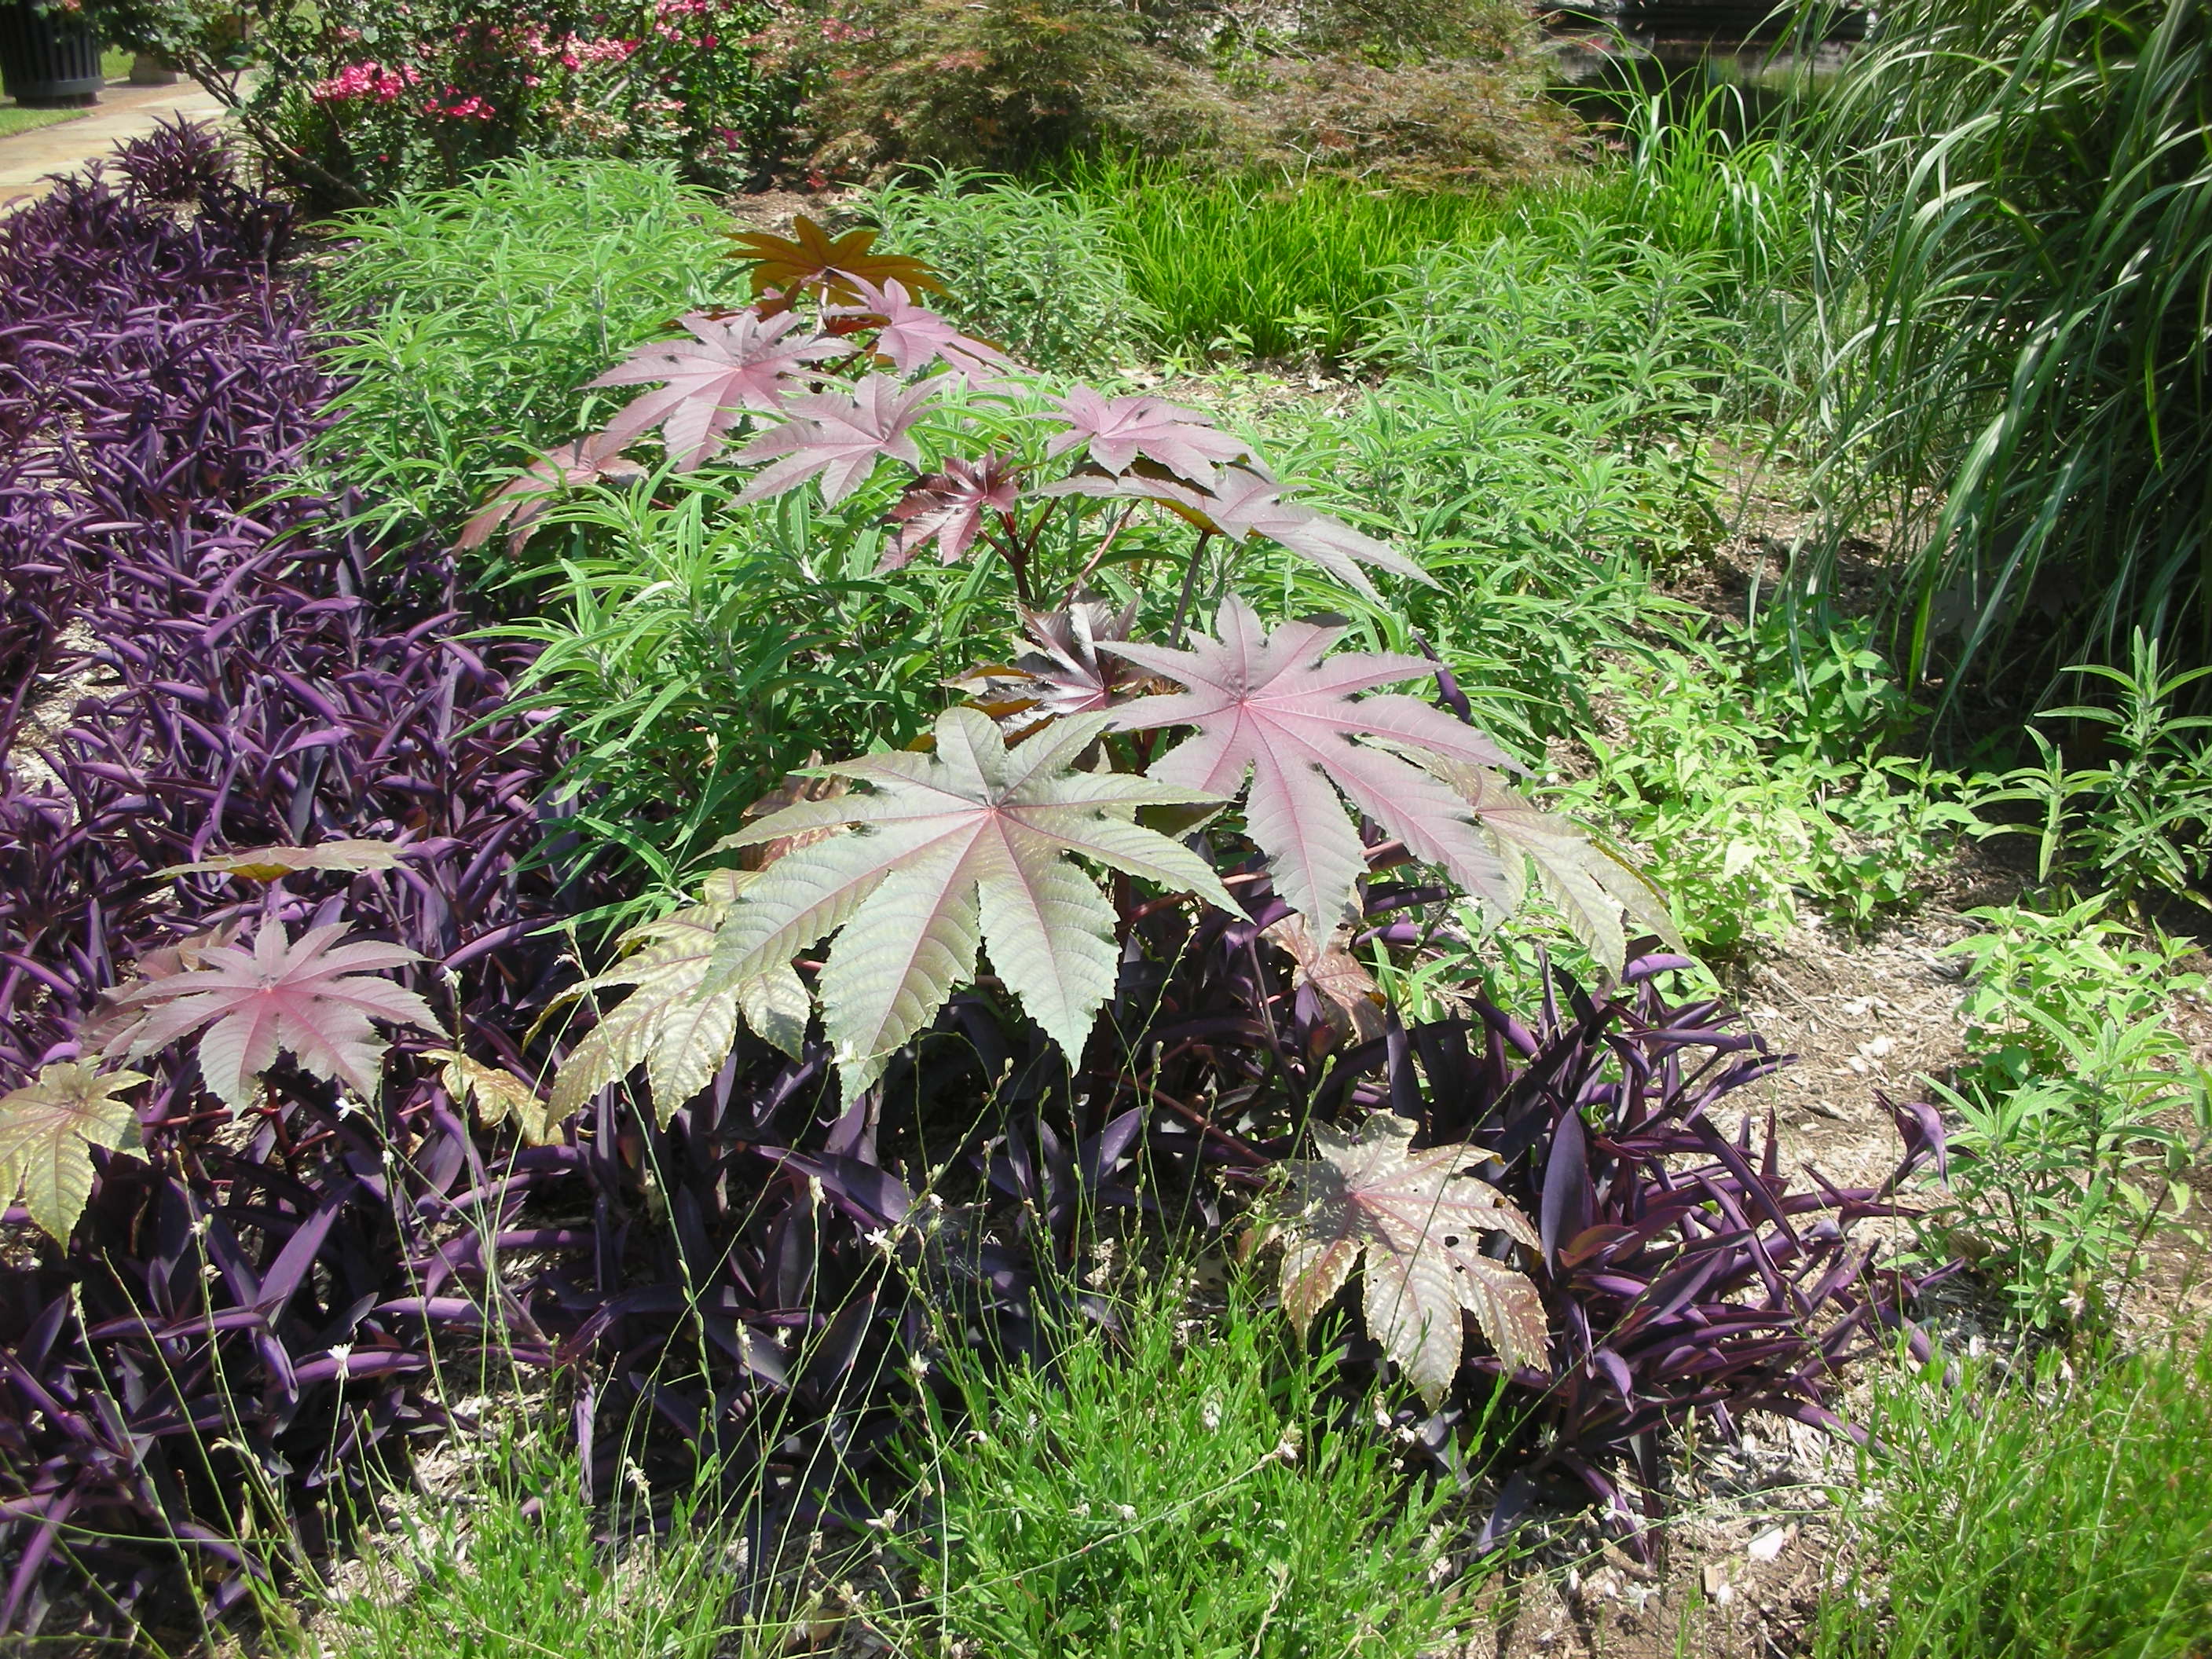
There were a few things growing at Philbrook that I have in my garden.  Below is a picture of a couple of things that are very common in our part of the world.

Castor bean and purple heart

 I really want a pond in my own garden.  The Philbrook’s ponds only made me want one more.

Koi and water lilies at the Philbrook

And finally, I will leave you with a view of Villa Philbrook looking up from the lower garden.

The Potato Box Experiment Is A Complete Failure

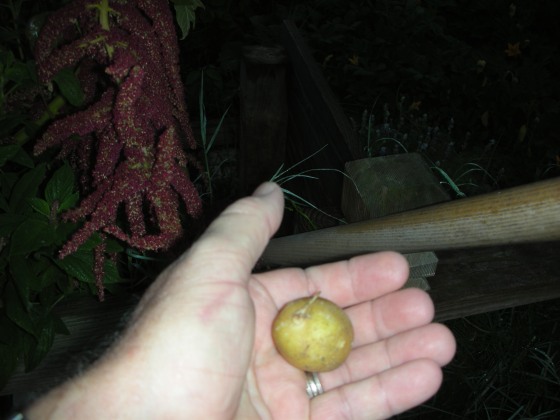
This is what failure looks like. Out of two large potato boxes, this is all I got.

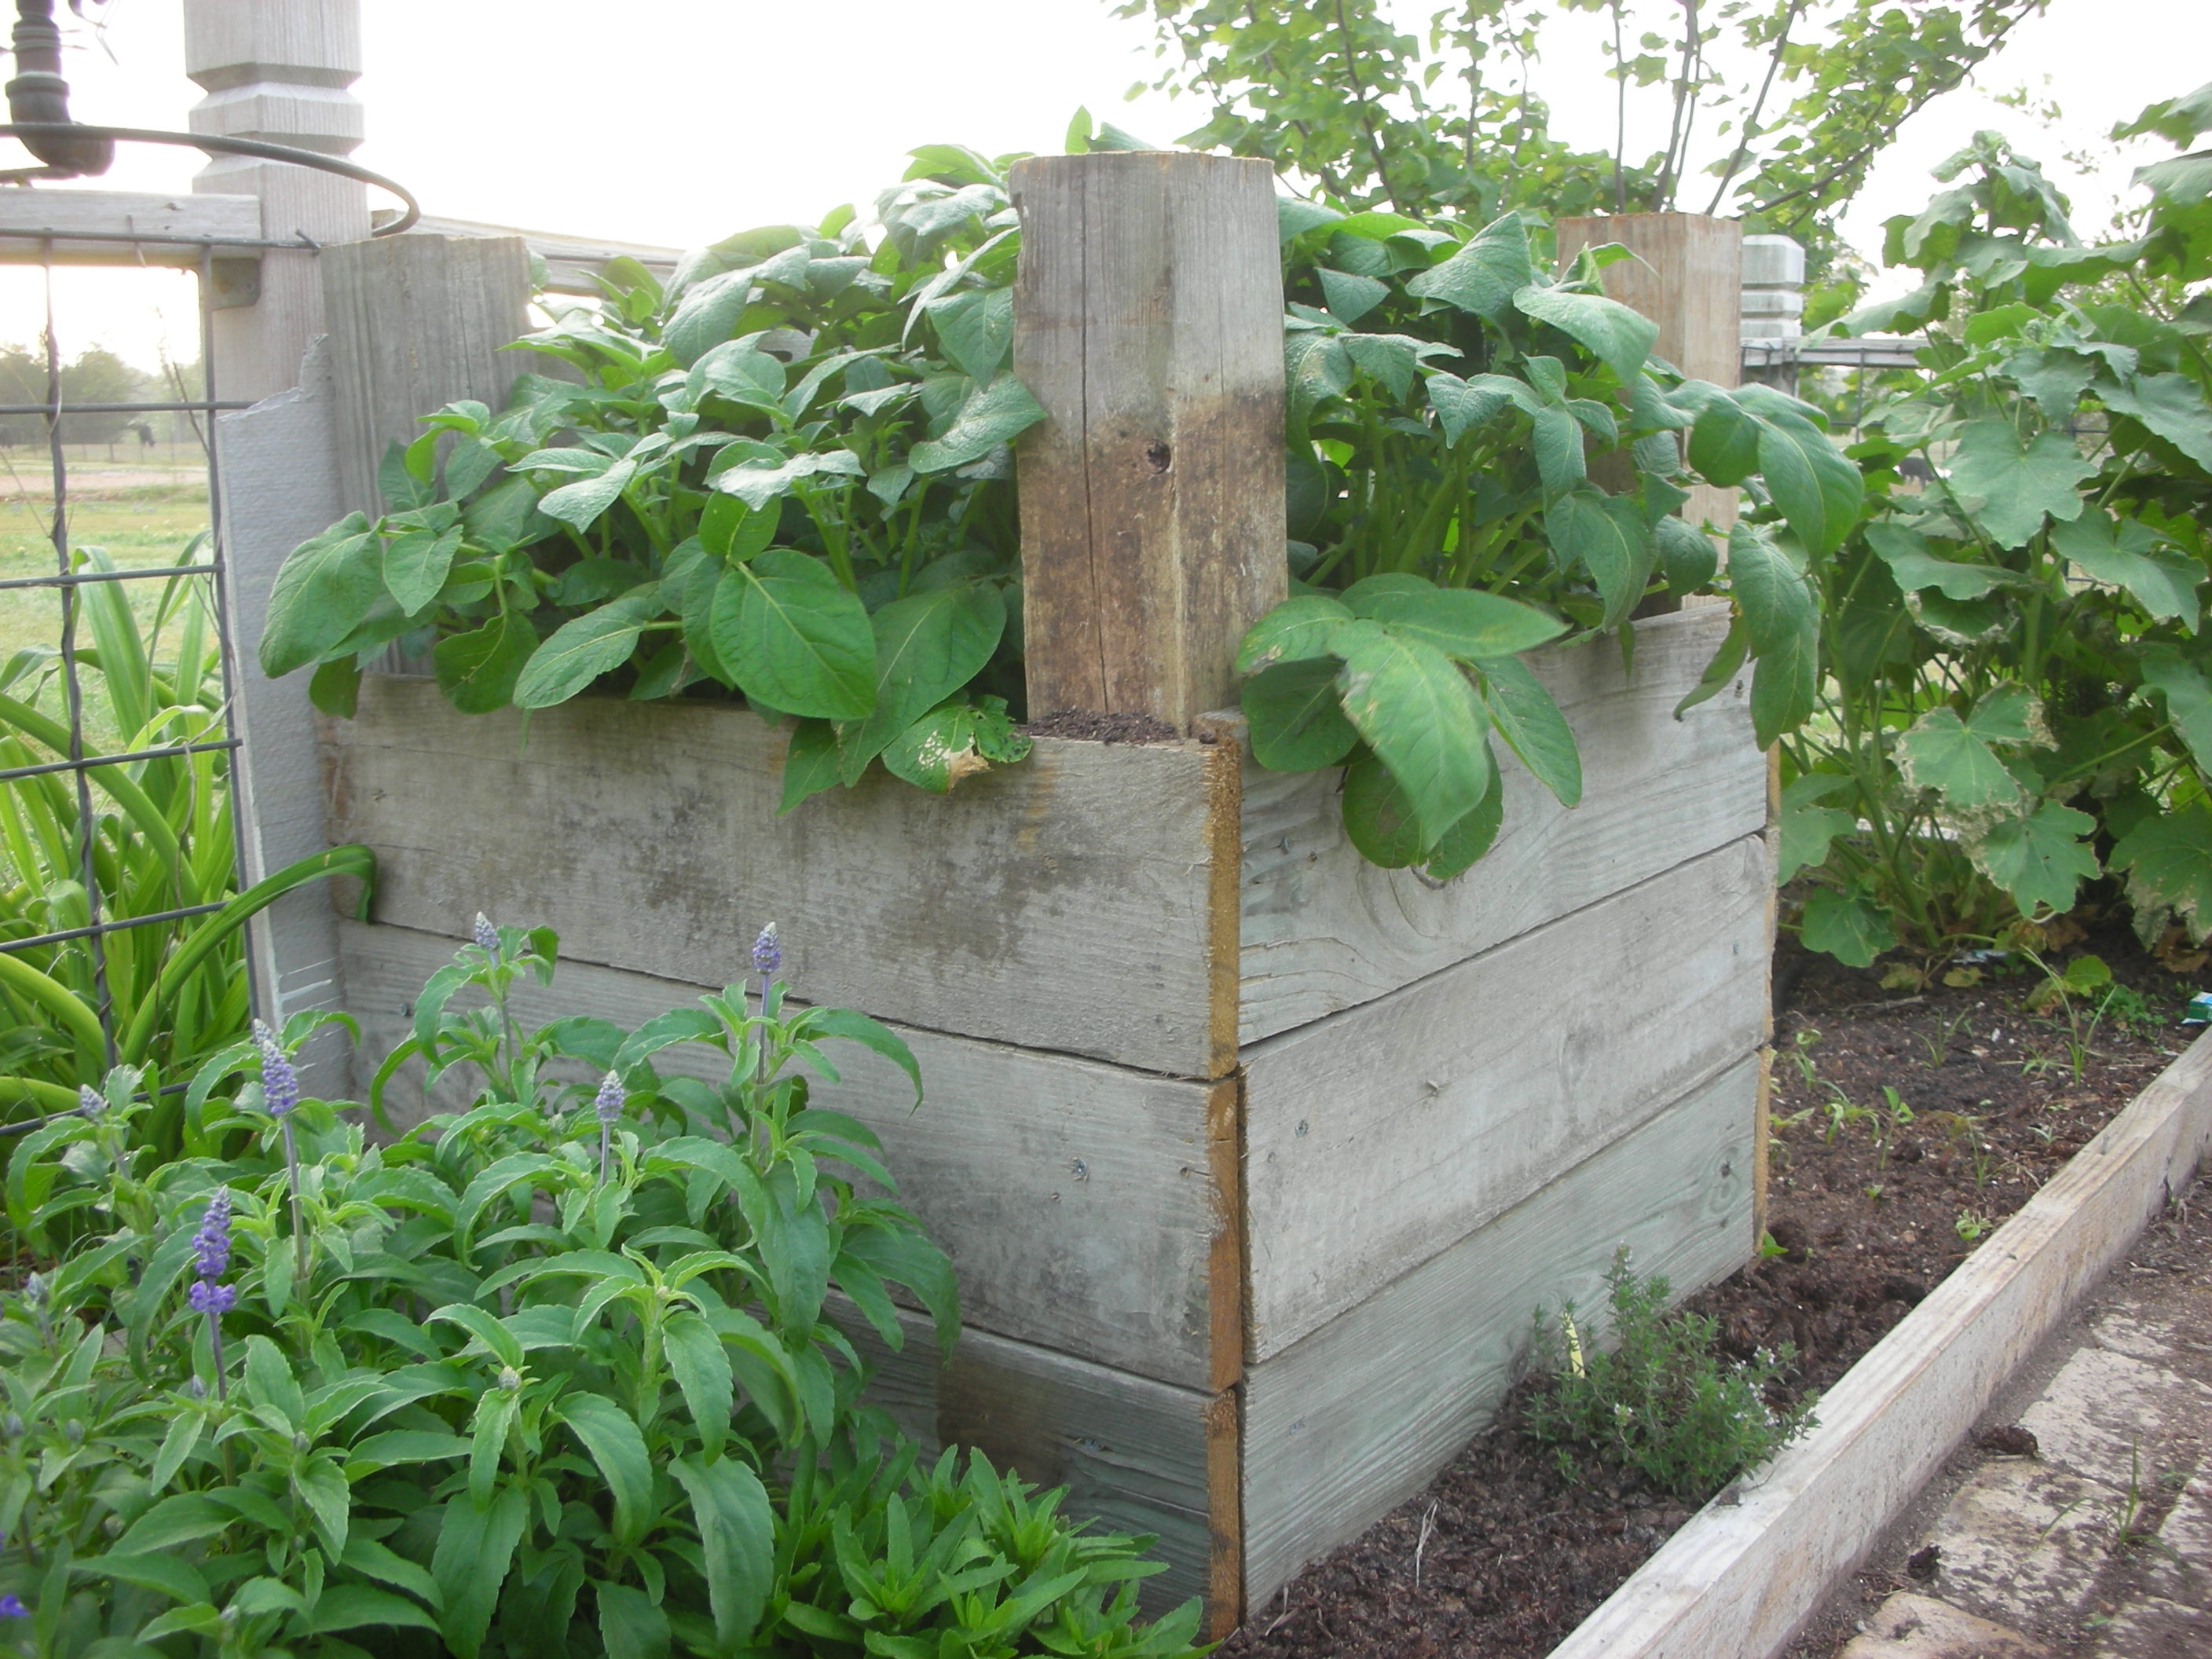
Well, all of the foliage of the potatoes in my potato box died so I decided to take the boxes apart and harvest my 200 lbs of potatoes.   Imagine my shock when I took the sides down from the box growing the red La Soda’s and found — NOTHING!!!  That is right, nothing.  Not a single little potato.  So, much discouraged, I proceeded to take apart the box containing the white Keenebec’s.  I was relieved to discover that this box was not a total failure.  I found one tiny little potato, smaller than a ping pong ball.  So, I am calling both boxes failures. 

I don’t yet know what went wrong.  I followed the instructions that I found on the web very carefully.  I spent quite a bit of time, effort and money on this and it was a complete and total disaster.  I will be doing some research to see if I can get to the bottom of this mystery.

Everything looked so good in April. I really cannot figure out what went wrong.

I just cannot yet accept that this is a bad method for growing potatoes.  There are just too many magazine articles and web posts about it for it to be an unsound method.  Right now, I am going to write this off to a bad year.  My friend Cynthia Mueller tried to grow several varieies of potatoes in her BCS garden and she had dismal luck as well.  As I have talked to other gardeners I have found that this was a hit and miss year for potatoes in general.  Some folks did well, but many folks that I have talked to have not had any luck either.

I am not a quitter.  I will try this experiment again in the fall. Fall potatoes are a bit trickier than spring potatoes but I am going to try nonetheless.

Save Money On Perennials Now!

Lovely vitex that I got for $17 at Wal-Mart's summer close out. This tree was marked $69.99. It was very root bound so I did a lot of root spreading and trimming. Also trimmed back the top. You can see, it was well worth the $17 and the extra effort.

This may sound funny, but I hate buying plants.  You see, I am cheap and plants are expensive.  Even though I love getting new plants for the garden, I just cannot bring myself to pay what most nurseries want for their plants.  Don’t get me wrong.  I know a lot about the horticultural world and I know very well how much it costs to grow, market and ship a plant.  The horticultural world has done a great job at keeping the prices for their products down.  In fact, when you adjust for inflation, there has been no real growth in the price of bedding plants in the last ten years.  However, I still hate paying full price.  So, I don’t.  I am constantly on the look-out for ways to increase my garden without depleting my checking account. 

A $5 ornamental plum. My wife got two of these at Wal-mart during their end of season.

In the last month, I have purchased a lovely 7’ foot tall, three trunked Vitex (Vitex agnus-castus), two 7’ ornamental plum trees (Prunus cerasifera), two huge Southern wax myrtles (Myrica cerifera), three one gallon pots of variegated New Zealand flax (Phormium “Rainbow Queen”), three one gallon Purple Fountain grass (Pennisetum setaceum “Rubrum”) and a one gallon Broom plant (Genista racemosa).  While the list may or may not be impressive to you, what I paid for it should be.  I got all of these plants from the big boxes and I paid just $56!  That is not a typo.  I got five large trees and several large bedding plants for just $56.  That averages out to just $5.10 per plant.  How can that be?

I wish I could say that I was a master negotiator and I talked the owners of Wal-Mart and Lowe’s into selling me these fabulous plants for this ridiculously low price.  However, that would be a lie.  What really happened is this: Lowe’s and Wal-Mart are closing out their overstock from their spring buying.  I just happened to be in the stores when this was happening.

Plants I bought this weekend at the Lowe's summer close out. Total cost of plants shown: $10.34

Post season close outs happen twice a year at every nursery in America.  If you want to get the good deals, then you need to pay attention to when the stores receive their new stock — and then buy at another time.  In most of Texas, spring stock usually arrives around late February or early March and the fall shipments start coming by late August.  Armed with this knowledge, you can save a lot of money by purchasing your plants off peak. 

If you buy off-season, you need to keep a few things in mind.  First, you can realistically only buy perennials off-season.  Annuals (which usually mean Spring and Fall color) are only good for a short season.  It will not do you any good to buy pansies in July or mums in January.  However, if you want a good deal on loropetalum or New Zealand flax, then you can buy and plant them anytime of the year.  With a little care, you can plant perennials after their off-peak selling season and they will become beautiful, well established plantings in next year’s garden.

Look at the size of that Southern Wax Myrtle. I got two of these for $10 each.

If you buy off-season, you will have limited availability.  If there is a particular plant that you want and it absolutely has to be that plant, then you probably shouldn’t gamble that it will still be there at the end of the season.  Go ahead and buy it.  I have done it and there is no shame in paying retail.  However, if you garden more by form and color than by specific plant, there is a good chance you will find many things left in the nursery at the end of the season that will work somewhere in your garden.

One of my beds has wound up with a lot of purples in it: fall asters, liatrus and castor bean.  So I needed some yellow to compliment and break up all of that purple.  That is why I bought the variegated New Zealand flax.  The light green and yellow foliage and the upright, grass like form will be a great contrast to the mounding asters and the spiky liatrus.  This flax was $7.99 in March.  I got it $2 in June.

Another problem with off-season plants is the fact that they have been in the pot for so long.  When you remove these plants from their pot, many will be completely root bound.  That is no problem to the experienced gardener.  If you buy a root bound plant, simply unwind what you can and trim off the rest.  The plant will actually thank you for this.  Also remember that the top of the plant should be in balance with the bottom.  If you cut many of the roots you will need to prune the top as well.

Finally, if you buy off-season you are going to have to give these plants a little extra TLC once they are planted.  Once they are in the ground, make sure they receive enough water to keep them from going into stress.  If you give them a little extra care, they will grow and thrive just like the plants that your neighbors bought in season and paid full retail for.

There are many, many beautiful things to buy in the nursery.  I wish I could afford them all.  Since I can’t, I buy what I can off-season.  If you are willing to wait, are flexible in your design and willing to give your off-season purchases a little extra TLC then you can have a very full and beautiful garden that didn’t drain your bank account!

Daikon

The other day I was at lunch in BCS (that is Bryan-College Station for all you non-Aggies out there) with several Masters of Horticulture.  We were talking about our gardens and I mentioned that my daikon were doing really well.  To my surprise, not a single one of these PhD Horticulturists knew what a daikon was.  I found this somewhat amusing but I guess if you do not eat a lot of Asian food, then you would have no reason to know about daikon. 

Sydney Pickle, Hannah Michna and Lindsey Pickle pull the first daikon of the year from the yupneck's garden

If you are not familiar with daikon, here is a little background.  They are a root crop much like carrots or parsnips.  In fact, the Japanese translation of their name means “large root”.  Daikon is a radish and it is a staple of Japanese food.  They cook it, pickle it, stir fry it, stew it and eat it raw.  The Chinese, Koreans and Indians also eat a lot of this spicy root.  The greens are also edible.  One reason it is so popular in the Far East is it’s storage capabilities.  Unbruised daikon can stay fresh for three months in a root cellar.  When dried, they can last much longer.  This allows the Japanese to have a ready supply of a vitamin C throughout the long winters.  There are more acres of daikon in production in Japan than any other vegetable.

There are two varieties of daikon.  One looks like a big turnip and can grow to 100 pounds.  However, the one that I grow is much more common.  Raphanus sativus var. longipinnatus is a long white root that resembles a carrot.  It has white flesh and skin.  It can grow to lengths of 36” but is most often harvested when it is between 12” to 18” long and the diameter is between “1” and 2”.  Summer diakon have a sharper and spicier flavor than fall diakon.  Also, the taste of the daikon changes as you progress up the stalk.  The hottest (and most radish-ey tasting) part is near the tip.  The flavor becomes milder as you move up the root toward the greens. 

Daikon, Chinese cucmbers and volunteer zinnias in the potager

Daikon are very easy to grow.  They like rich, loose soil and full sun.  Plant at the same time as you plant other root crops.  They actually work best as a fall vegetable but do quite well in the spring.  Since they produce roots that weigh over a pound, a small amount of space will provide you with lots of radish. 

I work with several Indian and Chinese ex-pats so I grow enough to share.  This year, one of my friends took some home and had his wife make me pickles.  They are AWESOME!!!!  I have enjoyed these pickles so much that I am including the recipe here.  It is a simple and delicious recipe that will make a perfect side for all of your outdoor summer grilling.  Hope you enjoy!

Debbie Kwan’s Daikon Pickles

Slice the daikon and sprinkle with about 1 tsp of salt. Use your hands to knead the vegetables for about 3 minutes.  Place in fridge and wait about 15-30min until water has been expelled.  Drain in a colander and rinse under cold running water, then press gently to expel extra water.

 Combine 1/2 cup sugar, 1/2 cup rice vinegar and 1/2 cup of water in a pot on low heat until the sugar has dissolved. Let cool then pour over the daikon. The brine should cover the daikon. Add peppers of your choice to make it spicy.  Let it marinate in the brine for at least 1 day before eating. They will keep in the refrigerator for up to 3-4 weeks.

Daylilies-A Month of Blooms

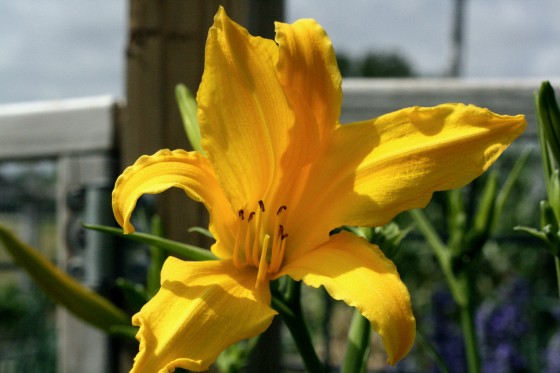
One of the daylilies that was passed along to me from my wife's grandmother

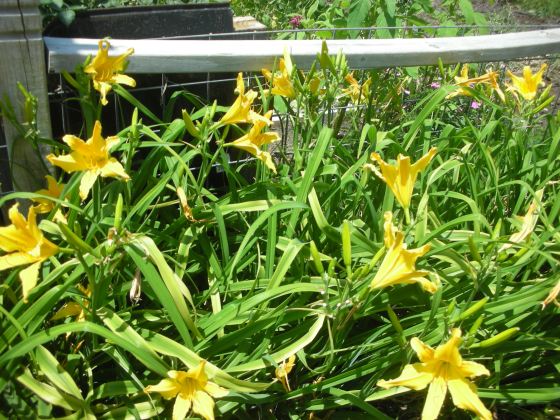
Very few plants in my garden give me as much enjoyment as my daylilies.  Early in April, I start watching them.  I am looking for that first sign of stalks. When I see these I know that soon, the green border around my potager will be covered in bright yellow flowers.

A masss of Nana's daylilies border my potager

My daylilies were passed to me by my wife’s grandmother.  Not directly, though.  A few years after she passed, we dug them up from her home place in the sandy loam of East Texas and moved them to the black clay of Washington County.  This sentence should tell you a lot about daylilies.  First, they lived at Nana’s for several years with absolutely no care.  So, daylilies are tough.  They also survived being dug out of a beautiful loamy soil and moved to a not so wonderful black clay.  So, daylilies are adaptable.  Throw in the fact that they are absolutely reliable, pest free and beautiful and you begin to understand why so many people love them.

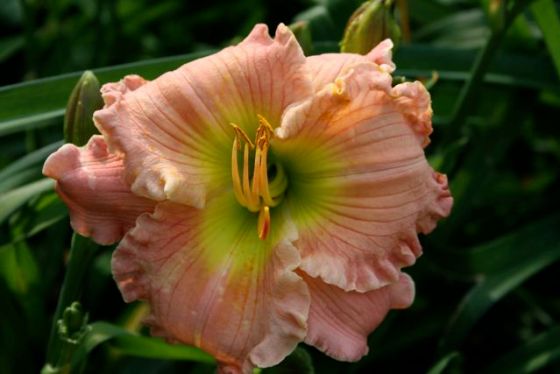
A lovely daylily bred by Chris von Kohn. You can buy this and others from him. All of his contact info is at the bottom of the post.

History – Daylilies originated in China, Korea and Japan.  They found their way to the Americas by the 1700s.  The Tawny Daylily was one of the first.  It quickly escaped cultivation and is now so common on the east coast that many think it is a native wildflower.  This flower was often planted close to outhouses and so it derived the very unfortunate common name of “Outhouse Lily”.  Daylilies began to lose their popularity in the US in the 1800s.  In 1920, the “Hyperion” daylily was introduced.  This began the resurrection of the flower as a major bedding plant in American gardens.

Despite their name, they are not true lilies.  Daylilies belong to the genus Hemerocallis and there are over 60,000 registered cultivars.  Their name is derived from Greek and literally means “beautiful day”.  Since the 1950s, the US has been the world leader in daylily hybridization.  I have a young friend at A&M named Chris von Kohn.  He has already created over 1000 daylily hybrids.  He hasn’t gotten one named yet, but he is only 22!  Chris is an up and coming Master of Horticulture and I am betting that we are going to be hearing a lot more about him in the years to come.  Thanks to the efforts of people like Chris, you can now own daylilies in every color except blue.  Some have  a strong fragrance and others have none.  There are daylilies with ruffled petals and multi-colored petals.  Some have “eyes” and still other sparkle with “diamond dust”. 

Another lovely daylily bred by Chris von Kohn. He is about to start grad school so he will greatly appreciate every order. All of his contact info is at the bottom of the post.

Planting – Daylilies are incredibly easy to grow.  Plant them in direct sun (or dappled shade) in well worked soil.  Dig a hole about 8” deep and make a small mound in the center of the base.  Spread the roots of the plant over this mound and backfill to a point where there is no more than 1” of soil over the crown.  If the roots of the plant are too big for the hole, trim them.  Water them in and then apply mulch (but not around the crown).  Water regularly for the first year.  After that, the daylily should be able to survive with minimal amounts of supplemental water.

Dividing – Daylilies reproduce rapidly.  If their clumps become too dense, they will begin to flower less and less.  Because of this, you need to divide them every two or three years.  This is best done in late summer or early fall.  Also, it is a good idea to give your plants a good watering the day before you do your dividing and transplanting. 

There are two ways to divide your plants.  The easiest is to just stick your shovel in the middle of the clump and remove half of the plant.  Since they have an extensive root system you may need to push your shovel all the way into the soil.  Use the shovel to work around the new clump and remove.  Replant in a prepared hole at the same depth as the original plant and water.  Place them about two feet apart.

Another creation of Chris von Kohn. You can buy this and others from him. All of his contact info is at the bottom of the post.

If you want to get individual plants, you can use a sharp knife to divide your clump into fourths.  Once this done, you can begin to remove individual fans.  Replant these fans like previously described.

Very few beautiful plants are as hardy or as easy to grow as Daylilies.  There are varieties that are hardy from zones 1 to 11.  Once established, they have a low water requirement and they are relatively pest free.  On top of all of that, they are incredibly diverse in color and form.  With so much to offer there is no reason for you not to grow daylilies in your own garden.

Buy Your Daylilies Here – Chris von Kohn will be selling some of his creations this fall.  They are incredible!  He is currently taking orders.  They are in bloom now so if you live in the Arlington/DFW area you can go by and pick your favorite.  He will mark it and save it for you and you can pick it up in the fall.  You can reach Chris at cvk007@earthlink.net or you can give him a call at either 817-269-7474 or 817-483-5146.   If you don’t live in the DFW area, just drop him an e-mail and he will be happy to send you pictures and then ship your plants when they are ready.

The yupneck with Chris von Kohn. He has just been awarded the outstanding senior agriculture student for horticulture by Gamma Sigma Delta, The Honor Society of Agriculture.