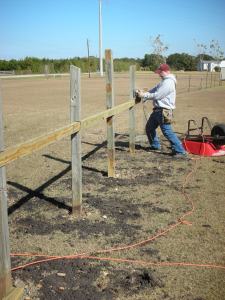
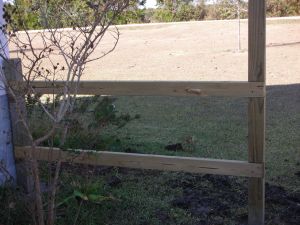
My wife and I made real progress on the picket fence this week end. In fact, we were rather surprised at how much progress we made. After a good breakfast and a few errands, we got busy. Before we could really get going we had to “notch the posts” to hold the stringers. For our fence design, we wanted the posts to show. The posts would then have 2 1/2″ pickets with 2 1/2″ gaps that hang on stringers that are flush mounted in the back of the post. After the top and bottom stringers were set, we trimmed the posts to their final height. The post tops were cut to be 6″ taller than the top stringer.
Next, we set up the cutting center. This was basically a sheet of plywood on two saw horses. I reinforced the plywood by placing three 4X4 posts under it and screwing them down. Next, I set up a cutting jig for the posts. This was done by screwing a piece of a 4X4 to the end of the plywood to serve as a stop for cutting the pickets. I then moved my chop saw until the blade was the proper distance from the stop. I then squared the saw and screwed it down to the plywood. Once this was a secure, I set up my portable table saw behind the cutting jig. I set the saw to rip pickets 2 1/2″ wide.
Now that the stretchers were in place and the cutting center was ready, my wife and I set about making the pickets. We did this by cutting 5/4″ boards that were 5 1/2 inches wide into 42″ long sections. We then ran these sections through the the table saw to create two 2 1/2″ wide pickets from one 42″ section. When the wheel barrow was full of pickets, we would go and hang them.
Hanging pickets is pretty easy if you have the right tools. In our case, the right tool was another jig. Since we had hung our stringers perfectly level, we used them to hold the jig that I built for this purpose. This jig was very simple. I took a 4′ 2X4 and screwed a 4′ 1X4 at a 90 on the top and another 1X4 to the back that hung past the bottom edge of the 2X4. This created a lip that I could use to screw the jig down to the stringer. This jig ensured that all of the pickets would be perfectly level across the top.
With the help of this jig, my wife and I set about hanging the pickets. Working together, she would hold and space the picket (using another picket), and I would screw them down. I used galvanized screws for this entire project so I do not have to worry about rusty screws staining my posts in the future. As you can see from the pic, we made very good progress. We got about two thirds of the front of the fence built in about four hours. Now that we have the jigs and “a system” we expect to finish the rest of this side of the fence by the end of next weekend. Check back to see how it goes.


