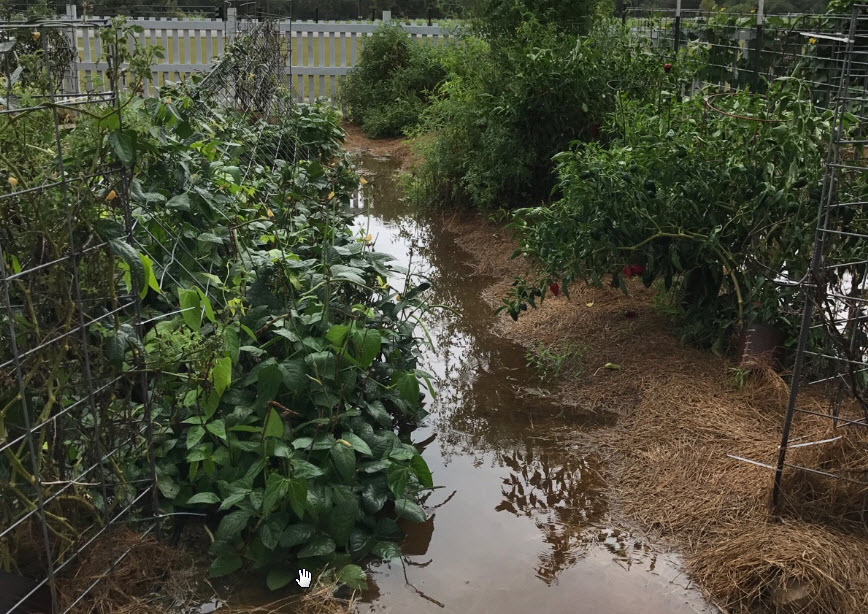
Tomato Trellises

If you have ever grown tomatoes, you know they have to be trellised.  If this is going to be your first year growing tomatoes, understand that “they have to be trellised”.  I have yet to meet the tomato bush that does not grow so big that it can fully support itself.  I guess that’s not true really.  All tomatoes can support themselves in their own way.  However, their way involves sprawling all over the ground.  This sprawl will work fine for the tomato since all it really cares about is reproducing.  It doesn’t care if its seeds are in fruit lying on the ground or if the seeds are in fruit that is 6’ up in the air.  However, as gardeners, we care very much where the tomato seeds (fruit)  are on the plant.  Because of this, if you are going to grow them successfully, you have to support them.

A homemade tomato trellis in my potager

A homemade tomato trellis in my potager

Why Trellis? – Since the tomato plant has the ability to create roots anywhere along its stem, tomatoes vines will root wherever they touch the ground.  This will create an ever wider and wider bush if left alone.  All of that vining uses up nutrients that can and should be channeled into fruit production.  Trellises allow you to prevent this. A properly trellised tomato will have one and only one point of contact with the soil.  This will allow you to control branching and keep your fruit from lying on the ground where it will quickly cause rot and attract insects, bunnies and other pests.

Trellising adds support to limbs that can become very heavy when laden with fruit.  High winds are the enemy of large tomato plants and the trellis will provide extra protection against it.  Also, trellising allows you the added support needed to open the bush up through pruning.  This increased air flow through the plant allows moist plants to dry quickly (thus limiting fungal infections).  An open bush also makes tomato harvest easier and it provides access to the inside of the bush if you need to apply organic or inorganic pesticides.

This "Celebrity" has already outgrown its store bought cage and it is only half grown

This “Celebrity” has already outgrown its store bought cage and it is only half grown

Types of Trellises – Trellises can be very simple or very elaborate.  You have to decide what works best for you.  A local greenhouse grows a hydroponic “tomato forest”.  Their vines grow ten to twelve feet in the air.  They grow these massive vines by clipping them to a single nylon cord attached to the roof and the growing area.  You can’t get much simpler than one string!

Bill uses "hog rings" to assemble his cages.  You can see full instruction in his book, "The Texas Tomato Lover's Handbook"

Bill uses “hog rings” to assemble his cages. You can see full instruction in his book, “The Texas Tomato Lover’s Handbook”.  This photo is the property of William D. Adams and cannot be reused without witten consent.


Probably the most commonly used trellises are those welded wire rings that we get at the big box or local garden center.  While convenient, I have found that even the largest ones sold are inadequate for my needs.  If you are growing two or three plants in pots, the store bought “cages” will probably be fine for you.  If you are going to buy cages, I recommend you buy the biggest ones available.  Since these cages are made out of small gauge wire, their welds are weak and they will begin to break apart after just a few uses. 

Sturdy cages allow you to apply shade cloth that will protect your young plants from cold, wind and some bug damage

Sturdy cages allow you to apply shade cloth that will protect your young plants from cold, wind and some bug damage.  This photo is the property of William D. Adams and cannot be reused without written consent.

A common homemade version of the tomato cage is made by bending a heavy gauge wire mesh into a circular cage.  These work very well, but storage can be a problem.  Since they can’t be stacked inside each other (like the store bought cages) they can take up a lot of room in the garage.  Also, since they don’t have long wire “legs” like the store bought version, you will have to find a way to stake them.  Rebar and zip ties work very well for securing them to the ground.

My friend Bill Adams cuts cattle panels into three sections and then ties them together in a trianglular shape with metal clips (read more about these in his book “The Texas Tomato Lover’s Handbook”).  These are really great.  They are tall enough and strong enough to support the bushiest tomatoes out there.  After assembly, he uses a “T-Post” to secure the cage in place.  Theses “cattle panel cages” are durable enough to last a lifetime.  Plus, they provide a perfect surface to add shade cloth.  Shade cloth can do so much for your tomatoes.  If you use  it when you first put the plants out, you can easily add a top to the shade covered cage to keep in heat and avoid damage from a late season cold snap.  The shade cloth will also protect your tender young plants from sun scald, wind damage and also add some insect protection.  While there is some cost associated with this method, your cages will give you a lifetime of service.  In addition to durability, they are also very practicle.  At the end of the season, you can easily disassemble them and store your panels flat against the garage wall. 

Bills cages provide all of the support and protection your tomatoes will ever need.  This photo is the property of William D. Adams and cannot be used with written consent.

Bills cages provide all of the support and protection your tomatoes will ever need. This photo is the property of William D. Adams and cannot be used with written consent.

I also use cattle panels to support my tomatoes.  However, I don’t cut my panels up.  I line my tomato rows with cattle panels on each side of the row.  I place my panels about 32’ to 36” apart and support them with T-Posts.  As the tomatoes begin to bush, I can slip bamboo lengthwise through the panels to support any branches that become heavy with fruit.  There is one slight drawback to my method.  Since the tomatoes are grown between panels, I have to do all of my harvest and pruning “through the fence”.  However, the squares on the panels are large so this is only a minor inconvenience.

I grow my tomatoes between two rows of cattle panels

I grow my tomatoes between two rows of cattle panels

In my potager, I grow my tomatoes on “decorative” trellises that I made by wiring together small cedar limbs.  These trellises are very attractive and, since they are cedar, they last a very long time.  While not as functional as the cattle panels or the cages, they work well for determinate tomatoes.  This year, I am growing romas in them.  Roma tomatoes create a nice, neat, and compact bush that do not require as much support as an heirloom or big indeterminate like “Better Boy”.

I am currently growing roma tomatoes in my homemade, cedar trellises.  These trellises are six years old and still going strong

I am currently growing roma tomatoes in my homemade, cedar trellises. These trellises are six years old and still going strong

Posted in Gardening Basics, Potager, Vegetables, William Adams | Tagged , , , , , | 4 Comments

A Wounded Hummingbird

Every once in a while, something amazing happens.  For my wife and I, this Sunday brought us one of those amazing surprises.  While outside mowing the yard, our carpentar stopped her and showed her what appeared to be a half grown, wounded, ruby throated hummingbird laying in the grass.  She was surprised when the she bent down to pick it up that he offered no resistance.  She brought it to our son who took it inside and put it in a box that we had been using as a chicken brooder.  The bird was absolutely alert and alive, but he offered no resistance to our handling. 

Our tiny little friend was barely longer than two joints of Chris's finger

Our tiny little friend was barely longer than two joints of Chris’s finger

Chris brought him a drink in coke bottle lid a helped him get a small sip.  After a few minutes we checked on him and were surprised to find he had flown out of the box.  We decided this must mean he had been healed of whatever ailed him so he took him out and placed him on our deck.  Again, he just sat there motionless.  So, since it not every day you can get this close to a hummingbird, I went in and grabbed the camera.  I was lucky enough to get this truly beautiful shot of this truly amzing little creature.

Pictures like this make me truly appreciate my Canon Rebel

Pictures like this make me truly appreciate my Canon Rebel

After I took these pictures, I felt the little guy would be safer in the Chinese Privet that lines our deck.  So, I picked him up and gently started carrying him to the bush.  Before I got there, he bolted out of my hand and flew directly to the redbud tree that sits at the southeast corner of the potager.  If you think full grown hummingbirds are amazing, you should see one when it is “small”.  He was so tiny.  I cannot believe that God can make something so perfect and beautiful in such a small scale.  Everything from his tiny little feet, to his tiny little irridescent feathers was beautiful and perfectly formed.  It truly was a joy to be able to share a few moments with this amzing creature. 

The irridescent feathers of the Hummingbird are so lovely

The irridescent feathers of the Hummingbird are so lovely

I have seen countless hummers leave our feeders and go directly to that same spot in the redbud that our little friend escaped to. I hope there is something safe and nurturing in that tree that will heal our new little friend so he can join the others of his species around our feeders this summer.

Posted in Animals, Potager, Texas Native, Trees | Tagged , | 2 Comments

Chicken Update

5-12-2013 11-28-29 AMI am amazed at how much progress both our chickens and the coop have over the past two weeks.  Before Sally and I got our babies we read “Chick Days – Raising Chickens From Hatchlings to Laying Hens” by Jenna Woginrich.  This book was amazingly well written.  In it she stresses how quickly the little birds grow.  However, until you see it in person, you really can’t appreciate how quickly they mature.  In the past two weeks the birds have gone from fuzzy little babies to aggressive, active fledglings that are beginning to try to fly and already establishing a pecking order.  They have also learned to come when I call them (as long as I allow them to eat dehydrated meal worms out of my hand).

Chris is helping the girls adjust to the great outdoors.

Chris is helping the girls adjust to the great outdoors.

By the end of week one they had the beginnings of wing and tail feathers.  Now their wings and tails are very developed and all of that down is beginning to fall out.  Yesterday, since the girls are getting so big, we took them outside for the first time.  It is truly amazing to me that they do not need to be taught anything.  While they were a little nervous at first, they quickly began to happily scratch and eat all manner of weeds and grasses.  All in all I think it was a great start for them.

Chris's dog Ed wants to play with the girls too

Chris’s dog Ed wants to play with the girls too

Since they are growing so quickly, the coop has needed to progress just as quickly.  Luckily, it has.  I have been very lucky to have the help of our son Chris for the past couple of weekends.  Last weekend, we set the posts and started the framing.  This weekend, I paid a friend to come and add the roof and do the plumbing and electrical.  Here are some shots of our progress:

Last weekend's progress

Last weekend’s progress

Eventhough it rained on Friday, my buddy Ruben was still able to get the roof frame on the coop


Here you can see the the triangular topped door that is going to be very cute with the diamond shaped window that will go in it

Here you can see the the triangular topped door that is going to be very cute with the diamond shaped window that will go in it

5-12-2013 11-57-18 AM


Posted in Chickens | Tagged , , , , , | 2 Comments

My Accidental Lily (Lilium species)

I have to admit, until recently I was not fond of lilies.  In fact, I disliked them so much that I instructed my entire family to ensure that, on some glad morning when my life is over (and I fly away), there are no lilies in any of my funeral sprays.  I know that is a little weird but I evidently have some early childhood trauma associated with funerals.  To this day, when I smell that sweet, sweet smell of a lily I am thrust back in time to my grandmother’s wake and funeral.  Having her body in the house and the smell of all of those lilies evidently scarred my little seven year old psyche.

My "surprise" lilies

My “surprise” lilies

Recently, I have begun to rethink my aversion to these truly beautiful flowers.  Last year when we were in Tulsa, we visited the gardens at the Gilcrease Museum.  The beds surrounding Thomas Gilcrease’s house were scattered with clumps and clumps of some very beautiful Oriental lilies.  I was so taken with them that I began to rethink my aversion.

The reason I am writing about lilies now is because I have a beautiful orange Oriental lily blooming in the potager.  The funny thing is, I don’t know where it came from.  I certainly didn’t buy it.  My best guess is someone gave it to my wife as a gift and after the bloom faded I just stuck it in the ground.  Well, if that is what happened I am certainly glad that it did.

One of the lilies at the Gilcrease

One of the lilies at the Gilcrease

Lilies are a lot like roses when it comes to their importance in almost all cultures.  These flowers have been grown, loved, painted, written about, carved and sculpted by people all over the world for thousands of years.  White lilies have a special place for all Christians.  No Easter celebration is complete without pots and pots of pure white Easter Lilies on the altar or pulpit.

It is almost impossible to go into a Catholic Church and not see lilies.  Because they represent innocence, chastity and purity, they are often seen either in Mary’s hands or somewhere very close to her.  Legend says that the first lilies sprang forth from Eve’s tears as she cried repentantly while being expelled from the garden.  Since Mary is often called the new Eve (who bore the fruit that redeemed us from sin) she always has a lily nearby.

Some of my Easter Lilies emerging after winter

Some of my Easter Lilies emerging after winter

Many flowers that have lily in their name are not lilies at all.  Daylilies are members of the genus Hemerocalis and Oxblood lilies belong to the genus Rodaphiala.  True lilies belong to the genus Lilium.  Lilies are perennials that grow from bulbs that are typically deeply buried.  When planting lilies it is recommended that you plant them 2 ½ times as deep as the bulb is tall.  Lilies like full sun and average moisture.  An inch a week during their growing period is fine.

Lilies reproduce by seeds and rhizomes.  Some species even put out stolons.  These rhizomes form new bulbs.  After a few seasons a single bulb can create a very large and thick clump.  When this happens it is a good idea to dig them up and divide them in the fall of the year.

Remove lily stamens to extend their life as a cut flower

Remove lily stamens to extend their life as a cut flower

One of a lilies most recognizable features are their prominent reproductive organs in the middle of the flower. The pollen covered stamens are lovely to look at and dance in the breeze.  However,  if you want to use your lilies in an arrangement, you need to remove the stamens.  Some lily pollen will stain a pure white bridal gown.  Plus, removing the stamens will actually extend the life of the cut flower.

My “accidental” lily has been a bright spot in my spring time garden.  It is truly beautiful and I have thoroughly enjoyed watching it bloom.  However, no matter how pretty it is, I still don’t want any of them at my funeral!

Posted in Flowers, Potager | Tagged , , , | Leave a comment

Chickens!

photo3After raising our own brood of children and enjoying five unfettered years of blissful empty nestdom, we have decided to forego the free spirited life and tie ourselves down again to a small flock of chickens.  We have talked about this for quite some time,  two years to be exact.  We have researched the topic well, visited Funky Coop tours and talked to friends and neighbors about their experiences.

photo1Yesterday all the talking stopped and the action began.  We went to Ideal Poultry in Cameron, Texas and picked up our girls.  Our three Americuanas and three Buff Orpingtons were hatched sometime in the morning.  By three o’clock that afternoon, our babies were in our car and we were parents again.

The girls will have to be raised inside for the first six weeks.  After that, they will go outside into their very own palace that I will be building for them over the next few weeks.  I will be taking and posting lots of pictures as this whole process progresses because it appears people really like chickens and chicken coops.  And who can blame them?  As these pictures show baby chicks are absolutely adorable.

5-2-2013 7-48-40 AMEveryone that has chickens tells us that they all have their own unique personalities.  It was amazing to us that this personality was already beginning to show.  There is already a dominant Americuana and a dominant Buff.  Both of these little birds are much more active and inquisitive than their friends.

5-2-2013 7-52-58 AMAnother thing we are very excited about is the opportunity to name them.  As proud parents, we want to make sure they have the perfect name to reflect their personality.  We can already tell that the Americuanas are going to be much easier to assign names because their unique colorations allow us to easily distinguish which is which.  Unfortunately, the Buffs are all yellow and very difficult to differentiate.  

5-2-2013 7-58-58 AMIn addition to my usual garden posts, I am going to try and post pictures of both the chicken’s progress and the progress of the coop on a weekly basis.  So, if you want to watch our chickens grow with us, check back often.

Posted in Chickens | 6 Comments

2013 Garden Experiment-Companion Planting of Marigolds and Tomatoes

Each year I like to try some kind of experiment in the garden.  I truly believe that the best way to become a better gardener is to try new things.  This year I will be putting one of the most commonly talked about organic pest control methods to the test.  I am going to try a companion planting of tomatoes and marigolds to keep the stink bugs away.

One of my "porch grown" marigolds is about ready to bloom

One of my “porch grown” marigolds is about ready to bloom

If you believe everything you read, then you no doubt believe that marigolds are miracle plants.  It is truly amazing to me how many articles/posts there are on the internet making incredible claims about their bug fighting abilities. One of the more recent things I read swears that all you have to do is plant a marigold in each corner of your garden and all of your bug problems are solved.  While there may be some truth to the marigold’s bug fighting abilities, I really don’t believe they are going to very successful at riding my tomatoes of their stink bugs.

The above marigold two days after opening

The above marigold two days after opening

Now don’t get me wrong.  I really want my experiment to work.  In fact, I have gone out of my way to give the marigolds as much of a chance as possible.  Instead of trying to plant four plants in the corners of my garden, I am going to completely surround the tomatoes in marigolds.  For this experiment, I grew about 100 marigold plants from seed in my new back porch seed starting rack.  Once the little plants got up to about four inches tall I used them to line the triangular beds of my potager.  I planted the starts six inches in from edge and spaced them at six inches.  It took about 20 plants to line each bed.

My first "bug fighting" marigold of the year

My first “bug fighting” marigold of the year

Once the flowers were in, I planted the tomatoes.  For this experiment I am using romas.  Romas grow on nice, neat determinate bushes.  My thought is, those nice, compact determinate bushes will give all of those pesky bugs fewer places to hide.  I am also hoping that their relatively open form will allow whatever magic bug fighting qualities the marigolds possess to waft freely deep into the bush where the bugs are hiding.

Holidays mean free labor.  My daughter jessie helps me plant the marigolds for my experiment on Easter Sunday

Holidays mean free labor. My daughter jessie helps me plant the marigolds for my experiment on Easter Sunday

I apologize a little about my attitude here.  I really, really, really want the marigolds to run all of the bugs off.  However, I am very skeptical.  Even though I am doubtful of the marigold’s bug fighting abilities, I do truly expect they will keep any nematode issues at bay.  It is a proven, scientific fact that marigold roots secrete alpha-terthienyl.  This compound has insecticidal, nematodial and anti-viral properties.  It also stops nematode eggs from hatching.

I love my larkspur.  This has absolutely nothing to do with the experiment but it is lovely and i just wanted to include it!

I love my larkspur. This has absolutely nothing to do with the experiment but it is lovely and i just wanted to include it!

My last big garden experiment was growing potatoes in a box.  That one was a complete failure.  I had very high hopes for that one when the experiment started.  For this one, my expectations are a bit lower.  I expect to have almost aero nematode problems but I really don’t expect the marigolds to be very successful at keeping the bugs away.  Only time will tell.  Check back at the end of the season to see how it goes.

Posted in Flowers, Gardening Basics, Potager, Vegetables | Tagged , , , , , | 6 Comments

Trowel and Error Symposium at Mayfield Park

This past week should have been one of the busiest weeks of the whole year in the garden.  However, instead of setting out plants, weeding, mulching and making blog posts about it all, I was laid up fighting/recovering from the flu.  If you have never had the flu, I don’t recommend you try it.  This one bout has been enough to make sure that I never ever miss a flu shot ever again.

The water gardens at Mayfield are lovely

The water gardens at Mayfield are lovely

At least something good happened “garden wise” this past week.  Last Saturday, Sally and I got to go Austin to give a presentation on organic weed control at the Mayfiled Park Trowel and Error symposium.  Mayfield Park (http://mayfieldpark.org/page1.php) is a 23 acre nature preserve deep in the heart of Austin.  However, what makes it outstanding (as far as I am concerned) are the two beautiful acres nestled behind rustic stone walls.

All of the beds at Mayfield are paid for and maintained by volunteers

All of the beds at Mayfield are paid for and maintained by volunteers

These two acres were once the pride and passion of two remarkable Texans.  Dr. Milton Gutsch (Chairman for the History Department at UT for many years) married Mary Mayfield in 1918.  In 1922, the young couple moved into the tiny board and batten cottage that had served as a weekend/summer home for the Mayfield family (Mr. Mayfield served as the Chairman of the Railroad Commission and Secretary of State of Texas).  Over the next 50 years, the Gutsch’s worked to turn two acres into a beautiful and restful garden dotted with beautiful water features, paved limestone patios and pigeonnier.

A white Banksia is stunning over a limestone archway that leads to a private seating area

A white Banksia is stunning over a limestone archway that leads to a private seating area

After the death of her husband, Mrs. Gutsch gave the property to the city to be used a park.  Unfortunately, there was no endowment.  So for the next several years the park began to suffer from neglect.  Then, in 1986, a group called the Mayfield Park/Community Project came together to return the Mayfield cottage and gardens back to their former glory. This group, headed by Karen Camannati has been at it ever since.  This group receives no money from the city of Austin.  All of the money for the upkeep of this beautiful and historic place comes from an occasional grant, an annual newsletter and the annual Trowel & Error Symposium.

The flock of peafowl that roam the grounds are all descendants from the first peacocks that came to the property in 1935

The flock of peafowl that roam the grounds are all descendants from the first peacocks that came to the property in 1935

I attend a lot of gardening presentations each year.  While I usually enjoy all of them, this year’s Trial and Error was one of the most special events that I have ever attended.  The welcoming and dedicated spirit of Karen, the generosity of the volunteers and the sheer beauty and history of the place made it the perfect place for a spring gardening event. If you did not make it out to this year’s Trial and Error, please make a point to attend next year.  For the past several years Karen and the other members of the board have brought together an impressive array of horticultural speakers.  For a $5 donation, you can support an historic Austin gem, learn from talented and passionate gardeners and buy starts from some of the hundreds of antique plants that bloom in the Mayfield gardens.  And, if growing plants is not your thing, you can still come. The gardens and the flock of peacocks (that have descended from the original birds gifted to the Gutsch’s in 1935) provide a great opportunity and backdrop for all of you shutterbugs out there.

Pigeonneirs were once common throughout the rural south.  today, they are harder and harder to find.  The one at Mayfield is outstanding

Pigeonneirs were once common throughout the rural south. Today, they are harder and harder to find. The one at Mayfield is outstanding

I seldom do personal stuff on the blog, but today I am making an exception.  Our oldest daughter Kate, is in the hospital.  She is suffering from an autoimmune disease called polymyositis.  If you are the praying kind, I ask that you remember her and her husband in your prayers.  She is in constant pain and there is no quick fix.  If you are Catholic and you are participating in the Chaplet of Divine Mercy (http://www.praydivinemercy.com/) right now, please offer one up for her!

Posted in Field Trips, Flowers, Gardening Basics, Speaking Engagements, Weed Control | Tagged , | 11 Comments