Crimson Glory Antique Rose

A cloeup of the antique rose "Crimson Glory" in my front bed

When we bought our house it was almost devoid of ornamental plantings.  The previous owner must not have been much of a gardener.  However, he did leave behind a truly remarkable and beautiful rose called Climbing Crimson Glory.

A couple of months ago I did an article for Texas Gardener about how drought resistant antique roses have proven to be.  As you will see in the attached pictures, Crimson Glory is a testament to their durability.  Not only did this rose survive last year’s drought, it has produced more flowers this year than ever before.  AND … it did all of this in spite of the fact that I had just dug it up and moved it in March of last year.  Now that is durable!

Crimson Glory is not a true climber.  It is what some call a “mannerly climber”.  It has fairly thick canes that can be 12’ to 15’ long.  Instead of wrapping around an arbor, this rose is best tied along the top of a fence.  And that is exactly why I moved it.  It had been in front of our porch for about ten years.  However, last spring, I built a picket fence.  I knew this rose would be the perfect choice to put in front of the new white fence.  As you can see, it loves its new location and does not seem to mind that I ripped it out a place that it was pretty happy in.

The deep red color and lemon-y scent makes Crimson Glory my favorite rose in my garden

According to Mike Shoup (owner of The Antique Rose Emporium), both Crimson Glory and Climbing Crimson Glory are a great choice for anyone that wants a rose that “looks and smells like a rose is supposed to”.  With its deep red, velvety petals and bright yellow stamens, Climbing Glory will be a stand out in any garden.  Plus it’s beautiful, lemony scent makes it the perfect addition to those romantic, hand cut bouquets that can only come from a home garden.

Don't the deep red flowers look levely against the white picket fence?

If you have avoided roses in the past because they require so much pruning and spraying, give antique varieties a try.  These roses require less maintenance and trimming than modern hybrids.  They thrive in full sun and can with stand the worst drought in Texas history.  All they ask from you is about an inch of water per week and two good mulching a year with a high quality, finished compost.  Give them a try and I am certain you will be as impressed with their performance as this old gardener!

Hyacinth Bean (Lablab purpureus)

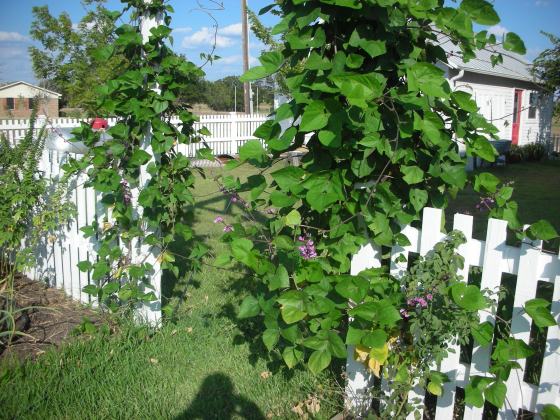
The lovely foliage of the Hyacinth Bean on my trellis

This past spring I was at a garage sale at the home of a truly extraordinary horticulturist named Lorraine.  She and her daughter hold this sale every spring.  In addition to clothes and knick knacks, Lorraine sells plants.  You never know what she is going to have.  Many folks in town know that she can grow anything, so they bring her pots, seeds and cuttings.  She always turns them into beautiful plants that she then sells at ridiculously low prices.  She grows in compost that she makes herself.  She has a green house, the cutest potting shed in town, and a dang fine vegetable garden that she has been tending in the same spot for over 60 years.  She is truly incredible and I hope to someday be just like her.  I really admire her and I never miss her sale.  This year, she had three pots of hyacinth beans that I snatched up and took home.  Those three little four inch pots of hyacinth beans have turned out to be the best $3 I have spent all year!

This year, the first flowers on my hyacinth bean appeared in late July

I planted Lorraine’s starts in May at the base of the trellis that leads to my side yard.  This trellis is over 12’ at the top.  I planted two plants on one side and one on the other.  Since May, those three plants have grown and grown until they almost completely cover this huge trellis.  The foliage is striking and the pinky-purple flower spikes are extraordinary.  The bees, butterflies and wife love them. 

Planting –Plant your seeds outdoors after all danger of frost has passed.  You can also start them inside three or four weeks before the last frost.  Some folks recommend pre-sprouting the seeds in damp paper towels before planting.  However you get them to sprout, be sure and plant them in full sun. Hyacinth bean likes rich, well drained soil.  Water regularly to get them established.  Germination from seed can take about two weeks.  Once the plant starts to grow, provide regular water but do not over water.  They are relatively fast growing and should start producing flowers 45-60 days after germination.

My hyacinth bean bloomed for over a month before it set seeds.  Maybe that was because it was just so hot.  I saw my first flowers in July but I did not see my first seed pods until the first week of September.  The plant is still blooming and it is beginning to get covered in the deep purple, iridescent seeds pods that it is famous for.

The first of the deep purple seed pods appeared last week

Hyacinth beans send out long runners that are perfect for quickly covering a fence, building or trellis. If growing on a fence, they need no support.  To get mine to go up the trellis I tied the tendrils and shoots to the posts of my trellis using a jute-like twine.  Once I had the vines trained over the structure I let them go.  They soon sent out their long inflorescence of magenta flowers that make them so attractive.  The posts of my trellis are 4 ½ feet apart.  The inflorescences of these plants are now so long that you have to push your way through the flowers.

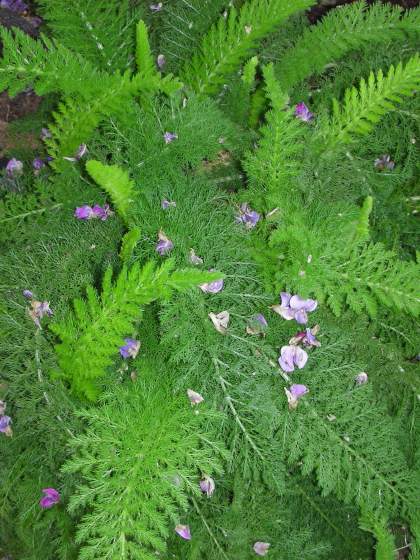
Flower petals from the plant falling onto my yarrow

Harvesting – You can eat hyacinth beans if you harvest them when they are very young.  Many cultures around the world use them extensively in their cooking.  However, if you want to eat them you need to know that are slightly toxic when mature.  So only eat them if you know when to pick them.  In fact, once fully mature, they should not be cooked or ingested at all.

Hyacinth beans are fairly good re-seeders.  Leave them alone and they will come back year after year.  If you want to harvest the seed, wait until the plant has died and then pick the dry, brown seed pods.  Once fully dry, open the seed pod and save the unique black seeds in a cool dry place until next spring.

Spider Flower (Cleome hasslerana)

Top view of a Cleome flower just beginning to bloom

If you are looking for a large scale plant that can tolerate a drought, resist deer and other pests, blooms until late summer and then reseeds itself, then Cleome may be the plant for you.  Cleome is a large scale flower that can reach 6’ in a good season.  Their blooms come in different shades of pink ranging from deep magenta to almost white.  As the flower matures it will generally have three shades of pink on it at a single time.  The flowers grow in clusters that grow up the stalk as the plant matures.  As the flowers move up the stalk, they leave behind very long and slender seed pods that give the plant its common; spider plant. These slender seed pods also contain and deploy the seeds that allow Cleome to reseed its self year after year.

Cleome’s large stature and large colorful flower heads allows it to be used in mass as a lovely stand alone.  However, because of it sheer size, it is one of the few annual flowers that pairs very well with established shrubs.  Because of its generally pink color, it pairs well with loropetalum.  I paired it with buddleia this year and it was very pretty.  Cleome works fairly well as a cut flower.  However, the plant emits a very strong musky scent that reminds me of citronella.  Some find it unpleasant. 

First blooms

Besides its funny smell, another interesting thing about Cleome is the fact that a lot of people think its leaves look a whole lot like marijuana.  I heard a story where a high schooler was participating in a “mock trial” competition.  He was to “defend” one of his friends in a drug possession case.  This enterprising young “lawyer” contacted local horticulturists to see if there were any plants that closely resembled cannabis.  One of them sent him the leaves of Cleome.  When he presented them as evidence in his mock trial, the judge dismissed all of the “mock charges” because he felt that there was enough resemblance between the two plants to place reasonable doubt in the minds of the juror.

If growing a plant that resembles marijuana does not turn you off, then you are in luck.  Cleome is fairly easy to grow and it does well in average soils.  Cleome can be started indoors about two weeks before the last frost.  Cleome also does very well when it is direct seeded.  If you want to direct seed, place your seeds about a foot apart and cover them with  ¼” to a ½” of soil.  Plant in direct sun after all threat of frost has passed.  The seeds take 10 to 14 days to germinate.  Provide regular water to get them established.  Once established, provide Cleome with average water (1” per week) but it can withstand some drought conditions. 

Cleome and Buddleia in my front bed

When you buy your Cleome seeds, check to see if you are buying an open pollinated variety or a hybrid.  This is important to keep in mind because Cleome is a very good self seeder.  If you buy a hybrid, than when the plant reseeds, you will have no idea what type of Cleome will pop back up.  With that in mind, I think this hybridization of Cleome is a very good thing for gardeners.  There is a very popular hybrid out now called “Sparkler”.  Sparkler is lovely and it only gets about three feet tall.  This “dwarf” version can now be worked into the front of the bed or border.  I believe t his will make Cleome much more popular with gardeners in the future. 

I love Cleome.  I am fond of big plants and this one is a joy to watch grow.  I love the way the flowers start when the plant is half grown and the fact that they continue to grow “up the stem” as the plant continues to develop.  I love the “whiskers” that develop under the flowers.  In fact, I even kind of like the way it smells.  So, if you have a spot for a big, showy, pink plant that is easy to grow and has just about zero pest problems, I recommend that you include Cleome in your spring planting list.

A great shot of the seed pods on the ends of the plants "whiskers". Note the seed pods on the bottom of the plant. This is where the first flowers formed. You can see from this shot that the plat grew two more feet after it put on the first flower heads, The heads continued to "move up" the stalk as the plant grew.

Picket Fence Update

The back gate with the arbor in the background

All of the time off around the holidays provided me with a couple of opportunities to work on the picket fence.  My son-in-law Ramez helped me finish the arbor and build the back gate.  My son-in-law Jared helped me prime the back fence and gate.  Thanks to their efforts, I now have a pretty good idea of how good it is going to look once it is complete.  Now close your eyes and imagine it covered in running pink roses!

Prepare Beds Now for Spring

 Yesterday, I noticed that my narcissus were beginning to poke up.  This is a reminder to me that spring is on its way.  December is typically a slow time in the yupneck’s garden.  However, this year, I actually have a lot to do to get ready for spring.  Because I built the picket fence I now have the opportunity to put in a lot of new beds.  Since I do things organically, now is the perfect time for me to start preparing these future beds. 

Weeds are a real problem for me.  Through much experience I have developed an integrated approach to weed control (you can read all about this in an article I have written for the upcoming March issue of Texas Gardener magazine).  The first step in this program is preparation.  Now preparation means a lot of different things to different people.  To me, it means defining where the bed is going to be and then killing everything that is growing in that area.  I kill my weeds in two ways; smothering or solarizing.

Here I am using a sheet of plywood to smother my weeds. the plywood is secured with hadite tiles. this photo was taken by Ramez Antoun.

Smothering is the process of placing an opaque material over vegetaion.  It works by depriving the plants of the water and light they need to survive.  Since smothering involves using a heavy material (that wont blow away) like plywood or Hardie plank, I only use it in relatively small areas.  If I want to kill a bigger swath of weeds, I use solarization.

Solarizing involves wetting the soil, covering it with a translucent material and securing the edges of that material so no heat escapes.  I use 6 mil poly.  Solarizing  allows the sun’s heat to raise the temperature in the air gap to a level that “cooks” the weeds to death.  Since it is winter, and not as many hot days are available, I put out my poly about a month ago.  This will give the sun four months to kill my weeds before I create the beds in the spring.  If you solarize in the summer, you can get by with a two month solarization window. 

Solarizing a bed on the back side of the picket fence. Photo bt Ramez Antoun.

Both of these methods have been very effective for me.  So, if you are going to put in a new bed in the Spring, and you are looking for an organic way to get control of your weeds early, now is the time to get started.  A little work now will make your weeds much less of a headache in the future.

Picket Fence – Phase 2

Hanging the stringers

My wife and I made real progress on the picket fence this week end.  In fact, we were rather surprised at how much progress we made.  After a good breakfast and a few errands, we got busy.  Before we could really get going we had to “notch the posts” to hold the stringers.  For our fence design, we wanted the posts to show.  The posts would then have 2 1/2″ pickets with 2 1/2″ gaps that hang on stringers that are flush mounted in the back of the post.  After the top and bottom stringers were set, we trimmed the posts to their final height.  The post tops were cut to be 6″ taller than the top stringer. 

Next, we set up the cutting center.  This was basically a sheet of plywood on two saw horses.  I reinforced the plywood by placing three 4X4 posts under it and screwing them down.  Next, I set up a cutting jig for the posts.  This was done by screwing a piece of a 4X4 to the end of the plywood to serve as a stop for cutting the pickets.  I then moved my chop saw until the blade was the proper distance from the stop.  I then squared the saw and screwed it down to the plywood.  Once this was a secure, I set up my portable table saw behind the cutting jig.  I set the saw to rip pickets 2 1/2″ wide.

A good shot of how the sringers are set into the posts

Now that the stretchers were in place and the cutting center was ready, my wife and I set about making the pickets.  We did this by cutting 5/4″ boards that were 5 1/2 inches wide into 42″ long sections.  We then ran these sections through the the table saw to create two 2 1/2″ wide pickets from one 42″ section.  When the wheel barrow was full of pickets, we would go and hang them. 

Hanging pickets is pretty easy if you have the right tools.  In our case, the right tool was another jig.  Since we had hung our stringers perfectly level, we used them to hold the jig that I built for this purpose.  This jig was very simple.  I took a 4′ 2X4 and screwed a 4′ 1X4 at a 90 on the top and another 1X4 to the back that hung past the bottom edge of the 2X4.  This created a lip that I could use to screw the jig down to the stringer.  This jig ensured that all of the pickets would be perfectly level across the top. 

The yupneck at work hanging pickets

With the help of this jig, my wife and I set about hanging the pickets.  Working together, she would hold and space the picket (using another picket), and I would screw them down.  I used galvanized screws for this entire project so I do not have to worry about rusty screws staining my posts in the future.  As you can see from the pic, we made very good progress.  We got about two thirds of the front of the fence built in about four hours.  Now that we have the jigs and “a system” we expect to finish the rest of this side of the fence by the end of next weekend.  Check back to see how it goes.

Building the Picket Fence

The yupneck leveling a post for the picket fence

I started this blog as a way to share some of the things I am learning as I pursue my Master’s degree in Horticulture at Texas A&M (Whoop!) with my fellow gardeners.  What started out as fun is slowly turning into a new side line for me; garden writing.  So far, four of the articles that are contained on this site have been published.  This has been a very exciting and fun diversion for me.  Once I stated getting published, it kind of changed the way I look at just about everything I do in the garden and around the house.  Now, instead of just taking cuttings from my coleus like I always have, I have to stop whatever I am doing and go find a camera so I can document it for an article!

This post is a classic example.  I am in the process of building a picket fence around my house.  In my “pre-writer” days, I would have just built the fence, taken a picture or two to show my friends and family, and then moved on to my next project.  Not anymore.  Now, each project has to be “documented”.  So, this post will document the “beginnings” of the picket fence project.  All of this picture taking is driving my wife a little nuts but she is going along with it for now.

I don’t know if I have mentioned it or not, but my wife and I are remodeling an old farmhouse.  One of the projects that we planned to do was build a picket fence around the place.  This was pretty low on the priority list (way behind getting central heat and air, a new kitchen and a new bathroom) until two weeks ago. 

Who would throw this out?

Two weeks ago, the fence took on a whole new level of importance when we picked up a beautiful Australian Shepherd out of the middle of the road.  Someone had “dumped her” in our neck of the woods.  At first, we figure she was lost.  She was so pretty and wearing a collar.  Who would dump such a fine animal?  So, thinking she was lost, we took her in and set out to find her owner.  Well, no owner came forward and we slowly began to accept the fact that we had inherited a dog.  Now normal people that do not have the means to keep a dog would simply not keep her.  However, I am proud to say my wife and I are not normal.  Instead of taking her to the pound, we decided to build a fence!

As luck would have it, my neighbor had just taken down a lovely two board fence that ran across the front of his property.  Since the yupneck is too cheap to buy new, I bought the used 4X4 posts and the runners from him.  He also owns a bobcat set up as a post hole digger.  So, for a very few dollars, I got most of the materials for the fence and someone to save my back from the hours of manual post hole digging. 

My neighbor's post hole digging machine

Alan showed up at 7:15 last Sunday and drilled all of my post holes.  It took him 20 minutes to drill 17 holes.  It would have taken me 20 minutes to dig a single hole.  Over the past week, Sally and I have cleaned out the holes, filled the bottoms with brick bats and started cementing the posts in.  We finished this Sunday right after church.  If you notice in the pictures, we are still wearing our church clothes (like I said before, we are not completely normal)!

I am very excited that this project is under way.  I have wanted a picket fence for quite some time.  No, let me restate that.  I have NEEDED the fence for quite some.  You see, as this blog is supposed to highlight, I am a gardener.  Because of this, I have completely filled up all of the beds around my house.  This fence will allow me to create literally hundreds of more feet of beds!  Also, who has ever closed their eyes and envisioned an antique farmhouse in the country that didn’t have a picket fence?  No one, that’s who!  Old farmhouses are required to have picket fences covered in old roses (one of which we bought at the Antique Rose Emporium this weekend) and surrounded by beds full of things your grand mother grew.  That is what this fence will do for me.  It will complete the dream!

Setting posts in our church clothes

I hope to have the first section of fence completed by Thanksgiving.  My birthday is pretty close to Thanksgiving this year and I have asked all five kids to come celebrate by throwing me a painting party.  If all goes well, we will have the fence and the garage painted by the end of next weekend.  Check back to see how it goes.

P.S.  If you would like detailed instructions on how I build a picket fence, email me or leave a comment and I will post everything you need to know.