President’s Day Potatoes

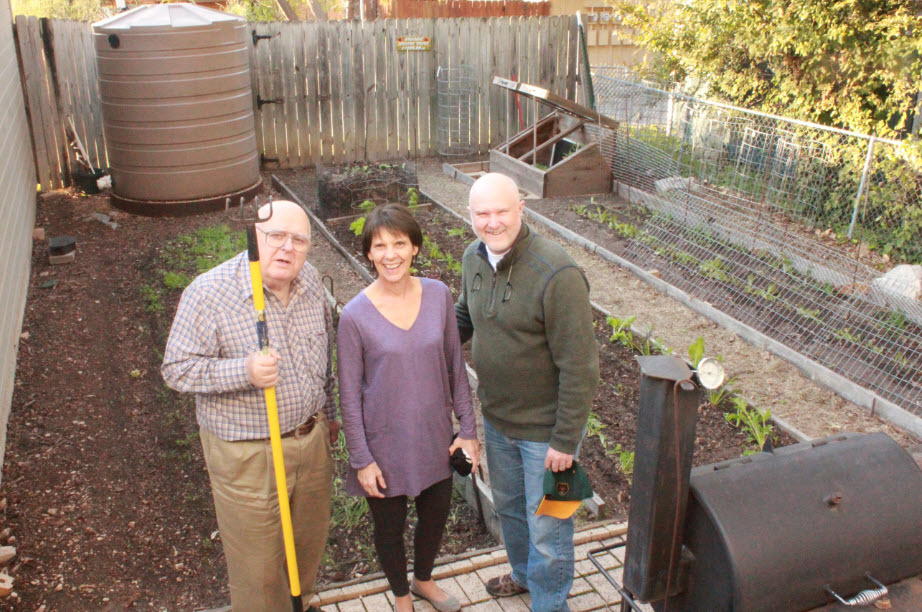
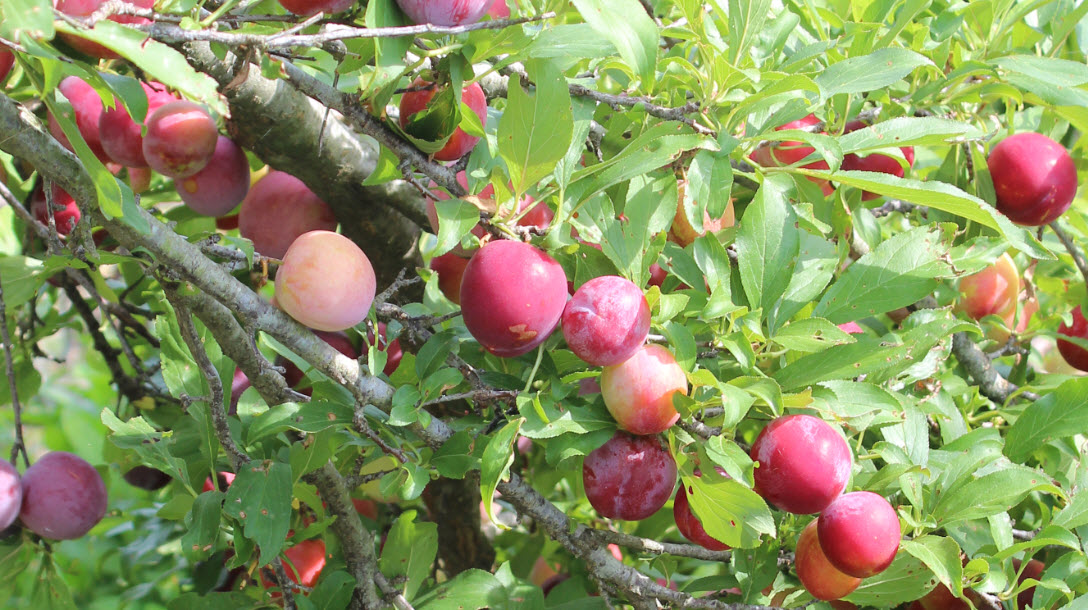
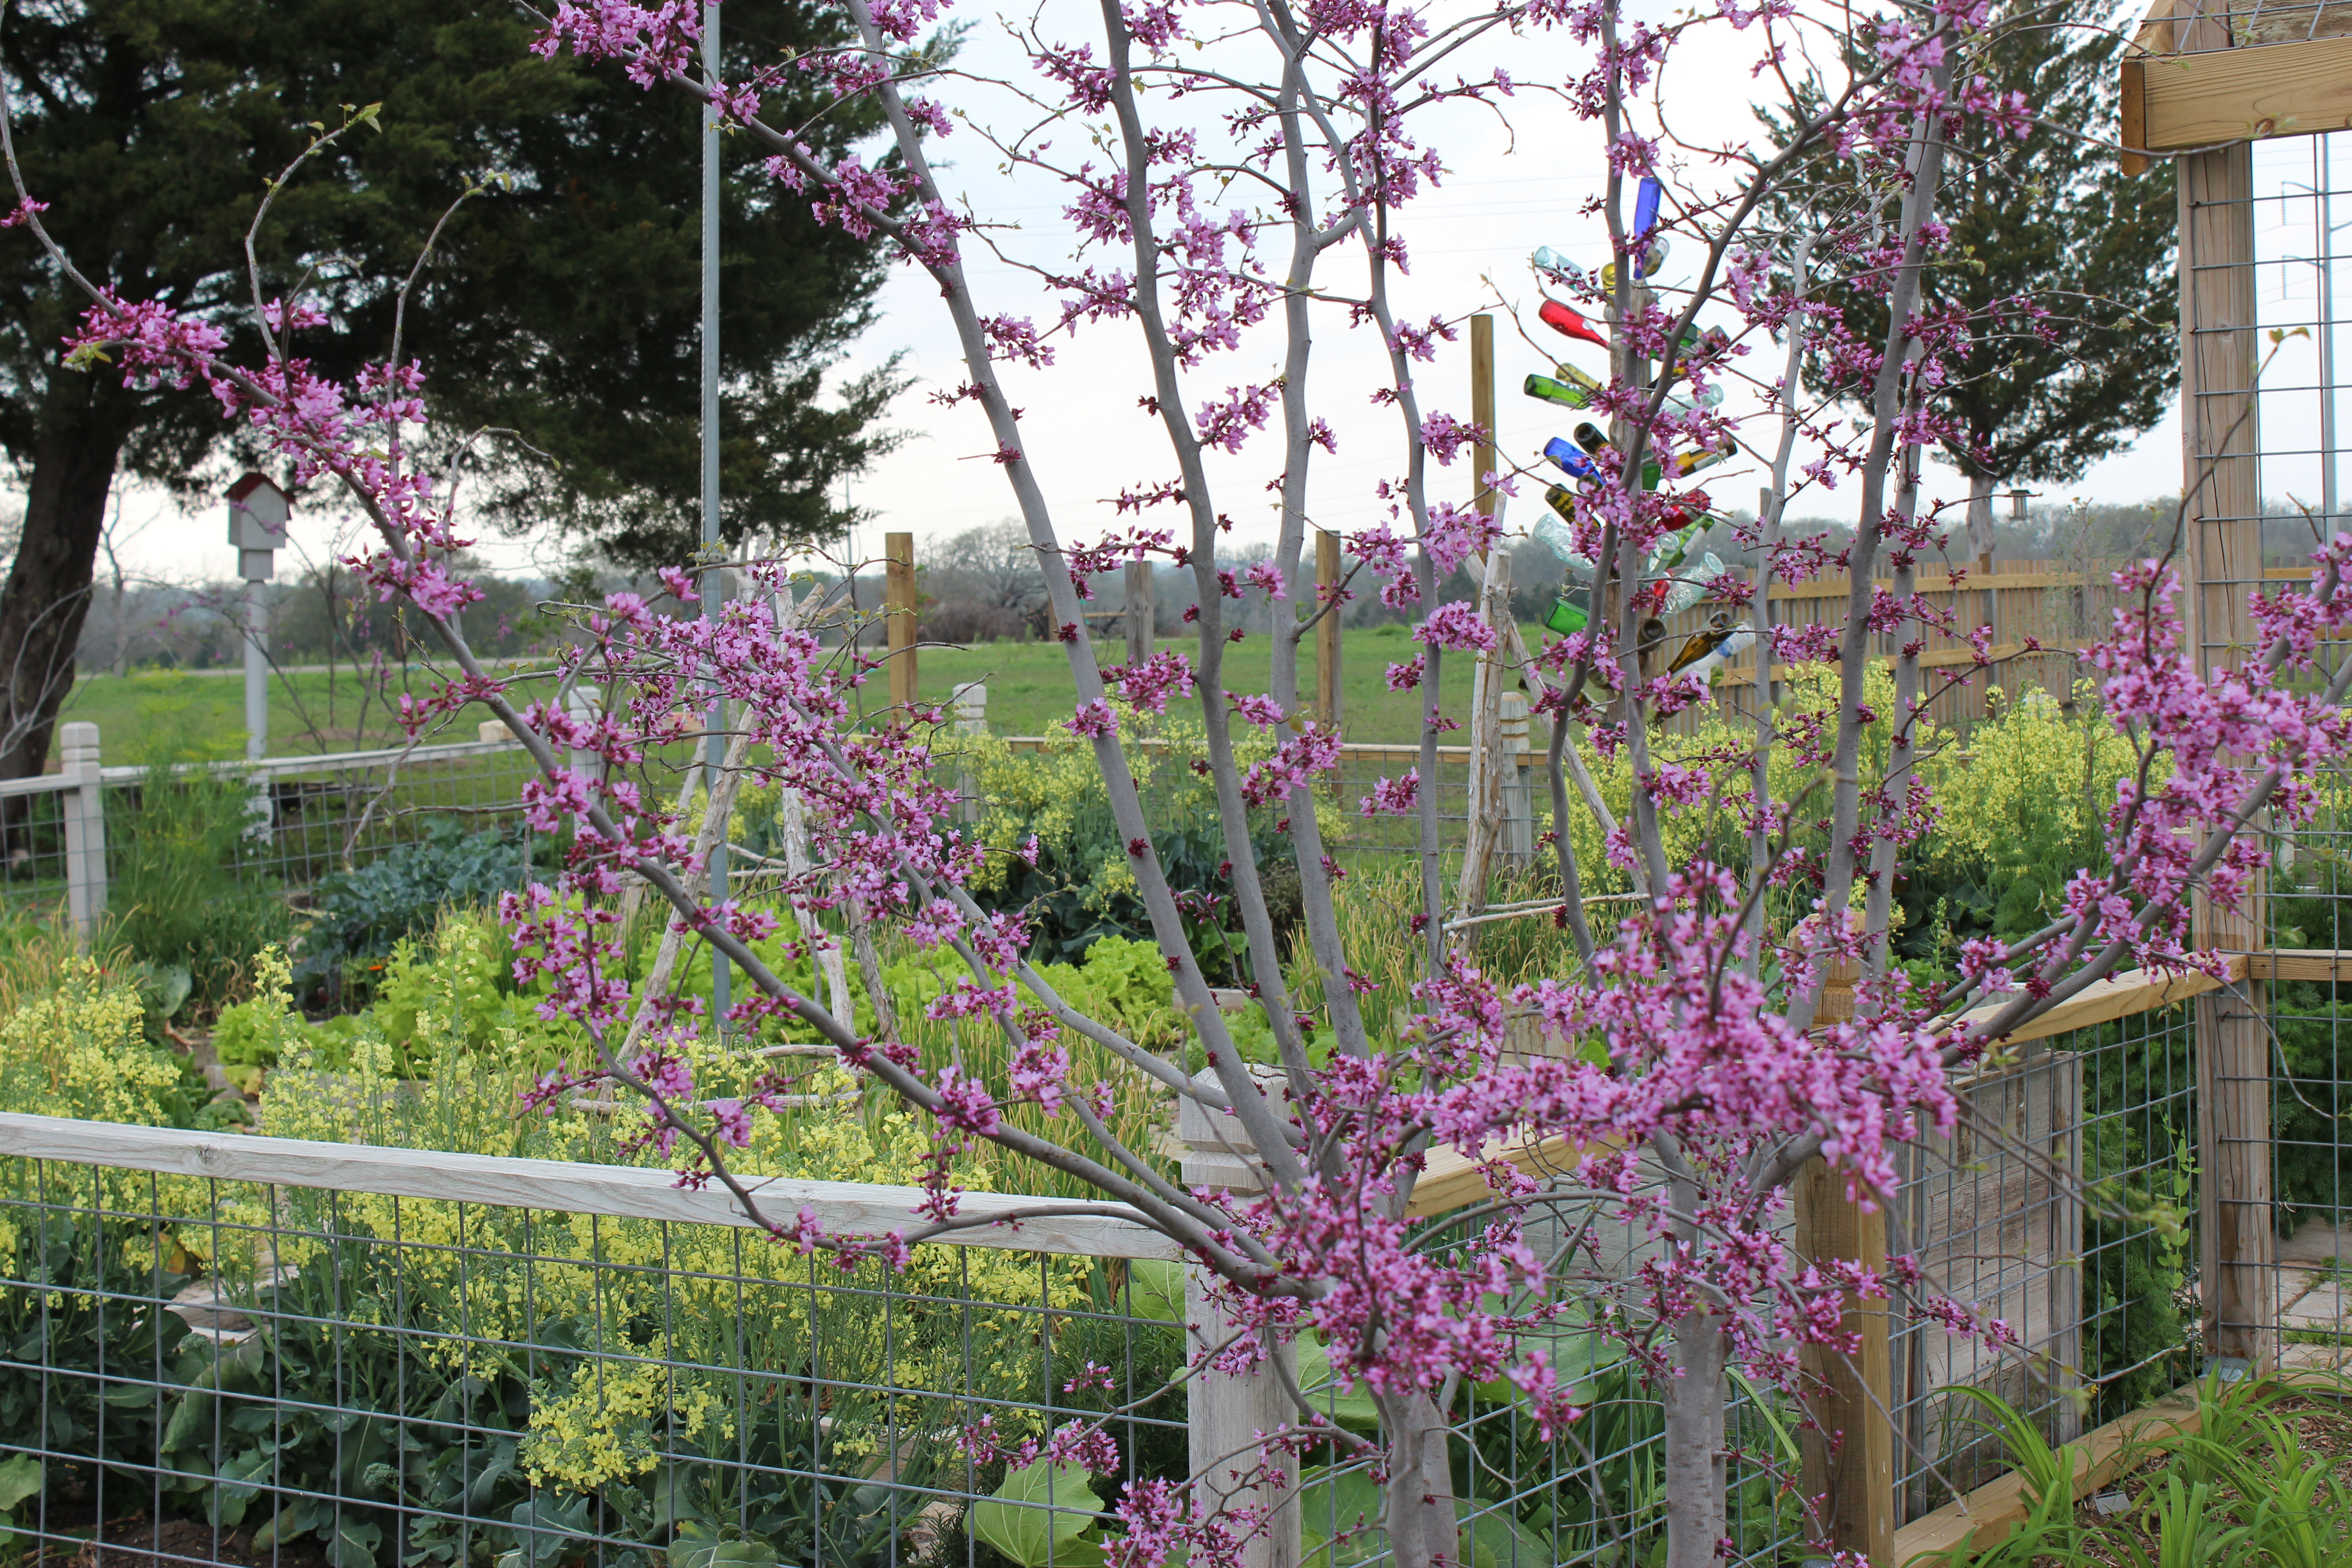
Last weekend I met Chris Corby (Owner of Texas Gardener Magazine) and Patty Leander (co-blogger and staff writer for Texas Gardener Magazine) in Waco for a little writer’s workshop.  As often happens with Texas Gardeners that are eating Thai food together (instead of gardening) on a beautiful January Saturday, we began to discuss whether or not to trust the weather and do some early planting.  Now we certainly know better.  I don’t care that the groundhog didn’t see his shadow, we have all lived here long enough to know that nothing guarantees a late season freeze better than planting an early spring garden.  Regardless, this warm winter weather has given all three of us a bad case of the itch that often occurs once one has been bitten by the gardening bug.  While we agreed we would wait for the middle of March to do the majority of our planting, we began to talk about the one thing that needs to be planted in the February garden – potatoes!

planting-potatoes-1

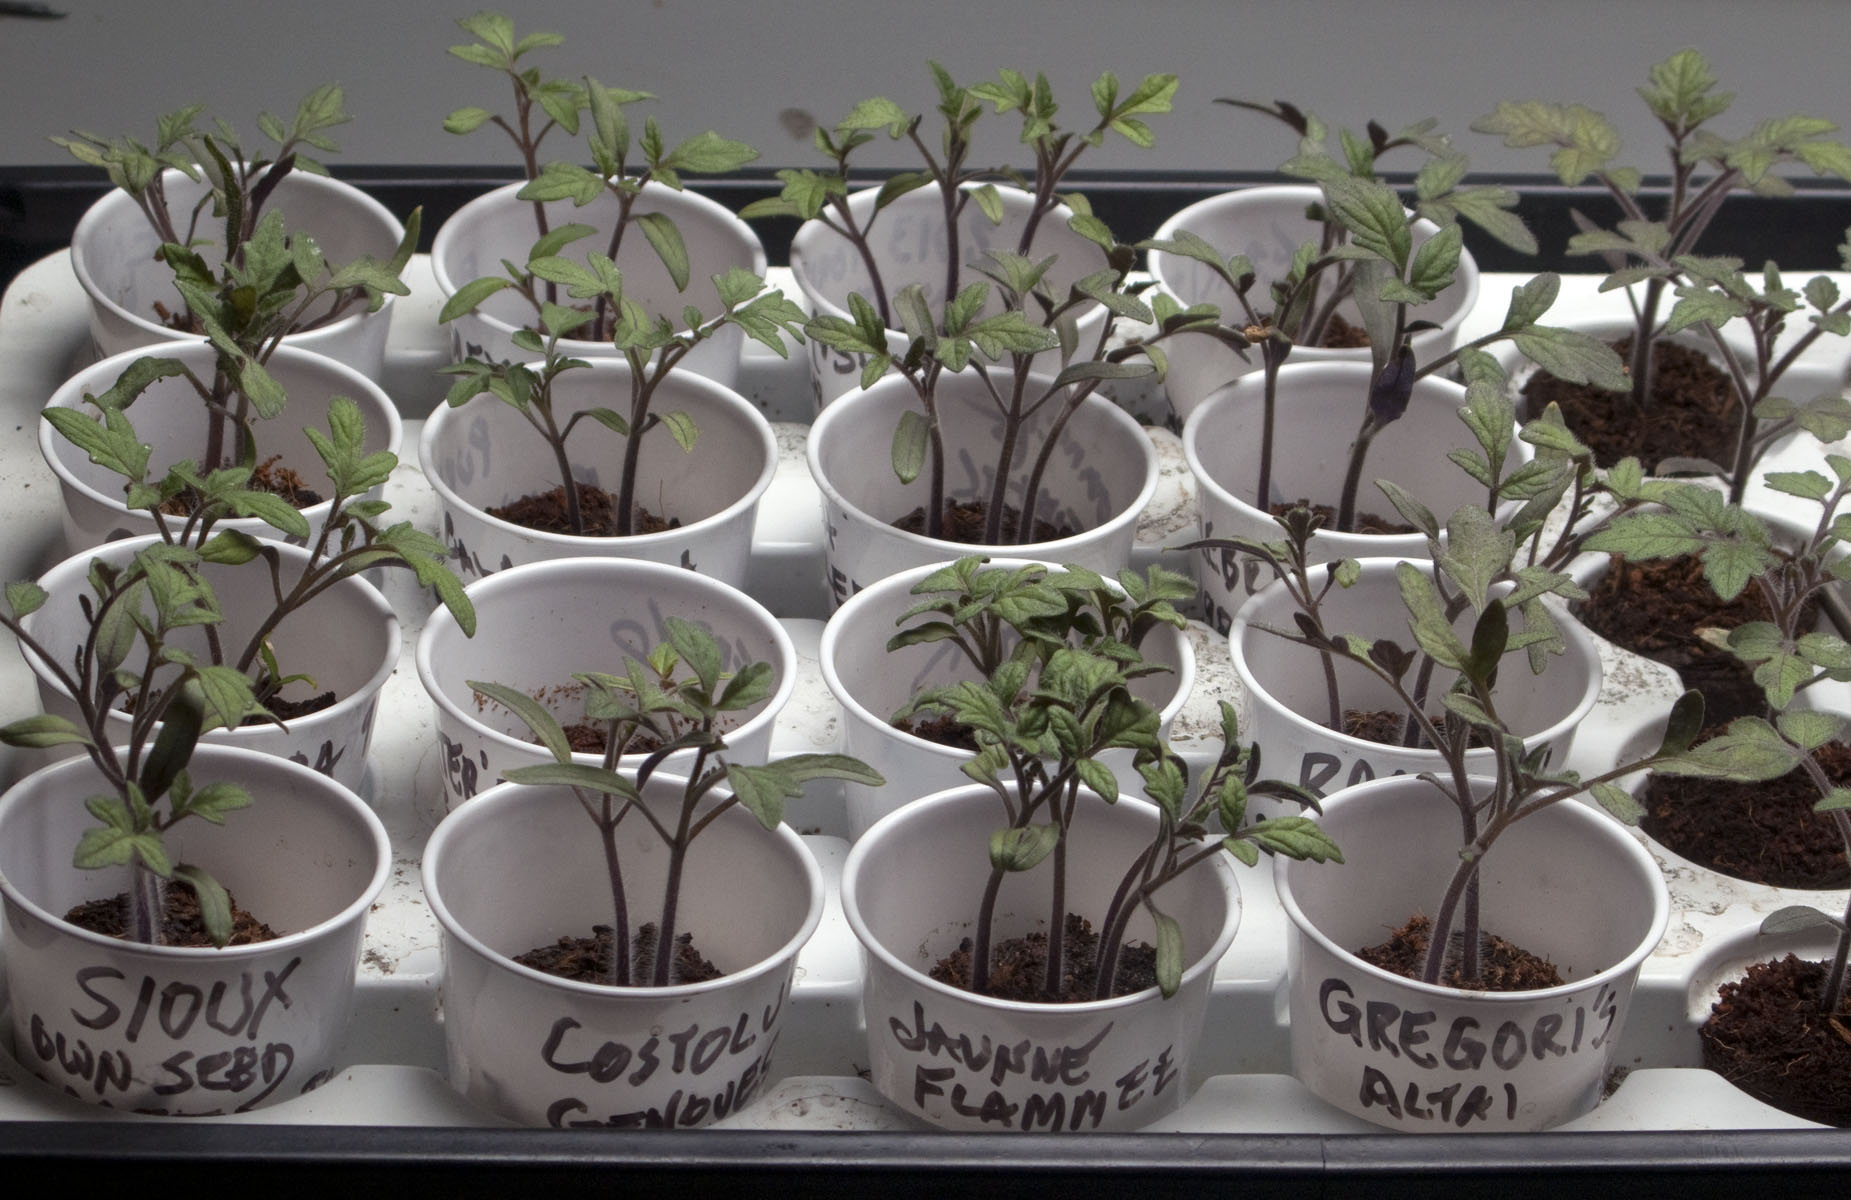
It is time to plant potatoes! I grow mostly Red La Soda and Kennebec. However, there is a huge number of varieties that do great for us in Texas

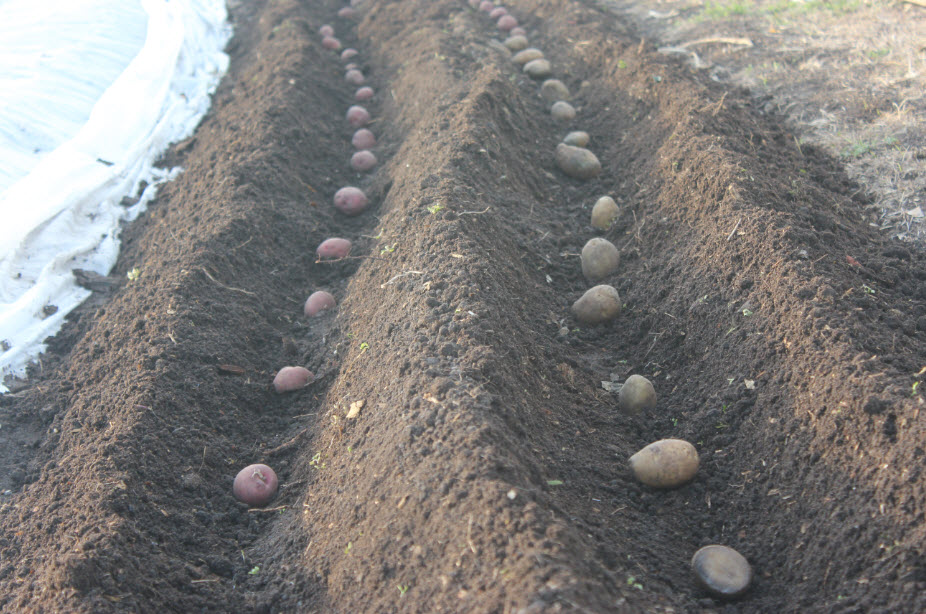
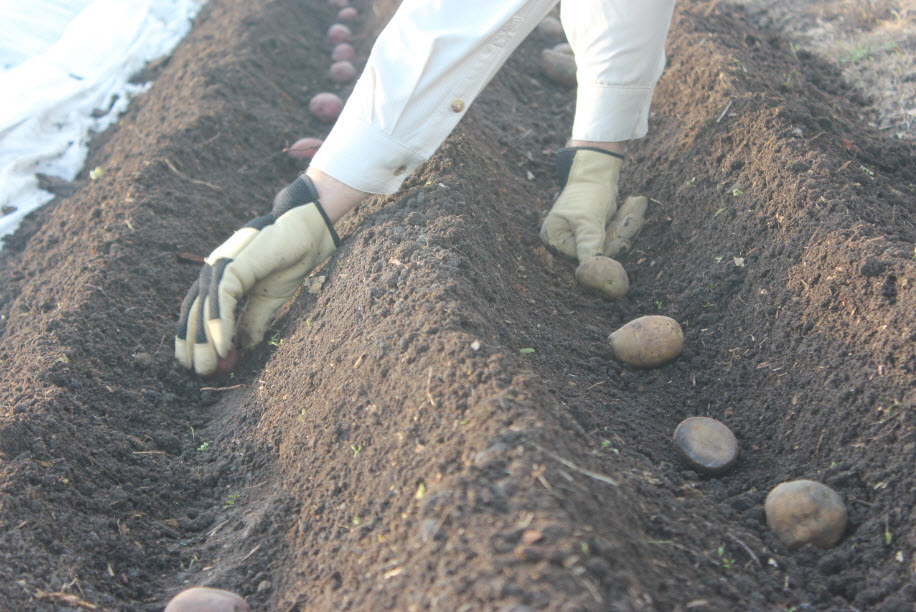
There is an old Southern saying that says you should plant potatoes on President’s Day (in Zones 8A through 9B).  President’s Day falls on Feb. 15 this year so if you are going to rely on the potato to give you a reason to get outside and do some early gardening you need to hurry.  You have less than two weeks left to buy your seed potatoes, get them cut up, scabbed over and planted.

February is not the only time you can plant potatoes in Texas. Save some of your harvest this year and try them in the fall.

February is not the only time you can plant potatoes in Texas. Save some of your harvest this year and try them in the fall.

There is no doubt that President’s Day is a great time to plant potatoes in most of Texas and the Gulf South.  However, after years of growing potatoes I would like to point out that the President’s Day saying is not, in my opinion, completely accurate.  It has been my experience that the saying would be a little more accurate if it said something like “President’s Day is the LAST day to plant your potatoes”.  Potatoes are very hardy plants and they will grow and produce in all but the hottest of months.  If you plant on President’s Day you can be relatively certain that your plants will have time to grow, bloom and produce spuds before our hot weather kicks in.   However, that is not the only time you can, or should plant potatoes in Texas.

fall-potatoes

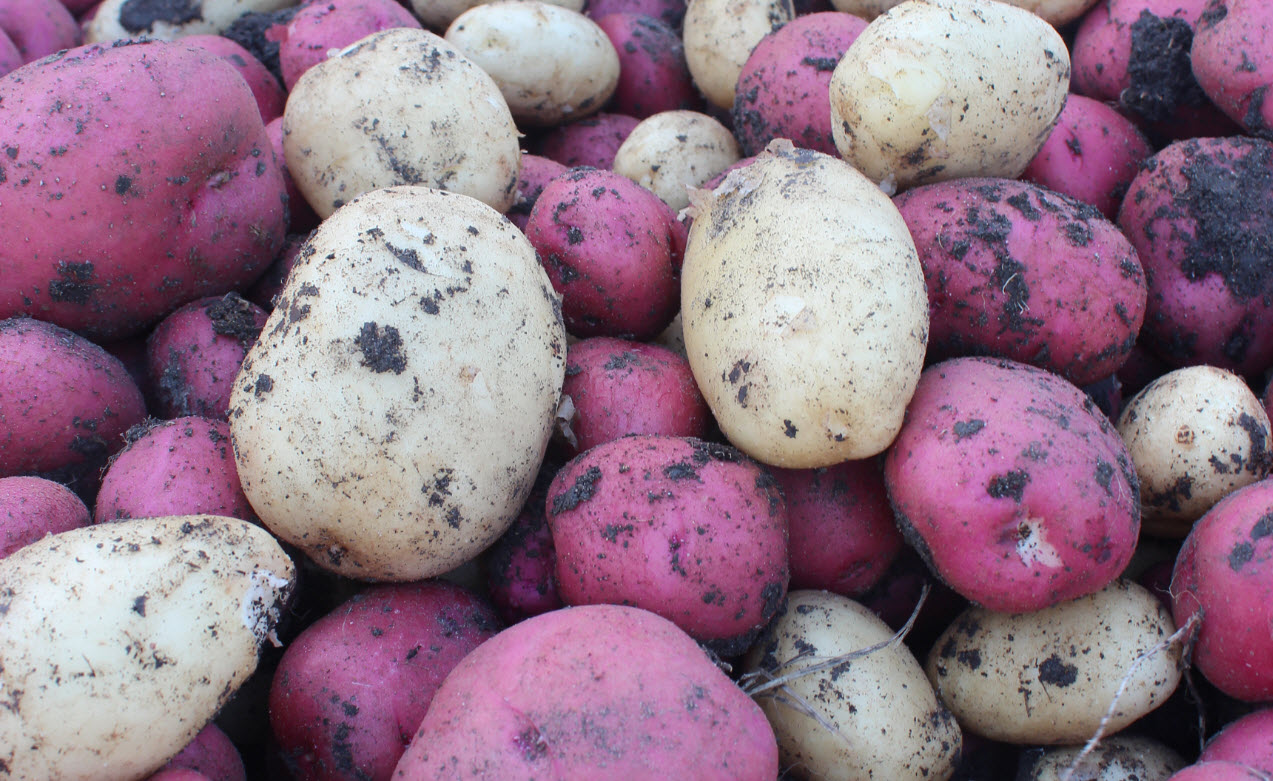
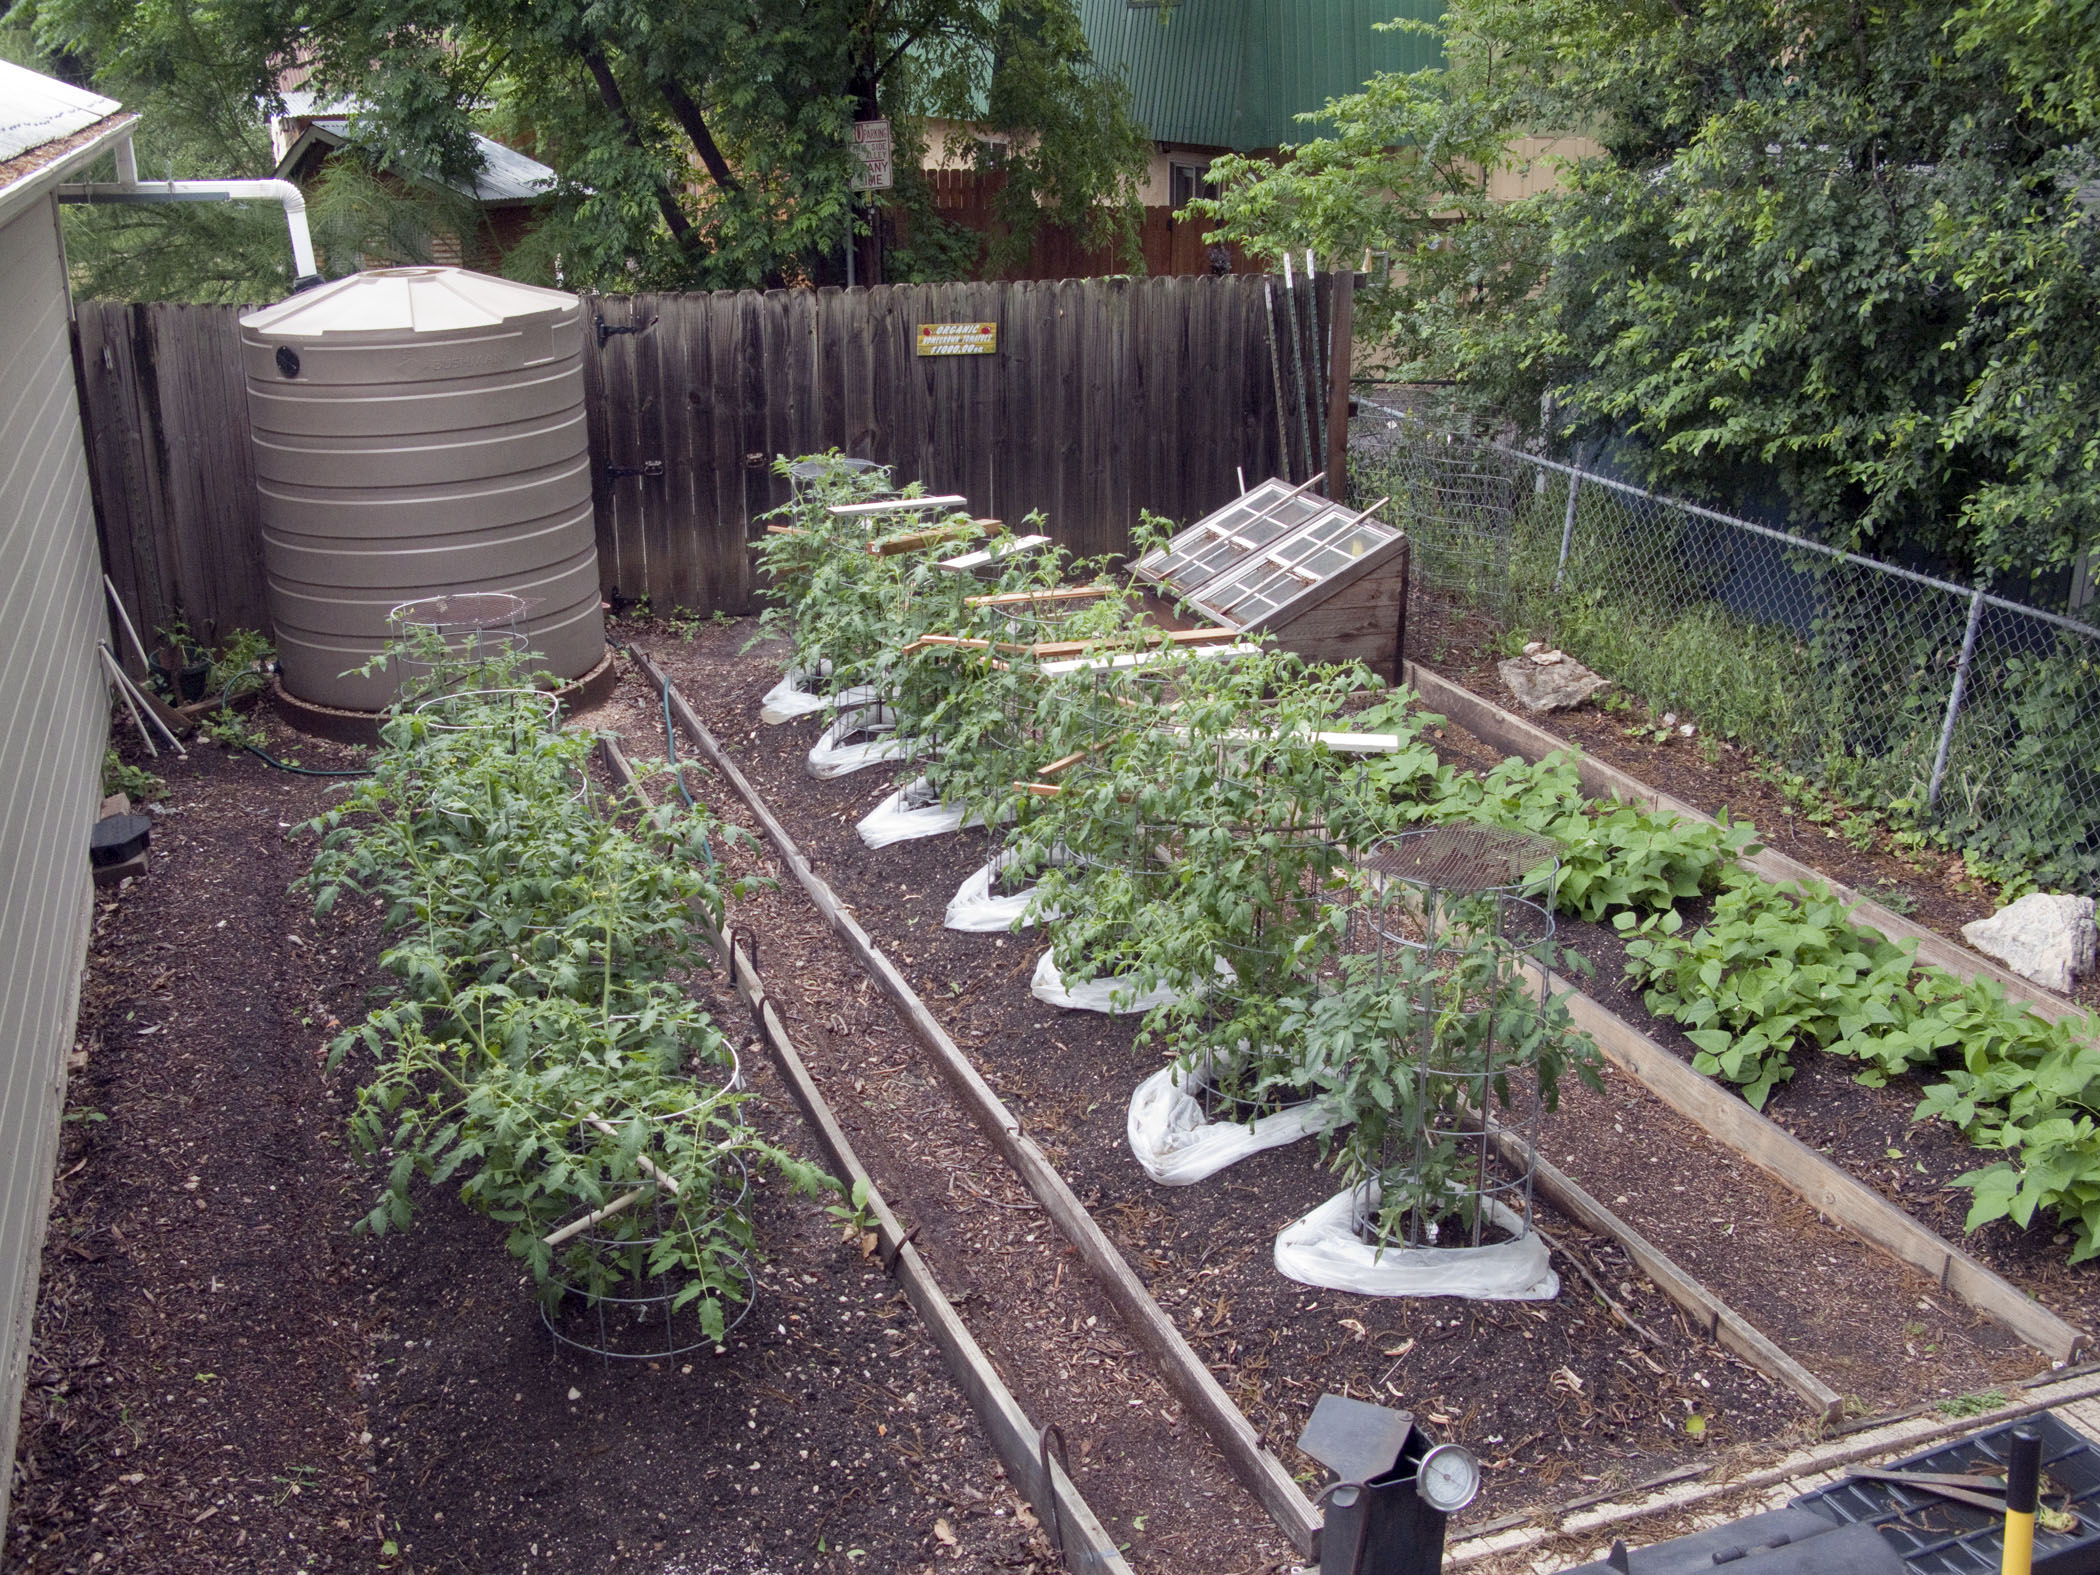
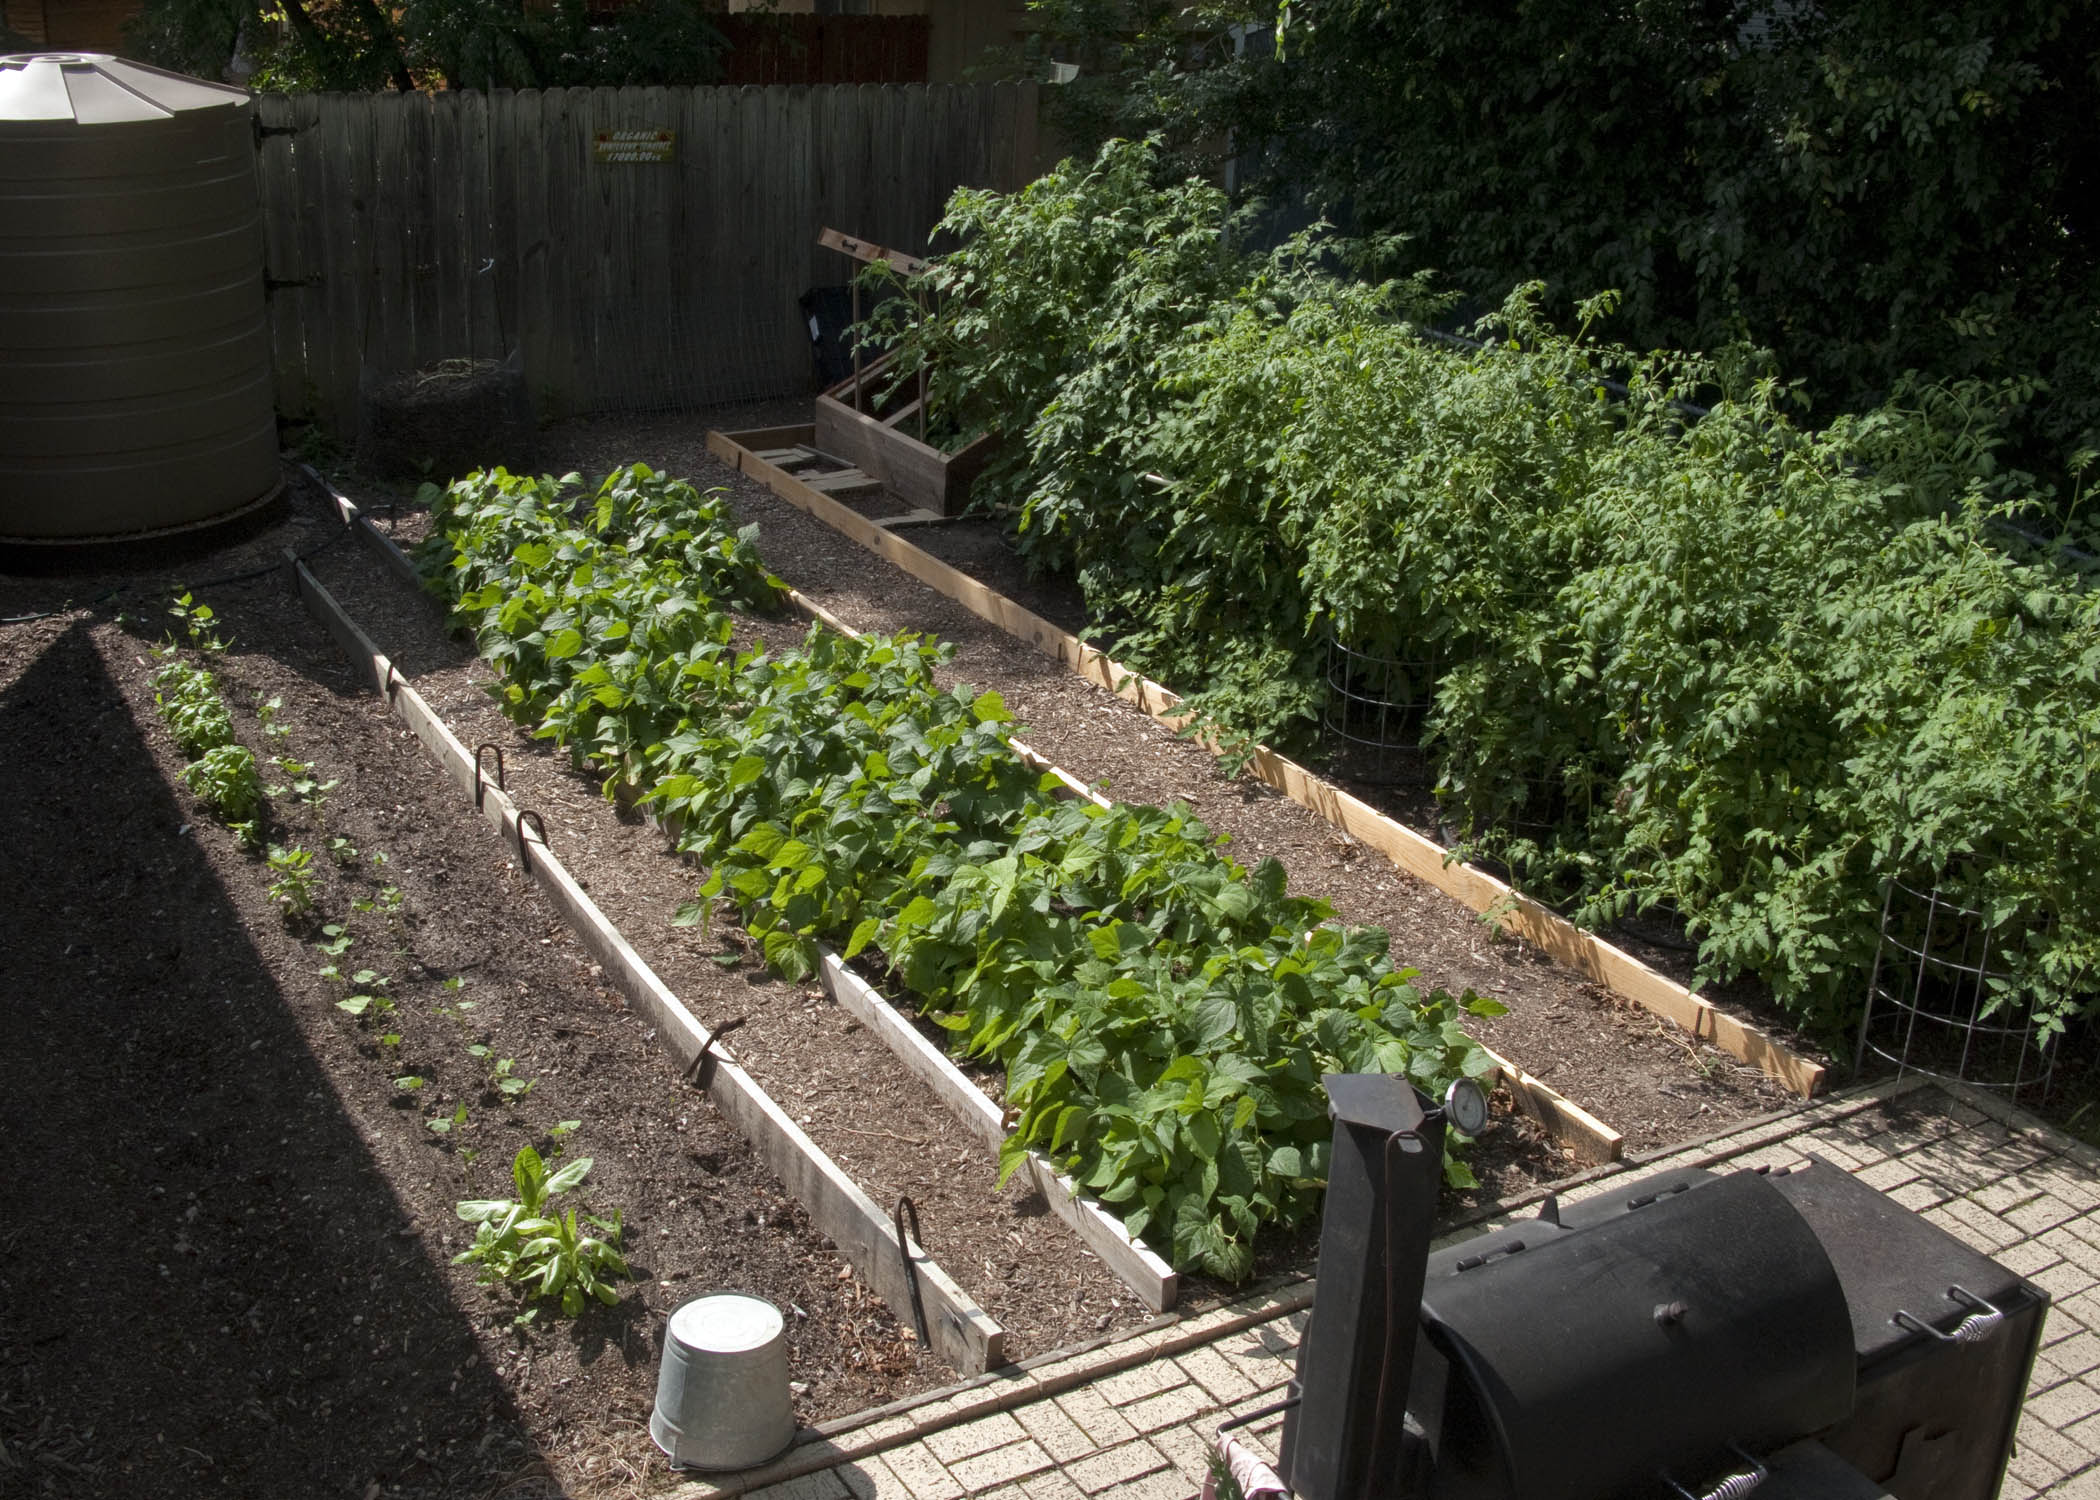
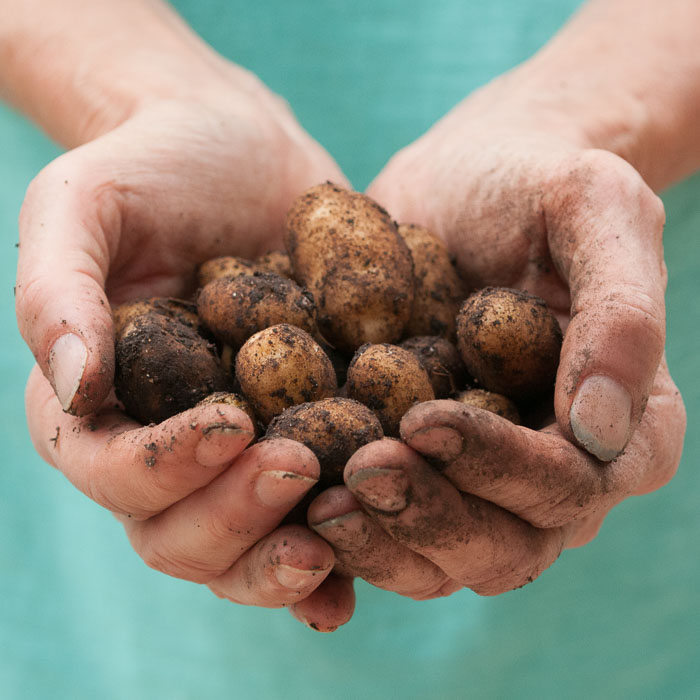
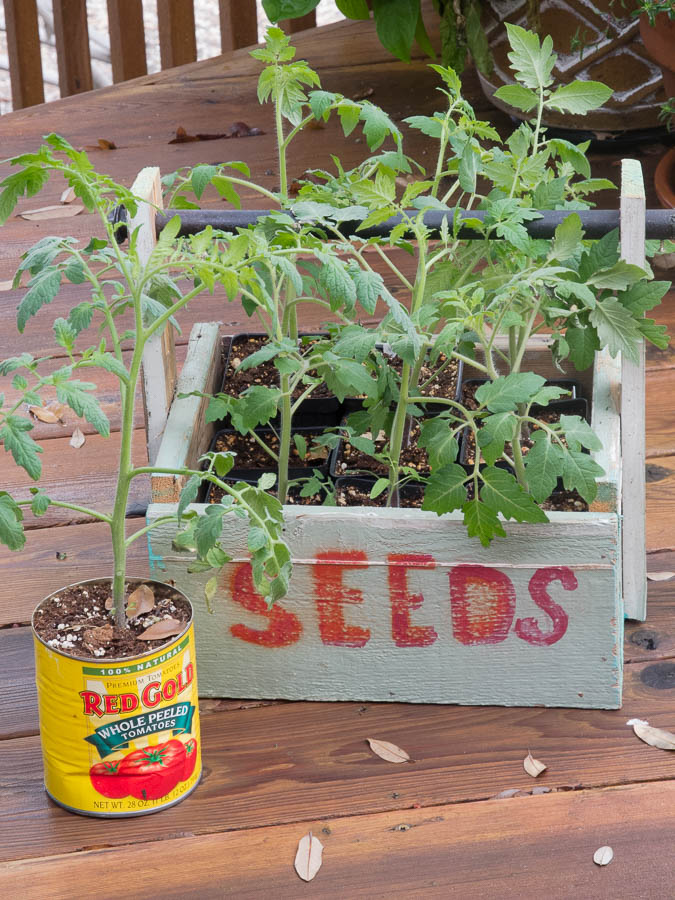
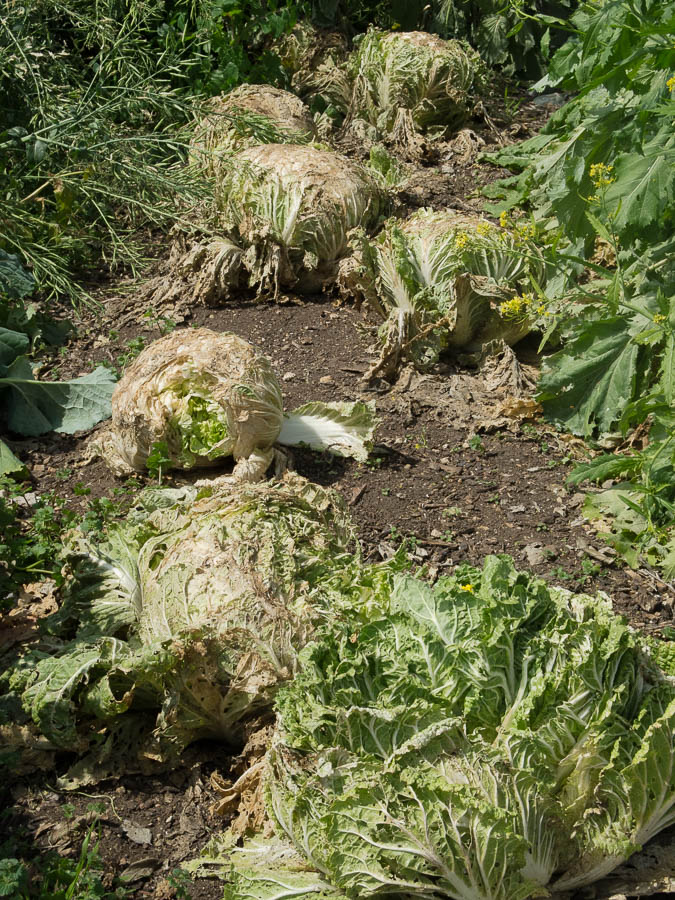
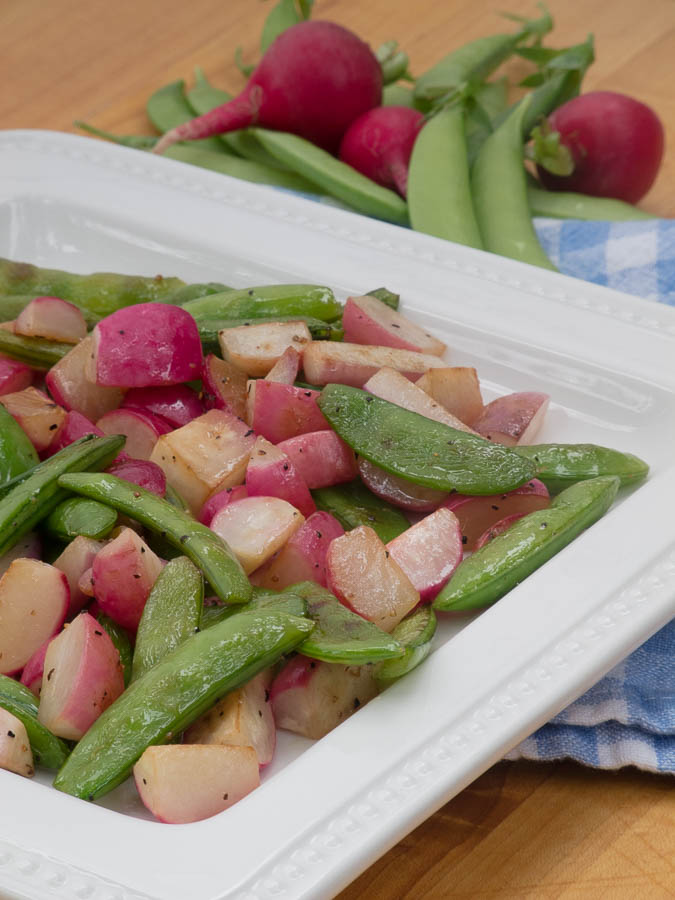
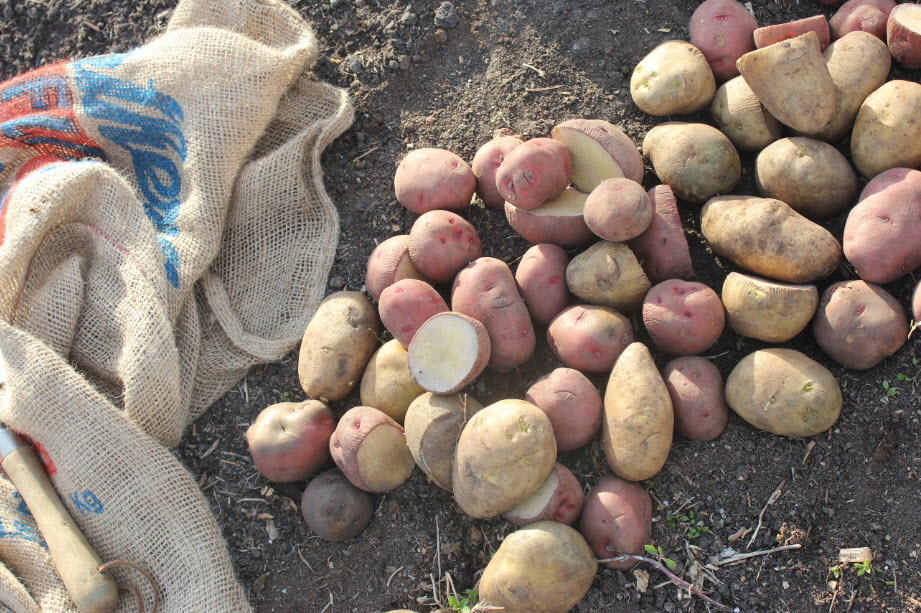
I planted these Red La Soda and Kennebecs in September of of 2013. I harvested them in February of 2014. As you see I had enough to eat and enough to plant again for my May harvest

The only thing that potatoes will not tolerate is high heat.  Because of that, they will do absolutely nothing in the Texas garden from late June to mid-September. However, once temperatures begin to fall in late September, you can begin planting potatoes. Thanks to their cold hardiness, potatoes can survive most of the freezes we get in the Gulf South.  If you are willing and able to give your potatoes a little TLC, you can plant your potatoes as early as September (for a winter harvest) and as late as President’s Day (for a spring harvest).  Plant potatoes in mid to late September and you can expect a decent harvest in December (as long as you are willing to cover them during cold snaps below 28 degrees).  If you plant potatoes in December, in an area that is protected from the north wind (and you can cover them in a hard freeze), they will be ready for harvest before President’s Day (read about my friends at Boggy Creek in Austin harvesting potatoes right now).  Growing potatoes this way will allow you to produce up to three potato harvests per year.

potato-containers

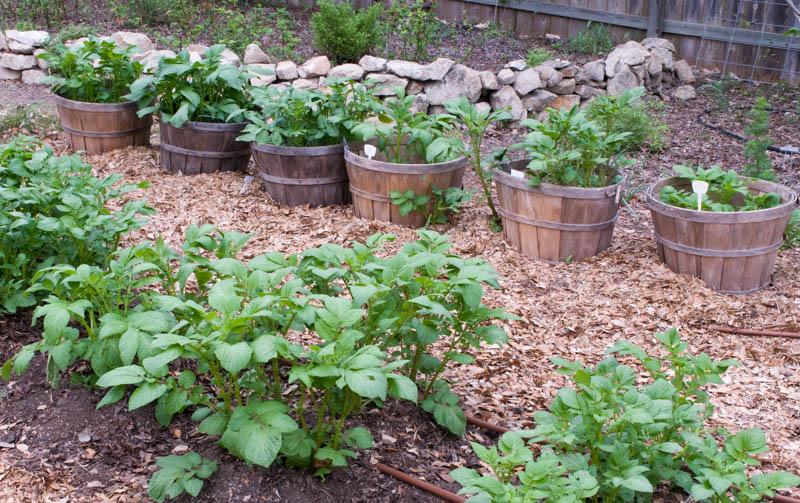
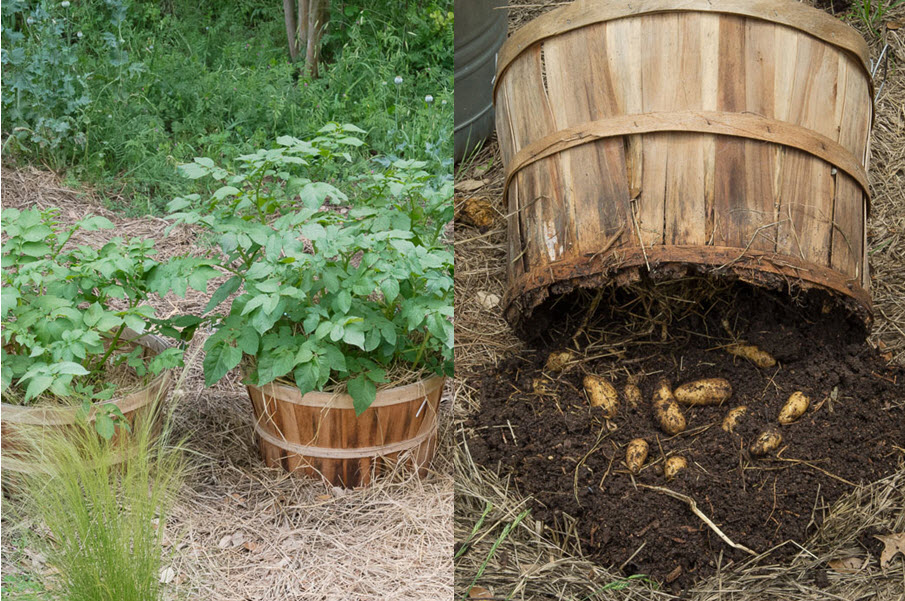
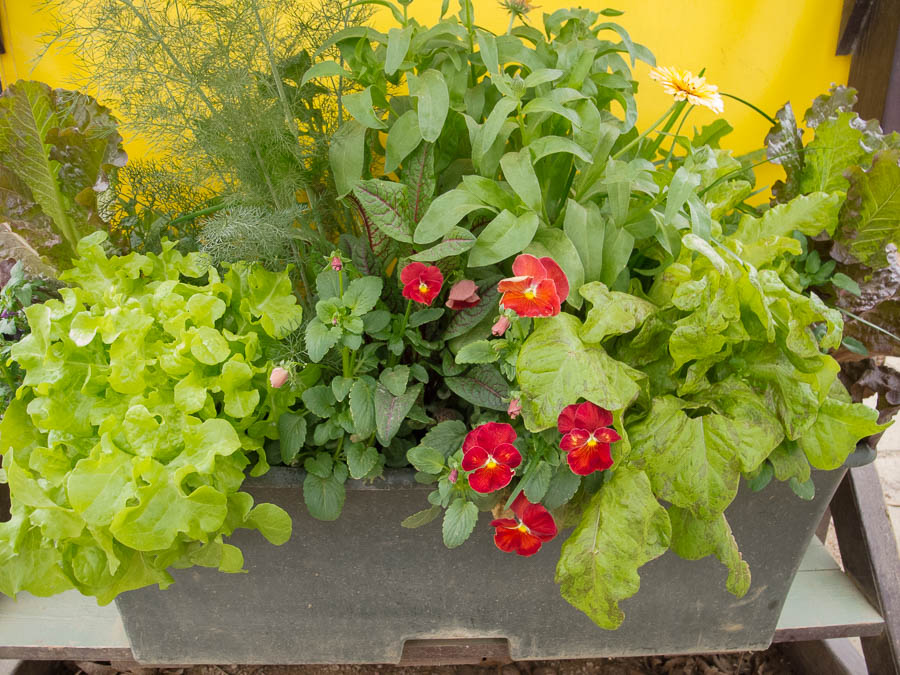
Each year Patty Leander loves to experiment with new varieties of potatoes. She is also a big proponent of growing them in containers.

If you have never grown potatoes I highly recommend trying them.  You can grow them successfully in long wide beds (click here to see how I grow mine) or you can grow them just as well in containers on your back porch (click here to read Patty’s awesome article on container grown potatoes).  Through the years I have learned to really appreciate the humble potato.  They truly are one of the most adaptable, and easy to grow vegetables available.  While planting on President’s Day is a good rule of thumb, don’t let it stop you from trying to grow potatoes at different times of the year.  This year, why not save some of your February planted potatoes for replanting in late fall and early winter?  With a little management and just a little extra care you can produce up to three potato harvests per year.

harvesting-container-grown-potatoes

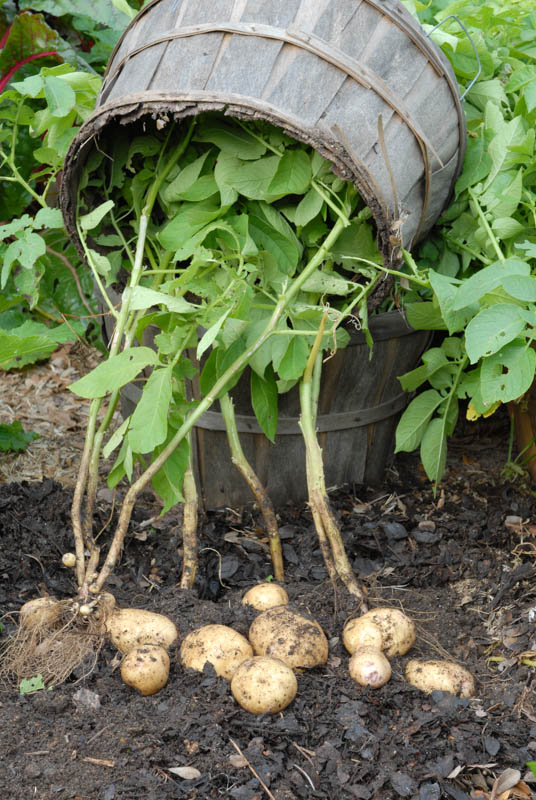
Growing potatoes in containers is fun and easy. Plus harvesting them is a snap!


I share these posts on Our SimpleHomestead Blog Hop.  Be sure to stop by.  The “hop” has tons of great information from gardeners and homesteaders all over the world!

A Garden Visit With Harry Cabluck

I love this sign that Harry has hanging in the back of his garden

I love this sign that Harry has hanging in the back of his garden

Over the next twelve months we will be visiting with 12 gardeners from all over Texas.  They will be sharing some of the knowledge that allows them to garden successfully in our beloved, but climatically challenging state. I have a masters degree in horticulture and I have gardened for years.  However, most of my gardening knowledge came from visits with other gardeners.   I hope these monthly visits will provide you, and me, with a few tips and tricks that will help us all become better gardeners.

Patty and I visited harry Cabluck and his incredibly well done garden earlier this month. We were blown away by how well down it was. Always humble, Harry gives much of the credit for his garden infrastructure to his good friend Tom Lupton.

Patty and I visited Harry Cabluck and his incredibly well done garden earlier this month. We were blown away by how well done it was. Always humble, Harry gives much of the credit for his garden infrastructure to his good friend Tom Lupton.

Our first gardener is Harry Cabluck.  Harry gardens in the back yard of his central Austin home.  While his garden is not the biggest I have ever seen, it is one of the neatest and most well managed gardens that I have ever been in.  Harry was gardening organically long before it was “cool”.  He collects rainwater for irrigation, makes tons of compost, has the nicest cold frame I have ever seen and grows tomatoes from seeds (click here to read how Harry grows his tomato transplants) and then grafts them onto other tomatoes that he has grown from seed.

Garbage bags over tomato plants Thursday, March 19, 2015, in Austin, Texas. ( Photo/Harry Cabluck)

Garbage bags over tomato plants Thursday, March 19, 2015, in Austin, Texas. ( Photo/Harry Cabluck)

tomato-cage-cover

Harry uses a piece of string and a rubber band to quickly and effectively secure his garbage covers to his tomato cages

Harry gives his beloved tomatoes a head start by growing them in an ingenious cage method that he developed.  As early in March as he can, Harry plants the tomatoes he started in January in his neatly bordered beds that are extremely well worked with compost.  He then takes a 55 gallon trash can liner, splits the end and bunches it around the tomato plant.  Then he uses his heavy duty cages to anchor the the trash bag in place.  To keep his trash bag liner secured to his cage he uses an ingenious string and rubber band fastener that is incredibly effective and easy to use.  With bags in place he is able to easily pull the bags up over his frame at the earliest sign of cold weather, high winds or heavy rain.  I was so impressed with this cage method that I seriously considered changing the way I grow tomatoes!  Now let’s hear more from Harry:

Cabluck garden on Tuesday, May 13, 2014, in Austin, Texas. ( Photo/Harry Cabluck)

Cabluck garden on Tuesday, May 13, 2014, in Austin, Texas. ( Photo/Harry Cabluck)

Name: Harry Cabluck

Location: Central Austin.  **City garden of three 100-sq. ft. raised beds.  We rotate a plot holding 12-15 tomato plants a year.

organic-garden-austin

(Photo/Harry Cabluck)

Years gardening: 43+.  First gardened as a child in late 1940’s.  My mother had a green thumb and a source for manure, as her father was a dairy farmer.  As an adult we have had small plots in Dallas and larger plots in Pittsburgh, Pa., and Columbus, Ohio.  We made good use of our Troy-Bilt 6 hp rototiller.  Often improved the soil in these gardens by importing soil, manure and/or spoiled hay.

Years in this plot: 20.   **Our backyard was once the corral area for a nearby home.  When we moved in it was black gumbo clay that would hold ankle-deep water for a few days after each rain. De-ionized the soil with gypsum. Built multiple compost piles 20-feet long before starting to plant in 1995.

tomato-transplants

Tomatoes under lights Sunday, March 2, 2014, in Austin, Texas. ( Photo/Harry Cabluck)

Favorite crop: Tomatoes.  Usually start 60 seeds in trays under lights in the garage in January.  This is the first year to use LED’s instead of T-5 or fluorescent lights. Hope to yield 36 heirloom/hybrids along with 18 rootstock for grafting.  After starts in trays become root bound, transplant to four-inch pots.  Some 12-15 pots stay under lights, the remaining pots are moved to the cold frame.  Sometimes need to run an extension cord and heating pad to cold frame.  Usually give away the tomato plants that are not planted in our garden.  Crop rotation includes basil, green beans, arugula, spinach, marigolds.  January crops include greens, carrots, elephant garlic, shallots, gumbo onions.  Would like to attempt parsnips.  Have never had good luck with sweet peas.

Best tips:  Make good garden dirt.

Compost!!!  This year’s compost pile of ground leaves, mixed with kitchen scraps, cottonseed meal, bat guano and molasses, seems to be the best ever.  In previous years used cooked barley malt (byproduct of brewery) mixed with coffee chaff (byproduct of air roasting).  That stuff needed to be turned at least once daily, as it would putrefy.

compost-bin

Harry composts directly in his beds

Although not necessary, we get great results using our cold frame and 800-gallon rainwater catchment.  A two-inch rain on our 20X20-foot garage roof will fill the tank.  It is usually empty around July 4.

Make use of store-bought soil for seed-starting and transplanting. Happy Frog brand seems best.  Don’t waste time and money on cheap tomato cages. Read Bill Adams’, “Texas Tomato Lover’s Handbook.”

Garden-Cold-Frame

Cold frame in Cabluck back yard garden Saturday, March 7, 2015, in Austin, Texas. ( Photo/Harry Cabluck)

Pest control:  Havahart traps for varmints.  For bugs, mix a one-gallon cocktail containing 50-squirts Tabasco, one ounce of liquid seaweed, one ounce molasses, one ounce fish emulsion, dash of dishwashing liquid…when necessary add BT.  I love my Hudson sprayer.

Weed control: We control weeds by cultivating and mulching regularly.  **Best stuff seems to be wood chips. Long-tined rake, six-inches wide, four tines.

Biggest challenge: Thwarting the squirrels and leaf-footed bugs.  **Would like to have a moveable pergola, because a hoop house is always a challenge to erect and doesn’t look good.

Favorite amendment: Cottonseed meal AND anything with trace elements…especially glauconite, WHICH seems to help blossoms set fruit in heat and cold.

Do we preserve:  No.   **Not large enough garden, small yields.

Favorite advice:  Have a good friend who has great ideas.   ***Thanks to Tom Lupton.

What would you like to do better?  Would like to learn more about tomato biology. How to ensure more tomato blossoming and fruit set and how to improve brix.

Gardening in a Galaxy Far, Far Away by Patty G. Leander

We began the New Year with three exciting events in our family – our oldest daughter completed her firefighter training, our Red Raider niece married a handsome red-headed Aggie and we took my awesome in-laws (ages 86 and 90) to see ‘Star Wars: A Force Awakens’.

Leander_Graduation

Proud of our courageous firefighter (and valedictorian)!

Bruce_Leander

Bruce practicing his photo bomb technique on our niece’s beautiful wedding cake.

Leander-Wedding

Grammy and Grampy Leander (he’ll be 91 next month) learning to take a selfie at the wedding reception – how cool is that?

During the movie, both my husband and my daughter looked over and nudged me. I get nudged a lot in reference to the vegetables I grow in my garden and I hope I won’t be giving much away if I tell you that cauliflower makes an appearance in the Star Wars Galaxy!

Romanesco-Cauliflower

Galactic Gardening – apparently this Romanesco cauliflower grows in other galaxies

You can grow Romanesco cauliflower in your earth-bound garden and January is a good time to set out transplants – if you can find them. You can also grow your own transplants but you’d have to start right away because this galactic brassica does not like the heat. It takes 5-6 weeks to grow a good sized transplant, then another 6-8 weeks to reach a harvestable size. That puts us well into April. If you live in North Texas or beyond you may be able to get away with this, but gardeners in Central and South Texas are better off waiting until next fall to give this one a go. If planted too late in spring the warm weather may cause it to bolt before it has a chance to reach maturity.

Romanesco_Cauliflower-2

A striking Romanesco cauliflower ready for harvest

Put this unique but easy-to-grow cauliflower on your list for fall 2016. Open-pollinated, heirloom seeds are available from Baker Creek (www.rareseeds.com), Sustainable Seed Company (www.sutainableseedco.com) and Seed Savers Exchange (www.seedsavers.org). Or you can opt for a slightly earlier hybrid called ‘Veronica’, available from Johnny’s Seeds (www.johnnyseeds.com) or High Mowing Seeds (www.highmowingseeds.com). And if you or your kids are really into Star Wars, give ‘Skywalker’ cauliflower a try. A hybrid variety noted for bright white, dense heads and cold tolerance; it is well-suited for fall cultivation. Seeds are available from Johnny’s and High Mowing.

Bolted_Romanesco_Cauliflower

Bolting Romanesco – not a pretty sight but still edible


I share these posts on Our SimpleHomestead Blog Hop.  Be sure to stop by.  The “hop” has tons of great information from gardeners and homesteaders all over the world!

Cucumbers: Cool, Crisp and Refreshing by Patty G. Leander

refreshing-cucmbers

Easy to grow and refreshing to eat!

Now that we have harvested, admired, ogled and savored the first of our home-grown tomatoes it’s time to let cucumbers, another summertime classic, share the limelight.

cucumber-vines

Cucumber plants have responded to the rain with oodles of fruit


This has been one of the best cucumbers seasons I have seen in several years; my plants have responded to the generous rains with vigorous growth and a steady supply of bright yellow flowers yielding firm, emerald fruit. I planted six varieties in my garden in mid-March and we have been slicing, dicing, dipping, pickling, steeping, even sautéing, cucumbers since early June with no signs of letting up any time soon. Below are a few of my favorite recipes for enjoying the non-stop cucumber harvest.

refrigerator-pickles

Make these quick, no-cook pickles any time you have a surplus of cucumbers

No Cook Sweet and Sour Pickles

6 cucumbers, thinly sliced

1 onion, sliced

1 ½ cups sugar

1 cup white vinegar

1 teaspoon celery seed

1 tablespoon coarse salt

Mix all ingredients and let stand 1-2 hours. Spoon into covered glass jars and store in refrigerator.

Japanese-buckwheat-and-cucumbers

A refreshing blend of mangoes, cucumbers and Japanese buckwheat noodles in a sweet-sour dressing


Soba Noodle Salad with Cucumber and Mango

¾ cup rice vinegar

¼ cup sugar

½ teaspoon salt

2 garlic cloves, minced

1 jalapeño or serrano chile, seeded and chopped

3 tablespoons fresh lime juice

1 tablespoon sesame oil

12 ounces soba noodles or thin spaghetti

2 large cucumbers, seeded, halved lengthwise and thinly sliced

1 ripe mango, peeled, halved and thinly sliced

1 cup chopped fresh basil

1 cup chopped fresh mint

1 cup chopped peanuts

Heat vinegar, sugar and salt over medium heat until sugar dissolves, about 1 minute. Stir in garlic and jalapeño and set aside to cool. Mix in lime juice and sesame oil.

Cook noodles in large pot of boiling water until tender but still firm to bite, 4-5 minutes. Drain then rinse under cold water. Drain again, shaking off excess water.

Transfer noodles to a large bowl. Add dressing and toss to coat. Add cucumber, mango, basil and mint to noodles and toss gently. Sprinkle with chopped peanuts and garnish with lime wedges just before serving.  Yield: 6-8 servings

cucumber-sandwiches

Grow your own sprouts or microgreens to top these little cucumber sandwiches.

Cucumber Sandwiches

Thanks to my local Central Market for this light and easy recipe – perfect for a little pick-me-up.

1 thin-skinned cucumber, thinly sliced

2 tablespoons rice vinegar

Salt & pepper to taste

8 oz cream cheese, softened

½ cup chopped pecans

2 teaspoons Dijon mustard

8 slices bread, crusts trimmed

Microgreens or sprouts

Sprinkle vinegar over cucumbers and season with salt and pepper. Set aside.

Mix cream cheese, pecans and mustard and spread lightly on 4 slices of bread.

Top with seasoned cucumber slices, microgreens or sprouts and remaining bread. Cut into 4 triangles to serve.

Thai-cucumber-salad

Peanuts add a nice crunch to this refreshing Thai Cucumber Salad

Thai Cucumber Salad

Sweet, tangy, minty, spicy – this salad has it all.

2 cucumbers, cut into matchsticks

1 onion, thinly sliced

¼ cup chopped mint

1 teaspoon Asian chili paste

2 tablespoon lime juice

1 tablespoon sugar

1 tablespoon rice vinegar

Salt to taste

½ cup roasted peanuts, chopped

Combine cucumbers, onion and mint in a large bowl. Whisk remaining ingredients together in a separate bowl. Pour over cucumbers and mix gently. Let sit at room temperature for 10-15 minutes to allow flavors to blend. Sprinkle with chopped peanuts just before serving. Yield: 4 servings


Raita

We love this refreshing Indian condiment; serve with spicy chicken, naan bread, pita chips or whole grain crackers.  Tweak the seasonings to suit your taste.

2 cups plain yogurt

2 medium cucumbers, peeled and seeded

1 garlic clove, minced

1 tablespoon chopped dill, cilantro and/or mint

1 tablespoon freshly squeezed lemon juice

½ teaspoon cumin

¼ teaspoon salt

¼ teaspoon pepper

Coarsely grate cucumbers. Place in a sieve to drain for a few minutes then pat dry. Mix with remaining ingredients and chill 1-2 hours before serving. Sprinkle lightly with cayenne before serving.

pickling-cucumbers

Pickling cucumbers (these are a variety called ‘Calypso’) are best for making dill pickles – they have thin skin and can stand up to the pickling process . Harvest regularly and use the smallest ones for pickles.

And last, but certainly not least, my favorite recipe for dill pickles. A few years ago my husband and I had the pleasure of visiting Greg Grant in his little East Texas kingdom of Arcadia (population 57). One of the highlights while we were there – and there were many – was dinner at his parent’s home…unfortunately his parents were off on a visit with grandkids but Greg played host and served us a delicious dinner, mostly prepared by his wonderful mother before she left town. When Greg set a quart jar of homemade dill pickles on the table I couldn’t stop eating them. I asked about how she made them and it will come as no surprise that his mother’s recipe is almost identical to Mary Stewart’s recipe for dill pickles. Both have been previously published and I am sharing them again here. Hope you will make and enjoy!

pickle-recipe

You know it’s gonna be good when two amazing cooks – who don’t know each other – use the same recipe!

Dill Pickles

This recipe makes 2 quarts, double if you have an abundance of cucumbers. Start with clean, sterilized jars. Use the grape leaves if you can find them – they contribute to crispness.

Small, whole pickling cucumbers, washed and drained

1 cup vinegar

2 ½ tablespoons pickling salt

2 cups water

4 heads fresh dill

4 cloves of garlic

4 hot peppers (optional)

4 grape leaves (optional)

Bring vinegar, water and salt to a boil. Meanwhile place one hot pepper, one clove garlic, one head of dill and one grape leaf in each quart jar.  Pack tightly with cucumbers and add another head of dill and garlic clove. Fill jars with hot pickling solution, leaving ½” headspace at top of jar. Wipe rim and seal with lid. Process jars in a boiling water bath for 10 minutes OR skip the water bath, let jars cool, top with lids and store in the refrigerator for short term enjoyment.

making-pickles

I share these posts on Our SimpleHomestead Blog Hop.  Be sure to stop by.  The “hop” has tons of great information from gardeners and homesteaders all over the world!

Tips for Week 25 in the Zone 9 Garden

This past weekend I harvested my first crop of elephant garlic.  This was a new plant for me and I thoroughly enjoyed growing it.  While it is not technically garlic (it is more closely related to leeks) it was a beautiful plant that can be used ornamentally or for its fist sized, mild, garlic tasting bulbs.  My elephant garlic was given to me by a man who has grown it in his garden for 47 years.  He got it from his parents who grew it for years before sharing with him. I absolutely love plants like this.  Whether they are called heirloom plants or pass a long plants, they are a living link to our horticultural past.  I love finding, growing and preserving these living links to our southern heritage.  If you have an heirloom plant that you love, leave me a comment.  I would love to hear about it.

elephant-garlic-scapes-2

With it long curvy scapes and big flower heads, Elephant Garlic is a useful as as ornamental as it is as a food source.

Pest Control

  • Invest in a few select organic insecticides– Bt for caterpillars, insecticidal soap for soft-bodied aphids, neem oil for beetles and squash bugs, spinosad for caterpillars and stink bugs. Follow label instructions, and spray only as needed. Mark the purchase date on the product container and store in a protected location, preferably indoors.
  • When using any insecticide, mix up only what will be needed for the plants you are treating – I rarely mix up a gallon of anything, and often get by using a one pint or one quart squirt bottle, depending on the product and number of plants needing treatment. Once I determine how much a particular product is needed per pint, I write it directly on the pesticide container so I don’t have to scour the label and recalculate every time.
  • Protect bees by applying pesticides in the late afternoon or evening, when bees are less active.
  • Control Spurge and Puslane-These two plants are some of the most difficult to control. Both grow rapidly and produce thousands of seeds.  Chemical control has little effect on mature purslane.  Pull these weeds and place in a plastic trash bag.  Do not compost!  Apply heavy mulch or solarize if possible after you remove the plants.
acetic-acid-weed-control

When mixing herbicides or pesticides mix only what you need and clearly mark each container

Vegetables

  • Plant okra, sweet potatoes, winter squash and peppers-Realize this is the absolute end of the spring planting season. It may be too late to plant even these in southern parts of the state.
  • Water correctly- It is better for your plants, and your water bill, if you apply one inch of water every five days. Water slowly in the morning to reduce evaporation loss. 
  • Remove spent plants like green beans to avoid attracting pests.
  • Top dress empty rows with compost and cover with a heavy layer of mulch to prepare them for fall planting in late July
water-sprinkler

Water deeply and less frequently to encourage deep root growth and conserve water

Ornamentals

  • Cut fresh flowers for the house-Cut your zinnia’s, sunflowers, gomphrena, celosia and other fresh cuts early in the morning. Cut stems on 45 degree angles, strip foliage and drop immediately into cool, clean water
  • Plant sweet potato vine from transplant-Sweet potato vine is a great way to add lots of low maintenance color to your pots and beds.  With its bright chartreuse or purple-black foliage this drought and heat tolerant plant will add LOTS of color to your summer landscape.  Sweet potato vine will provide you lots of color right up to the first freeze 

Fruit Trees

  • Pick remaining plums-Plums will continue to ripen after they are picked. Pull when they have half color and allow them to ripen inside;  especially if making jelly.  Over ripe fruit left on the trees, or on the ground, invites in raccoons, possums and mocking birds
  • Pick Peaches-Pick peaches when they are slightly soft to the touch

ripe-plums

.

I share these posts on Our SimpleHomestead Blog Hop.  Be sure to stop by.  The “hop” has tons of great information from gardeners and homesteaders all over the world!

Drought-Busting Rains by Patty G. Leander

As the designated voice of vegetables for Jay’s blog, it seems fitting to commiserate with all the vegetable gardeners out there who are dealing with the challenges of May’s drought-busting rains. First let me say that my heart and deepest sympathy go out to those who have experienced tragic losses as a result of the flooding and I extend my admiration and gratitude to the hard-working first responders, rescue teams and dedicated volunteers who have come to the aid of the distressed.

Here in Central Texas we broke the record for total rainfall for May with a little over 17 inches; our average May rainfall is normally around 4 inches. The experts have declared that we are officially in an El Niño year which means more rain and hotter temperatures can be expected. After receiving almost 10” of rain the last week of May things are starting to dry out around here and a look at the latest drought monitor map indicates that the rains have finally pulled Texas out of the extreme drought category:

http://droughtmonitor.unl.edu/Home/RegionalDroughtMonitor.aspx?south

Not the most stylish look but it works!

Not the most stylish look but it works!

All of this moisture has created an ideal environment for lots of pesky mosquitoes and each individual gardener must decide how far they want to go to combat this pest. After a recent morning in the garden spent waving my arms hysterically to shoo the mosquitoes from my face, I abandoned fashion and style in favor of practicality and protection and pulled out my secret weapon: a mosquito hat my nephew bought for me at a Boy Scout Trading Post during summer camp a few years ago. He told me it worked great and he was right. I get tremendous satisfaction when I hear the buzzing around my ears and I know the little buggers can’t get to me. If you don’t have access to a Boy Scout Trading Post, look for these nets at hunting, camping or sporting goods stores – you might even find something more stylish.

container-grown-potatoes

Potatoes growing in open-ended bushel baskets

The excessive rains and water-logged soil caused some rotting among my onions and garlic but fortunately I planted my potatoes above ground in open ended bushel baskets and got a modest harvest of Red LaSoda, White Kennebec and La Ratte fingerling potatoes.

la-ratte-fingerling-potato

‘La Ratte’ fingerling potatoes

tasty-tomatoes

Hoping for tasty tomatoes

It’s been a good year so far for cucumbers and green beans but not so good for tomatoes. From Houston to Austin to San Antonio and beyond I have been hearing reports of delayed ripening and watered-down flavor due to the rainy weather and cool, cloudy days. My favorite variety from a couple of years ago was ‘Marianna’s Peace’, a rich red tomato with juicy, complex flavor, but the first fruits I’ve tasted from this year are washed out and bland tasting. Has this been a good tomato season where you live?  Hopefully the warmth and sun and drier weather will help intensify that flavor we crave in the tomatoes yet to ripen. Hope you are blessed with a good harvest and many sumptuous tomatoes in your future!

‘Stewart’s Zeebest’ Okra by Patty G. Leander


Southern-Living-Seed-Guide

The Southern Living Seed Guide

A little over a month ago I was thumbing through the February issue of Southern Living while waiting for a dental appointment. I skipped past the kitchen redo, the make-your-own-berry-wreath and the South’s new hotels to land on a piece titled The Southern Living Seed Guide. As a seed-admiring, seed-saving vegetable gardener I am drawn to stories and articles about seeds, varieties and the stories behind them.

My favorite seed story, of course, is the one I am most familiar with and one I have a personal connection to – ‘Stewart’s Zeebest’ bushy okra, developed by my all-time favorite garden mentors, teachers and encouragers, the late George and Mary Stewart. So when I saw ‘Stewart’s Zeebest’  listed as a Southern Living pick it made me smile real big, and then my smile turned to disbelief and dismay when they referred to it as a Louisiana heirloom!

Stewart’s-Zeebest-okra

‘Stewart’s Zeebest’ okra harvest.

Uh-uh, no way. We love you, Louisiana, but the Lone Star State’s reputation is at stake here: ‘Stewart’s Zeebest’ is not a Louisiana heirloom though you certainly get some credit since George was born in Westlake, Louisiana and ‘Zeebest’ was selected from a planting of ‘Louisiana Green Velvet’ okra. But all the toil and sweat that George and Mary put into developing ‘Zeebest’ – planting, selecting, saving, replanting and ultimately sharing – occurred in the 1980s at the Stewart homeplace in Houston, right down on South Main where George and Mary spent most of their adult life, across the street from the train tracks and a few doors down from the auto repair shop. And to add a little more perspective, George and Mary had lived in Houston so long they could remember the installation of Houston’s first traffic light and gleefully shared tales of the days before air-conditioning.

houston-chronicle-stewart

Houston’s premier garden educators, George and Mary Stewart, profiled by Kathy Huber in the Houston Chronicle, 1990

George and Mary Stewart were extraordinary gardeners, full of wit and wisdom and a special gift for entertaining while educating. They drew the audience into their horticultural adventures with stories and laughter, inspiring a can-do attitude that made you want to go home and grow-your-own. For posterity’s sake and to keep the record straight, here is a brief history of ‘Stewart’s Zeebest’:

George-Stewart

A proud George with one of his branching, productive ‘Zeebest’ okra plants. Photo by William D. Adams

In the 1980s George and Mary were given a few pods from a highly productive planting of ‘Louisiana Green Velvet’ okra from the garden of family friend Joe Ziegler. The seeds were planted in the Stewart garden and George recognized that some of the plants developed a strong branching pattern. They began carefully selecting for tender, productive and heavily branched plants which George enthusiastically referred to as ‘Stewart’s Zeebest Bushy Okra’; over time it was shortened to ‘Stewart’s Zeebest’ or simply ‘Zeebest’ and soon they were promoting their home-grown Texas variety and giving away seeds. That was almost 30 years ago so it hasn’t yet reached heirloom status. An heirloom is generally defined as an open-pollinated variety that has been grown and maintained by an individual or a community for 50 years. Well, George and Mary are gone now but they left ‘Zeebest’ in our hands and we in turn need to keep it in production for future generations. Today, thanks mostly to the efforts of Bill Adams, Retired Harris County Extension Agent and good friend of George and Mary, seeds are available from Baker Creek Heirloom Seeds (Rare Seeds) and Southern Exposure Seed Exchange (Southern Exposure).

Whether you are a native Texan or a transplant, if you live in Texas I hope you have learned to love okra. If you haven’t planted seed yet now is a good time. Okra not only survives but it thrives in our heat and looks pretty good while doing it, thanks to being a member of the mallow family which also includes hibiscus and hollyhock. Most varieties produce in 60-65 days and will continue to produce right up to the first frost. Overgrown okra can be fibrous and tough and should be picked when it is 3-5” long. It grows fast so check for pods every other day.

stewarts-zeebest-okra

Flag the best okra pods for saving and let them dry on the plant.

Saving seed of okra is very easy to do as the seeds are big and the pods are a perfect receptacle.  To ensure the purity of the seed it is recommended that you grow and save seed from only one variety at a time. Select one or two pods (or more if you want to have plenty to share) from your healthiest specimens, flag the chosen pods with brightly colored tape, and let those pods dry on the plant.

I met George and Mary in 1989, when Mary was 79 and George was 83. I was in my early thirties and they could run circles around me in the vegetable garden. They gardened intuitively and frugally, generously sharing what they knew about growing vegetables to scores of home gardeners along the Gulf Coast.  George and Mary were proud of the vegetables that they grew and their produce needed no enhancements. But George was a born storyteller and was known to sometimes embellish the truth. Though he tried to keep his exaggerations to a minimum, it seemed to be Mary’s lot in life to keep George grounded in truth. In fact, at the age of 83, after some 60 years of marriage, Mary wrote and dedicated the following poem to George:

Tell any tale you like, m’love,

Embroidered with lies and fiction;

I’ll not interrupt to correct, m’love,

                   Your facts or figures or diction.

Embellish your stories to any degree

                   With fables and falsification;

Just don’t turn to me and expect me to give

                   My unqualified verification.


With that in mind, below is a description of ‘Zeebest’, taken right out of Mary’s garden notes:

“The parent plant of these seed had 28 branches and 243 pods on it at one time.  We started with Louisiana Green Velvet and over a period of 9 years of selection for branching tendencies, this is the result.  To save seed, let a fine pod on a good specimen plant dry on the stalk,
then shell out and let dry completely in open tray at room temperature.  Store seeds in a tightly closed container in the refrigerator.”

mary-stewart

Mary’s collection of recipes and remembrances, published at the age of 80

Mary learned to use a computer when she was 80 years old and proceeded to write a cookbook which she titled, “Kitchen NostalgiaAn Incomplete Cookbook–A Collection of Heirloom Recipes, Past and Future”.  The preface of Mary’s cookbook begins “This is in memory of Mamma.” Here is a favorite recipe from the files of vegetable gardener and home-cook extraordinaire, Mary Stewart, in her own words:

Okra and Tomatoes

“This has been a summer mainstay as long as we have had a garden, which has been forever. Some add browned beef, but I never have. It is good served over rice or just as a side vegetable. Searing the cut okra in hot fat at the start takes away some of the slickness and makes it more palatable. The amounts are really variable, so feel free to deviate.”
4 cups sliced fresh okra

¼ cup oil (or bacon fat)
1 cup chopped onion

1 cup chopped bell peppers, red, green or mixed

2 cloves garlic, minced

1 teaspoon salt

1 teaspoon chili powder

1 teaspoon cumin

2 8-ounce cans tomato sauce or 1 can tomato paste (or 2 cups peeled, chopped tomato)

1 cup water

Heat the oil in a heavy pot or skillet; add okra, stirring to sear the cut edges. Don’t let it burn. Add onions and sauté till limp, then add garlic and pepper and simmer about 5 minutes, stirring to prevent burning. Then add the tomato sauce or paste, thinning with water to have it a bit on the “soupy” side. Add the seasonings and simmer about 15 minutes, stirring now and then until the okra is tender but not falling apart. Yield: 8 servings

George and Mary Stewart in their Houston vegetable garden in the early 1990s. Photo by William D. Adams

George and Mary Stewart in their Houston vegetable garden in the early 1990s. Photo by William D. Adams

I hope that if you decide to grow ‘Stewart’s Zeebest’ bushy okra, you will share it with compliments of George and Mary, and take the time to reflect on the heritage of gardeners from your own family history, passing these stories down to a future generation of vegetable growers.

Springing Forward in the Vegetable Garden-by Patty G. Leander

So long winter, it’s time for you to move on! You have overstayed your welcome, and not just here in Texas but the Midwest and Northeast as well, where the snow keeps growing deeper and the icicles have reached massive lengths (check out these incredible Instagram icicle photos at http://www.boston.com/news/weather/2015/02/11/the-icicles-instagram/YfkqQcjuV5xW7JIEFPVsEJ/story.html).

spring-garden

The spring season is upon us! Photo by Bruce Leander

Here in Austin we’ve had over two inches of gentle rain the last few days, we now have an extra hour of daylight, the forecast is looking good and like most gardeners I am itching to plant. We must proceed with caution though. Working wet soil can cause clumping and compaction so if you’ve had rain it’s best to wait a few days and allow the soil to dry out. One way to know if the soil is too wet is to take a handful and squeeze it in your hand; if it forms a muddy clump then it is too wet, but if it crumbles or breaks apart when dropped from above you are good to go.

over-ripe-produce

Remove over-mature crops before they become infested with unwanted pests. Photo by Bruce Leander

If you have not yet cleaned out your fall and winter crops it’s time to do so. Cool season vegetables that are left in the ground after the weather starts to warm up tend to become a breeding ground for unwanted pests, plus they quickly grow beyond their prime.

vegetable-transplants

Grow transplants of cool season greens in partial shade. Photo by Bruce Leander

As Jay mentioned in his previous post you’ll find transplants of mustard, collards and lettuce available at nurseries but think twice before you reach for that plant. Do you have room for it in your garden or will it be taking up valuable space needed for warm season vegetables like cucumbers, beans, okra or squash?  If you’d love to have some fresh greens for spring consider planting these vegetables in pots and place them close to the house in a spot that gets dappled or morning sun.

swiss-chard

Swiss chard will take the heat of summer as long as it receives shade during the hottest part of the day. Photo by Bruce Leander

Swiss chard is the most adaptable of the cool weather greens as it will grow happily into summer, especially if you plant it where it will get some shade during the hottest part of the day.

Bread smeared with butter is totally American, but top it with some fresh radishes and a sprinkle of course salt and you have a classic French hors d’oeuvre. Photo by Bruce Leander

Bread smeared with butter is totally American, but top it with some fresh radishes and a sprinkle of course salt and you have a classic French hors d’oeuvre. Photo by Bruce Leander

Enjoy this time of transition in the vegetable garden and the eating-in-season that comes with it. Radishes are great sliced in a salad but have you ever tried them sliced over buttered bread with a sprinkling of sea salt? Or sautéed with sugar snap peas? Talk about a versatile vegetable, radishes can be grated, steamed, braised or simmered, even the leaves and seed pods are edible. Take this opportunity to branch out from sliced radishes in a salad or cauliflower covered with cheese sauce (not that there’s anything wrong with that!) to bring some exciting new flavors to your kitchen. Below are a few ideas to help with your end-of-winter harvest.

radish-sugar-snap-peas

Braised radish and sugar snap peas are different and delicious. Photo by Bruce Leander

Braised Radishes and Sugar Snap Peas

Remove the strings from sugar snap peas and quarter radishes. Melt butter in a skillet and add the peas and radishes. Sauté briefly then add a few tablespoons of water or chicken broth. Cook, partially covered, until radishes and peas are tender. Top with chopped mint or chervil and a splash of vinegar.


Broccoli and Cauliflower don't have to be steamed!  Try roasting them for a healthy and tasty side.  Photo by Bruce Leander

Broccoli and Cauliflower don’t have to be steamed! Try roasting them for a healthy and tasty side. Photo by Bruce Leander

Roasted Cauliflower and Broccoli

Cut broccoli and cauliflower into equal sized pieces. Toss in olive oil, sprinkle with salt and pepper and arrange in a single layer on a large baking sheet. Roast at 425° until golden and slightly charred, about 25-30 minutes.

Cauliflower-rice

Try cooking grated cauliflower as a quick side or a flavorful substitute for rice.

Cauliflower “Rice”

Grated cauliflower is a lot like rice yet cooks faster than couscous – you’ve never made cauliflower so quick and easy. We like big, plump Medjool dates but any dates or even raisins will do.  

Grate one head of cauliflower into a bowl. Sauté in a small amount of olive oil until golden, about 10 minutes. Add ½ cup chopped dates, sprinkle with ¼- ½ teaspoon turmeric, season with salt and pepper and cook 5-7 minutes longer. Top with chopped cilantro and sliced almonds before serving.

pot-likker

A big pot of greens will yield plenty of pot likker; freeze some of that delicious liquid as a base for flavoring summer vegetables.

Greens

Flavored with some bacon or ham, leaves of collards, kale, kohlrabi, broccoli, beets and cauliflower are all edible and can be cooked together into a nutritious pot of greens with plenty of pot likker. Even though we love to slurp that Southern elixir I always set aside a few jars for freezing and use it to flavor the butter beans and cowpeas that are coming my way this summer.

This post has been shared on the HomeAcre Hop!  Please drop by and see what gardeners and homesteaders across the country are doing.

Tip of the Week – Week 7 in the Zone 9 Garden

This past weekend I planted my potatoes.  While planting I got a very pleasant surprise – more potatoes!  For the past two years I have wanted to try fall potatoes.  However, no one sells seed potatoes in the fall.  I had my best ever potato crop in the spring so this September I took my left overs and planted them.  We had a very mild winter.  I covered the potatoes once in December and once in January for light frosts.  Then I did not get them covered for the last freeze in January.  I thought the freeze ended my experiment.  I cut off the frozen vines and forgot about them.  That’s why I was so surprised this Sunday.  As I dug my trenches for my new potatoes, my fall potatoes were literally turning up all over the place.  I harvested over 20 lbs!  So, it looks like you definitely can grow fall potatoes in the Zone 9 Garden.  Below are more things to consider doing this weekend.

My latest garden experiment proves you can grow fall potatoes - at least in a mild winter

My latest garden experiment proves you can grow fall potatoes – at least in a mild winter

Vegetables

For a complete list of the vegetables you can plant now please check out the planting guide in the sidebar.  If you are not sure what particular vegetable varieties to plant check out Patty Leander’s variety list in the sidebar.  This is a great tool for new gardeners or for those of us who like to try different things.  Also be sure to look at her seed sources.  March 15 is go date for most of the veggies we like to grow in the Zone 9 spring garden.  If you don’t hurry it will soon be too late to order your seeds.

blog-Crimson_Glory_rose

Valentine’s Day is a great time to prune your roses.

Ornamentals

There are two times to prune roses – Labor Day and Valentine’s Day.  This weekend reduce the size of your hybrid roses by up to one half.  Also remove any dead wood.  It is also a great time to open up the center of the bush.  Most shrub roses will look beautiful if you have six to eight healthy, upright canes.  Remove all suckers that are smaller than a pencil and top foliage by cutting branches at a 45 degree angle above a bud.  Antique roses do not need as much pruning.  Reduce them by no more than a third, get rid of all dead wood and open up the centers.  DO NOT prune spring  blooming climbers until after their first bloom.

Lawns

It is still too early to apply commercial fertilizers to your lawn.  However it is a great time to aerate and add compost.  When fertilizing your lawn with compost, mow closely and then spread a half to one inch of compost over the lawn.  Rake it into the grass and water well.  Do not mow again for a least a week.  You can fertilize your lawn with compost 2,3 or 4 times a year.  You really can’t add too much.  Plus compost will often contain macro nutrients and trace elements that are missing from commercial fertilizers.

red_bud_blooms

Buds on my redbud trees mean that all trees will soon be breaking dormancy. Spray horticultural oils now for insect control later.

Trees and Shrubs

My redbud is beginning to bud out.  That is the first sign that trees are coming out of dormancy.  If you want to plant any fruit trees, bare root or containerized, do it soon.  The weather conditions that we have right now are perfect for allowing them to rapidly start producing the roots that will “establish” them in your landscape.

While your crepe myrtles are still bare, spray them with horticultural oil (also known as dormant oils) to mites and scale insects.  Horticultural, or dormant, oils are generally refined petroleum products.  They are great at controlling several pests in shrubs and fruit trees.  However, they are not organic.  Look for the organic equivalent that is made from cotton seed oil.  Another organic, Neem oil, shows some promise as a dormant oil and research is currently being done on its effectiveness.  Do not spray dormant oils after buds have broken on your trees and shrubs.


****Be sure to check out my friend Bart’s blog (Our Garden View) for more great tips for the Central and South Central garden!


I share my posts on the HomeAcre Hop.  Be sure to stop by the hop.  It has tons of great information from gardeners and homesteaders all over the world!


Tip of the Week – Week 6 in the Zone 9 Garden

I know that Punxsutawney Phil saw his shadow, but I think his prediction is wrong.  As I drive the back roads of Washington County, I see signs of an early spring everywhere.  Now I don’t want to jinx anything, but we are quickly approaching the date when a freeze is highly unlikely.  Because of this, there are many, many tasks to be done in the February zone 9 garden.  Below are the things I will be doing this weekend

potato-planting

Most years I grow La Soda reds and Kennebek whites. This year I was only able to find La Soda seed potatoes.

Vegetables

There are lots of veggies that can be planted this week.  For a complete list check out Patty Leander’s planting calendar on the sidebar of the blog.  Since I have planted about all of the seeds I can I am moving on to planting potatoes.  A couple of weeks ago I bought ten pounds of red La Soda.  I cut them into pieces and have allowed them to “scab” in the kitchen.  Plant them 4” deep in loose soil that is in full sun.

larkspur

Larkspur is so pretty and so reliable. Plant this self-seeding annual once and you may be able to enjoy it for a lifetime.

Ornamentals

It is not too late to plant snap dragons (but is getting close).  Place these transplants about a foot apart in full sun.  Give them an extra boost with blood meal.  Blood meal is a great source of organic nitrogen.  The recommended rate is one cup per five feet of row.

If you have not cut back your ornamental grasses, cannas, gingers, asters, salvias and woody perennials, do it now.  It is also a great time to start mulching.  I love mulch and use it extensively.  It suppresses weeds, conserves moisture and insulates roots.  Plus, if you use natural mulches, they turn into compost that will feed your plants.

I have tons of poppies, larkspur, marigolds and bachelor buttons (gomphrena) that come back every year.  Be careful not to cover these self-seeding annuals with mulch or pull the tender starts while you are weeding.

acetic-acid-weed-killer

Concentrated acetic acid makes a great organic weed killer

Lawns

My wife mowed for the first time this past weekend.    While the stuff that passes for grass at my house is not growing, lots of weeds are.  A weekly mowing will prevent lots of these weeds from going to seed and spreading their problems into future years.  For weeds that can’t be reached with a mower use acetic acid as a good natural herbicide.  Don’t think you can get by with household vinegar.  Real weed killing power is found in the concentrated form at your local garden supply center.

If you are into organic weed control, start putting out corn gluten meal (CGM) now.  A weekly application during February is a very effective pre-emergent for all broadleaf weeds.  Besides cost, there is absolutely no down side to CGM.  Apply CGM at a rate of 20 lbs per thousand square feet of lawn.  If you have more lawn than money you can also use CGM as a natural fertilizer.  Apply 10 pounds per 1000 square feet to give yor lawn a great boost of natural nitrogen.


****Be sure to check out my friend Bart’s blog (Our Garden View) for more great tips for the Central and South Central garden!

This post has been shared on the HomeAcre Hop.  Be sure to stop by the hop.  It has tons of great information from gardeners and homesteaders all over the world!