Okra and Butterbeans – Harvest Now, Enjoy Later by Patty G. Leander

okra-butterbean-heart

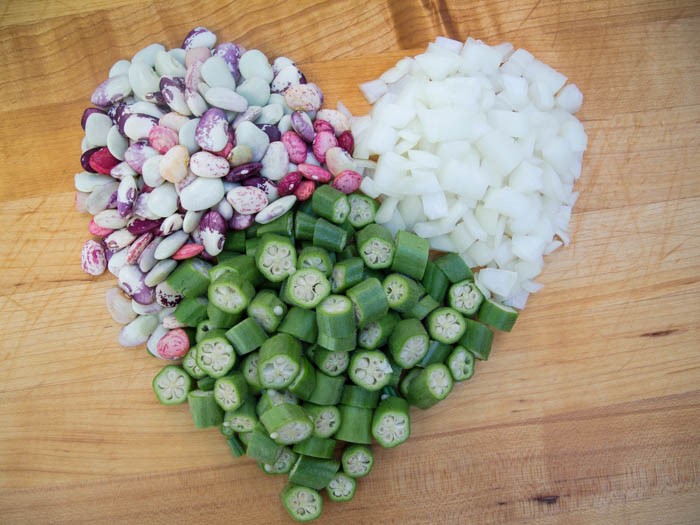
Butterbean and okra love

Okra and butterbeans are like peanut butter and chocolate – two great tastes that taste great together…and apart! You may be harvesting them now as the warm weather wanes or perhaps you will consider a space for them in your garden next year. Each vegetable stands on its own delicious qualities, but aside from taste there are several reasons that okra and butterbeans are two of my favorite vegetable crops.

butterbeans-1

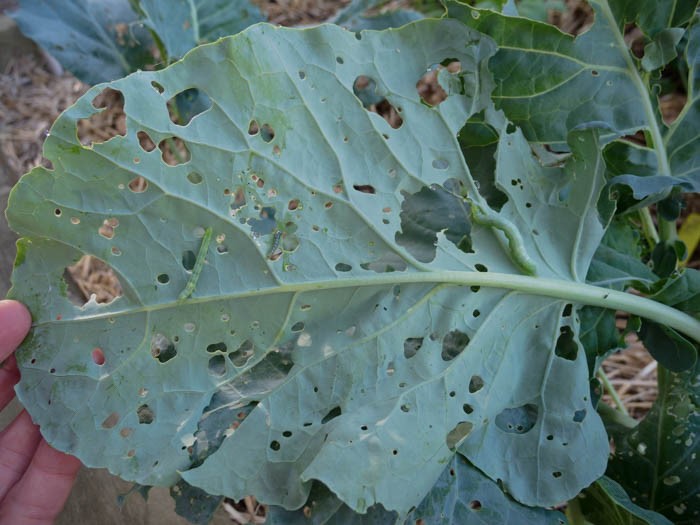
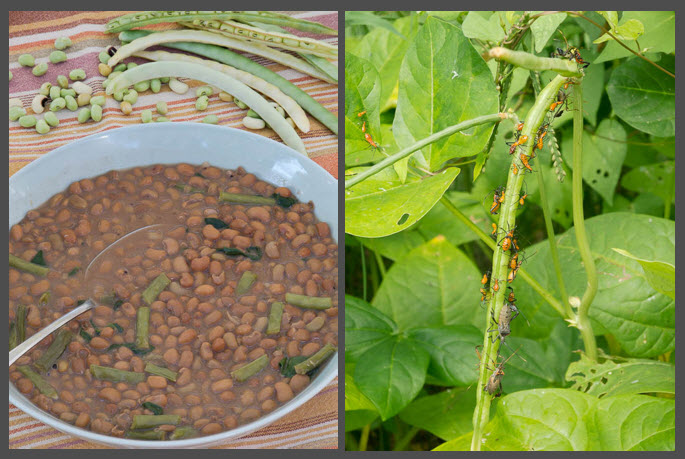
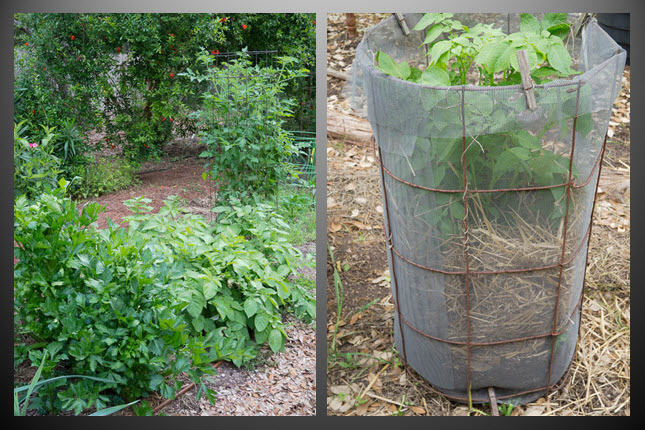
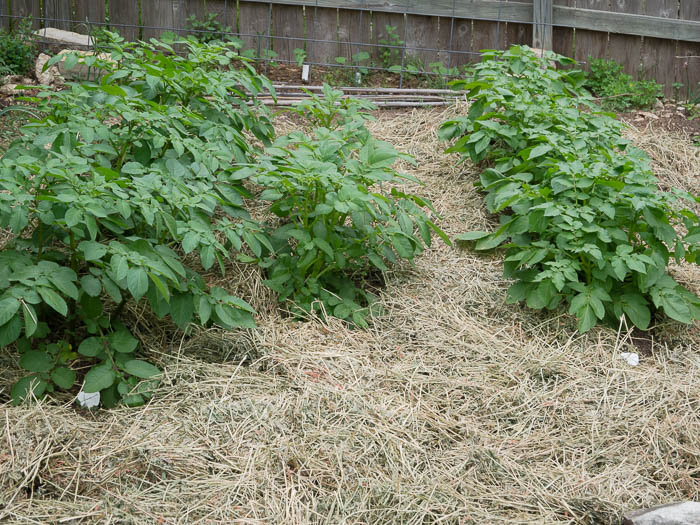
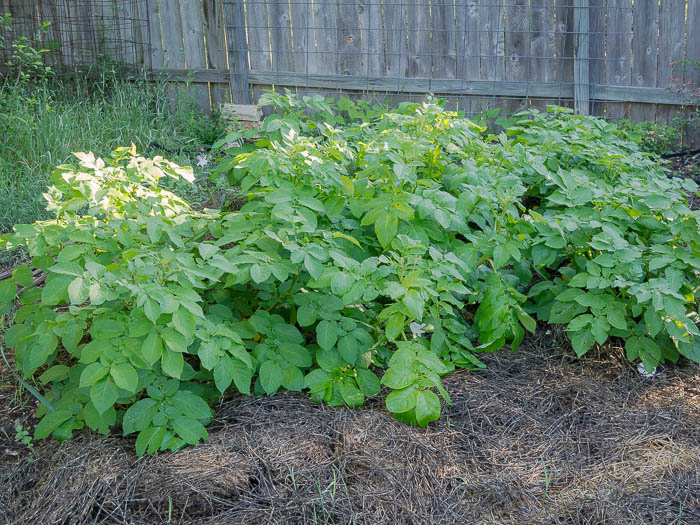
Butterbeans love the heat and are relatively pest free.

For starters, they are two of the easiest vegetables to grow in Texas and the South. They like heat, they like sun, they are not prone to disease and unless you have nematode-infested soil they are not bothered by many insect pests.  And unless you grow your own butter beans you’ll be hard pressed to find them fresh, even at the farmer’s market (at least where I live).

canned-okra

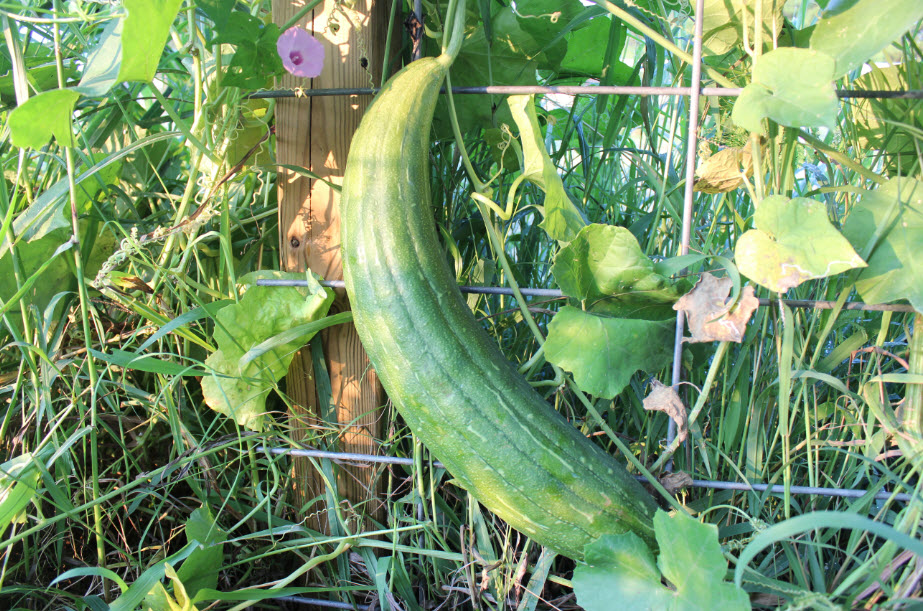
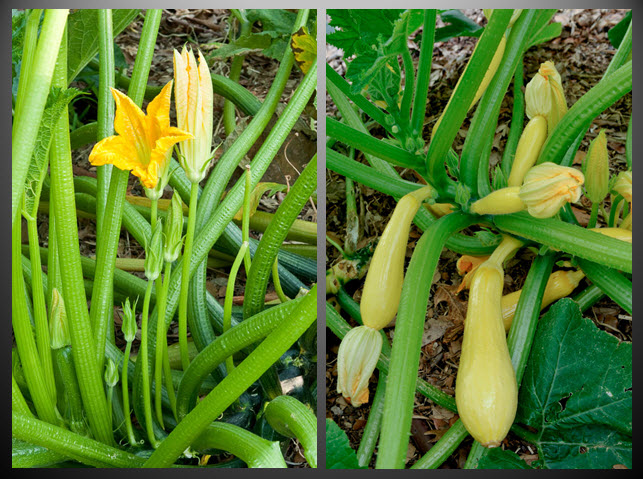
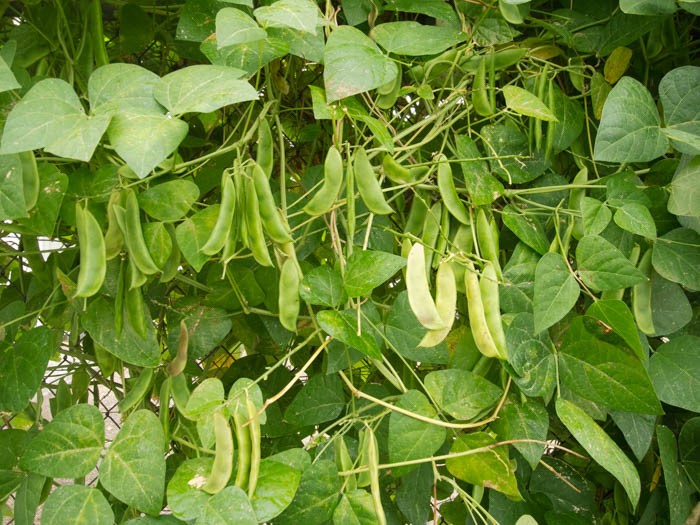
Okra does so well in the Texas heat and it is easy to preserve in a variety of ways

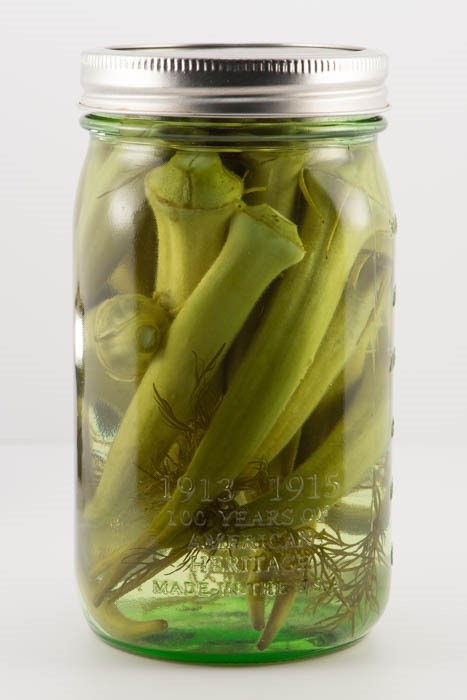
They are prolific producers, providing plenty of pods for eating fresh in season as well as preserving for later enjoyment. When I am blessed with a bountiful harvest of both butter beans and okra I like to cook them up in a tasty soup or stew, freeze in smaller portions and then pull it out on a cold night. That home-grown taste of summer warms me up in the middle of winter and reminds me why I love vegetable gardening.

Okra and butterbeans are easy to grow and they taste great when combined together into a hearty soup or stew.

Okra and butterbeans are easy to grow and they taste great when combined together into a hearty soup or stew.

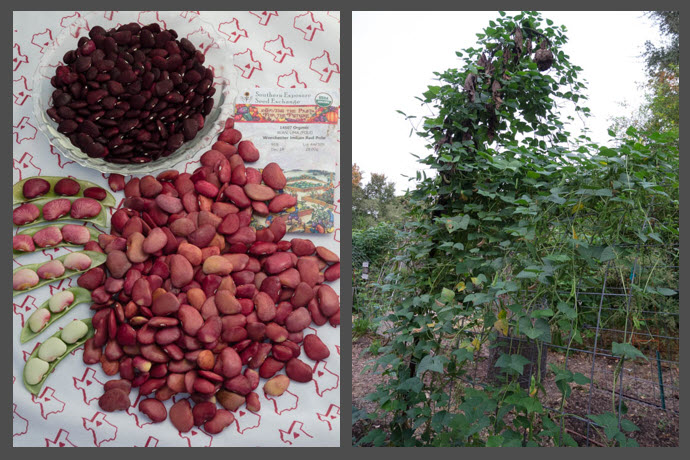
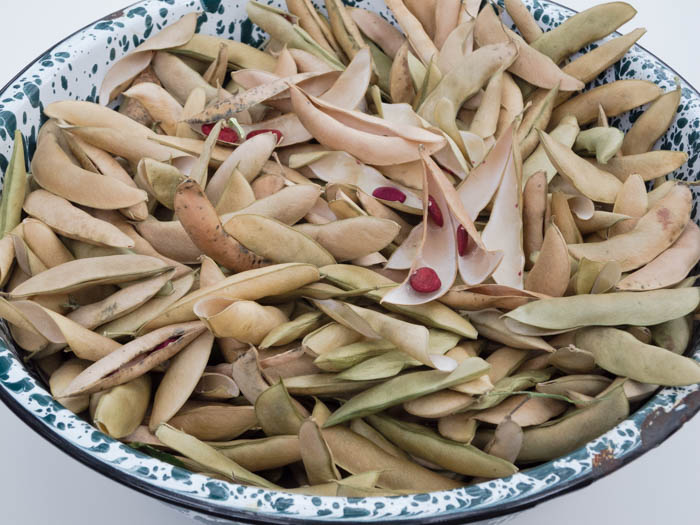
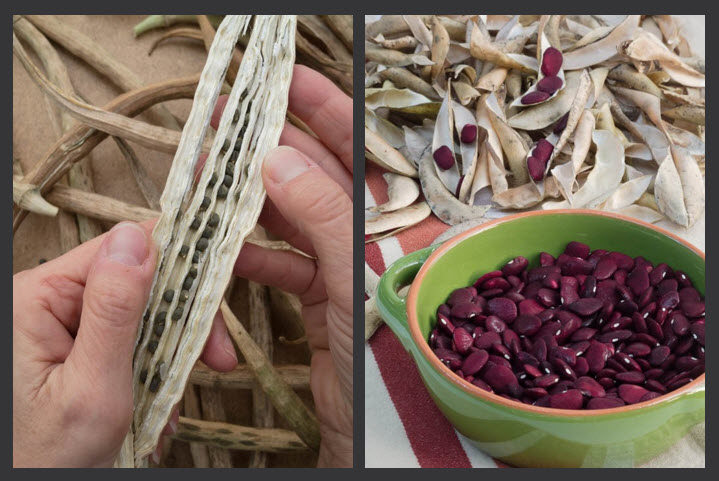
Because they are self-pollinated, okra and butter beans are super easy for beginning seed savers. Be sure you are growing open pollinated varieties (as opposed to hybrid varieties) and allow some of the okra and bean pods to mature and dry before harvesting. For okra I usually tag 2 or 3 pods per plant that I am going to allow to mature for seed and then I can harvest all the rest for fresh eating or preserving. Once the okra pods have dried twist or crack open and remove the seeds.

If you want to keep seeds of okra be sure and plant only a single variety.

If you want to keep seeds of okra be sure and plant only a single variety.

One okra pod has lots of seeds so save according to your needs. Try to pick the healthiest looking pods from the healthiest plants and avoid pods that are diseased or deformed. For butter beans set aside enough dried seed for planting in your garden the next year plus a few more for giving away if you are so inclined. If you are serious about maintaining the purity of a particular variety like I am with ‘Stewart’s Zeebest’ okra, (https://masterofhort.com/2015/05/stewarts-zeebest-okra-by-patty-g-leander/) only plant that single variety to avoid any accidental cross-pollination.

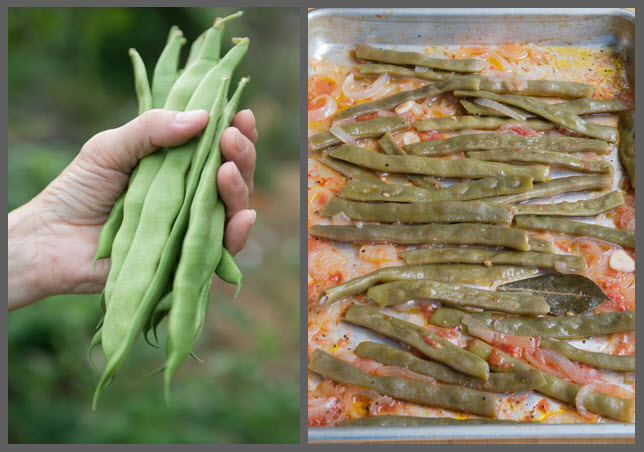
Here is one of my favorite recipes for using okra and butter beans at the end of the season. It is a very forgiving recipe so feel free to tweak it, substitute sauage for ham, leave the meat out completely, add more vegetables or whatever makes it work for you. I usually double the recipe, freeze in single serving or dinner-sized batches and pull out to enjoy in the cold of winter.

okra-butterbean-stew

Okra Stew

If you don’t have fresh butter beans you can usually find them in the frozen food section, most likely labeled as limas beans or baby limas.


1 onion, chopped

1 cup chopped ham

1 lb fresh, sliced okra

2 cups fresh butter beans

1-2 tablespoons oil

2 cups chopped cooked chicken

16 oz can puréed tomatoes

1-2cups fresh or frozen corn

2 cups chicken broth

½ tsp each salt, pepper, thyme

2-3 cups spinach or other available greens, chopped (optional)


Heat oil in a large pot and sauté onion, ham, okra and butter beans for 6-8 minutes. Stir in remaining ingredients and simmer 30-45 minutes. Serve over rice or cooked grains, if desired.  Yield: 2 qts


Very Hungry Caterpillars by Patty G. Leander

cabbage-worm-damage

Caterpillars bring insatiable appetites to the vegetable garden.

Along with colorful butterflies, smaller and more ordinary looking moths flit around the vegetable garden this time of year, laying eggs that hatch into caterpillars whose sole purpose is to eat and excrete. If you are growing brassicas your plants have probably already been under attack by these very hungry caterpillars.

Cross-striped-caterpillar-cabbage-looper

Cross-striped caterpillar (left) and cabbage looper (right).

The main culprits here in Texas are the cabbage looper (mottled brown moth with a small white marking on each wing), cross-striped caterpillar (brownish-gray moth with darker brown spots) and cabbageworm (whitish-yellow moth with a single black dot on each wing).

cross-striped-cabbageworm-eggs

What looks like a small yellow blob (less than 1/8 inch across) on the back of a broccoli leaf is actually a mass of cross-striped caterpillar eggs waiting to hatch.

These creatures are stealth; I seldom notice the moths that lay the eggs (they are more active at night) and the freshly hatched caterpillars are so miniscule and blend so well into the foliage that they can do severe damage before they are detected. Inspect your plants often, especially on the underside of leaves; if you miss them you may be surprised to find your plants decimated the next morning.

cabbage-worm

As the caterpillar grows so does its appetite.

Though these tiny munchers are good at camouflage there is one sure way to affirm their presence before too much damage is done: miniature dark green balls of excrement. Yep, what goes in must come out and caterpillars are prolific poopers.

caterpillar-poop

Dark green droppings mean caterpillars are feasting nearby.

And the bigger they get the more they eat and the more they eat the more they poop. I have had more than one novice gardener tell me that they thought those little green balls were eggs, but if you look above or near the excrement you will almost assuredly find a caterpillar or two or three chewing away.

If you only have a few plants a good defense is to hand pick and destroy caterpillars or infested leaves every time you inspect your plants, but if you have many plants an insecticide will be more effective and a more efficient use of your time. Bacillus thuringiensis (Bt for short) is the recommended control for caterpillars, especially in the earliest stages of growth. It is an organic insecticide made from a naturally occurring bacteria found in soil; when caterpillars ingest the Bt-coated leaves it destroys their gut, causing them to stop feeding and die within a couple of days.

cabbage-worms-bt

Note the tiny egg mass inside the black circle (left); so tiny yet so destructive (right).


Bt is only effective against caterpillars; it will not harm humans, cats, dogs or beneficial insects but it will kill any caterpillars that ingest it, including butterfly larvae, so apply it only to edibles that are being damaged. Be sure to follow label instructions for application rate and frequency as follow-up applications may be necessary for control. Bt is sold under different trade names, including Dipel and Thuricide, and can be applied as a spray or a dust. Liquid Bt seems to roll off some of the thick, waxy leaves of cabbage, kale and collards, so I have found it beneficial to apply Bt as a dust.

Dustin-Mizer

The Dustin Mizer is a good tool for applying Bt as a dust.

Several years ago my brother gave me a tool called the Dustin Mizer that I use quite often for this purpose. When cranked it emits a fine dusting of powder over and under the plant.  It is especially important to direct Bt to the underside of the leaves as that is where the caterpillars are usually feeding.

It’s always a good idea to vary insect control methods in the vegetable garden so consider alternating Bt with a product containing the active ingredient spinosad (also derived from a soil bacterium and also organic). One other option is to use lightweight floating row cover to protect cabbage crops; cover plants as soon as they go in the ground so the moth never has access to the plants to lay her eggs.


I share these posts on Our SimpleHomestead Blog Hop.  Be sure to stop by.  The “hop” has tons of great information from gardeners and homesteaders all over the world!

Late Season Legumes and a Pomegranate Tip by Patty Leander

kwintus-trellis

Kwintus’ pole beans

The transition to cool season vegetables is well underway and my garden has gone from an embarrassing end-of-summer jumble to a reenergized and productive backyard vegetable patch. It seemed like it would never come but that hint of cool weather finally arrived and nighttime temperatures have begun their gradual decline. Even though the thermometer may still hit the 90° mark it takes most of the day to get there and it doesn’t stay there for long. That spells R-E-L-I-E-F for plants.

savoy-cabbage-growing

Alcosa’ savoy cabbage and ‘Green Fingers’ cucumber

Thanks to some timely rains, cooling shade cover and a protective layer of mulch, the beans, squash and cucumbers I planted in late August are now producing and the broccoli, cauliflower, collards, cabbage and mustard are growing strong.

cow-peas-leaf-footed-bugs

The Southern peas yielded several yummy meals before being invaded by leaf-footed bugs.

Southern peas that were planted in April – black-eyed peas, crowder peas and purple hulls – produced like champs all summer long but by October those *#!@ leaf-footed bugs were multiplying like crazy so I decided at this point in the season it was better to remove the plants than try to battle the stinkbugs. I harvested what I could; plenty of fresh pods for shelling and immediate enjoyment and even more dry pods that will be shelled and set aside for winter meals (including New Year’s Day).  Freezing fresh cowpeas couldn’t be any simpler: spread the shelled peas in a single layer on a baking sheet and freeze till solid, then pour them into a plastic freezer bag, no blanching required.

worchester-red-beans

Worchester Indian Red’ limas grow into vigorous, productive vines.

Butter beans are coming at me high and low – seems like I can harvest just as many on my hands and knees as I can on a ladder. They have produced off and on all summer and put on a new flush of growth and blooms in response to August rains that were accompanied by an ever-so-slight drop in temperature. I am growing three excellent pole varieties, ‘Sieva’, ‘Violet’s Multicolor Butterbean’ and ‘Worchester Indian Red’.  Their vigorous vines will climb whatever they come in contact with; the Worchesters have engulfed a 10 foot sunflower growing next to the trellis and the Sievas have found their way up into the pomegranate tree. Is this what they mean by companion planting?!

dried-butter-bean-pods

Dried pods ready for shelling – if they don’t shatter first.

If the dried pods are left too long on the vine they will sometimes split open and the seeds will fall to the ground, sprouting up wherever they land. I harvest dried pods every couple of days and keep them in a bowl on my kitchen counter; every once in awhile, without warning, a random pod shatters and the dried beans fly out of the bowl with an explosive POP, landing on the floor or flying into the sink. Makes me jump every time. When I have a full bowl I take them to my mom so she can shell them.

kwintus-flat-beans

Kwintus flat beans are large and perfect for roasting!

I planted ‘Kwintus’ pole beans in late August and harvested my first pods about 50 days later. They are an early, flat, Romano-type bean, delicious and productive. They are also known as ‘Early Riser’ and their fast growth makes them great for the fall or spring season. If you’d like to give them a try next year order seeds online from Kitazawa Seeds (www.kitazawseed.com) or Turtle Tree Seeds (www.turtletreeseed.org). And be sure to try them in the following lip-smacking recipe.

Roasted Flat Beans

These roasted beans melt in your mouth. I came across this recipe in a Southern Foodways Alliance (SFA) publication a few years ago. The ingredients and the technique intrigued me and I had a bounty of beans at the time so I tried it and have been enjoying these beans ever since. The recipe was originally shared by Sheila and Matt Neal of Neal’s Deli in Carrboro, North Carolina. They recommend it as an economical side dish to feed a crowd and they say it tastes even better if made a day ahead. I can attest to that!

2 ½ lbs flat beans, rinsed and stemmed

½ cup peeled and thinly sliced garlic

2 cups diced yellow onion

2 medium-sized tomatoes, grated*

1 tsp sugar

½ tsp black pepper, coarsely ground

¼ tsp red pepper flakes

1 tbsp kosher salt

3 bay leaves

1 cup water

½ cup extra virgin olive oil

Heat oven to 350°. Gently and thoroughly combine the above ingredients in a roasting pan. Place parchment paper directly onto the beans. Cover with a tight-fitting lid or foil. Cook until the beans are tender, stirring well every 15 minutes for about an hour and 15 minutes.

*Grating tomatoes is an easy way to “peel” them. Cut the tomato in half and remove seeds with your fingers. Place the cut side down on the coarse holes of a box grater. Run the tomato back and forth until all the flesh is grated. Discard the skin.

A POMEGRANATE TIP

removing-pomegranate-seeds

Hold a pomegranate half, seed side down, over a bowl and whack it several times to remove seeds

Pomegranate season is upon us and if you’ve been to the grocery store lately you’ve undoubtedly noticed pomegranates prominently displayed in the produce section. Or perhaps you are lucky enough to have your own tree. But the mysterious and exotic nature of the pomegranate can be a bit confounding when it’s time to liberate those seeds. I use to cut a pomegranate in half or quarters and turn them inside out into a bowl of water to release the seeds but ever since I saw this tip on the internet I’ve been paddling my pomegranates – it’s so easy!

The following video shows a street vendor in Bangkok who has an even better way; he removes the top and then scores the outside of the pomegranate along the white membranes. When he pulls it apart the membrane is loose and comes right out, then he proceeds – with lightening speed – to whack the seeds out of each section (jump ahead to 1:20 to go straight to his demo):

https://www.youtube.com/watch?v=aUsfw-KppCU

Those juicy little seeds (actually called arils) are a perfect pop of color and flavor to brighten leafy salads, rice or grain pilafs, oatmeal, yogurt, orange or grapefruit segments, cocktails or even sprinkled atop your favorite guacamole. I eat the entire seed. Do you?


I share these posts on Our SimpleHomestead Blog Hop.  Be sure to stop by.  The “hop” has tons of great information from gardeners and homesteaders all over the world!

Fall Into Winter Vegetables on Central Texas Gardener

If you have questions about what to grow in the fall and winter garden, then this week’s episode of Central Texas Gardener is perfect for you.  Patty and I were thrilled to be invited to talk about fall gardening on this award winning  PBS (KLRU) television program.

In my opinion Fall is the best time of the year to garden in Texas.  The temperatures are milder and the weeds are not nearly as aggressive.  Plus, you can grow so many great vegetables!  While it is a little late for tomatoes it is the perfect time to plant broccoli, cauliflower, cabbage and Brussels sprouts.  It is also a good time to plant root crops like beets, carrots, turnips, radishes and parsnips.  It is also time to start your salad greens.  Fall and winter are the ONLY time you can grow your lettuce and spinach in Texas. danvers-carrots

I have been a fan of CTG for years.  Growing in Texas is challenging and their experts and guest always have the right answers for the problems I am dealing with in my own garden.  If you are not a regular viewer, or you do not get CTG on your local PBS channel, go to their website (http://www.klru.org/ctg/ ).  Each and every segment they do is available on YouTube on their site or on their YouTube Channel.   texas-lettuce

This was my first time in a television studio and I was a little nervous.  However producer Linda Lehmusvirta and host Tom Spencer (and the Hays County Master gardeners) made the whole experience so much fun.  I would also like to thank all of the people behind the scenes at KLRU for making Patty and I feel  so comfortable in front of your cameras. Heck, I didn’t even get offended when you had to put make up on my bald head to kill the glare!

Many thanks to the whole KLRU, and the Hays County Master Gardeners for a truly wonderful experience!

Many thanks to the whole KLRU crew, and the Hays County Master Gardeners, for a truly wonderful experience!


Luffas – Nature’s Bath Sponge

Right now, I am growing bath sponges.  Really, I am truly growing bath sponges in my garden.  While this statement makes perfect sense to many of my gardening friends, lots of the non-gardening people that I tell this to, or show the plants to, are truly surprised to learn that the $10 natural bath sponges that they use to scrub their bodies are the xylem fibers of a dead gourd that they can easily grow in their own yard (and you can too). Luffa-Bath-Sponge

Luffas, or loofahs, are members of the same family as squash, cucumbers and gourds.  The luffa is the fruit of one of two plants – L. aegyptiaca and L. acutangula.  Luffas are truly amazing plants.  You can eat them, cleanse your body with them and, thanks to a dedicated and visionary woman named Else Zaldivar, you can build your house out of them.

This little luffa has turned out to be the biggest one we have ever grown

This little luffa has turned out to be the biggest one we have ever grown

Elsa Zaldivar was looking for an alternate crop that could be grown to bring in much needed income for the indigenous people of Paraguay.  One day, while sitting under the shade of an arbor covered in luffa, she had an epiphany.  Luffas were the plant!  She encouraged the women of the area to grow these natural bath sponges for export.  Today, the women have a thriving business that produces bath sponges, mats, slippers, insoles and other beauty products.

While the beauty business was incredibly successful, she was bothered by the amount of waste that was involved in the process.  One third of the luffas were not good enough to be sold and the process of preparing the luffas for sale resulted in a 30% loss of fiber.  In order to find another revenue stream for the people of Paraguay she teamed up with an industrial engineer named Pedro Palas to find a way to turn this waste into another saleable product.

Luffas are big, aggressive plants. This one plant has now grown to over 20 feet. In fact, it has jumped the fence and is growing up into our Cedar tree!

Luffas are big, aggressive plants. This one plant has now grown to over 20 feet. In fact, it has jumped the fence and is growing up into our Cedar tree!

Thanks to their efforts, you can now build your house out of sheets of recycled plastic that are reinforced with the fibrous waste that comes from the process of turning luffas into beauty products.  The product Ms. Zaldivar and Mr. Palas have created is an eco-friendly substitute for plywood.   With the addition of colors to the recycled plastic/luffa mixture you can now clad your house in a renewable, recycled product that never needs painting.  Click here to read more about Ms. Zaldivar (the queen of the luffa as she calls herself) and the amazing things she is doing with this humble plant.

While it is nice to know we can use to luffas to build a house, Sally and I grow them for the shear fun of it.  Luffas are big leafed, unruly, vining plants that are covered in large yellow flowers that have “crinkly” yellow petals.  These flowers always bring in tons of pollinators (this year they have been covered in bumble bees).  Once the flowers are pollenated small, green, pencil shaped fruits begin to develop.  These fruits grow quickly and get big.   In fact, they grow fast enough that my wife and I can notice the changes in both the fruit and vines on our daily trips to the garden.

The big yellow flowers really bring in the pollinators. This year the luffa flowers have brought in an unusually large number of bumble bees.

The big yellow flowers really bring in the pollinators. This year the luffa flowers have brought in an unusually large number of bumble bees.

Luffas are incredibly easy to grow.  All you need is a sunny spot with decent soil and some type of structure for them to grow on – and a lot of frost free time!  Luffas take 150 to 180 frost free days to go from seed bath sponge.  I planted my luffas the first week of April.  While I got lots of flowers, I did not get my first fruits until the end of July.  Now the vines have several fruits that range in size for 18 to 24 inches.

I have grown BIG luffas and I have grown some that were not so big.  If you want to grow the biggest bath sponges possible (and get the most fruit possible off the vine) you need to make sure they get plenty of food, plenty of water and a regular trimming.  This year we are growing ours on a fence by our compost pile.  Since the soil is well worked with organic material and we water almost every day, this year’s luffas are the biggest we have ever grown.  We do not trim ours vines.  However, if you clip the ends off of your vines they will branch, get bushy and produce up to 25 fruits per plant.

Here is our giant luffa two weeks after the first picture.

Here is our giant luffa two weeks after the first picture.

Luffas will continue to grow and set fruit up until the first frost.  However, their growth will slow as temperatures fall.  I stop watering them around the first of September to encourage their demise.  We leave our luffas on the vine until the vines are dead and the thin green skins of the fruits have turned brown and brittle.  However, you can harvest your luffa whenever they begin to feel noticeably lighter.  Many people like to harvest them green and then bring them in to cure over the winter.

Here is our giant luffa on Sept. 1. Well over 2 feet!

Here is our giant luffa on Sept. 1. Well over 2 feet!

To get your bath sponge you are going to need to remove the skin.  If the fruit is really dry, you may be able to remove the skins by simply pulling it off.  However, I have much more luck soaking the luffa in warm water in the sink for 30 minutes or so before I start trying to remove the skin.  If you “skin” your luffas when they are still slightly green (but definitely turning brown), you can soak them over night and then peel them like a banana.

As you remove the skins, the black seeds will fall out of the end of the luffa that was attached to the vine.  Since I soak my luffas the seeds are always wet when they come out.  This has not been a problem.  I simply gather them up and lay them out on paper towels to dry.  After a couple of days I gather them up and store them in a seed packs that we make from old magazines.

Once you remove the skins and dry the fruit your luffas are ready to use.  When the “sponge” comes out of the skin it is a lovely, “burlap-y” color.  While they are lovely in their natural state, I like to bleach them.  If you want your luffas to be a lovely off white color, place four gallons of water and 1 cup of bleach in a five gallon bucket.  I bleach my luffas over three days.  Each day I remake my bleach solution and let the luffas stay in the mixture for about an hour each day.

This year our vines have grown to about 30 feet in length and jumped into our cedar tree. If you trim vines you will get more fruit and you won't have to get a ladder to harvest them!

This year our vines have grown to about 30 feet in length and jumped into our cedar tree. If you trim vines you will get more fruit and you won’t have to get a ladder to harvest them!

My wife and I give most of our luffa bath sponges as Christmas presents.  We cut them into 9 inch to 12 inch pieces and tie a bow around them with a with a pack of seeds that came out of them.  These are always big hits.  People love getting homemade things for Christmas.  While people enjoy our preserves and homemade wine they LOVE our luffas!  We literally have people ask us if the can get on the Christmas luffa list.

I share these posts on Our SimpleHomestead Blog Hop.  Be sure to stop by.  The “hop” has tons of great information from gardeners and homesteaders all over the world!

Poppies, Potatoes and Protecting Squash by Patty G. Leander

Patty-Leander-Spring-Garden

I sure don’t need a calendar, computer or even a meteorologist to tell me it’s spring. Anytime I am outdoors I can see it, hear it, feel it and smell it. Not to mention the chirp of crickets in the house!

There is so much happening in the vegetable garden this time of year that it is hard to narrow it down to just one topic but here are three that are currently at the top of my list.

POPPIES: Jay has written about poppies before (https://masterofhort.com/2012/11/remembering-our-veterans-with-poppies/) but they are so lovely in spring they deserve another mention, especially since this is when we gather seeds for sowing next year. Poppies start to look a little ratty if left long enough to reseed themselves but a few seedpods will give you hundreds, if not thousands, of seed for sowing and sharing, so it’s not necessary to let ALL your blooms go to seed. Choose a few for saving and let the seedpods dry on the plant, long enough so you can hear the seeds rattle. Carefully snip off the seedpods (keep them upright so the seeds don’t scatter to the ground, unless that’s where you want them), remove the seeds and store them in a cool, dry location. Sow seeds in the fall for a spectacular spring display in 2017.

Patty-Leander-Poppies

Save seeds from spring poppy blooms to plant in the fall.

POTATOES: Potatoes are growing everywhere in my garden – under mulch, under hay, in cages and tucked in between other plants. My garden is big but it’s not big enough to grow bushels of potatoes and still have room for other favorite vegetables so I usually grow a few reliable favorites, like Yukon Gold and Red La Soda, along with a few less common selections. This year I have planted 8 varieties: Red La Soda, Austrian Crescent, Red Thumb, Russian Banana, Purple Majesty, Purple Viking, Russet Nugget and Lemhi Russet.

Patty-Leander-Potatoes

Potatoes go in where carrots came out, flanked by celery and tomatoes (left); on the right a fingerling variety grows under straw in a cylinder lined with fine mesh screen.

It sounds like a lot but I only purchase a pound of each variety since I am growing them more for fun and discovery than to fill a larder. I usually order my seed potatoes in December or January from Potato Garden in Colorado; they are one of the few places that will ship potatoes at the time we need to plant them here in Central Texas, which is mid-February. And they have an amazing selection of potatoes and growing information on their website (www.potatogarden.com).

Patty-Leander-Potatoes-2

More potatoes tucked inside an A-frame constructed for pole beans and sugar snap peas (I wouldn’t recommend this unless you are petite in stature and into lots of bending, crouching and squatting – hey, this is how I get my exercise!). You can see their rapid growth from April 6 (left) to April 22 (right). As soon as the sugar snap peas on the right are done producing they will be removed to provide easier access to the potatoes.

Most of my potatoes were planted on February 26th, a little later than I would have liked, but the potatoes seem to be making up for lost time. Potatoes like people weather – mild days, cool nights, not too wet and not too dry – and so far Mother Nature has obliged.

Patty-Leander-Potatoes-3

From left to right: Purple Majesty, Russet Nugget and Red Thumb on 4-10-16

Patty-Leander-Potatoes-4

Growing by leaps and bounds: Russet Nugget (center) catches up to Purple Majesty and Red Thumb by 4-22-16

Growing potatoes means lots of surprises since you don’t get to see what is going on below ground. As the season progresses it’s hard for me to resist the temptation to dig around the base of the plants feeling for swollen tubers. Last week, much to my surprise and delight, I harvested 3 pounds of new potatoes from a planting of sorry looking Red La Sodas left over from my fall harvest.

Red-La-Soda-Seed-Potato

They may not look like much but these Red La Sodas had plenty of life yet to give

If you are growing potatoes be sure to keep the base of the plants mounded with soil, mulch or hay as they grow – it’s ok to bury some leaves in the process. The goal is to keep the tubers covered so they are not exposed to the greening effects of sunlight. And if you decide to start digging around to harvest some baby spuds remember that they do not store as well as mature tubers so eat and enjoy!

Red-La-Soda-New-Potatoes

Surprise and delight: a little bit of careful digging yielded three pounds of new potatoes eight weeks after planting Red La Sodas left over from my fall harvest

SQUASH: Squash vine borer is a perennial problem for many gardeners but there is a new product to help battle this annoying pest. It is called Micromesh, and after using it the last couple of years I find that I like it better than floating row cover. It is available through the Territorial Seed catalog (www.territorialseed.com) and I have also seen it at The Natural Gardener in Austin. If you have seen this product at other Texas nurseries please share in the comments below.

Micromesh-Squash-Vine-Borer

Micromesh: a new product to battle squash vine borer

Micromesh is a fine mesh netting used to keep bugs off of plants. It still allows water and light to pass but it is more see-thru than standard row cover and provides better ventilation, an important factor as the warm season progresses. I cover my squash plants as soon as they emerge and don’t uncover until I see female flowers. You can recognize a female flower because it has a small, immature fruit attached at the base of the petals. Once the flower gets pollinated the baby squash starts to develop, but if no pollination takes place the flower and the fruit shrivel and fall off. If you choose to keep your squash covered after female flowers appear you will have to perform the role of pollinator. Jay covered the how-tos in a previous post: https://masterofhort.com/2013/01/hand-pollinating-squash/.

Patty-Leander-Squash

All types of squash produce both male and female flowers on the same plant; the male flowers generally appear first, followed by female flowers which have a tiny, immature fruit at their base

Hope you are having an awesome spring season in your vegetable garden! People pests (mosquitoes-grrrr),  plant pests, diseases and heat are lurking and soon enough will make their presence known, but for now we can give thanks for the rain, revel in the mild temperatures and watch in amazement as a seed becomes a plant and a plant becomes a harvest.

A Garden Visit with Eli Kubicek

Each year I buy several of my ornamental plants from a small, independent grower named Eli Kubicek.  Eli has been organically growing and propagating vegetables and ornamentals in his Brenham gardens for 8 years.  Over the past few years Eli has developed quite a following of local people who literally line up to buy his high quality starts and transplants.  While it is not unusual for gardeners to line up to purchase high quality transplants from an organic grower, it is incredibly unusual for the producer of those transplants to be just 10 years old!

Eli Kubicek is a plant propagating 10 year old entreprunuer from Brenham, Tx

Eli Kubicek is a plant propagating 10 year old entreprunuer from Brenham, Tx

I met Eli three years ago when he was a second grader in my wife’s class at St. Paul’s Christian Day School.  For some occasion or another Eli presented her with a lovely pot of aloe vera that he proudly told her he had propagated himself.  Thanks to that gift I now have pots and pots of aloe vera all around my house.  We were so impressed with this plant propagating second grader that we have made it a point to buy from him each and every year.

Eli's skills are not limited to plant propagation. Here he proudly displays a birdhouse he designed and built.

Eli’s skills are not limited to plant propagation. here he proudly displays a birdhouse he designed and built.

Eli lives on six acres outside of Brenham with Dad Stan, Mom Becky and Duece, their flop eared, yellow guard dog.  The Kubicek’s live in a rambling farmhouse that started life as a two room home in the late 19th century.  Stan and Becky have spent years restoring the old house and cultivating some very attractive ornamental and vegetable beds around it.  When Eli came along, his parents included him in everything they were doing.  Around the time Eli turned two they noticed that he had a real affinity for plants.  Since that time they have encouraged his interest.  Both of his parents are what I would consider craftsmen.  Stan (who earns his living as a college math professor) is a fine furniture and cabinet maker .  Becky (who is a nutritionist by trade) has created some of the most beautiful cottage beds and garden rows I have ever seen.  Working alongside his parents, Eli has developed an eye for detail, an appreciation of hard work, the value of “re-use” and the confidence needed to tackle whatever issues he encounters while building a garden, a bird house or a remote control Lego car.

Eli recently installed his latest ornamental bed. He laid the the brick border himself and is filling the bed with several plants that he has divided or propagated

Eli recently installed his latest ornamental bed. He laid the the brick border himself and is filling the bed with several plants that he has divided or propagated

When it comes to plants, Eli now has free reign as far as his parents are concerned.  Each year he selects the plants from the garden he wants to propagate.  He and his dad then get a load of mulch from the local landfill.  To create his potting mix, and the compost for his gardens, Eli sifts the mulch with a slotted tray from the nursery that was used to hold 8 cell transplant packs.   The sifted compost fills his pots and feeds his gardens and the mulch is used to suppress weeds in those same plots.

Eli designed this lovely bed at the entrance to his house. He also grew all of the plants.

Eli designed this lovely bed at the entrance to his house. He also grew all of the plants.

Each year, Eli’s inventory and sales grow.  As he has gotten older he has learned to propagate more and varieties.  This year, I went to buy my annual “Eli Plants” at the Brenham Christian Academy Bazaar.  His booth was lovely and it was stocked with figs, Turk’s Cap, rosemary, several salvias and lots of succulents.  He also had some of the most beautiful Hardy Amaryllis for sale that I have ever seen.  Since my wife is an amaryllis lover we came home with all he had for sale.

A clump of Hardy Amaryllis in that Eli divides and sells at his annual plant sale

A clump of Hardy Amaryllis that Eli divides and sells at his annual plant sale

Eli’s enthusiasm for growing and propagation has been an inspiration for me.  While I love to garden it is always refreshing to find someone who shares your loves and passions.  Eli is an outstanding young man with so much promise and potential.  I am truly glad our paths have crossed and I can’t wait to see where all of his gifts and talents take him.

Name:  Eli Kubicek

Location:  Brenham, Tx

Years gardening in this location: 8 years (80% of my life!)

Favorite thing to grow:  Snapdragons and perennials in general

Eli has several varieties of salvia that he propagates each year. This year he added pineapple sage to his list of offerings

Eli has several varieties of salvia that he propagates each year. This year he added pineapple sage to his list of offerings

Best growing tip:  Don’t “over tend” your garden.  In my garden I don’t do much except weed, fertilize twice a year and water when necessary

Best pest control tip:  We don’t have a big problem with pests.  However we have had grasshopper problems in the past.  For those I pick and smush or let our guinea take care of them.  For slugs I pick and smush with a stick.  I have a good guard dog name “Duece” who takes care of armadillos and other big pests.

Best weed control tip:  Yank ‘em out before they spread

Biggest challenge:  Covering and uncovering all of the plants I am propagating before and after a frost or freeze.  I also have a problem keeping the guinea (grasshopper control) away from the melons,strawberries and persimmons

Favorite soil amendment:  Fresh compost which I make myself!  I don’t use that bagged stuff.

Preserving the harvest:  Some vegetables don’t make it to the house.  They are just too tempting and I eat them immediately.  For example, carrots (I just brush off most of the soil and munch away), green beans and bell peppers .

Favorite advice:  Don’t let weeds get out of control!

Eli with mom Becky and dad Stan in front of a bottle tree that they made by wiring together old Christmas Tree trunks

Eli with mom Becky and dad Stan in front of a bottle tree that they made by wiring together old Christmas Tree trunks


I share these posts on Our SimpleHomestead Blog Hop.  Be sure to stop by.  The “hop” has tons of great information from gardeners and homesteaders all over the world!

Spring Time is Weed Time!

If you need a reminder as to why gardening in Texas is so difficult, here it is.  According to something I heard on the radio the other day, this is the earliest spring since something like 1884.  Despite that, if you planted your “tomatoes” when you were “supposed to” in a normal year, they still got burned by a late season freeze during the earliest spring ever!  Gotta love Texas!!!

tomato-transplants

I hope your tomato transplants made it through the late season cold snap. If they didn’t, I hope you have enough left to replant

If you took my advice and planted your tomatoes last week then I hope you got them covered before the cold weather came in.  If not, I apologize.  There was a 95% chance it would not freeze.  Since it froze anyway many of you will probably need to replant if your tomatoes lost most of their leaves.  This late season cold snap also hit ornamentals.  If you had already put out tender flower transplants they likely got burned as well.  Pull them up and replant if more than 50% of their foliage was burned.

Butter-cup

Some weeds are too pretty to pull! Even though they are a bit invasive, I leave most of the buttercups that pop up in my beds

If last weekend was the perfect time for planting, then this weekend is the perfect weekend to get control of the weed problems that are “popping up”.  I get a lot of weed control questions on the blog.  For an organic gardener, the options are fairly limited.  You can pull them, hoe them or spray with an acetic acid mixture.  Only problem with acetic acid is it kills everything.  So if you are trying to kill a few dandelions in the middle of your beautiful lawn, cover them with a shield.  A great trick is cut the bottom out of a jug.  Place the bottomless jug over the weed and spray your herbicide into the top of the container.   This will limit the amount of grass, or other plants that are potentially affected by overspray.

acetic-acid-weed-spray

Concentrated acetic acid is a great organic weed killer.

If you go to the trouble of pulling and chopping all of those weeds this weekend, be sure to mulch afterwards.  The best way to control weeds is to prevent them and nothing does that better than a thick layer of mulch.  I am lucky enough to have a truck so I get my mulch in bulk from my local landfill.  I use wood chips in my ornamental beds and spoiled hay in my vegetable garden.  Any dead, organic material will work.  Another thing I often use in the vegetable garden is newspaper.  If you wet newspaper and then overlap several layers over an area it will dry and form a very good barrier.  Cover it with mulch to make your rows and beds look a little mote tidy.

Sweet-green-fertilizer

Sweet Green is a high notrogen, organic fertilizer that works as well on your vegetables as it does on your lawn

I also get a lot of lawn questions this time of year.  Here are my tips.  Do not put out pre-ememrgent weed and feed products now.  It is too late.  The fertilizer is going to feed the weeds that have already germinated.  Instead, mow your lawn on your lowest setting.  In fact I would do this for the next two or three weeks in a row.  This will kill most of the weeds that are growing now.  After mowing put out a high nitrogen fertilizer like “Sweet Green”.

Another great thing about spring is the chickens start laying again on a regular basis!

Another great thing about spring is the chickens start laying again on a regular basis!

Tomato Tips From a Commercial Grower

Nathan Hanath and his parents own and operate one of the nicest family farms that I have ever visited.  Magnolia Hill Farm is located just west of Brenham off Highway 290.  They have been filling the stomachs and freezers of Washington County residents with fresh, local, organic produce for the past 32 years.  While Magnolia grows all types of produce, their absolute best selling crop is tomatoes.  Last year, the farm sold 2300 pounds in the spring season and almost that many in the fall.

Magnolia-Hill-Farm-Sign

Magnoli Hill Farm of Brenham has been producing high quality, organic produce for 32 years.

Nathan and I are both members of our local volunteer fire department.  Several of our members are gardeners and the talk at our meetings often turns to vegetable production.  Our little fire department has lots of hobby gardeners who grow tomatoes; and they grow them well.  However, Nathan is the only one of our group that actually makes a considerable part of his living growing them.  Since Nathan depends on his tomatoes to help pay his bills I asked him if he would share some of the things he does to consistently produce almost two tons of tomatoes each and every year.

Grow in Good Soil – Nathan has a 20,000 sq ft bed that has been producing vegetables 12 months a year for the past 32 years.  That is incredible.  He has been able to keep his bed healthy by constantly replenishing it with compost.

Magnolia Hill Farm produces almost a ton of succulent, organic tomatoes every season

Magnolia Hill Farm produces almost a ton of succulent, organic tomatoes every season

Grow Healthy Transplants – Nathan grows over 300 tomato plants each year.  He grows between 10 and 12 nematode resistant determinate or semi-determinate varieties.  He starts his seeds in a commercial mix in January and then again in June.  He starts his seeds in little foam cups and then bumps them up to bigger containers after about 21 days.  He keeps his starts in shallow trays and waters them from the bottom with a solution of “Fish and Poop”.  Some of his favorite varieties include Amelia, BHN1021, Celebrity, Celebration, Carnival, Santa Belle, Top Gun, Phoenix, Tasty Lee and Tycoon.  While these are his favorites he encourages you to try his methods on whatever varieties work best for you.

Fish&Poop

Give your transplants a boost by feeding them with a solution of a soluble organic fertilizer like “Fish & Poop”

Plant Late – Resist the urge to plant early.  Tomatoes grow best in warm soils.  Grow big healthy transplants and do not put them in the ground until the third week of March.  Plant them deep to encourage a large root ball

Fertilize – Each year Nathan has a soil sample done on his beds and each year he gets the same results.  The rich organic soil he has built is perfect to slightly high in all nutrients except nitrogen.  Nathan believes that many gardens are nitrogen deficient because growing plants use so much and rain, heat and tilling all allow it to leach from the soil.  To make up for low nitrogen Nathan works “Sweet Green” into his tomato beds before planting.  Sweet Green (11-0-4) is an organic fertilizer that contains dried cane molasses and beet molasses.  Because of its high nitrogen content Sweet Green is marketed as a lawn fertilizer.  However, the high nitrogen levels of the fertilizer make it an excellent supplement for the organic garden.

fabric-mulch

Nathan use heavy mil landscape fabric to mulch his tomatoes (and cabbage shown here). Be sure to cover it in a heavy layer of hay or wood chips when temperatures begin to rise

Mulch – Keep your beds as weed free as possible.  They rob your plants of nutrients and they attract pests.  Nathan uses landscape fabric to suppress weeds.  While the fabric alone is great to help warm the soil in March and early April, you will need to cover it with a thick layer of mulch once the temperatures start climbing.

Calcium – Blossom End Rot is caused by a calcium deficiency.  Prevent it by spraying them weekly with Nutri-Cal.  Nutri-Cal is a calcium supplement that contains nitrogen.  The supplemental calcium will prevent blossom end rot and the nitrogen will give your plants a little boost to keep them healthy and productive up until July.

Nathan-Hanath

If you are passing through Brenham on 290 be sure and stop at Magnolia Hill Farm. Nathan loves to visit about all of the wonderful things they are doing on the farm

If you are going to be passing through Brenham on 290, be sure and stop in at Magnolia Hill Farm.  They have outstanding produce available every month of the year and they stock a huge selection of his mother’s famous preserves and pickles.  In addition to produce, Nathan collects and breeds daylilies.  He has over 900 varieties for sale from March through June.  The farm is truly a sight to see when all of those daylilies are in bloom and Nathan loves to visit with you about them.

I share these posts on Our SimpleHomestead Blog Hop.  Be sure to stop by.  The “hop” has tons of great information from gardeners and homesteaders all over the world!

Nathan has over 900 varieties of daylilies available for purchase at Magnolia Hill Farm

Nathan has over 900 varieties of daylilies available for purchase at Magnolia Hill Farm

Planning the Spring Garden by Patty G. Leander

We are well into the second month of the new year and I am loving the mild winter weather we are experiencing here in Central Texas. It is perfect for the gardener – sort of makes up for all the gardening we must do in the mosquito-infested heat that often starts in late spring and lasts till early winter!

Kale-collards-mustard greens

A bed of brassicas – kale, mustard and collards – almost too pretty to pick

The spring gardening season will be here soon and I am giddy with anticipation, itching to plant and obsessed with the weather forecast. January is normally our coldest month of the year yet it has come and gone and now February, a month that can bring snow and sleet and 80°F days, even in the same week, is halfway over…and my winter coat still hangs at the ready, unworn.

soil-thermometer

Gauge planting time by soil temperature rather than air temperature.

The current 14 day forecast for Central Texas shows a string of 60-80F° days with nights in the 40s and 50s. The weather screams, “It’s warm and sunny, come outside, plant some seeds!” But at this time of year soil temperature is a better gauge of when to plant than air temperature. Direct-seeded beans, cucumbers, squash and other warm-season vegetables have their best chance at germination when soil is consistently above 60°F, which usually doesn’t happen around here until early March. If planted now the seeds would likely rot or suffer multiple setbacks as they struggle to get a start in cool soil. And despite the gorgeous weather we could still get a freeze – if you have lived here long enough you know that Easter tends to be a magnet for freezing weather.

vegetables-in-containers

Colorful pottery and fabric pots are suitable containers for vegetables.

Planting too much or too early is a perennial conundrum in spring and it’s best to follow the forecast, monitor the soil temperature and have a plan that takes into account the space available in your garden and how long it takes a crop to reach maturity. Right now the soil in my garden hovers around 45-60°, an acceptable temperature for cool season plants like carrots, beets or broccoli. But those plants take 60-65 days to reach maturity and if planted now they will be taking up valuable space when the time comes for warm season planting next month.

container-vegetables

Lettuce and mesclun mixes grow happily in containers, large or small.

As we transition into spring I always wish I had more garden, but one way to extend the cool season harvest without taking up room in the vegetable garden is to grow in containers. I’ve grown lettuce, beets, radishes, carrots, broccoli and more in large clay pots, fabric grow bags and steel tubs. And at this time of year containers are less likely to dry out as they tend to do later in the season.

interplanting-beans

An excellent example of interplanting from a past season in the Children’s Vegetable Garden located at the San Antonio Botanical Garden. Broccoli and cabbage, planted 6 weeks before tomatoes, beans and squash, are ready for harvest, leaving more space for the remaining crops.

Another approach to squeezing in more is to plant quick-growing, cool season crops along the edge of a bed or in the area between future plantings of warm-season vegetables with larger space requirements. Mark the spot reserved for larger plants, such as tomatoes or squash, then plant beets, Asian greens, turnips, Swiss chard, cabbage or broccoli in the area between the markers. These plants will be ready to harvest before the tomatoes or squash take over. Commonly known as interplanting, this technique will help optimize space in the garden. It also increases diversity, confuses detrimental pests and attracts beneficials.

I share these posts on Our SimpleHomestead Blog Hop.  Be sure to stop by.  The “hop” has tons of great information from gardeners and homesteaders all over the world!